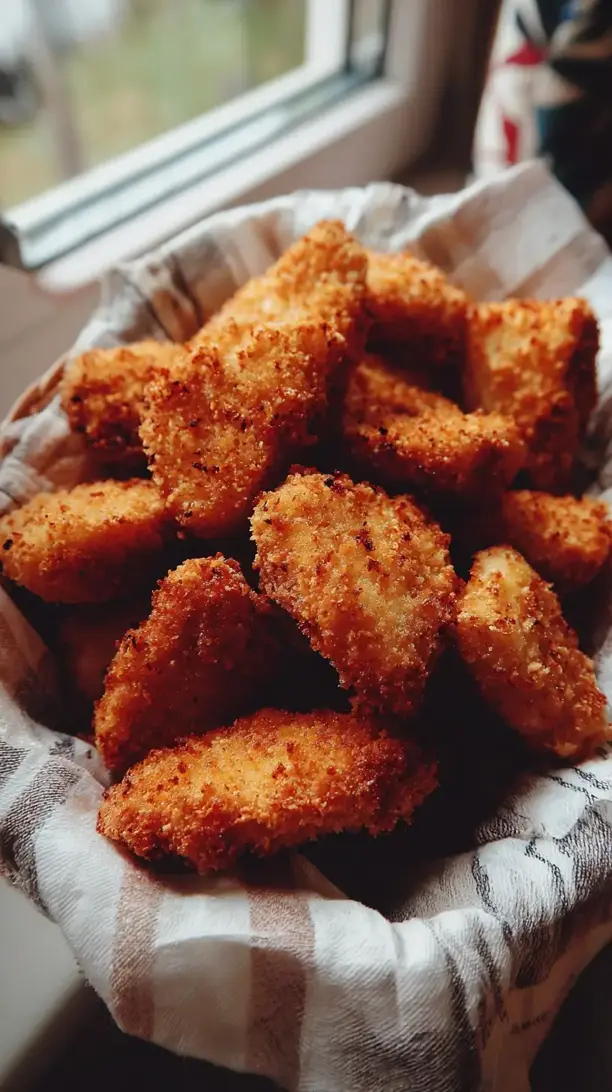
Nothing beats the satisfying crunch and juicy tenderness of homemade chicken nuggets. This recipe delivers that perfect golden crispiness using a simple double-coating method. You’ll love how easy it is to make these crowd-pleasing chicken nuggets from scratch.
If you're looking for the perfect Chicken Nuggets, you're in the right place. Whether you love Chicken Recipes or want to explore our Chicken Thigh Recipes collection, we've got you covered.


Why You’ll Love This Chicken Nuggets
- Unbeatable Texture: Double coating ensures a crispy outside and juicy inside.
- Total Flavor Control: Customize seasonings to match your taste.
- Surprisingly Simple: Fun assembly-line process ready in under 30 minutes.
- Ultimate Crowd-Pleaser: Universally adored by kids and adults alike.
Ingredients & Tools
- 500 g boneless, skinless chicken breasts
- 240 ml buttermilk
- 1 tsp hot sauce (like Tabasco)
- 120 g all-purpose flour
- 1 tsp garlic powder
- 1 tsp onion powder
- 1 tsp paprika
- 1/2 tsp salt, plus more for seasoning
- 1/2 tsp freshly ground black pepper
- 2 large eggs
- 150 g panko breadcrumbs
- 1 litre neutral oil (like vegetable or canola), for frying
Tools: Three shallow bowls, a large heavy-bottomed pot or Dutch oven, a deep-fry thermometer, a wire rack set over a baking sheet, tongs.
Notes: Buttermilk tenderizes the chicken; panko breadcrumbs create an ultra-crispy crust; a thermometer ensures perfectly cooked, non-greasy nuggets.
Nutrition (per serving)
| Calories: | 320 kcal |
| Protein: | 25 g |
| Fat: | 15 g |
| Carbs: | 20 g |
| Fiber: | 1 g |
Serves: 4 | Prep Time: 20 minutes | Cook Time: 10 minutes | Total Time: 30 minutes
Before You Start: Tips & Ingredient Notes
- Why buttermilk? The acidity in buttermilk works wonders on the chicken, breaking down proteins just enough to ensure a melt-in-your-mouth tender bite. If you’re in a pinch, you can make a substitute by adding a tablespoon of lemon juice or vinegar to a cup of milk and letting it sit for 5 minutes.
- Panko vs. Regular Breadcrumbs. Panko is made from crustless bread, resulting in a lighter, flakier, and crispier texture that doesn’t get soggy as easily. Regular breadcrumbs can be used, but the final crunch won’t be nearly as impressive.
- The Importance of Oil Temperature. This is the golden rule of frying. If the oil is too cool, the nuggets will absorb oil and become greasy. If it’s too hot, the outside will burn before the inside is cooked. A thermometer is your best friend here.
- Cutting the Chicken. Try to cut your chicken pieces into roughly similar sizes. This isn’t about being perfect, but uniform pieces will cook at the same rate, so you don’t end up with some overcooked and some undercooked nuggets.
How to Make Chicken Nuggets
Step 1: Prep and Marinate the Chicken. Start by cutting your chicken breasts into bite-sized nuggets, roughly 1 to 1.5-inch chunks. In a medium bowl, whisk together the buttermilk and hot sauce. Add the chicken pieces, making sure they’re all submerged. Let this marinate for at least 15 minutes at room temperature, or for more flavor and even more tender chicken, you can cover and refrigerate it for up to 4 hours. You’ll notice the chicken looks a little paler after its buttermilk bath.
Step 2: Set Up Your Dredging Station. This is your assembly line for crunch. Get three shallow bowls. In the first, combine the flour, garlic powder, onion powder, paprika, salt, and pepper. Whisk it all together so the spices are evenly distributed. In the second bowl, beat the two eggs until they are smooth and uniform. In the third and final bowl, place your panko breadcrumbs. Line them up in this order: flour, egg, panko. This sequence is key for the coating to properly adhere.
Step 3: Coat the Chicken. Using one hand for wet ingredients and one for dry will save you from ending up with “club hands.” Take a piece of chicken from the buttermilk, letting the excess drip off. Dredge it thoroughly in the seasoned flour, shaking off any excess. Next, dip it into the egg wash, coating it completely. Finally, press it firmly into the panko breadcrumbs, ensuring an even, generous coating on all sides. Place the finished nugget on a clean plate or baking sheet and repeat with the remaining chicken.
Step 4: Heat the Oil. Pour your oil into a large, heavy-bottomed pot or Dutch oven—you want the oil to be about 2-3 inches deep. Attach your deep-fry thermometer to the side of the pot. Heat the oil over medium-high heat until it reaches 175°C (350°F). This is the sweet spot. While the oil heats, set a wire rack over a baking sheet—this is where you’ll drain the cooked nuggets so they stay crisp instead of getting steamy on a paper towel-lined plate.
Step 5: Fry to Golden Perfection. Once the oil is at temperature, carefully lower a few nuggets into the hot oil using tongs. Don’t overcrowd the pot; fry in batches to maintain the oil temperature. They should sizzle actively but not violently. Fry for 3-4 minutes, turning them occasionally, until they are a deep, golden brown and crispy all over. You can check for doneness by removing one nugget and cutting it in half—the chicken should be white throughout with no pink.
Step 6: Drain and Season. As each batch finishes cooking, transfer the nuggets to the wire rack using your tongs. Immediately sprinkle them with a little pinch of salt. This step, salting them right out of the fryer, makes all the difference for the final flavor. Let them rest for a minute or two—this allows the crust to set and become extra crunchy, and it also lets the chicken juices redistribute, ensuring every bite is juicy.
Storage & Freshness Guide
- Fridge: Store in an airtight container for up to 3 days.
- Freezer: Freeze breaded raw or cooked nuggets in a single layer, then bag for up to 3 months.
- Reviving: Reheat in an air fryer or oven to restore crispiness.
Serving Suggestions
Complementary Dishes
- Classic French Fries — You can’t go wrong with this timeless duo. The salty, starchy fries are the perfect textural companion to the crispy nuggets.
- A Simple Coleslaw — The cool, creamy, and slightly acidic slaw provides a refreshing contrast that cuts through the richness of the fried chicken beautifully.
- Buttered Corn on the Cob — Its sweet, juicy kernels offer a lovely sweetness that balances the savory, salty notes of the nuggets.
Drinks
- A Crisp Lager — The clean, effervescent bubbles are fantastic for cleansing the palate between bites of rich, fried food.
- Sparkling Lemonade — For a non-alcoholic option, the zesty, sweet-tart fizz is incredibly refreshing and highlights the subtle tang from the buttermilk.
- Iced Sweet Tea — Its mild sweetness and cool temperature make it a classic Southern-style pairing that just feels right.
Something Sweet
- Warm Chocolate Chip Cookies — Ending the meal with a gooey, warm cookie feels like a natural, comforting progression from the savory main event.
- Vanilla Ice Cream Sundaes — The cold, creamy vanilla is a perfect, simple dessert that feels like a celebration after a fun, hands-on meal.
- Apple Pie — The warm cinnamon-spiced apples and flaky crust continue the homestyle, all-American theme in the most delicious way.
Top Mistakes to Avoid
- Mistake: Overcrowding the pot. Adding too many nuggets at once will cause the oil temperature to plummet. This leads to oily, soggy nuggets as they essentially steam and soak up oil instead of frying. Patience is key—fry in small batches.
- Mistake: Skipping the resting step. I know it’s tempting to eat them straight from the pot, but letting them rest on a wire rack for just a minute or two allows the crust to firm up and become truly crunchy, rather than softening immediately.
- Mistake: Not seasoning the flour. The flour layer is your first and best opportunity to build a foundation of flavor right into the crust. Unseasoned flour will result in a bland coating, no matter how good your dipping sauces are.
- Mistake: Using the wrong oil. Oils with low smoke points, like extra virgin olive oil, will burn and impart a bitter, off flavor. Stick with neutral, high-heat oils like vegetable, canola, or peanut oil.
Expert Tips
- Tip: For extra-crispy nuggets, try a double dredge. After the first round of flour, egg, and panko, dip the nugget back into the egg and then into the panko one more time. This creates a thicker, more substantial crust that’s incredibly crunchy.
- Tip: Keep cooked nuggets warm in the oven. If you’re frying multiple batches, heat your oven to 120°C (250°F) and place the wire rack with the finished nuggets inside. This keeps them warm and crisp while you finish frying the rest.
- Tip: Make them ahead for easy freezing. After you’ve breaded the raw nuggets, place them in a single layer on a parchment-lined baking sheet and freeze until solid. Then transfer to a freezer bag. You can fry them directly from frozen, just add an extra minute or two to the cooking time.
- Tip: Add a secret ingredient to the breadcrumbs. For a next-level flavor boost, try mixing a tablespoon of grated Parmesan cheese or a teaspoon of chicken bouillon powder into your panko breadcrumbs. It adds a deep, savory umami note.
FAQs
Can I bake these instead of frying?
Absolutely! For a baked version, arrange the breaded nuggets on a wire rack set over a baking sheet (this promotes air circulation for even crisping). Spray them generously with cooking spray and bake at 220°C (425°F) for 15-18 minutes, flipping halfway through, until golden brown and cooked through. They won’t be *quite* as crispy as the fried version, but they’ll still be delicious and far healthier.
What’s the best way to reheat leftover nuggets?
To restore the crunch, avoid the microwave—it will make them soft and chewy. Instead, reheat them in an air fryer at 190°C (375°F) for 3-4 minutes or in a conventional oven at 200°C (400°F) for about 8-10 minutes. They’ll come out hot and surprisingly crisp, almost as good as new.
Can I use chicken thighs instead of breasts?
You sure can! Thighs will result in an even juicier and more flavorful nugget due to their higher fat content. Just be sure to trim off any excess fat and cut them into similarly sized pieces. The cooking time should remain about the same.
How long can I marinate the chicken?
The sweet spot is 15 minutes to 4 hours. Any longer than 4 hours and the acidity in the buttermilk can start to break down the chicken too much, giving it a slightly mushy texture. If you need to prep ahead, the 4-hour mark in the fridge is your limit for the best texture.
My coating is falling off during frying. What did I do wrong?
This usually happens for one of two reasons. First, the oil wasn’t hot enough, causing the coating to soak up oil and slip off. Always use a thermometer. Second, you might not have shaken off the excess flour properly after the first dredging. A thin, even layer of flour is crucial for the egg to act as a proper “glue” for the breadcrumbs.


Chicken Nuggets
Make perfect crispy Chicken Nuggets at home with this easy recipe. Golden, juicy, and ready in 30 minutes. Get the foolproof method now!
Ingredients
For the Ingredients
-
500 g boneless, skinless chicken breasts
-
240 ml buttermilk
-
1 tsp hot sauce (like Tabasco)
-
120 g all-purpose flour
-
1 tsp garlic powder
-
1 tsp onion powder
-
1 tsp paprika
-
1/2 tsp salt (plus more for seasoning)
-
1/2 tsp freshly ground black pepper
-
2 large eggs
-
150 g panko breadcrumbs
-
1 litre neutral oil (like vegetable or canola, for frying)
Instructions
-
Start by cutting your chicken breasts into bite-sized nuggets, roughly 1 to 1.5-inch chunks. In a medium bowl, whisk together the buttermilk and hot sauce. Add the chicken pieces, making sure they’re all submerged. Let this marinate for at least 15 minutes at room temperature, or for more flavor and even more tender chicken, you can cover and refrigerate it for up to 4 hours.01
-
Get three shallow bowls. In the first, combine the flour, garlic powder, onion powder, paprika, salt, and pepper. Whisk it all together so the spices are evenly distributed. In the second bowl, beat the two eggs until they are smooth and uniform. In the third and final bowl, place your panko breadcrumbs. Line them up in this order: flour, egg, panko.02
-
Take a piece of chicken from the buttermilk, letting the excess drip off. Dredge it thoroughly in the seasoned flour, shaking off any excess. Next, dip it into the egg wash, coating it completely. Finally, press it firmly into the panko breadcrumbs, ensuring an even, generous coating on all sides. Place the finished nugget on a clean plate or baking sheet and repeat with the remaining chicken.03
-
Pour your oil into a large, heavy-bottomed pot or Dutch oven—you want the oil to be about 2-3 inches deep. Attach your deep-fry thermometer to the side of the pot. Heat the oil over medium-high heat until it reaches 175°C (350°F). While the oil heats, set a wire rack over a baking sheet—this is where you’ll drain the cooked nuggets so they stay crisp instead of getting steamy on a paper towel-lined plate.04
-
Once the oil is at temperature, carefully lower a few nuggets into the hot oil using tongs. Don’t overcrowd the pot; fry in batches to maintain the oil temperature. Fry for 3-4 minutes, turning them occasionally, until they are a deep, golden brown and crispy all over. You can check for doneness by removing one nugget and cutting it in half—the chicken should be white throughout with no pink.05
-
As each batch finishes cooking, transfer the nuggets to the wire rack using your tongs. Immediately sprinkle them with a little pinch of salt. Let them rest for a minute or two—this allows the crust to set and become extra crunchy, and it also lets the chicken juices redistribute, ensuring every bite is juicy.06
Not what you're looking for?


