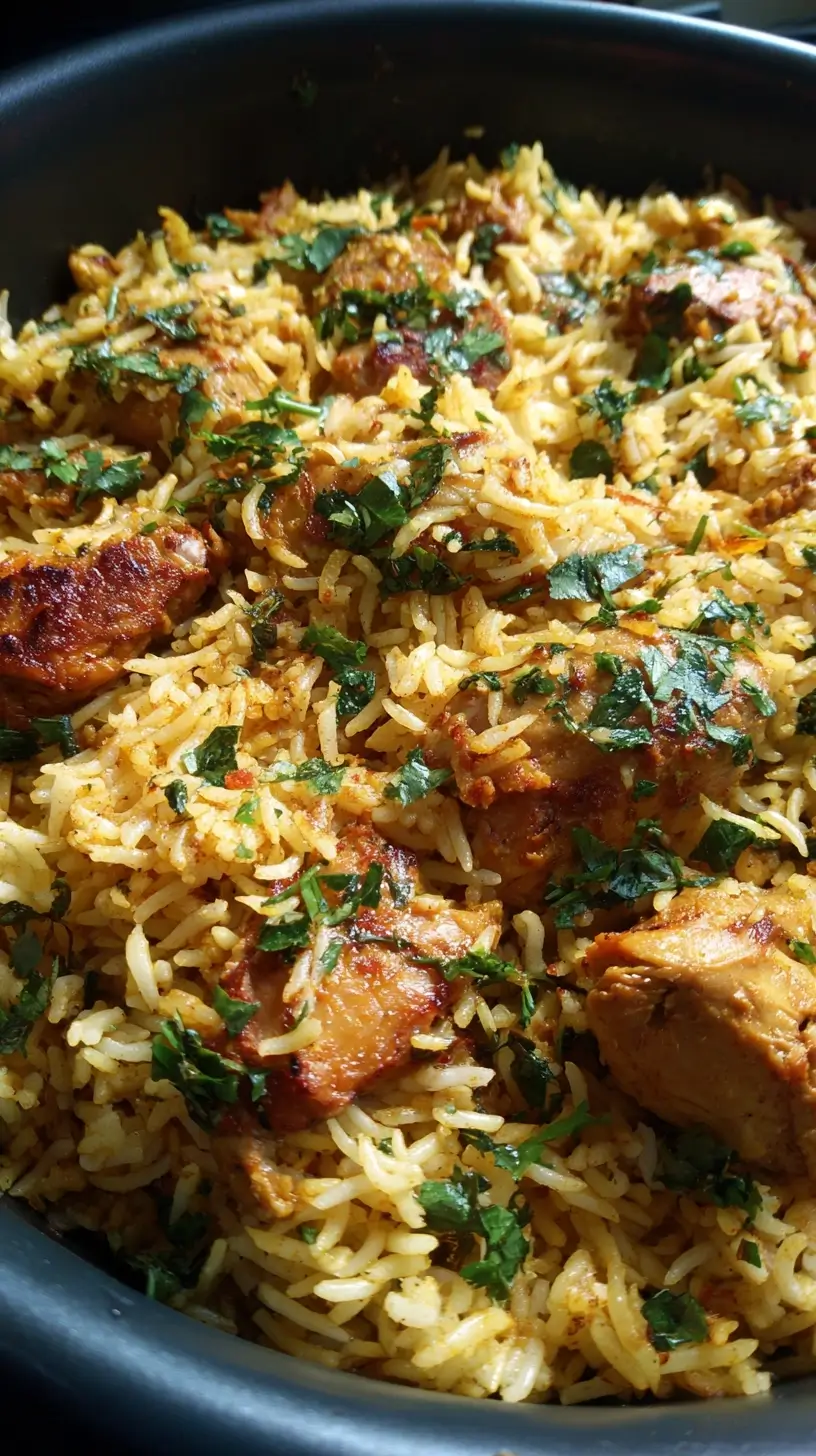
This Chicken Thigh Biryani delivers fragrant, layered perfection with tender spiced chicken and fluffy rice. It’s an approachable yet impressive one-pot meal that fills your kitchen with incredible aroma. Using juicy chicken thighs ensures moist, flavorful results every time.
Looking for Chicken Thigh Biryani inspiration? You'll love what we have! Explore more Chicken Thigh Recipes recipes or discover our Appetizers & Snacks favorites.


Why You’ll Love This Chicken Thigh Biryani
- Flavorful & aromatic: Layers of spiced chicken, rice, and whole spices create an irresistible taste.
- Juicy, tender chicken: Bone-in thighs stay moist through slow cooking.
- Impressive yet approachable: Simple layering creates a showstopper meal.
- Feeds a crowd: One-pot wonder scales beautifully and tastes even better the next day.
Ingredients & Tools
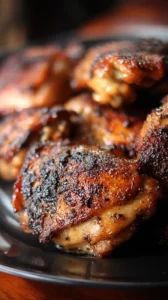
- 4 bone-in, skin-on chicken thighs
- 1.5 cups basmati rice
- 1 large onion, thinly sliced
- 1/2 cup plain yogurt
- 2 tbsp ginger-garlic paste
- 1 tsp turmeric powder
- 1 tbsp biryani masala
- 1 tsp red chili powder
- 1/2 cup chopped mint leaves
- 1/2 cup chopped cilantro
- 4 tbsp ghee or oil
- 1 bay leaf
- 4 green cardamom pods
- 2 cloves
- 1 cinnamon stick
- 1 pinch saffron strands
- 2 tbsp warm milk
- Salt to taste
Tools: Heavy-bottomed pot or Dutch oven with tight-fitting lid, small bowl, large mixing bowl
Notes: The quality of your spices really makes a difference here—fresh biryani masala and good saffron will elevate the entire dish. Don’t skip the fresh herbs either; the mint and cilantro add a bright, fresh contrast to the rich, spiced layers.
Nutrition (per serving)
| Calories: | 520 kcal |
| Protein: | 28 g |
| Fat: | 22 g |
| Carbs: | 52 g |
| Fiber: | 3 g |
Serves: 4 | Prep Time: 30 minutes | Cook Time: 50 minutes | Total Time: 1 hour 20 minutes (plus marinating time)
Before You Start: Tips & Ingredient Notes
- Marinating is non-negotiable. For the most flavorful chicken, let it marinate for at least 2 hours, or ideally overnight. The yogurt and spices need time to penetrate the meat, tenderizing it and building deep flavor.
- Don’t rinse the rice? Think again. Always rinse basmati rice until the water runs clear to remove excess starch. This prevents the grains from sticking together and ensures they cook up fluffy and separate—a key texture for great biryani.
- Brown those onions properly. When frying the sliced onions for the birista (fried onions), take your time. Cook them slowly over medium heat until they’re evenly golden brown and crisp. Burnt onions will taste bitter, while undercooked ones won’t add that signature sweetness.
- Handle the saffron with care. Soak your saffron strands in warm milk (not hot) for at least 15 minutes before using. This helps release its beautiful color and aroma, which you’ll drizzle over the top layer for that classic biryani look and taste.
- Choose the right pot. A heavy-bottomed pot or Dutch oven is essential for even heat distribution. This prevents the bottom layer from burning during the dum (steaming) process, giving you perfectly cooked rice and chicken from top to bottom.
How to Make Chicken Thigh Biryani
Step 1: Marinate the Chicken In a large bowl, combine the chicken thighs with yogurt, ginger-garlic paste, turmeric, biryani masala, red chili powder, half of the mint and cilantro, and salt to taste. Mix everything thoroughly, making sure each thigh is well-coated in the marinade. Cover the bowl and refrigerate for at least 2 hours—honestly, the longer, the better. You’ll notice the yogurt working its magic, tenderizing the chicken and allowing all those spices to meld together beautifully.
Step 2: Prepare the Rice and Fried Onions Rinse the basmati rice under cold water until it runs clear, then soak it in water for 30 minutes. Meanwhile, heat 2 tablespoons of ghee or oil in your pot over medium heat. Add the sliced onions and fry, stirring occasionally, until they turn a deep golden brown and become crisp. Remove half for garnishing later. In the same pot, you’ll have beautifully flavored oil ready for the next step.
Step 3: Cook the Chicken Layer To the pot with the remaining fried onions and ghee, add the whole spices—bay leaf, cardamom, cloves, and cinnamon. Let them sizzle for 30 seconds until fragrant. Add the marinated chicken along with all the marinade. Cook for 8–10 minutes, turning the thighs occasionally, until the chicken is partially cooked and the masala thickens slightly. The aroma at this stage is incredible—savory, spiced, and deeply inviting.
Step 4: Par-boil the Rice While the chicken cooks, bring a large pot of water to a rolling boil. Drain the soaked rice and add it to the boiling water along with 1 teaspoon of salt. Cook for exactly 5 minutes—the rice should be about 70% cooked, still firm in the center. Drain immediately and set aside. You’ll notice the grains have lengthened but still have a slight bite, which is perfect for the layering process.
Step 5: Layer the Biryani Spread the partially cooked chicken and masala evenly in the bottom of your pot. Sprinkle half of the remaining fresh herbs over the chicken. Carefully layer the par-boiled rice on top, creating an even blanket. Drizzle the saffron-infused milk over the rice, followed by the remaining herbs and reserved fried onions. Dot the top with the remaining 2 tablespoons of ghee. The layers should be distinct—chicken at the bottom, rice on top, with all those beautiful garnishes shining through.
Step 6: The Dum (Steaming) Process Cover the pot with a tight-fitting lid. If your lid isn’t heavy, you can seal the edges with dough or place a heavy pan on top. Cook on the lowest possible heat for 25 minutes. Then, turn off the heat but don’t open the lid—let it rest for another 15 minutes. This slow steaming allows the flavors to marry and the rice to absorb all those beautiful juices from the chicken.
Step 7: Serve and Enjoy Carefully remove the lid—that first burst of aromatic steam is pure bliss. Use a fork to gently fluff the biryani, bringing up rice from the bottom and mixing the layers slightly. Serve hot, making sure each portion gets some of that juicy chicken, fragrant rice, and those crispy onions. The texture should be perfect—tender chicken, separate rice grains, and incredible depth in every bite.
Storage & Freshness Guide
- Fridge: Store in an airtight container for up to 3 days.
- Freezer: Freeze in portions for up to 1 month.
- Reviving: Reheat gently with a splash of water to restore moisture.
Serving Suggestions
Complementary Dishes
- Raita — A cool, yogurt-based condiment with cucumber and mint that provides a refreshing contrast to the spiced biryani. It helps balance the heat and adds a creamy element that complements the fragrant rice beautifully.
- Mirchi ka Salan — A spicy, tangy curry made with green chilies and peanuts that’s a traditional Hyderabad biryani accompaniment. The complex, slightly sour gravy cuts through the richness of the biryani for a perfect flavor pairing.
- Simple Kachumber Salad — A quick mix of chopped onions, tomatoes, and cucumbers with a squeeze of lemon juice. Its crisp freshness and acidity help cleanse the palate between bites of the flavorful biryani.
Drinks
- Mango Lassi — The sweet, creamy yogurt drink provides a cooling counterpoint to the spices. Its tropical sweetness and smooth texture make it the ultimate biryani partner, especially on warmer days.
- Sweet Lime Soda — A fizzy, citrusy refreshment that cuts through the richness with its bright acidity. The slight sweetness and bubbles make it incredibly refreshing alongside the complex spices.
- Masala Chai — A warm, spiced tea served after the meal to aid digestion and extend the cozy, aromatic experience. The cardamom and ginger in the chai echo the biryani’s spice profile beautifully.
Something Sweet
- Gulab Jamun — Soft, syrup-soaked milk solids that provide the perfect sweet ending after the savory feast. Their rose-scented syrup and melt-in-your-mouth texture create a delightful contrast to the biryani’s spices.
- Kheer — A creamy rice pudding flavored with cardamom and nuts that continues the aromatic theme in dessert form. Its cool, comforting texture makes it a soothing follow-up to the layered complexity of the biryani.
- Mango Kulfi — A rich, Indian-style ice cream with intense mango flavor that cleanses the palate with its cool creaminess. The tropical sweetness provides a fantastic finish to the meal.
Top Mistakes to Avoid
- Overcooking the rice during par-boiling. If the rice is fully cooked before layering, it will turn mushy during the dum process. You want grains that are still firm in the center so they can absorb the chicken juices and finish cooking perfectly during steaming.
- Skimping on marinating time. Rushing the marination means less flavorful, less tender chicken. The yogurt and spices need those hours to work their way into the meat—I’ve messed this up before too, and the difference is noticeable.
- Using high heat during the dum process. This will burn the bottom layer before the top has a chance to steam properly. The lowest possible heat is crucial for that gentle, even cooking that makes biryani so special.
- Opening the lid too soon. Patience is key! That resting time after cooking allows the steam to redistribute and the flavors to settle. Peeking releases all that precious steam and can leave you with undercooked rice.
Expert Tips
- Tip: For an extra layer of flavor, add a teaspoon of rose water or kewra water to the saffron milk. This traditional touch adds a beautiful floral aroma that elevates the biryani to restaurant-quality levels without much effort.
- Tip: If you’re short on time, you can use a packet of fried onions (birista) from an Indian store instead of making your own. They work surprisingly well and save you the trouble of standing over the stove watching onions brown.
- Tip: To check if your dum is working, listen for a gentle sizzle when you place your ear near the pot—that’s the sound of perfect slow cooking. If you don’t hear anything, your heat might be too low; if it’s loud and aggressive, it’s too high.
- Tip: For the fluffiest rice, spread the par-boiled rice on a baking sheet for a few minutes before layering. This helps evaporate excess moisture and ensures each grain stays separate during the final cooking process.
- Tip: Leftover biryani often tastes even better the next day as the flavors continue to develop. Reheat it gently in a covered pan with a splash of water to restore moisture, or enjoy it cold—it’s delicious either way!
FAQs
Can I use chicken breast instead of thighs?
You can, but I honestly don’t recommend it. Chicken thighs have more fat and connective tissue, which keeps them moist and tender through the long cooking process. Breast meat tends to dry out and become stringy. If you must use breast, reduce the marinating time to 1 hour maximum and check for doneness earlier to prevent overcooking. The texture just won’t be the same though—thighs really make this dish special.
My rice turned out mushy. What went wrong?
This usually happens for one of two reasons: either you overcooked the rice during par-boiling, or there was too much liquid in the pot during the dum process. Remember, the rice should be only 70% cooked before layering—still quite firm in the center. Also, make sure your chicken layer isn’t too watery; it should have thickened slightly during cooking. If there’s excess liquid, cook it down before adding the rice.
Can I make this biryani ahead of time?
Absolutely! Biryani actually improves in flavor when made a day ahead. Complete all the steps except the final dum steaming. Refrigerate the layered pot, then when ready to serve, place it on low heat for the dum process—you might need to add 5-10 minutes to the cooking time since it’s starting from cold. The resting time remains the same. This makes it perfect for dinner parties!
What’s the purpose of the dough seal on the lid?
The dough seal (called pardah) creates an airtight environment that traps steam inside the pot, essentially turning it into a pressure cooker of sorts. This steam is what cooks the rice and chicken gently and evenly while infusing every grain with flavor. If you don’t have dough, you can use aluminum foil under a tight-fitting lid, or simply place a heavy object on top of the lid to weight it down.
My biryani is too spicy. How can I adjust the heat level?
If you’re sensitive to spice, reduce or omit the red chili powder in the marinade—the biryani masala provides plenty of flavor without excessive heat. You can also remove the seeds from any fresh green chilies if using them. Serving with extra raita and a squeeze of lemon also helps balance spiciness. Remember, you can always add heat at the table with chili flakes, but you can’t take it out once it’s cooked in!


Chicken Thigh Biryani
Make the best Chicken Thigh Biryani at home! This easy one-pot recipe features tender chicken, fragrant rice, and authentic spices. Get the step-by-step guide now!
Ingredients
For the main ingredients:
-
4 bone-in, skin-on chicken thighs
-
1.5 cups basmati rice
-
1 large onion (thinly sliced)
-
0.5 cup plain yogurt
-
2 tbsp ginger-garlic paste
-
1 tsp turmeric powder
-
1 tbsp biryani masala
-
1 tsp red chili powder
-
0.5 cup chopped mint leaves
-
0.5 cup chopped cilantro
-
4 tbsp ghee or oil
-
1 bay leaf
-
4 green cardamom pods
-
2 cloves
-
1 cinnamon stick
-
1 pinch saffron strands
-
2 tbsp warm milk
-
Salt (to taste)
Instructions
-
In a large bowl, combine the chicken thighs with yogurt, ginger-garlic paste, turmeric, biryani masala, red chili powder, half of the mint and cilantro, and salt to taste. Mix everything thoroughly, making sure each thigh is well-coated in the marinade. Cover the bowl and refrigerate for at least 2 hours—honestly, the longer, the better.01
-
Rinse the basmati rice under cold water until it runs clear, then soak it in water for 30 minutes. Meanwhile, heat 2 tablespoons of ghee or oil in your pot over medium heat. Add the sliced onions and fry, stirring occasionally, until they turn a deep golden brown and become crisp. Remove half for garnishing later.02
-
To the pot with the remaining fried onions and ghee, add the whole spices—bay leaf, cardamom, cloves, and cinnamon. Let them sizzle for 30 seconds until fragrant. Add the marinated chicken along with all the marinade. Cook for 8–10 minutes, turning the thighs occasionally, until the chicken is partially cooked and the masala thickens slightly.03
-
While the chicken cooks, bring a large pot of water to a rolling boil. Drain the soaked rice and add it to the boiling water along with 1 teaspoon of salt. Cook for exactly 5 minutes—the rice should be about 70% cooked, still firm in the center. Drain immediately and set aside.04
-
Spread the partially cooked chicken and masala evenly in the bottom of your pot. Sprinkle half of the remaining fresh herbs over the chicken. Carefully layer the par-boiled rice on top, creating an even blanket. Drizzle the saffron-infused milk over the rice, followed by the remaining herbs and reserved fried onions. Dot the top with the remaining 2 tablespoons of ghee.05
-
Cover the pot with a tight-fitting lid. If your lid isn’t heavy, you can seal the edges with dough or place a heavy pan on top. Cook on the lowest possible heat for 25 minutes. Then, turn off the heat but don’t open the lid—let it rest for another 15 minutes.06
-
Carefully remove the lid—that first burst of aromatic steam is pure bliss. Use a fork to gently fluff the biryani, bringing up rice from the bottom and mixing the layers slightly. Serve hot, making sure each portion gets some of that juicy chicken, fragrant rice, and those crispy onions.07
Not what you're looking for?


