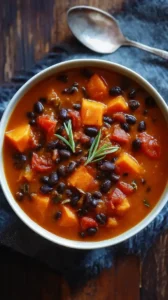
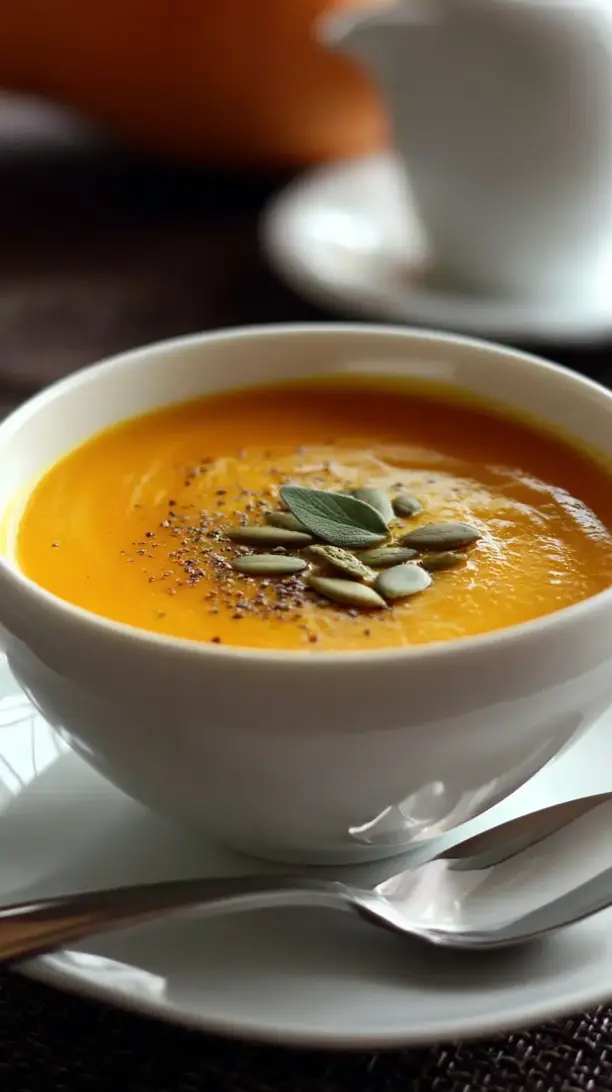
This Roasted Butternut Squash and Apple Soup captures the cozy magic of autumn in a bowl. Roasting caramelizes the squash and apples for deep, sweet flavor, while blending creates a velvety texture without cream. It’s a simple yet elegant meal that’s perfect for weeknights or festive gatherings.
If you're looking for the perfect Roasted Butternut Squash and Apple Soup, you're in the right place. Whether you love Soup Recipes or want to explore our Breakfast & Brunch collection, we've got you covered.


Why You’ll Love This Roasted Butternut Squash and Apple Soup
- Deep roasted flavor: Caramelization unlocks sweet, nutty complexity.
- Creamy without cream: Blending creates a silky, luxurious texture.
- Make-ahead friendly: Flavors deepen overnight for easy meals.
- Sweet-savory balance: Apples and squash mingle with thyme and spice.
Ingredients & Tools
- 1 large butternut squash (about 2-2.5 lbs / 900g-1.1kg), peeled, seeded, and cubed
- 2 medium sweet-tart apples (like Honeycrisp or Fuji), peeled, cored, and chopped
- 1 large yellow onion, roughly chopped
- 3 cloves garlic, peeled
- 2 tablespoons olive oil
- 1 teaspoon fresh thyme leaves (or ½ tsp dried)
- ½ teaspoon ground cinnamon
- ¼ teaspoon ground nutmeg
- 4 cups vegetable broth (or chicken broth)
- Salt and black pepper to taste
- For garnish (optional): a drizzle of coconut milk or cream, toasted pumpkin seeds, a sprinkle of fresh thyme
Tools: A large baking sheet, a large soup pot or Dutch oven, a high-speed blender or immersion blender
Notes: Don’t skip peeling the squash—the skin can be tough. A good-quality broth makes a difference as the flavor foundation.
Nutrition (per serving)
| Calories: | 180 kcal |
| Protein: | 3 g |
| Fat: | 5 g |
| Carbs: | 35 g |
| Fiber: | 6 g |
Serves: 4-6 | Prep Time: 20 minutes | Cook Time: 45 minutes | Total Time: 1 hour 5 minutes
Before You Start: Tips & Ingredient Notes
- Which apples are best? You want an apple that holds its shape and offers a balance of sweet and tart. Honeycrisp, Fuji, or Braeburn are fantastic choices. Steer clear of very soft apples like Red Delicious, which can become mushy, or intensely tart varieties like Granny Smith, which can overpower the squash’s delicate flavor.
- Don’t crowd the baking sheet. This is the golden rule of roasting. If you pile all the squash and apples onto one small pan, they’ll steam instead of roast. You want a single, even layer with a little space between the pieces to ensure they caramelize beautifully and develop those lovely browned edges.
- Why roast the garlic, too? Tossing whole, peeled garlic cloves onto the roasting pan is a little pro-move. Roasting tames garlic’s sharp, pungent bite and transforms it into something sweet, soft, and spreadable. It blends seamlessly into the soup, adding a deep, mellow garlic flavor without any bitterness.
- To blend hot soup safely. If you’re using a countertop blender, you must be careful. Never fill it more than halfway with hot liquid. Hold the lid firmly in place with a kitchen towel draped over the top—this prevents a steam explosion that could send hot soup everywhere. An immersion blender is the safer, easier option for blending directly in the pot.
How to Make Roasted Butternut Squash and Apple Soup
Step 1: Preheat your oven to 400°F (200°C). While it’s heating up, get all your veggies and fruit prepped. Peel and cube the butternut squash into roughly 1-inch chunks—a consistent size is key for even roasting. Don’t forget to scoop out the seeds and stringy bits from the center. Peel, core, and chop the apples, and roughly chop the onion. Toss the squash, apples, onion, and whole garlic cloves onto a large, rimmed baking sheet.
Step 2: Drizzle the olive oil over the mixture on the baking sheet. Then, sprinkle everything with the fresh thyme, cinnamon, nutmeg, and a generous pinch of salt and pepper. Now, get your hands in there! Toss everything together until every piece is evenly coated in the oil and spices. This hands-on approach ensures maximum flavor in every single bite. Spread the mixture out into a single layer, making sure nothing is piled on top of anything else.
Step 3: Slide the baking sheet into the preheated oven and roast for 30-35 minutes. You’ll know it’s ready when the squash is fork-tender and you can see beautiful, caramelized, browned spots on the edges of the squash and apples. The aroma filling your kitchen will be absolutely incredible—sweet, spicy, and deeply comforting. This roasting step is non-negotiable for developing that signature depth of flavor.
Step 4: Carefully transfer the entire contents of the baking sheet into a large soup pot or Dutch oven. It’s okay—and actually encouraged—to scrape in all those delicious, sticky browned bits from the pan. They are packed with flavor. Pour in the vegetable broth, giving everything a good stir to combine.
Step 5: Bring the pot to a gentle boil over medium-high heat, then immediately reduce the heat to low and let it simmer for about 10 minutes. This simmering time allows the flavors to meld together perfectly and ensures everything is soft and ready for blending. You’ll notice the apples will have almost completely broken down, which is exactly what you want.
Step 6: Now for the transformation! If you’re using an immersion blender, submerge it into the pot and blend until the soup is completely smooth and velvety. If using a countertop blender, work in batches, never filling the blender jar more than halfway. Blend until silky smooth, then return the pureed soup to the pot.
Step 7: Give the soup a final taste. This is where you make it your own. Does it need more salt? A crack of black pepper? Maybe another tiny pinch of cinnamon? Adjust the seasoning until it sings. If the soup is thicker than you’d like, you can thin it out with a little more broth or even some water until it reaches your perfect consistency.
Step 8: Ladle the hot, fragrant soup into bowls. Now for the fun part—the garnishes! A swirl of coconut milk or cream adds a lovely visual contrast and a touch of richness. A sprinkle of toasted pumpkin seeds gives a delightful crunch, and a few fresh thyme leaves make it look restaurant-worthy. Serve immediately and enjoy the taste of autumn in every spoonful.
Storage & Freshness Guide
- Fridge: Cool completely, then store in an airtight container up to 4 days.
- Freezer: Portion into freezer-safe containers, leaving headspace, for up to 3 months.
- Reviving: Reheat gently on the stovetop, thinning with broth if needed.
Serving Suggestions
Complementary Dishes
- A thick slice of crusty sourdough bread — There’s nothing better for dipping and sopping up every last bit of this velvety soup. The chewy, tangy bread provides a perfect textural contrast.
- A simple arugula salad with a lemon vinaigrette — The peppery arugula and bright, acidic dressing cut through the soup’s richness beautifully, cleansing the palate between spoonfuls.
- A grilled cheese sandwich, especially with sharp cheddar — This is the ultimate comfort food pairing. The gooey, salty cheese and crispy bread are a match made in heaven with the sweet and savory soup.
Drinks
- A dry hard cider — The appley notes in the cider echo the soup’s own flavor profile, while its crisp, effervescent quality refreshes your palate.
- A lightly oaked Chardonnay — The subtle vanilla and butter notes from the oak complement the soup’s creamy texture and roasted flavors without overpowering them.
- Sparkling water with a twist of orange — A non-alcoholic option that adds a festive fizz and a hint of citrus that brightens up each bite.
Something Sweet
- Warm apple crisp with vanilla ice cream — It doubles down on the cozy autumn apple theme, offering a warm, crunchy, and cold dessert that feels like a natural progression from the meal.
- Spiced ginger molasses cookies — Their warm, spicy kick and chewy texture are a wonderful way to end the meal, continuing the cozy spice notes from the soup.
- A dark chocolate and sea salt brownie — The deep, bitter notes of dark chocolate provide a sophisticated and rich contrast to the sweet and savory soup you just enjoyed.
Top Mistakes to Avoid
- Mistake: Underseasoning the roasting vegetables. The seasoning in the roasting stage is crucial because it gets caramelized onto the surface of the squash and apples. If you’re too shy with the salt and spices here, you’ll end up with a bland soup that’s very difficult to fix later.
- Mistake: Blending the soup while it’s too hot in a countertop blender. I’ve seen this happen and it’s a messy, dangerous situation. The steam pressure can blow the lid right off. Always let it cool slightly or, better yet, use an immersion blender directly in the pot for safety and ease.
- Mistake: Skipping the roasting step and just boiling everything. I know it seems faster, but you’ll sacrifice almost all the complex, caramelized flavor that makes this soup so special. Boiling will give you a one-dimensional, steamed-vegetable taste instead of that deep, roasted character.
- Mistake: Adding too much liquid before blending. You can always add more broth to thin the soup, but you can’t take it out. Start with the recommended amount, blend until smooth, and then decide if you need to thin it further. It’s much easier to fix a thick soup than a watery one.
Expert Tips
- Tip: Add a parsnip or carrot to the roast. For an extra layer of earthy-sweet complexity, chop a parsnip or a carrot and roast it along with the squash. It blends right in and adds another subtle flavor note that will have people wondering what your secret ingredient is.
- Tip: A dash of acid at the end is a game-changer. After blending, stir in a tiny squeeze of fresh lemon juice or a teaspoon of apple cider vinegar. You won’t taste the acid itself, but it will brighten all the other flavors and make the soup taste more vibrant and well-rounded.
- Tip: Make a double batch and freeze it. This soup freezes beautifully for up to 3 months. Let it cool completely, then portion it into freezer-safe containers or bags. It’s a lifesaver on a busy night—just thaw, reheat, and dinner is served.
- Tip: Use an ice cream scoop for the squash seeds. The next time you’re prepping a butternut squash, use an ice cream scoop to clean out the seed cavity. It’s the perfect tool for scraping away the stringy pulp quickly and efficiently, saving you time and mess.
FAQs
Can I make this soup ahead of time?
Absolutely, and it might even taste better! The flavors have time to meld and deepen overnight in the refrigerator. Simply store it in an airtight container for up to 4 days. Reheat it gently on the stovetop over medium-low heat, stirring occasionally. You may need to add a splash of broth or water when reheating as it tends to thicken up when chilled.
Can I use frozen butternut squash?
You can, but the final result won’t be quite the same. Frozen squash is typically blanched before freezing, which means it contains more water and won’t caramelize and brown in the oven the way fresh squash does. The soup might be a bit more watery and lack the deep, roasted flavor. If you must use frozen, thaw it completely and pat it very dry before roasting, and don’t expect the same level of browning.
My soup is too thin. How can I thicken it?
The easiest way is to simply let it simmer on the stove for a bit longer, uncovered, to allow some of the liquid to evaporate. If you’re still in a pinch, you can stir in a tablespoon of plain yogurt, a spoonful of coconut cream, or even a small, cooked, and pureed potato to help thicken it up and add body.
Is this soup freezer-friendly?
It’s one of the best soups for freezing! Ensure it is completely cooled to room temperature first. Ladle it into freezer-safe bags or containers, leaving about an inch of space at the top for expansion. It will keep well for up to 3 months. To serve, thaw it overnight in the refrigerator and then reheat gently on the stovetop.
What can I use instead of an immersion blender?
A standard countertop blender is your next best bet—just be very careful with the hot liquid as described earlier. As a last resort, you could use a food processor, though it may not get the soup quite as silky-smooth. In a real pinch, you could even press the mixture through a fine-mesh sieve with the back of a ladle, but this is a very labor-intensive process.


Roasted Butternut Squash And Apple Soup
Make this creamy Roasted Butternut Squash and Apple Soup for the ultimate fall comfort food. It's naturally sweet, savory, and dairy-free. Get the easy recipe now!
Ingredients
For the soup:
-
1 large butternut squash (about 2-2.5 lbs / 900g-1.1kg, peeled, seeded, and cubed)
-
2 medium sweet-tart apples (like Honeycrisp or Fuji, peeled, cored, and chopped)
-
1 large yellow onion (roughly chopped)
-
3 cloves garlic (peeled)
-
2 tablespoons olive oil
-
1 teaspoon fresh thyme leaves (or ½ tsp dried)
-
½ teaspoon ground cinnamon
-
¼ teaspoon ground nutmeg
-
4 cups vegetable broth (or chicken broth)
-
Salt and black pepper (to taste)
For garnish (optional):
-
coconut milk or cream (a drizzle)
-
toasted pumpkin seeds
-
fresh thyme (a sprinkle)
Instructions
-
Preheat your oven to 400°F (200°C). While it's heating up, get all your veggies and fruit prepped. Peel and cube the butternut squash into roughly 1-inch chunks—a consistent size is key for even roasting. Don't forget to scoop out the seeds and stringy bits from the center. Peel, core, and chop the apples, and roughly chop the onion. Toss the squash, apples, onion, and whole garlic cloves onto a large, rimmed baking sheet.01
-
Drizzle the olive oil over the mixture on the baking sheet. Then, sprinkle everything with the fresh thyme, cinnamon, nutmeg, and a generous pinch of salt and pepper. Now, get your hands in there! Toss everything together until every piece is evenly coated in the oil and spices. This hands-on approach ensures maximum flavor in every single bite. Spread the mixture out into a single layer, making sure nothing is piled on top of anything else.02
-
Slide the baking sheet into the preheated oven and roast for 30-35 minutes. You’ll know it’s ready when the squash is fork-tender and you can see beautiful, caramelized, browned spots on the edges of the squash and apples. The aroma filling your kitchen will be absolutely incredible—sweet, spicy, and deeply comforting. This roasting step is non-negotiable for developing that signature depth of flavor.03
-
Carefully transfer the entire contents of the baking sheet into a large soup pot or Dutch oven. It’s okay—and actually encouraged—to scrape in all those delicious, sticky browned bits from the pan. They are packed with flavor. Pour in the vegetable broth, giving everything a good stir to combine.04
-
Bring the pot to a gentle boil over medium-high heat, then immediately reduce the heat to low and let it simmer for about 10 minutes. This simmering time allows the flavors to meld together perfectly and ensures everything is soft and ready for blending. You'll notice the apples will have almost completely broken down, which is exactly what you want.05
-
Now for the transformation! If you're using an immersion blender, submerge it into the pot and blend until the soup is completely smooth and velvety. If using a countertop blender, work in batches, never filling the blender jar more than halfway. Blend until silky smooth, then return the pureed soup to the pot.06
-
Give the soup a final taste. This is where you make it your own. Does it need more salt? A crack of black pepper? Maybe another tiny pinch of cinnamon? Adjust the seasoning until it sings. If the soup is thicker than you'd like, you can thin it out with a little more broth or even some water until it reaches your perfect consistency.07
-
Ladle the hot, fragrant soup into bowls. Now for the fun part—the garnishes! A swirl of coconut milk or cream adds a lovely visual contrast and a touch of richness. A sprinkle of toasted pumpkin seeds gives a delightful crunch, and a few fresh thyme leaves make it look restaurant-worthy. Serve immediately and enjoy the taste of autumn in every spoonful.08
Not what you're looking for?