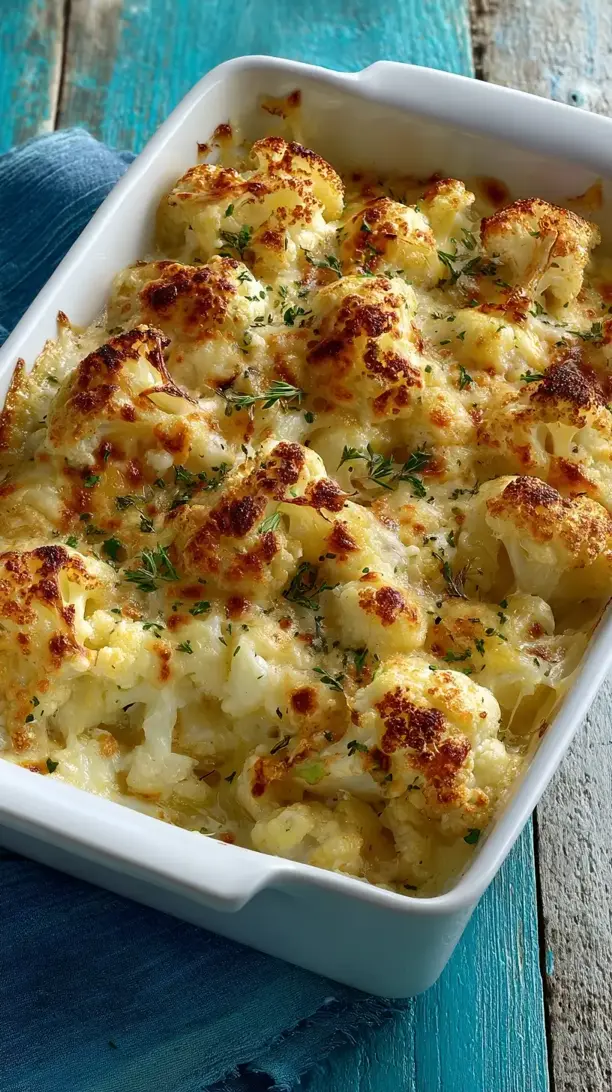
This Roasted Cauliflower Mac and Cheese delivers all the comfort of the classic dish in a low-carb form. Roasting the cauliflower brings out a nutty sweetness that pairs perfectly with the rich, velvety cheese sauce. It’s a simple yet decadent meal that feels both wholesome and indulgent.
Nothing beats a great Roasted Cauliflower Mac and Cheese. Whether you're a fan of Dinner Ideas or want to try something from our Chicken Thigh Recipes selection, keep scrolling!


Why You’ll Love This Roasted Cauliflower Mac and Cheese
- Comfort food reimagined: Creamy, cheesy goodness with a satisfying texture and deep flavor.
- Roasting is key: Caramelizes the cauliflower for a nutty, sweet taste that stands up to the sauce.
- Surprisingly simple: Straightforward process where the oven does most of the work.
- Incredibly versatile: Easy to customize with different cheeses, spices, or crunchy toppings.
Ingredients & Tools
- 1 large head of cauliflower, cut into bite-sized florets
- 2 tablespoons olive oil or avocado oil
- 1 teaspoon garlic powder
- 1/2 teaspoon smoked paprika
- Salt and black pepper to taste
- 2 tablespoons unsalted butter
- 1/2 cup heavy cream
- 1/2 cup unsweetened almond milk (or full-fat coconut milk)
- 4 ounces cream cheese, softened and cubed
- 2 cups shredded sharp cheddar cheese, divided
- 1/2 cup grated Parmesan cheese
- 1/4 teaspoon ground mustard (optional, but great for depth)
- A pinch of nutmeg (trust me on this one)
Tools: A large sheet pan, a medium saucepan, a whisk, and a 9×9 inch baking dish (or similar-sized oven-safe dish).
Notes: The quality of your cheese really makes a difference here—since it’s the star of the sauce, using a good, freshly grated sharp cheddar will give you the best flavor and meltability. Pre-shredded cheese often contains anti-caking agents that can make the sauce a little grainy.
Nutrition (per serving)
| Calories: | 385 kcal |
| Protein: | 16 g |
| Fat: | 33 g |
| Carbs: | 8 g |
| Fiber: | 3 g |
Serves: 4 | Prep Time: 15 minutes | Cook Time: 35 minutes | Total Time: 50 minutes
Before You Start: Tips & Ingredient Notes
- Don’t skip the roasting. I know it’s tempting to just steam the cauliflower to save time, but roasting is non-negotiable for the best flavor. It transforms the cauliflower from bland and watery to deeply flavorful and caramelized, which is the foundation of the whole dish.
- Grate your own cheese. It might seem like a small thing, but pre-shredded bagged cheese is coated to prevent clumping, which can sometimes prevent your sauce from getting perfectly smooth. Taking a minute to grate a block of cheddar is a pro-move for a silky sauce.
- Have your ingredients ready. When you’re making the cheese sauce, things can move quickly. Have your cream cheese cubed and your shredded cheeses measured and close by. This “mise en place” makes the process feel effortless and prevents the sauce from breaking while you scramble for ingredients.
- Season as you go. Don’t just add all your salt at the end. Season the cauliflower before it roasts, and taste your sauce before you combine everything. Building layers of seasoning is the key to a dish that tastes complex and well-balanced.
How to Make Roasted Cauliflower Mac and Cheese
Step 1: Roast the Cauliflower to Perfection. Start by preheating your oven to 425°F (220°C). On your large sheet pan, toss the cauliflower florets with the olive oil, garlic powder, smoked paprika, salt, and pepper. Make sure they’re in a single layer with a little space between them—this is crucial for getting those lovely browned edges instead of steaming. Roast for 20-25 minutes, giving the pan a shake halfway through. You’re looking for tender florets with crispy, caramelized bits. The smell at this point is absolutely incredible.
Step 2: Start Your Cheese Sauce Base. While the cauliflower is roasting, it’s sauce time! In your medium saucepan over medium heat, melt the butter. You just want it melted and bubbly, not browned. Then, pour in the heavy cream and almond milk. Whisk it all together and let it heat up until it’s just beginning to simmer around the edges—you’ll see little bubbles forming. Don’t let it boil vigorously.
Step 3: Melt in the Cream Cheese. Reduce the heat to low. Now, add your cubed cream cheese to the warm cream mixture. Whisk continuously until the cream cheese has completely melted and the mixture is smooth. This might take a couple of minutes, and you’ll notice it starting to thicken slightly. Patience is key here to avoid any little lumps.
Step 4: Create the Cheesy Magic. Once your base is smooth, it’s time for the main event. Add 1 1/2 cups of the shredded cheddar cheese (reserving the other 1/2 cup for the top), all of the Parmesan, the ground mustard, and that tiny pinch of nutmeg. The nutmeg sounds odd, but it adds a warm, subtle background note that makes the cheese flavor pop. Whisk constantly until all the cheese is melted and the sauce is gloriously smooth and velvety. Give it a taste and adjust the salt and pepper if needed.
Step 5: Combine and Top. By now, your cauliflower should be perfectly roasted. Transfer the hot roasted cauliflower to your baking dish. Pour the luxurious cheese sauce all over it, and gently toss to ensure every single floret is coated in that cheesy goodness. Sprinkle the remaining 1/2 cup of cheddar cheese evenly over the top.
Step 6: Bake Until Bubbly and Golden. Place the baking dish back into the oven (still at 425°F) and bake for 10-15 minutes, or until the cheese on top is completely melted and the sauce is bubbling enthusiastically around the edges. For a more golden, crispy top, you can switch the oven to broil for the last minute or two—but watch it like a hawk!
Step 7: The Most Important Step—Rest. I know it’s hard, but you have to let it rest for about 5-10 minutes after pulling it from the oven. This allows the sauce to thicken up just a bit more and settle, so it doesn’t run everywhere when you scoop it. It also saves you from burning the roof of your mouth on molten cheese—a noble cause.
Storage & Freshness Guide
- Fridge: Store in an airtight container for up to 4 days.
- Freezer: Freeze in a sealed container for up to 3 months; thaw in fridge before reheating.
- Reviving: Reheat in the oven at 350°F until warm, or microwave in 30-second intervals, stirring between.
Serving Suggestions
Complementary Dishes
- A simple green salad with a tangy vinaigrette — The crisp, acidic greens cut through the richness of the cheese sauce beautifully, creating a perfect balance on the plate.
- Pan-seared chicken thighs or pork chops — The savory, juicy protein makes this a complete and very satisfying meal, especially if you’re serving hungry folks.
- Garlic sautéed spinach or kale — Adding another vegetable on the side is never a bad idea, and the garlicky greens are a fantastic flavor companion.
Drinks
- A crisp, dry white wine like Sauvignon Blanc — Its bright acidity and citrus notes are a classic pairing that cleanses the palate between bites of rich, cheesy goodness.
- A light-bodied, malty amber ale — The caramel notes in the beer can mirror the roasted flavors of the cauliflower, while the carbonation helps reset your taste buds.
- Sparkling water with a squeeze of lemon — For a non-alcoholic option, the bubbles and citrus are wonderfully refreshing and do a great job of cutting through the fat.
Something Sweet
- A few fresh raspberries or blackberries — Their natural sweetness and slight tartness are a lovely, light finish that doesn’t feel too heavy after a rich meal.
- A square of very dark chocolate (85% or higher) — It’s rich without being sugary, and the bitter notes provide a sophisticated end to your dining experience.
- A small bowl of whipped coconut cream with vanilla — It’s creamy and indulgent-feeling but still keeps things low carb and light.
Top Mistakes to Avoid
- Overcrowding the sheet pan. If you pile the cauliflower on top of itself, it will steam and become soggy instead of roasting and caramelizing. You want a single layer with space for hot air to circulate.
- Using high heat for the cheese sauce. High heat is the enemy of a smooth cheese sauce. It can cause the fats to separate, leaving you with a greasy, grainy mess. Keep it on low to medium-low and be patient.
- Adding cold cheese to a hot sauce. If your shredded cheese is straight from the fridge, it can shock the sauce and make it harder to melt smoothly. Letting it sit out for 10-15 minutes beforehand can help.
- Skipping the rest time. I’ve messed this up before too, diving in straight from the oven. The sauce needs a few minutes to set up, otherwise it’ll be soupy on the plate. Letting it rest ensures the perfect, creamy consistency.
Expert Tips
- Tip: For an extra flavor boost, toss a couple of unpeeled garlic cloves on the pan with the cauliflower while it roasts. Once soft, you can squeeze the sweet, mellow paste right into your cheese sauce.
- Tip: If your sauce seems a bit too thick after adding the cheese, just whisk in a tablespoon of almond milk at a time until it reaches your desired consistency. It should coat the back of a spoon nicely.
- Tip: For a fantastic crispy topping, mix that last 1/2 cup of cheddar with 1/4 cup of crushed pork rinds or almond flour before sprinkling it over the dish. It adds a wonderful textural contrast.
- Tip: This dish is a great make-ahead option! You can assemble it completely (without the final bake) a day in advance. Keep it covered in the fridge, then just add a few extra minutes to the baking time when you’re ready to cook.
FAQs
Can I use frozen cauliflower?
You can, but you’ll get a very different texture. Frozen cauliflower has a much higher water content, so even after roasting, it can become a bit soft and release more liquid into your sauce, potentially making it watery. If you must use frozen, thaw it completely and pat it *very* dry with paper towels before roasting. Honestly, fresh is highly recommended for the best results.
My cheese sauce is grainy. What happened and can I fix it?
A grainy sauce is usually caused by two things: the heat was too high, causing the proteins to tighten and squeeze out the fat, or the cheese was added too quickly. To try and rescue it, remove the pan from the heat immediately and whisk in a spoonful of heavy cream or a squeeze of lemon juice. Sometimes you can bring it back! For next time, just remember: low and slow is the way to go for a silky sauce.
Can I make this dairy-free?
Absolutely! The method remains the same. Use vegan butter, a plain, unsweetened vegan cream cheese, and your favorite meltable vegan cheddar and Parmesan-style shreds. Just be sure to read the labels to confirm they are low carb, as some vegan cheeses can contain starches or sugars.
How do I store and reheat leftovers?
Store any leftovers in an airtight container in the fridge for up to 4 days. The best way to reheat is in the oven at 350°F until warmed through, which helps maintain the texture. You can also use the microwave, but stir it every 30 seconds to heat it evenly, as it can sometimes separate.
Can I add protein to this dish?
Of course! This is a fantastic base. You could stir in some cooked, crumbled bacon, diced ham, shredded rotisserie chicken, or even some browned ground sausage right before you put it in the baking dish. Just make sure any add-ins are already cooked, as the final bake time isn’t long enough to cook raw meat.


Roasted Cauliflower Mac And Cheese
Make the best Roasted Cauliflower Mac and Cheese with this easy recipe. A rich, low-carb comfort food that's creamy and delicious. Get the recipe now!
Ingredients
For the Roasted Cauliflower:
-
1 large head cauliflower (cut into bite-sized florets)
-
2 tablespoons olive oil or avocado oil
-
1 teaspoon garlic powder
-
1/2 teaspoon smoked paprika
-
Salt and black pepper (to taste)
For the Cheese Sauce:
-
2 tablespoons unsalted butter
-
1/2 cup heavy cream
-
1/2 cup unsweetened almond milk (or full-fat coconut milk)
-
4 ounces cream cheese (softened and cubed)
-
2 cups shredded sharp cheddar cheese (divided)
-
1/2 cup grated Parmesan cheese
-
1/4 teaspoon ground mustard (optional, but great for depth)
-
A pinch nutmeg (trust me on this one)
Instructions
-
Start by preheating your oven to 425°F (220°C). On your large sheet pan, toss the cauliflower florets with the olive oil, garlic powder, smoked paprika, salt, and pepper. Make sure they're in a single layer with a little space between them—this is crucial for getting those lovely browned edges instead of steaming. Roast for 20-25 minutes, giving the pan a shake halfway through. You’re looking for tender florets with crispy, caramelized bits.01
-
While the cauliflower is roasting, it’s sauce time! In your medium saucepan over medium heat, melt the butter. You just want it melted and bubbly, not browned. Then, pour in the heavy cream and almond milk. Whisk it all together and let it heat up until it's just beginning to simulate around the edges—you'll see little bubbles forming. Don't let it boil vigorously.02
-
Reduce the heat to low. Now, add your cubed cream cheese to the warm cream mixture. Whisk continuously until the cream cheese has completely melted and the mixture is smooth. This might take a couple of minutes, and you’ll notice it starting to thicken slightly. Patience is key here to avoid any little lumps.03
-
Once your base is smooth, it’s time for the main event. Add 1 1/2 cups of the shredded cheddar cheese (reserving the other 1/2 cup for the top), all of the Parmesan, the ground mustard, and that tiny pinch of nutmeg. The nutmeg sounds odd, but it adds a warm, subtle background note that makes the cheese flavor pop. Whisk constantly until all the cheese is melted and the sauce is gloriously smooth and velvety. Give it a taste and adjust the salt and pepper if needed.04
-
By now, your cauliflower should be perfectly roasted. Transfer the hot roasted cauliflower to your baking dish. Pour the luxurious cheese sauce all over it, and gently toss to ensure every single floret is coated in that cheesy goodness. Sprinkle the remaining 1/2 cup of cheddar cheese evenly over the top.05
-
Place the baking dish back into the oven (still at 425°F) and bake for 10-15 minutes, or until the cheese on top is completely melted and the sauce is bubbling enthusiastically around the edges. For a more golden, crispy top, you can switch the oven to broil for the last minute or two—but watch it like a hawk!06
-
I know it’s hard, but you have to let it rest for about 5-10 minutes after pulling it from the oven. This allows the sauce to thicken up just a bit more and settle, so it doesn't run everywhere when you scoop it. It also saves you from burning the roof of your mouth on molten cheese—a noble cause.07
Not what you're looking for?


