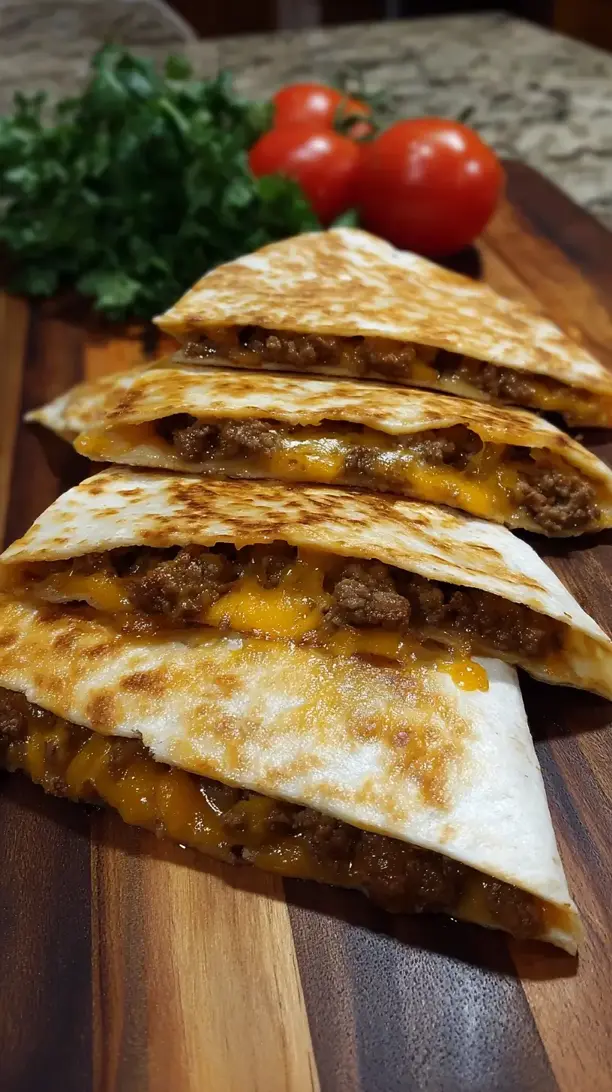
There’s nothing more comforting than a golden, crispy beef and cheese quesadilla with a molten, savory filling. This recipe is incredibly versatile and comes together in under 20 minutes, making it perfect for busy nights. The simple act of toasting the tortilla in a dry skillet transforms it into a crispy vessel for all that cheesy, beefy goodness.
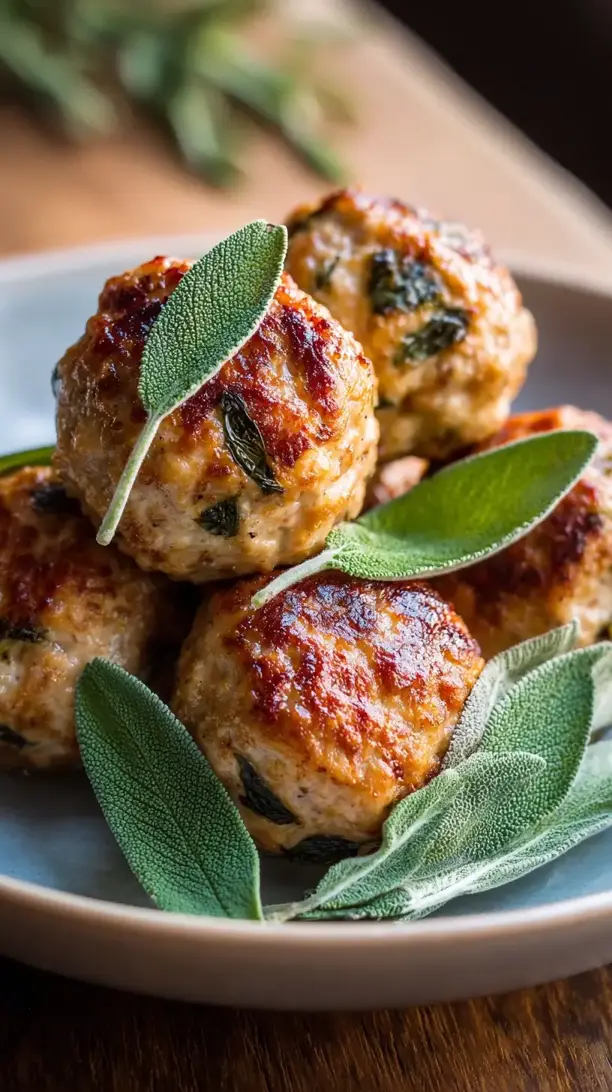
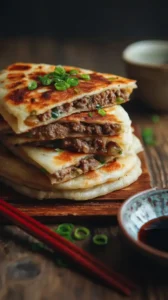
Looking for Beef and Cheese Quesadilla inspiration? You'll love what we have! Explore more Savory Combo Recipes recipes or discover our Burgers favorites.


Why You’ll Love This Beef and Cheese Quesadilla
- Fast & satisfying: Ready in 15 minutes for an indulgent, protein-packed meal.
- Endless customization: Easily add peppers, beans, or corn to make it your own.
- Crispy-to-melty ratio: Dry-pan toasting ensures a crisp shell and gooey interior.
- Universal comfort food: A guaranteed hit for kids, crowds, or solo dinners.
Ingredients & Tools
- 4 large (10-inch) flour tortillas
- 1 tbsp olive oil or vegetable oil
- 1/2 lb ground beef (80/20 lean-to-fat ratio works well)
- 1 tsp chili powder
- 1/2 tsp ground cumin
- 1/2 tsp garlic powder
- 1/4 tsp onion powder
- 1/4 tsp smoked paprika
- Salt and black pepper to taste
- 1 1/2 cups shredded cheese (a blend of Monterey Jack and cheddar is ideal)
- Optional for serving: salsa, sour cream, guacamole, chopped cilantro
Tools: A large skillet (non-stick or cast-iron is perfect), a spatula, and a plate.
Notes: Don’t skimp on the cheese blend—Monterey Jack’s meltiness with cheddar’s sharp flavor creates the iconic quesadilla experience. Fresh spices make a world of difference.
Nutrition (per serving)
| Calories: | 520 kcal |
| Protein: | 28 g |
| Fat: | 29 g |
| Carbs: | 34 g |
| Fiber: | 2 g |
Serves: 2 | Prep Time: 5 minutes | Cook Time: 10 minutes | Total Time: 15 minutes
Before You Start: Tips & Ingredient Notes
- Get your mise en place ready. Quesadillas cook quickly, so having your cooked beef, shredded cheese, and tortillas all within arm’s reach makes the assembly process smooth and stress-free.
- Why a dry skillet? You might be tempted to add butter or oil to the pan for the tortilla, but a dry skillet over medium heat is the secret to a crisp, blistered tortilla without it becoming greasy.
- The cheese is your glue. Make sure you spread the cheese all the way to the edges of the tortilla. As it melts, it will seal the quesadilla shut, making it easier to flip and preventing the filling from falling out.
- Don’t overfill. It’s tempting to pack in as much beef as possible, but a thinner, even layer ensures the quesadilla cooks evenly and the tortilla gets perfectly crisp. A little goes a long way.
How to Make Beef and Cheese Quesadilla
Step 1: First, let’s cook the beef. Heat the olive oil in your skillet over medium-high heat. Add the ground beef, breaking it up with a spatula as it cooks. You’ll want to cook it until it’s nicely browned and no pink remains, which should take about 5-6 minutes. As it cooks, you can drain off any excess fat if you prefer.
Step 2: Now, season the beef. Sprinkle the chili powder, cumin, garlic powder, onion powder, smoked paprika, salt, and pepper over the cooked beef. Stir everything together and cook for another minute until the spices are fragrant. This quick bloom in the pan really wakes up the spices and coats the beef in all that wonderful flavor. Transfer the seasoned beef to a bowl and wipe the skillet clean with a paper towel.
Step 3: Time to assemble. Place one tortilla flat on your work surface. Sprinkle a thin, even layer of shredded cheese over one half of the tortilla. Then, spoon a generous but not excessive amount of the seasoned beef over the cheese. Top the beef with another good layer of cheese—this second cheese layer acts as the top “glue” for the other tortilla half.
Step 4: Carefully fold the bare half of the tortilla over the filled half, pressing down gently. You should have a perfect half-moon shape. Repeat this process with the remaining tortillas and filling.
Step 5: Now for the cooking. Place your dry skillet back over medium heat. Once hot, carefully transfer one assembled quesadilla to the skillet. Cook for 2-3 minutes, until the bottom is golden brown and you can see the cheese starting to melt around the edges. You’ll hear a gentle sizzle—that’s the sound of success.
Step 6: The flip! This is the moment of truth. Slide your spatula underneath the quesadilla and confidently flip it over. It should feel sturdy. Cook for another 2-3 minutes on the second side until it’s equally golden and the cheese is completely molten. You can press down gently with the spatula to ensure even contact with the pan.
Step 7: Transfer the cooked quesadilla to a cutting board and let it rest for a minute before slicing. I know it’s hard to wait, but this allows the cheese to set slightly so it doesn’t all ooze out when you cut into it. Repeat with the remaining quesadillas.
Step 8: Finally, slice each quesadilla into wedges—I usually do three or four. Serve them immediately while they’re hot and crispy, with your favorite dips on the side. The contrast between the crunchy exterior and the steamy, cheesy interior is absolutely divine.
Storage & Freshness Guide
- Fridge: Store cooled quesadillas in an airtight container for up to 3 days.
- Freezer: Wrap individually in foil and freeze for up to 1 month.
- Reviving: Reheat in a 375°F oven or dry skillet until crispy and warm.
Serving Suggestions
Complementary Dishes
- A simple corn and black bean salad — The sweet corn and earthy beans provide a fresh, cool contrast to the rich, hot quesadilla, balancing the meal perfectly.
- Classic Mexican rice — The fluffy, tomato-infused rice is a classic partner that soaks up any extra salsa or sour cream and makes the meal feel more complete.
- Charred street corn (Esquites) — The creamy, tangy, and slightly spicy flavors of this off-the-cob salad add a fantastic textural and flavor pop alongside the quesadilla.
Drinks
- A chilled Mexican lager — The light, crisp beer cuts through the richness of the beef and cheese beautifully, cleansing the palate between bites.
- Sparkling limeade — The fizzy, tart, and slightly sweet drink is incredibly refreshing and a fantastic non-alcoholic option that everyone can enjoy.
- Paloma cocktail — The grapefruit and tequila combo is bright, citrusy, and bold enough to stand up to the robust flavors of the seasoned beef.
Something Sweet
- Churros with chocolate dipping sauce — The warm, cinnamony crunch of a churro followed by a dip in rich chocolate is the ultimate celebratory finish.
- Tres leches cake — This impossibly moist and milky cake is a classic for a reason, offering a sweet, creamy counterpoint to the savory main course.
- Mango sorbet — A few scoops of bright, fruity, and icy sorbet are a light and palate-cleansing way to end the meal on a fresh note.
Top Mistakes to Avoid
- Mistake: Cooking on too high heat. This is the number one error. High heat will burn the tortilla before the cheese has a chance to melt and the filling to heat through. A steady medium heat is your friend.
- Mistake: Overstuffing the quesadilla. I’ve messed this up before too… when you add too much filling, the tortilla becomes difficult to flip and is more likely to break open, spilling its precious cargo into the pan.
- Mistake: Using cold filling. If your cooked beef is straight from the fridge, the center of the quesadilla might still be cold by the time the tortilla is perfectly browned. Using warm or room-temperature filling ensures everything is hot and melty.
- Mistake: Skipping the rest time. Cutting into a quesadilla the second it leaves the pan seems right, but you’ll lose a lot of cheese. Letting it sit for just 60 seconds allows the cheese to set slightly.
Expert Tips
- Tip: Grate your own cheese. Pre-shredded bags contain anti-caking agents that can prevent the cheese from melting as smoothly. A block of cheese you shred yourself will give you a far superior, silkier melt.
- Tip: Use a lid for extra melt. If you find your cheese isn’t melting fast enough before the tortilla browns, try placing a lid over the skillet for the last minute of cooking. This traps steam and helps melt the cheese perfectly.
- Tip: Keep finished quesadillas warm. If you’re cooking in batches, keep finished quesadillas warm and crisp in a single layer on a baking sheet in a 200°F (95°C) oven while you cook the rest.
- Tip: Add a flavor boost with a spread. Before adding the cheese and beef, try spreading a thin layer of refried beans, chipotle mayo, or even a bit of guacamole on the tortilla for an extra layer of flavor.
FAQs
Can I make these ahead of time?
You can absolutely prep the components ahead! Cook and season the beef, shred the cheese, and store them separately in the fridge for up to 2 days. When you’re ready to eat, assembly and cooking only take minutes. I don’t recommend assembling them completely ahead of time, as the tortilla can get soggy from the filling.
What’s the best way to reheat a leftover quesadilla?
The oven or a toaster oven is your best bet to recapture the crispness. Reheating at 375°F (190°C) for about 5-7 minutes will make it taste almost fresh. Avoid the microwave, as it will turn the tortilla soft and rubbery. If you’re in a pinch, a dry skillet over medium heat works wonders too.
Can I use corn tortillas instead of flour?
You can, but it requires a slightly different technique. Corn tortillas are smaller and less pliable, so they’re more likely to crack when folded. I’d recommend making two separate, smaller quesadillas and sandwiching the filling between them, then flipping carefully. The flavor is great, but the texture is different.
My cheese keeps leaking out. What am I doing wrong?
This usually happens for one of two reasons: the heat is too high, causing the cheese to melt and bubble out too violently before the tortilla seals, or you’re overfilling. Try a slightly lower heat and make sure you’re leaving a small border around the edge when you add the fillings.
What other fillings can I add?
Oh, the possibilities are endless! Sautéed onions and bell peppers are a classic addition. For a little spice, diced jalapeños are fantastic. You can also add black beans, corn, cooked chicken, or even some spinach. Just remember the golden rule: don’t overfill!


Beef And Cheese Quesadilla
Make the perfect crispy Beef and Cheese Quesadilla in just 15 minutes! This easy recipe delivers a gooey, savory filling every time. Get the recipe now!
Ingredients
For the Ingredients
-
4 large (10-inch) flour tortillas
-
1 tbsp olive oil or vegetable oil
-
1/2 lb ground beef (80/20 lean-to-fat ratio works well)
-
1 tsp chili powder
-
1/2 tsp ground cumin
-
1/2 tsp garlic powder
-
1/4 tsp onion powder
-
1/4 tsp smoked paprika
-
Salt and black pepper (to taste)
-
1 1/2 cups shredded cheese (a blend of Monterey Jack and cheddar is ideal)
-
Optional for serving (salsa, sour cream, guacamole, chopped cilantro)
Instructions
-
First, let’s cook the beef. Heat the olive oil in your skillet over medium-high heat. Add the ground beef, breaking it up with a spatula as it cooks. You’ll want to cook it until it’s nicely browned and no pink remains, which should take about 5-6 minutes. As it cooks, you can drain off any excess fat if you prefer.01
-
Now, season the beef. Sprinkle the chili powder, cumin, garlic powder, onion powder, smoked paprika, salt, and pepper over the cooked beef. Stir everything together and cook for another minute until the spices are fragrant. This quick bloom in the pan really wakes up the spices and coats the beef in all that wonderful flavor. Transfer the seasoned beef to a bowl and wipe the skillet clean with a paper towel.02
-
Time to assemble. Place one tortilla flat on your work surface. Sprinkle a thin, even layer of shredded cheese over one half of the tortilla. Then, spoon a generous but not excessive amount of the seasoned beef over the cheese. Top the beef with another good layer of cheese—this second cheese layer acts as the top “glue” for the other tortilla half.03
-
Carefully fold the bare half of the tortilla over the filled half, pressing down gently. You should have a perfect half-moon shape. Repeat this process with the remaining tortillas and filling.04
-
Now for the cooking. Place your dry skillet back over medium heat. Once hot, carefully transfer one assembled quesadilla to the skillet. Cook for 2-3 minutes, until the bottom is golden brown and you can see the cheese starting to melt around the edges. You’ll hear a gentle sizzle—that’s the sound of success.05
-
The flip! This is the moment of truth. Slide your spatula underneath the quesadilla and confidently flip it over. It should feel sturdy. Cook for another 2-3 minutes on the second side until it’s equally golden and the cheese is completely molten. You can press down gently with the spatula to ensure even contact with the pan.06
-
Transfer the cooked quesadilla to a cutting board and let it rest for a minute before slicing. I know it’s hard to wait, but this allows the cheese to set slightly so it doesn’t all ooze out when you cut into it. Repeat with the remaining quesadillas.07
-
Finally, slice each quesadilla into wedges—I usually do three or four. Serve them immediately while they’re hot and crispy, with your favorite dips on the side. The contrast between the crunchy exterior and the steamy, cheesy interior is absolutely divine.08
Not what you're looking for?