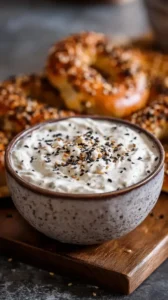
There’s something deeply comforting about warm, savory Cheddar Herb Scones fresh from the oven. These flaky, tender treats are packed with sharp cheddar and fragrant herbs, perfect for brunch or a quick snack. They come together in about 30 minutes with no fancy equipment required.
Love Cheddar Herb Scones? So do we! If you're into Savory Snacks or curious about Chicken Thigh Recipes, you'll find plenty of inspiration below.


Why You’ll Love This Cheddar Herb Scones
- Incredibly versatile: Serve with soup, as breakfast sandwiches, or plain.
- Perfect texture: Flaky and tender inside with a crisp, golden top.
- Minimal prep: Just a bowl, fork, and 15 minutes hands-on time.
- Freezes beautifully: Bake straight from frozen for fresh scones anytime.
Ingredients & Tools
- 250 g all-purpose flour
- 2 tsp baking powder
- ½ tsp baking soda
- 1 tsp granulated sugar
- ½ tsp fine sea salt
- 115 g cold unsalted butter, cubed
- 120 g sharp cheddar cheese, grated
- 2 tbsp fresh chives, finely chopped
- 1 tbsp fresh parsley, finely chopped
- 1 tsp fresh thyme leaves
- 180 ml cold buttermilk
- 1 large egg, for egg wash (optional)
Tools: mixing bowl, box grater, baking sheet, parchment paper, fork or pastry cutter
Notes: Using cold butter and buttermilk is non-negotiable for flaky layers. Fresh herbs provide the best aromatic quality.
Nutrition (per serving)
| Calories: | 285 kcal |
| Protein: | 7 g |
| Fat: | 17 g |
| Carbs: | 25 g |
| Fiber: | 1 g |
Serves: 8 | Prep Time: 15 minutes | Cook Time: 15 minutes | Total Time: 30 minutes
Before You Start: Tips & Ingredient Notes
- Keep everything cold. Seriously—chill your butter and buttermilk beforehand. Cold fat creates steam pockets in the oven, which equals flaky layers. Warm ingredients will give you dense scones.
- Grate your own cheese. Pre-shredded cheese contains anti-caking agents that can affect melting and texture. A block of sharp cheddar, freshly grated, delivers superior flavor and melt.
- Don’t overwork the dough. Overmixing develops gluten, leading to tough scones. Mix just until the dough comes together—a few dry spots are totally fine.
- Fresh herbs make a difference. While dried herbs work in a pinch, fresh chives, parsley, and thyme provide a brighter, more vibrant flavor that complements the cheddar beautifully.
How to Make Cheddar Herb Scones
Step 1: Preheat your oven to 220°C (425°F) and line a baking sheet with parchment paper. In a large mixing bowl, whisk together the flour, baking powder, baking soda, sugar, and salt. You want these dry ingredients evenly distributed so your scones rise uniformly.
Step 2: Add the cold, cubed butter to the flour mixture. Using a pastry cutter or fork, cut the butter into the flour until the mixture resembles coarse crumbs with some pea-sized butter pieces remaining. The trick is to work quickly so the butter stays cold—you’ll notice the mixture looks a bit like sandy gravel.
Step 3: Toss in the grated cheddar and chopped herbs. Use a fork to gently combine, ensuring the cheese and herbs are evenly coated in the flour-butter mixture. This step smells amazing—that sharp cheddar and herby aroma is a little preview of what’s to come.
Step 4: Pour the cold buttermilk into the bowl. Stir gently with a fork just until a shaggy dough forms. It might look a bit dry in spots, but that’s okay—don’t be tempted to add more liquid. The dough should just hold together when pressed.
Step 5: Turn the dough out onto a lightly floured surface. Gently press and fold it a few times to bring it together, then pat it into a 2 cm thick circle. Handle it as little as possible—overworking will make the scones tough.
Step 6: Use a sharp knife or bench scraper to cut the circle into 8 wedges, like a pizza. Arrange the wedges on the prepared baking sheet, leaving about 2 cm between each for expansion. If you’d like a golden finish, brush the tops with a beaten egg.
Step 7: Bake for 12–15 minutes, or until the scones are puffed, golden on top, and sound hollow when tapped on the bottom. Your kitchen will smell incredible—buttery, cheesy, and herby all at once. Let them cool on the sheet for 5 minutes before serving warm.
Storage & Freshness Guide
- Fridge: Store cooled scones in an airtight container for up to 3 days.
- Freezer: Freeze unbaked wedges on a tray, then transfer to a bag; bake from frozen, adding 2–4 minutes.
- Reviving: Reheat in a 180°C (350°F) oven for 5–8 minutes to restore crispness.
Serving Suggestions
Complementary Dishes
- Creamy tomato soup — The tangy, velvety soup is a classic partner that highlights the scones’ rich, cheesy flavor.
- A simple green salad with lemon vinaigrette — The fresh, zesty dressing cuts through the richness and adds a crisp contrast.
- Soft-scrambled eggs with chives — For a hearty breakfast or brunch, the creamy eggs and herbal notes echo the scones’ own flavors beautifully.
Drinks
- Earl Grey tea — The bergamot notes complement the herbs and provide a lovely aromatic balance to the savory scone.
- Dry cider — Its crisp, slightly tart profile cleanses the palate and contrasts nicely with the rich, cheesy scone.
- Bloody Mary — For a brunch gathering, the spicy, savory cocktail stands up boldly to the scones’ robust flavor.
Something Sweet
- Lemon curd tartlets — The bright, citrusy sweetness provides a refreshing finish after the savory scones.
- Fresh berry compote with vanilla ice cream — The juicy, slightly tart berries and cool creaminess create a lovely sweet contrast.
- Dark chocolate espresso beans — A few of these offer a bitter-sweet, grown-up treat that doesn’t overwhelm the palate.
Top Mistakes to Avoid
- Using room temperature butter. If your butter softens before baking, it will blend too thoroughly into the flour, resulting in a dense, cake-like texture instead of flaky layers.
- Overmixing the dough. I’ve messed this up before too—stirring beyond the “just combined” stage activates gluten and makes scones tough rather than tender.
- Skimping on the baking time. Underbaked scones can be gummy inside. Look for that golden top and hollow sound when tapped—it’s the best indicator they’re fully cooked.
- Using stale baking powder. If your leavener is old, your scones won’t rise properly. Test it by mixing a little with hot water—if it doesn’t bubble vigorously, replace it.
Expert Tips
- Tip: Freeze your grated cheese for 10 minutes before using. This helps prevent it from clumping and ensures even distribution without melting prematurely into the dough.
- Tip: For extra flaky layers, try folding the dough like a letter before cutting. After patting it into a rectangle, fold one third over the center, then the other third over that, and gently roll it out again before cutting.
- Tip: If you don’t have buttermilk, make a quick substitute by adding 1 tablespoon of lemon juice or vinegar to 180 ml of whole milk. Let it sit for 5 minutes until slightly curdled—it works like a charm.
- Tip: For a flavor boost, add a pinch of smoked paprika or garlic powder to the dry ingredients. It subtly enhances the cheesy, herby profile without overpowering it.
FAQs
Can I make these scones ahead of time?
Absolutely! You can prepare the dough, cut it into wedges, and freeze them unbaked on a parchment-lined tray. Once frozen solid, transfer to a zip-top bag. Bake straight from frozen, adding 2–4 extra minutes. This way, you’re never more than 20 minutes away from a warm scone.
What if I don’t have fresh herbs?
You can use dried herbs—just reduce the amount by half since dried herbs are more concentrated. So, use 1 tablespoon dried chives, 1½ teaspoons dried parsley, and ½ teaspoon dried thyme. The flavor will be slightly different but still delicious.
Why did my scones spread too much?
This usually happens if the butter was too soft or the oven wasn’t hot enough. A hot oven sets the exterior quickly, allowing the scones to rise up rather than spread out. Always preheat your oven thoroughly and keep that butter cold!
Can I use a different type of cheese?
Yes—Gruyère, Parmesan, or even a pepper jack would work well. Just make sure it’s a cheese that melts nicely and has a robust flavor. Avoid very soft or overly moist cheeses, as they can make the dough greasy or heavy.
How should I store leftover scones?
Store completely cooled scones in an airtight container at room temperature for up to 2 days. To reheat, wrap them in foil and warm in a 180°C (350°F) oven for 5–8 minutes. Microwaving can make them rubbery, so the oven is your best bet for restoring that fresh-baked texture.


Cheddar Herb Scones
Make the best flaky Cheddar Herb Scones in just 30 minutes! This easy recipe is packed with sharp cheddar and fresh herbs. Get the simple steps now.
Ingredients
For the scones
-
250 g all-purpose flour
-
2 tsp baking powder
-
½ tsp baking soda
-
1 tsp granulated sugar
-
½ tsp fine sea salt
-
115 g cold unsalted butter (cubed)
-
120 g sharp cheddar cheese (grated)
-
2 tbsp fresh chives (finely chopped)
-
1 tbsp fresh parsley (finely chopped)
-
1 tsp fresh thyme leaves
-
180 ml cold buttermilk
-
1 large egg (for egg wash (optional))
Instructions
-
Preheat your oven to 220°C (425°F) and line a baking sheet with parchment paper. In a large mixing bowl, whisk together the flour, baking powder, baking soda, sugar, and salt.01
-
Add the cold, cubed butter to the flour mixture. Using a pastry cutter or fork, cut the butter into the flour until the mixture resembles coarse crumbs with some pea-sized butter pieces remaining.02
-
Toss in the grated cheddar and chopped herbs. Use a fork to gently combine, ensuring the cheese and herbs are evenly coated in the flour-butter mixture.03
-
Pour the cold buttermilk into the bowl. Stir gently with a fork just until a shaggy dough forms.04
-
Turn the dough out onto a lightly floured surface. Gently press and fold it a few times to bring it together, then pat it into a 2 cm thick circle.05
-
Use a sharp knife or bench scraper to cut the circle into 8 wedges, like a pizza. Arrange the wedges on the prepared baking sheet, leaving about 2 cm between each for expansion. If you’d like a golden finish, brush the tops with a beaten egg.06
-
Bake for 12–15 minutes, or until the scones are puffed, golden on top, and sound hollow when tapped on the bottom. Let them cool on the sheet for 5 minutes before serving warm.07
Not what you're looking for?


