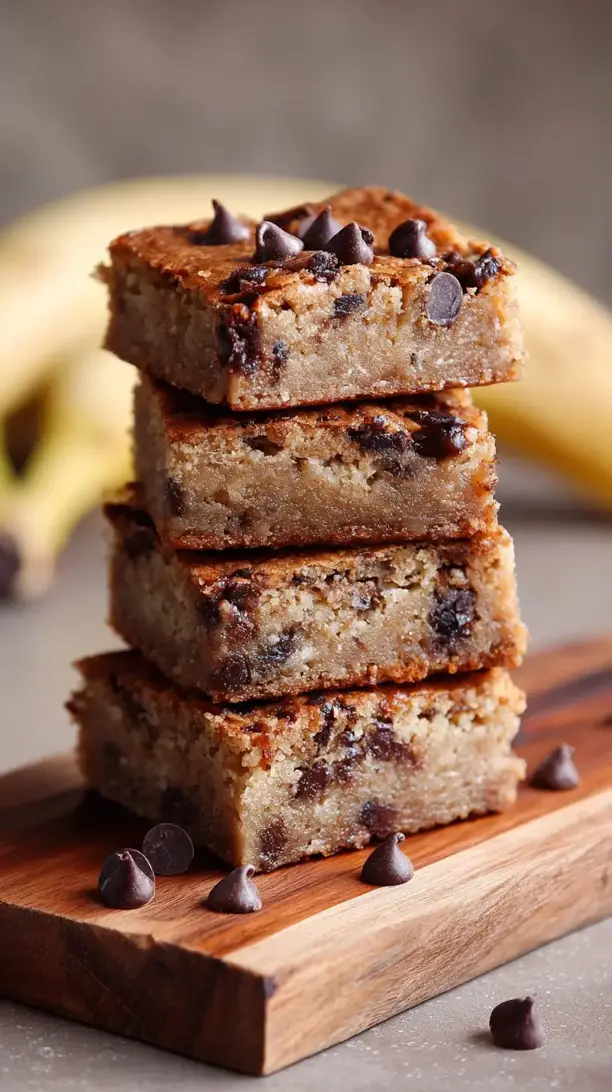
These Chocolate Chip Banana Bread Bars capture all the cozy comfort of classic banana bread in a portable, shareable form. They bake up quickly into soft, cake-like bars studded with melty chocolate chips. This fuss-free recipe is perfect for breakfast, lunchboxes, or a simple dessert.
Love Chocolate Chip Banana Bread Bars? So do we! If you're into Snacks or curious about Chicken Thigh Recipes, you'll find plenty of inspiration below.


Why You’ll Love This Chocolate Chip Banana Bread Bars
- Quick & easy: Mixed in one bowl and ready in half the time of a loaf.
- Perfect texture: Moist, tender crumb with chewy edges and a soft center.
- Banana rescue: Ideal use for overripe, spotty bananas.
- Versatile base: Easily adapt with nuts, different chips, or swirls.
Ingredients & Tools
- 3 large, very ripe bananas (about 1 ½ cups mashed)
- ½ cup (115 g) unsalted butter, melted and slightly cooled
- ¾ cup (150 g) light brown sugar, packed
- 1 large egg, at room temperature
- 1 teaspoon pure vanilla extract
- 1 ½ cups (190 g) all-purpose flour
- 1 teaspoon baking soda
- ½ teaspoon ground cinnamon
- ¼ teaspoon fine sea salt
- 1 cup (170 g) semi-sweet chocolate chips, plus more for topping
Tools: 1 large mixing bowl, 1 whisk or wooden spoon, 1 fork or potato masher for the bananas, an 8×8-inch square baking pan, parchment paper
Notes: The quality of your bananas really makes a difference here—the blacker, the better. And using brown sugar instead of white gives these bars a deeper, almost caramel-like flavor that pairs beautifully with the chocolate.
Nutrition (per serving)
| Calories: | 280 kcal |
| Protein: | 3 g |
| Fat: | 12 g |
| Carbs: | 42 g |
| Fiber: | 2 g |
Serves: 9 | Prep Time: 15 minutes | Cook Time: 25-30 minutes | Total Time: 45 minutes
Before You Start: Tips & Ingredient Notes
- How ripe should my bananas be? You want them to be heavily speckled or even mostly brown. This isn’t just for sweetness; super-ripe bananas are much easier to mash and incorporate more moisture into the batter, which is key for that soft texture.
- Why room temperature egg? Using an egg straight from the fridge can cause the melted butter to seize up a little, making your batter harder to mix smoothly. A quick 15-minute rest on the counter makes all the difference.
- Don’t skip the parchment paper. Lining your pan isn’t just for easy cleanup—it’s your guarantee that you’ll get perfect, intact bars out of the pan. A little overhang on two sides acts as a sling to lift the whole slab out effortlessly.
- The secret to a domed top? Believe it or not, letting your batter rest for 10-15 minutes before baking allows the baking soda to start reacting, creating those lovely air bubbles that give you a beautiful, slightly risen bar.
How to Make Chocolate Chip Banana Bread Bars
Step 1: First, preheat your oven to 350°F (175°C). Grab your 8×8-inch pan and line it with parchment paper, leaving some overhang on two opposite sides. This little sling is a game-changer—it means you can lift the entire block of bars out in one piece for clean, easy slicing.
Step 2: Now, let’s tackle the bananas. Peel them and add them to your large mixing bowl. Use a fork or a potato masher to mash them until they’re mostly smooth, but a few small lumps are totally fine—they add little pockets of pure banana flavor. You’re aiming for about 1 ½ cups of mashed banana.
Step 3: To the mashed bananas, add the melted (and slightly cooled) butter, brown sugar, room temperature egg, and vanilla extract. Whisk it all together until it’s well combined and looks relatively smooth. You’ll notice the mixture will be a lovely pale caramel color and have a thick, liquid consistency.
Step 4: It’s time for the dry ingredients. Sprinkle the flour, baking soda, cinnamon, and salt right on top of the wet mixture. Use a spatula or wooden spoon to fold everything together. The trick is to stop mixing the very moment you no longer see streaks of flour. Overmixing is the enemy of a tender texture!
Step 5: Now for the best part—the chocolate! Gently fold in one cup of the chocolate chips, reserving a small handful for sprinkling on top. The batter will be thick and almost scoopable, which is exactly what you want.
Step 6: Transfer the batter to your prepared pan. Use your spatula to spread it into an even layer, making sure to get into all the corners. Scatter the remaining chocolate chips over the top and press them in lightly. This gives you that beautiful, bakery-style finish.
Step 7: Slide the pan into your preheated oven and bake for 25-30 minutes. You’ll know they’re done when the top is golden brown, the edges are pulling away from the pan slightly, and a toothpick inserted into the center comes out clean or with a few moist crumbs (but no wet batter).
Step 8: This is the hardest part—let the bars cool completely in the pan set on a wire rack. I know it’s tempting to dive right in, but if you cut them while warm, they’ll be too soft and crumbly. Letting them cool ensures you get those perfect, clean slices.
Storage & Freshness Guide
- Fridge: Store in an airtight container for up to 5 days.
- Freezer: Wrap individual bars tightly and freeze for up to 3 months.
- Reviving: Warm briefly in the microwave or toaster oven to refresh.
Serving Suggestions
Complementary Dishes
- A scoop of vanilla bean ice cream — The classic warm-and-cold combination is heavenly here. The creamy ice cream melts into the warm, cakey bar for a simple yet decadent dessert.
- A side of fresh berries — A small bowl of raspberries or strawberries provides a bright, tart contrast that cuts through the sweetness of the chocolate and rich banana flavor beautifully.
- Whipped cream and a dusting of cocoa — For an extra-special treat, a dollop of freshly whipped cream and a light sprinkle of cocoa powder turns these bars into a cafe-worthy dessert.
Drinks
- A tall glass of cold milk — It’s a cliché for a reason. The creaminess of the milk is the perfect partner for the chocolate chips and soft, spiced crumb of the bar.
- A hot cup of coffee — The deep, roasty notes of coffee enhance the bittersweet chocolate and the warm cinnamon spice in the bars, making for a truly cozy pairing.
- Chai tea latte — The spices in a chai latte—cinnamon, cardamom, cloves—mirror and amplify the cinnamon in the banana bread, creating a wonderfully harmonious flavor experience.
Something Sweet
- Classic chocolate chip cookies — Double down on the chocolate theme! A chewy, buttery cookie alongside your bar makes for an irresistible dessert platter.
- Lemon sorbet — The sharp, clean citrus flavor of a good sorbet acts as a palate cleanser and provides a wonderfully refreshing counterpoint to the rich, sweet bars.
- Saltine toffee bark — The combination of crunchy toffee, chocolate, and a sprinkle of sea salt offers a different texture and a hit of salty-sweet that complements the soft bars perfectly.
Top Mistakes to Avoid
- Mistake: Using under-ripe bananas. Yellow bananas just don’t have the same concentrated sweetness or moisture content. Your bars will taste bland and can turn out dry. Wait for those brown spots!
- Mistake: Overmixing the batter. Once you add the flour, mix only until it’s just incorporated. Overworking the gluten will make your bars tough and dense instead of soft and cakey. A few lumps are okay.
- Mistake: Not letting the bars cool completely. I’ve messed this up before too, and you end up with a crumbly, gooey mess. The structure sets as it cools, so patience is key for those perfect, neat squares.
- Mistake: Overbaking. The bars continue to cook from residual heat as they cool. If you wait for a completely clean toothpick, they’ll be overdone and dry by the time they’ve cooled. Look for moist crumbs instead.
Expert Tips
- Tip: Brown your butter for a nutty twist. Take the extra five minutes to melt your butter until it foams and the milk solids turn a golden brown. This adds a deep, nutty flavor that makes these bars taste truly gourmet.
- Tip: Toss your chocolate chips in flour. Before folding them in, give your chocolate chips a light toss in a teaspoon of the measured flour. This helps suspend them in the batter and prevents them all from sinking to the bottom during baking.
- Tip: Add a sprinkle of flaky sea salt. Right when the bars come out of the oven, sprinkle a little flaky sea salt over the top. It enhances the chocolate flavor and creates a fantastic sweet-and-salty balance.
- Tip: Freeze ripe bananas for later. If your bananas are ripe but you’re not ready to bake, just peel them, pop them in a freezer bag, and freeze. Thaw them at room temperature when you’re ready—they’ll be extra soft and watery, which is perfect for this recipe.
FAQs
Can I make these bars ahead of time?
Absolutely! These bars are actually even better the next day. Once completely cooled, store them in an airtight container at room temperature for up to 3 days. The flavors have more time to meld, and the texture becomes even more moist and fudgy. You can also freeze them for up to 3 months—just wrap individual bars tightly in plastic wrap and then place them in a freezer bag.
Can I use whole wheat flour instead of all-purpose?
You can, but it will change the texture. For a 1:1 substitution, the bars will be a bit denser and have a heartier, nuttier flavor. I’d recommend starting with half whole wheat and half all-purpose flour for a lighter result. The liquid ratio should stay the same, but keep a close eye on the baking time as it might need a minute or two longer.
My bars turned out gummy in the middle. What happened?
A gummy texture is almost always a sign of overmixing. When you mix the batter too vigorously after adding the flour, you develop the gluten too much, leading to a tough, chewy crumb. Another possibility is under-baking. Make sure a toothpick comes out with moist crumbs, not wet batter, and remember that the bars will continue to set as they cool on the counter.
Can I add nuts to this recipe?
Of course! Chopped walnuts or pecans are a classic addition. I’d recommend using about ¾ cup of nuts. Toasting them first in a dry skillet for a few minutes until fragrant will really elevate their flavor. Just fold them in along with the chocolate chips.
Why did my bars sink in the middle?
A sunken center usually points to two issues: either the bars were under-baked, or there was too much leavener (baking soda) for the amount of flour. Make sure your baking soda is fresh and that you’re measuring your flour correctly—the spoon-and-level method is best to avoid accidentally using too much.


Chocolate Chip Banana Bread Bars
Make the best Chocolate Chip Banana Bread Bars with this easy one-bowl recipe. Perfectly moist, quick to bake, and ideal for snacks. Get the recipe now!
Ingredients
For the Ingredients
-
3 large very ripe bananas (about 1 ½ cups mashed)
-
1/2 cup unsalted butter (115 g, melted and slightly cooled)
-
3/4 cup light brown sugar (150 g, packed)
-
1 large egg (at room temperature)
-
1 teaspoon pure vanilla extract
-
1 1/2 cups all-purpose flour (190 g)
-
1 teaspoon baking soda
-
1/2 teaspoon ground cinnamon
-
1/4 teaspoon fine sea salt
-
1 cup semi-sweet chocolate chips (170 g, plus more for topping)
Instructions
-
First, preheat your oven to 350°F (175°C). Grab your 8x8-inch pan and line it with parchment paper, leaving some overhang on two opposite sides. This little sling is a game-changer—it means you can lift the entire block of bars out in one piece for clean, easy slicing.01
-
Now, let’s tackle the bananas. Peel them and add them to your large mixing bowl. Use a fork or a potato masher to mash them until they’re mostly smooth, but a few small lumps are totally fine—they add little pockets of pure banana flavor. You’re aiming for about 1 ½ cups of mashed banana.02
-
To the mashed bananas, add the melted (and slightly cooled) butter, brown sugar, room temperature egg, and vanilla extract. Whisk it all together until it’s well combined and looks relatively smooth. You’ll notice the mixture will be a lovely pale caramel color and have a thick, liquid consistency.03
-
It’s time for the dry ingredients. Sprinkle the flour, baking soda, cinnamon, and salt right on top of the wet mixture. Use a spatula or wooden spoon to fold everything together. The trick is to stop mixing the very moment you no longer see streaks of flour. Overmixing is the enemy of a tender texture!04
-
Now for the best part—the chocolate! Gently fold in one cup of the chocolate chips, reserving a small handful for sprinkling on top. The batter will be thick and almost scoopable, which is exactly what you want.05
-
Transfer the batter to your prepared pan. Use your spatula to spread it into an even layer, making sure to get into all the corners. Scatter the remaining chocolate chips over the top and press them in lightly. This gives you that beautiful, bakery-style finish.06
-
Slide the pan into your preheated oven and bake for 25-30 minutes. You’ll know they’re done when the top is golden brown, the edges are pulling away from the pan slightly, and a toothpick inserted into the center comes out clean or with a few moist crumbs (but no wet batter).07
-
This is the hardest part—let the bars cool completely in the pan set on a wire rack. I know it’s tempting to dive right in, but if you cut them while warm, they’ll be too soft and crumbly. Letting them cool ensures you get those perfect, clean slices.08
Not what you're looking for?


