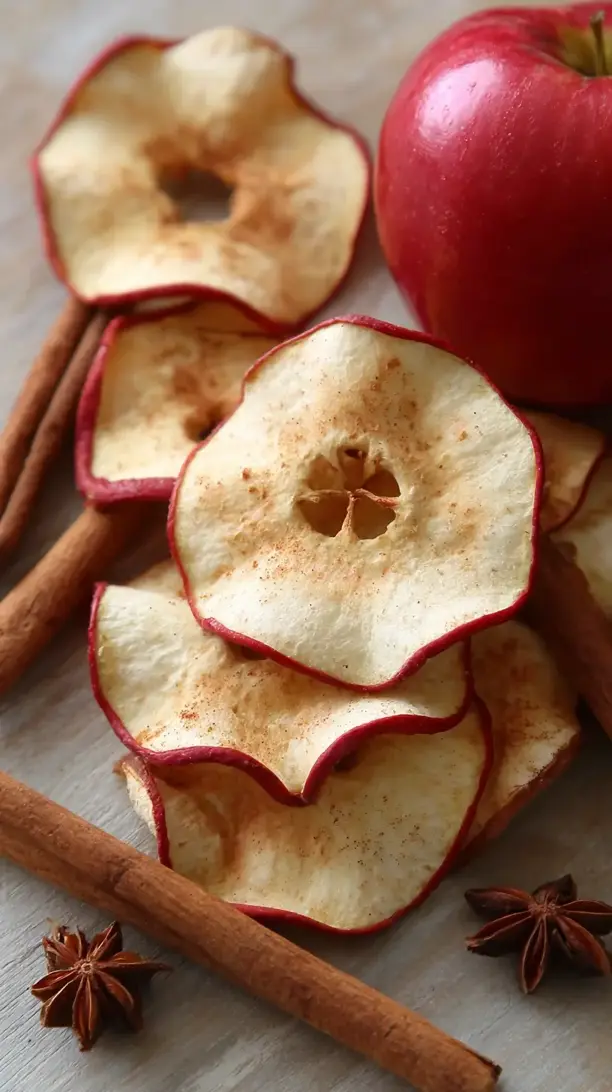
These Cinnamon Apple Chips transform humble apples into whisper-thin, crispy snacks. The simple process yields a naturally sweet, guilt-free treat perfect for lunchboxes or movie nights. Your kitchen will smell like autumn as they bake low and slow to perfect crispness.
Love Cinnamon Apple Chips? So do we! If you're into Snacks or curious about Christmas Cookie, you'll find plenty of inspiration below.


Why You’ll Love This Cinnamon Apple Chips
- Simple & wholesome: Just two main ingredients create an indulgent yet nourishing snack.
- Addictive texture: Light, airy crunch shatters delicately with every bite.
- Heavenly aroma: Warm scent of baking apples and cinnamon fills your home.
- Incredibly versatile: Enjoy straight, crumble over oatmeal, or use as garnish.
Ingredients & Tools
- 4 medium apples (a mix of Granny Smith and Honeycrisp works wonderfully)
- 1 tablespoon ground cinnamon
- 1 tablespoon granulated sugar (optional, for extra sweetness)
- 1 teaspoon fresh lemon juice
Tools: Mandoline slicer (highly recommended), two large baking sheets, parchment paper, a large bowl, paper towels or a clean kitchen towel.
Notes: The type of apple you choose really matters here—you want a balance of tartness and sweetness that holds its shape. The lemon juice might seem like a small thing, but it’s crucial for preventing the apple slices from browning and adds a subtle brightness that cuts through the spice.
Nutrition (per serving)
| Calories: | 53 kcal |
| Protein: | 0.3 g |
| Fat: | 0.1 g |
| Carbs: | 14 g |
| Fiber: | 2.5 g |
Serves: 4 | Prep Time: 15 minutes | Cook Time: 2 hours | Total Time: 2 hours 15 minutes
Before You Start: Tips & Ingredient Notes
- Apple selection is key. Firmer varieties like Granny Smith, Honeycrisp, or Fuji work best. They have less moisture and a tighter cell structure, which helps them get crisp instead of mushy during the long bake.
- Embrace the mandoline. I know it can be a scary tool, but for uniformly thin slices, it’s unbeatable. Consistent thickness is non-negotiable for even cooking. If you don’t have one, a very sharp knife and a steady hand will work, but it’ll take more time.
- Don’t skip the drying step. Patting the apple slices dry after you’ve tossed them with lemon juice might feel like an extra chore, but it removes surface moisture. This is a game-changer for achieving that perfect crispness rather than steaming in the oven.
- Low and slow is your mantra. A low oven temperature dehydrates the apples gently, driving out moisture without burning the sugars. Rushing this process with higher heat will only give you burnt edges and a chewy center.
How to Make Cinnamon Apple Chips
Step 1: First, preheat your oven to a low 200°F (95°C). This low temperature is the secret to crisp chips. While it’s warming up, line two large baking sheets with parchment paper. This prevents sticking and makes cleanup an absolute breeze.
Step 2: Now, let’s prep the apples. Wash and dry them thoroughly. Using your mandoline slicer (with the guard, please!), carefully slice the apples crosswise into very thin rounds, about 1/8-inch thick. You’ll notice the core creates a star pattern in the center of each slice—it’s quite pretty! You can remove the seeds from the core slices if you like, but I often leave them for a rustic look.
Step 3: In a large bowl, combine the cinnamon and the optional sugar. The sugar isn’t strictly necessary, but it does help create a lovely, lightly caramelized finish. Add the apple slices and the lemon juice to the bowl. Toss everything together with your hands, making sure each slice is lightly and evenly coated. The lemon juice will keep them from turning brown and add a subtle zing.
Step 4: This next step is crucial for texture. Lay the apple slices out on a clean kitchen towel or a few layers of paper towels. Gently pat them dry on both sides. You’re removing the excess moisture from the lemon juice and any natural apple juice, which is the enemy of crispiness. They should feel just slightly damp, not wet.
Step 5: Arrange the dried apple slices in a single layer on your prepared baking sheets. Make sure they aren’t overlapping or touching; they need plenty of space for air to circulate. If they’re crowded, they’ll steam instead of crisp up. You might need to work in batches.
Step 6: Place the baking sheets in the preheated oven and bake for 1 hour. After the first hour, carefully flip each apple slice over. You’ll notice they’ve started to shrink and curl at the edges—this is a good sign! This flip ensures they dry evenly on both sides.
Step 7: Continue baking for another 45 minutes to 1 hour. Keep a close eye on them during the final stretch. They’re done when they are dry to the touch, have a matte (not shiny) appearance, and are lightly browned around the edges. They will continue to crisp up as they cool, so don’t be tempted to over-bake them.
Step 8: Once they’re out of the oven, transfer the chips to a wire rack to cool completely. This is the final step to achieving maximum crunch. As they cool, you should hear faint crackling sounds—that’s the sound of success! Let them sit for at least 15-20 minutes before diving in.
Storage & Freshness Guide
- Fridge: Not recommended—store at room temperature to maintain crispness.
- Freezer: Freeze in a single layer then transfer to airtight container for up to 3 months.
- Reviving: If chips soften, re-crisp in a 250°F oven for 5-10 minutes.
Serving Suggestions
Complementary Dishes
- A sharp cheddar cheese board — The salty, creamy fat of the cheese is a fantastic contrast to the sweet, crisp chips. It creates a perfect sweet-and-salty bite that’s just irresistible.
- A bowl of vanilla bean Greek yogurt — Crumbling a few chips over the top adds a wonderful crunch and a spiced apple flavor that transforms your breakfast or snack into something special.
- Pork tenderloin or roast chicken — Use the chips as a unique, crunchy garnish. They add a surprising textural element and a hint of sweetness that complements savory meats beautifully.
Drinks
- Hot chai tea latte — The warm spices in the chai are a natural partner for the cinnamon on the chips. It’s a cozy, aromatic pairing that feels like a hug in a mug.
- A crisp hard cider — This brings the apple flavor full circle. The effervescence and slight tartness of the cider cleanse the palate and enhance the apple experience.
- Cold brew coffee with a dash of cream — The deep, smooth coffee provides a bitter counterpoint that makes the sweetness of the chips pop in a really satisfying way.
Something Sweet
- Vanilla ice cream or frozen yogurt — Crumble the apple chips over the top for an incredible crunch. The combination of cold, creamy ice cream and warm-spiced crisp is a textural dream.
- Apple crumble or crisp — Use them as a final garnish right before serving. It doubles down on the apple flavor and adds a new layer of texture to the classic dessert.
- Dark chocolate mousse — The rich, bitter chocolate and the light, airy, spiced chips create a sophisticated and decadent dessert pairing that’s sure to impress.
Top Mistakes to Avoid
- Mistake: Slicing the apples too thick. If the slices are more than 1/8-inch thick, they will retain too much moisture and never fully crisp up. You’ll end up with chewy, leathery rings instead of light chips.
- Mistake: Skipping the drying step. Any extra surface moisture will steam the apples in the oven. I’ve messed this up before too, and it’s the difference between a chip and a sad, limp slice.
- Mistake: Using too high of an oven temperature. This is the most common error. High heat will burn the sugars and cinnamon on the outside long before the inside has dehydrated, giving you bitter, uneven results.
- Mistake: Crowding the baking sheet. If the slices are overlapping, they trap steam. They need their personal space to release moisture effectively and become crisp all over.
Expert Tips
- Tip: Experiment with different apple varieties. Try a batch with just tart Granny Smiths for a more grown-up, less sweet chip, or use sweet Gala apples for a treat that kids will adore. Mixing types in one batch can be fun too!
- Tip: Add a pinch of other spices. A tiny pinch of nutmeg, cardamom, or even a smidge of cayenne pepper mixed with the cinnamon can create a wonderfully complex flavor profile that will keep people guessing.
- Tip: Check for doneness with a cool slice. The chips will never feel fully crisp while they’re hot. Pull one out, let it cool on the counter for a minute, and then test it. If it snaps, the batch is done.
- Tip: Store them perfectly. Once completely cool, store your chips in an airtight container at room temperature with a small silica gel packet (the kind you find in new purses or electronics) to absorb any residual moisture and keep them crunchy for days.
FAQs
Why are my apple chips chewy and not crispy?
This almost always comes down to one of three things: the slices were too thick, the oven temperature was too high, or they weren’t baked long enough. Remember, you’re dehydrating them, not roasting them. If they’re still chewy after cooling, you can pop them back into the 200°F oven for another 15-20 minutes to drive out that last bit of moisture. Humidity in your kitchen can also play a role!
Can I make these in an air fryer?
Absolutely! An air fryer can be a great tool for this. The principle is the same: low and slow. Set your air fryer to 300°F and cook for about 8-12 minutes, flipping halfway through. Keep a very close eye on them, as they can go from perfect to burnt very quickly in the concentrated heat of an air fryer. You’ll likely need to work in much smaller batches.
How long do homemade apple chips last?
If stored correctly in an airtight container in a cool, dry place, they should stay crisp for about 1-2 weeks. The key is making sure they are 100% cooled before sealing them up and including that silica gel packet if you have one. If they lose their crunch, you can briefly re-crisp them in a 250°F oven for 5-10 minutes.
Do I have to use sugar?
Not at all! The apples provide their own natural sweetness. The sugar is purely optional and is there for those who enjoy a slightly more candied effect and a shinier, more caramelized finish. Leaving it out results in a purer, more tart apple flavor that many people prefer.
Can I use other fruits?
You can, but the results will vary. This low-and-slow method works beautifully for firm fruits like pears or even certain stone fruits like nectarines if sliced very thin. Softer fruits like bananas or strawberries have a much higher water content and different sugar structure, so they require a different technique to avoid burning.


Cinnamon Apple Chips
Learn how to make perfectly crisp Cinnamon Apple Chips with this easy recipe. A healthy, delicious snack for any time of day. Bake your batch now!
Ingredients
For the Ingredients
-
4 medium apples (a mix of Granny Smith and Honeycrisp works wonderfully)
-
1 tablespoon ground cinnamon
-
1 tablespoon granulated sugar (optional, for extra sweetness)
-
1 teaspoon fresh lemon juice
Instructions
-
First, preheat your oven to a low 200°F (95°C). This low temperature is the secret to crisp chips. While it’s warming up, line two large baking sheets with parchment paper. This prevents sticking and makes cleanup an absolute breeze.01
-
Now, let’s prep the apples. Wash and dry them thoroughly. Using your mandoline slicer (with the guard, please!), carefully slice the apples crosswise into very thin rounds, about 1/8-inch thick. You’ll notice the core creates a star pattern in the center of each slice—it’s quite pretty! You can remove the seeds from the core slices if you like, but I often leave them for a rustic look.02
-
In a large bowl, combine the cinnamon and the optional sugar. The sugar isn’t strictly necessary, but it does help create a lovely, lightly caramelized finish. Add the apple slices and the lemon juice to the bowl. Toss everything together with your hands, making sure each slice is lightly and evenly coated. The lemon juice will keep them from turning brown and add a subtle zing.03
-
This next step is crucial for texture. Lay the apple slices out on a clean kitchen towel or a few layers of paper towels. Gently pat them dry on both sides. You’re removing the excess moisture from the lemon juice and any natural apple juice, which is the enemy of crispiness. They should feel just slightly damp, not wet.04
-
Arrange the dried apple slices in a single layer on your prepared baking sheets. Make sure they aren’t overlapping or touching; they need plenty of space for air to circulate. If they’re crowded, they’ll steam instead of crisp up. You might need to work in batches.05
-
Place the baking sheets in the preheated oven and bake for 1 hour. After the first hour, carefully flip each apple slice over. You’ll notice they’ve started to shrink and curl at the edges—this is a good sign! This flip ensures they dry evenly on both sides.06
-
Continue baking for another 45 minutes to 1 hour. Keep a close eye on them during the final stretch. They’re done when they are dry to the touch, have a matte (not shiny) appearance, and are lightly browned around the edges. They will continue to crisp up as they cool, so don’t be tempted to over-bake them.07
-
Once they’re out of the oven, transfer the chips to a wire rack to cool completely. This is the final step to achieving maximum crunch. As they cool, you should hear faint crackling sounds—that’s the sound of success! Let them sit for at least 15-20 minutes before diving in.08
Not what you're looking for?


