There’s something about the scent of honey and toasted nuts that feels like a warm kitchen hug. For me, these Pine Nut and Honey Cookies are pure magic—a simple, one-bowl dough that comes together even on the busiest days. As they bake, they fill the house with the most comforting aroma, a perfect balance of floral sweetness and rich, buttery crunch. This is truly my go-to comfort food recipe and an incredibly easy cookie recipe for when you need a moment of calm and a delicious reward.
I especially love making these during the festive season. If you’re searching for unique Christmas cookies or simple Christmas dessert ideas, this batch is a wonderful answer. They’re such lovely holiday treats, feeling special without any fuss, which makes them perfect easy Christmas treats for sharing.
So, whether you’re deep in planning your holiday baking or need a last-minute batch of Christmas sweets, these rustic cookies are a fantastic make-ahead solution. Tuck them away for a cookie tray, and you’ll always have a beautiful, ready-to-share option from your list of Christmas baking ideas. I hope they become a cherished, simple joy in your home, too.
Nothing beats a great Pine Nut and Honey Cookies. Whether you're a fan of Christmas Cookie or want to try something from our Dessert Recipes selection, keep scrolling!


Why You’ll Love These Pine Nut and Honey Cookies
- Texture symphony: Crunchy pine nuts against a chewy, soft cookie base.
- Complex flavor: Floral honey and rich, buttery pine nuts create elegant depth.
- Simple to make: One-bowl dough, no fancy equipment needed.
- Incredible aroma: Your kitchen will smell warm and comforting as they bake.
Ingredients & Tools
- 115 g unsalted butter, softened
- 100 g runny honey (a floral variety like orange blossom or wildflower is wonderful)
- 1 large egg, at room temperature
- 1 tsp pure vanilla extract
- 250 g all-purpose flour
- 1/2 tsp baking soda
- 1/4 tsp fine sea salt
- 100 g pine nuts, plus 2-3 tbsp extra for topping
Tools: A medium mixing bowl, a hand mixer or a sturdy whisk, a baking sheet, and parchment paper.
Notes: Using a good quality, flavorful honey really makes a difference here — it’s the star of the show! And don’t skip on toasting a few extra pine nuts for pressing on top; it not only looks beautiful but doubles down on that wonderful nutty flavor.
Nutrition (per serving)
| Calories: | 145 kcal |
| Protein: | 2.5 g |
| Fat: | 8 g |
| Carbs: | 17 g |
| Fiber: | 0.5 g |
Serves: 18-20 cookies | Prep Time: 15 minutes | Cook Time: 10-12 minutes | Total Time: 27 minutes (plus cooling)
Before You Start: Tips & Ingredient Notes
- Why room temperature ingredients? Using softened butter and a room-temperature egg is crucial for creating a smooth, emulsified dough that bakes up evenly. Cold butter won’t cream properly with the honey, leading to a denser cookie.
- Can I use a different nut? While pine nuts are classic, you could substitute with an equal amount of chopped pistachios or slivered almonds for a different twist. The flavor profile will change, but it will still be delicious.
- Don’t skip the salt. That quarter teaspoon of salt is not optional! It’s the secret weapon that balances the sweetness of the honey and enhances the buttery, nutty flavors, preventing the cookies from tasting one-dimensional.
- Toasting the pine nuts. I highly recommend giving your pine nuts a quick toast in a dry skillet before adding them to the dough. It only takes a few minutes and it unlocks their full, rich, aromatic potential, taking your cookies from good to unforgettable.
How to Make Pine Nut and Honey Cookies
Step 1: Prep and Toast. Start by preheating your oven to 175°C (350°F) and lining your baking sheet with parchment paper. Now, take about two tablespoons of your pine nuts and set them aside for later. Place the remaining 100g in a dry skillet over medium heat. Toast them, shaking the pan frequently, for 2-3 minutes until they are lightly golden and incredibly fragrant. Watch them like a hawk—they can burn in a heartbeat! Transfer them to a plate to cool completely.
Step 2: Cream the Wet Ingredients. In your mixing bowl, combine the softened butter and honey. Using a hand mixer (or a lot of elbow grease with a whisk), beat them together on medium speed for about 2-3 minutes, until the mixture is pale, fluffy, and well-combined. You’ll notice it lightens in color significantly. Scrape down the sides of the bowl, then beat in the egg and vanilla extract until the mixture is smooth and uniform.
Step 3: Combine the Dry Ingredients. In a separate small bowl, whisk together the flour, baking soda, and salt. This ensures the leavening and salt are evenly distributed throughout the flour, which prevents little bitter pockets of baking soda in your finished cookies. It’s a simple step that makes a big difference.
Step 4: Bring the Dough Together. Add the dry ingredients to the wet mixture. Mix on low speed just until the flour disappears and a soft dough forms. Be careful not to overmix! Now, fold in the cooled, toasted pine nuts with a spatula until they are evenly distributed. The dough will be quite soft and a little sticky—this is perfectly normal and promises a tender cookie.
Step 5: Portion and Top. Using a tablespoon or a small cookie scoop, portion out mounds of dough onto your prepared baking sheet, leaving about 5 cm (2 inches) between them as they will spread. Now, take the reserved raw pine nuts and gently press a few onto the top of each cookie dough ball. This gives them that beautiful, rustic, finished look straight from the bakery.
Step 6: Bake to Perfection. Bake for 10-12 minutes. The trick is to pull them out when the edges are a deep golden brown but the centers still look slightly soft and underdone. They will continue to cook and set on the hot baking sheet as they cool. This is the secret to a chewy center! Let them cool on the sheet for at least 5 minutes before transferring them to a wire rack to cool completely.
Storage & Freshness Guide
- Fridge: Not recommended; store at room temperature in an airtight container.
- Freezer: Freeze baked cookies for up to 2 months, layered with parchment.
- Reviving: Warm in a 300°F oven for 3–5 minutes to refresh crispness.
Serving Suggestions
Complementary Dishes
- A sharp cheese board — The saltiness of a good Pecorino or a creamy blue cheese creates a stunning contrast to the sweet, floral notes of the cookies, making for a sophisticated end to a meal.
- A bowl of lemon sorbet — The bright, zesty tang of the sorbet cuts through the richness of the cookies beautifully, cleansing the palate and making each bite taste fresh and new.
- Fresh figs or pears — Slices of ripe, fresh fruit add a juicy, mild sweetness that complements the honey and highlights the earthy notes of the pine nuts.
Drinks
- Earl Grey tea — The bergamot in the tea is a classic partner for honey and nuts, creating a fragrant and utterly comforting pairing that feels like a warm hug.
- A sweet dessert wine — A glass of Moscato d’Asti or a Sauternes mirrors the honeyed sweetness of the cookie while its acidity keeps everything balanced and elegant.
- Strong espresso — The bitter, intense hit of coffee is the perfect counterpoint to the cookie’s sweetness, making for a truly adult treat that’s full of contrast.
Something Sweet
- Dark chocolate gelato — The deep, bitter cocoa notes of a high-quality dark chocolate ice cream create a luxurious partnership with the honey and pine nuts, feeling both rustic and decadent.
- Poached apricots — Their gentle tartness and soft texture are a wonderful foil to the crisp-chewy cookie, adding another layer of fruitiness that works beautifully with the honey.
- A dollop of mascarpone — Its cool, rich, and mildly tangy creaminess is a simple but stunning way to elevate the cookie into a more composed dessert with minimal effort.
Top Mistakes to Avoid
- Using cold butter. If your butter isn’t properly softened, it won’t cream with the honey, resulting in a dense, greasy cookie that doesn’t spread correctly. I’ve messed this up before too—it’s worth the wait to let it soften!
- Over-baking the cookies. It’s so tempting to leave them in until they look “done,” but that will give you a hard, crunchy cookie all the way through. Remember, they set as they cool, so trust the process and pull them out when the edges are golden.
- Overmixing the dough. Once you add the flour, mix only until it’s just combined. Overworking the dough develops gluten, which can make your cookies tough instead of tender and delicate.
- Not spacing them out. These cookies spread! Giving them enough room on the baking sheet ensures they bake evenly and don’t merge into one giant, oddly-shaped cookie slab.
Expert Tips
- Tip: Weigh your flour for accuracy. If you must use cups, fluff the flour in the bag, spoon it lightly into the measuring cup, and level it off with a knife. Scooping directly packs in too much flour and leads to dry cookies.
- Tip: For a more intense honey flavor, use a darker, more robust honey like buckwheat or chestnut. For a lighter, floral cookie, stick with acacia or orange blossom.
- Tip: Chill the dough for 30 minutes if your kitchen is very warm. This prevents excessive spreading and gives you a slightly thicker, chewier cookie.
- Tip: Bake one test cookie first. This lets you check for spread and perfect your baking time without committing a whole batch, allowing you to adjust the dough or timing if needed.
FAQs
Can I make the dough ahead of time?
Absolutely! You can prepare the dough, portion it into balls, and freeze them solid on a baking sheet before transferring to a freezer bag. They’ll keep for up to 3 months. When you’re ready to bake, just place the frozen dough balls on a parchment-lined sheet, press on the extra pine nuts, and bake—you may need to add 1-2 extra minutes to the baking time. It’s the ultimate way to have warm, fresh cookies on demand.
Why are my cookies flat and greasy?
This usually points to two common issues: your butter was too warm or melted, or your baking soda might be old and lost its potency. Properly softened butter should hold a thumbprint but still be cool to the touch. And it’s a good practice to replace your baking soda every 6 months to ensure your baked goods rise properly.
My pine nuts burned while toasting. What now?
Oh, it happens to the best of us! Unfortunately, burned pine nuts will impart a bitter flavor to your entire batch, so it’s best to start over with a new batch of nuts. The key is a medium heat and constant, attentive shaking—they go from perfectly golden to acrid and black in mere seconds.
Can I use maple syrup instead of honey?
You can, but the flavor profile will be completely different. Maple syrup has a distinct, robust taste that will overpower the delicate pine nuts. The cookies will also spread more and be softer. If you do substitute, use a 1:1 ratio by weight, not volume, for the best results.
How should I store these cookies?
Once completely cooled, store them in an airtight container at room temperature. They’ll stay fresh and maintain their texture for about 4-5 days. If you need to keep them longer, they freeze beautifully for up to 2 months. Just layer them between sheets of parchment paper in a freezer-safe container to prevent them from sticking together.


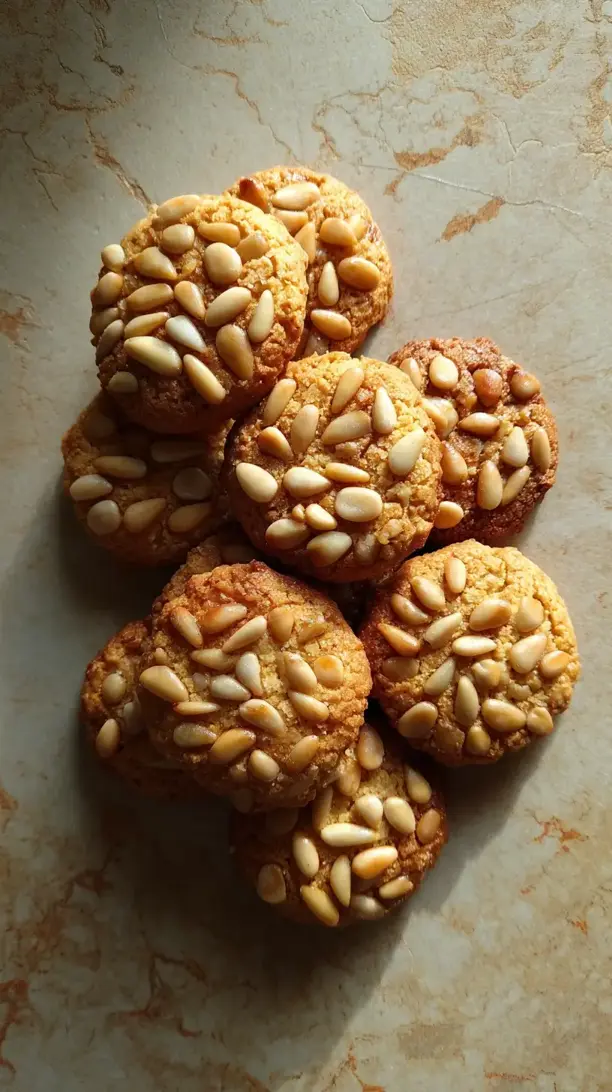
Pine Nut and Honey Cookies: An Easy One-Bowl Recipe
Whip up these Pine Nut and Honey Cookies, an easy cookie recipe that yields unique Christmas cookies with a rustic, buttery crunch and comforting honey aroma.
Ingredients
For the Ingredients
-
115 g unsalted butter (softened)
-
100 g runny honey (a floral variety like orange blossom or wildflower is wonderful)
-
1 large egg (at room temperature)
-
1 tsp pure vanilla extract
-
250 g all-purpose flour
-
1/2 tsp baking soda
-
1/4 tsp fine sea salt
-
100 g pine nuts (plus 2-3 tbsp extra for topping)
Instructions
-
Start by preheating your oven to 175°C (350°F) and lining your baking sheet with parchment paper. Now, take about two tablespoons of your pine nuts and set them aside for later. Place the remaining 100g in a dry skillet over medium heat. Toast them, shaking the pan frequently, for 2-3 minutes until they are lightly golden and incredibly fragrant. Watch them like a hawk—they can burn in a heartbeat! Transfer them to a plate to cool completely.01
-
In your mixing bowl, combine the softened butter and honey. Using a hand mixer (or a lot of elbow grease with a whisk), beat them together on medium speed for about 2-3 minutes, until the mixture is pale, fluffy, and well-combined. You’ll notice it lightens in color significantly. Scrape down the sides of the bowl, then beat in the egg and vanilla extract until the mixture is smooth and uniform.02
-
In a separate small bowl, whisk together the flour, baking soda, and salt. This ensures the leavening and salt are evenly distributed throughout the flour, which prevents little bitter pockets of baking soda in your finished cookies. It’s a simple step that makes a big difference.03
-
Add the dry ingredients to the wet mixture. Mix on low speed just until the flour disappears and a soft dough forms. Be careful not to overmix! Now, fold in the cooled, toasted pine nuts with a spatula until they are evenly distributed. The dough will be quite soft and a little sticky—this is perfectly normal and promises a tender cookie.04
-
Using a tablespoon or a small cookie scoop, portion out mounds of dough onto your prepared baking sheet, leaving about 5 cm (2 inches) between them as they will spread. Now, take the reserved raw pine nuts and gently press a few onto the top of each cookie dough ball. This gives them that beautiful, rustic, finished look straight from the bakery.05
-
Bake for 10-12 minutes. The trick is to pull them out when the edges are a deep golden brown but the centers still look slightly soft and underdone. They will continue to cook and set on the hot baking sheet as they cool. This is the secret to a chewy center! Let them cool on the sheet for at least 5 minutes before transferring them to a wire rack to cool completely.06
Not what you're looking for?


