There’s something so comforting about the scent of vanilla and sugar wafting through the kitchen, isn’t there? That’s exactly why I return to these Vegan Sugar Cookies again and again. They deliver that classic, buttery flavor and the perfect soft-yet-crisp texture, all without any dairy or eggs. For me, this recipe is a little haven of calm—it’s a wonderfully forgiving dough that rolls and cuts like a dream, turning holiday baking (or just a Tuesday sweet craving) into a moment of pure, simple joy.
If you’re searching through christmas cookies recipes for something special, let this be your go-to. They are, without a doubt, some of the easiest christmas treats you can make, and they’re perfect for any holiday cookies christmas celebration. Honestly, they’re at the top of my list for christmas baking ideas because they’re so wonderfully versatile.
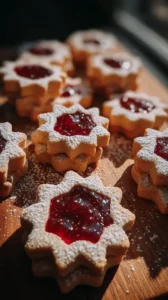
You can leave them as simple rounds or have fun transforming them into adorable Reindeer Sugar Cookies or playful Elf Sugar Cookies for a truly magical platter. However you shape them, these cookies are a plant-based dessert that feels like a warm hug, proving festive comfort food can be inclusive and incredibly delicious for everyone at the table.
Craving a delicious Vegan Sugar Cookies? You've come to the right spot! From Christmas Cookie favorites to amazing Chicken Breast Recipes recipes, there's something here for everyone.


Why You’ll Love This Vegan Sugar Cookies
- Simple & Forgiving: One-bowl dough that’s resilient for multiple rolls.
- Perfect for Decorating: Holds shape impeccably for sharp, clean designs.
- Just-Right Texture: Crisp edges with a soft, melt-in-your-mouth center.
- Rich Flavor: Tastes buttery and satisfying, even without dairy.
Ingredients & Tools
- 285 g all-purpose flour
- 1/2 tsp baking powder
- 1/4 tsp salt
- 113 g vegan butter, slightly softened
- 100 g granulated sugar, plus more for sprinkling
- 60 mL plant-based milk (unsweetened, unflavored)
- 1 tsp vanilla extract
- 1/4 tsp almond extract (optional, but highly recommended)
Tools: A large mixing bowl, electric hand mixer or stand mixer, rolling pin, cookie cutters, baking sheets, and parchment paper.
Notes: Use a stick-style vegan butter for best results. Almond extract adds complexity and richness.
Nutrition (per serving)
| Calories: | 120 kcal |
| Protein: | 1.5 g |
| Fat: | 4.5 g |
| Carbs: | 19 g |
| Fiber: | 0.5 g |
Serves: 24 cookies | Prep Time: 20 minutes | Cook Time: 10 minutes | Total Time: 45 minutes (includes chilling)
Before You Start: Tips & Ingredient Notes
- Your Vegan Butter Matters. Not all vegan butters are created equal for baking. For the best results and flavor, use a block-style butter rather than a soft, spreadable one from a tub. Brands like Miyoko’s Kitchen, Melt, or Earth Balance Buttery Sticks work wonderfully.
- The Chill is Non-Negotiable. I know it’s tempting to skip this step, but chilling the dough is what prevents your beautiful cookie shapes from spreading into puddles in the oven. It firms up the fat, giving the cookies time to set before they melt.
- Don’t Overwork the Dough. Once you add the flour, mix just until the dough comes together. Over-mixing develops gluten, which can lead to tougher cookies. We’re aiming for tender and delicate.
- Embrace the Almond Extract. If you’re not allergic, please don’t skip it! It doesn’t make the cookies taste strongly of almond; instead, it enhances the vanilla and gives the cookies a much richer, more bakery-style flavor profile.
How to Make Vegan Sugar Cookies
Step 1: In a medium bowl, whisk together the all-purpose flour, baking powder, and salt. This isn’t just busy work—whisking ensures the leavening and salt are evenly distributed throughout the flour, which means every bite is consistent. Set this dry mixture aside for now.
Step 2: In your large mixing bowl, combine the slightly softened vegan butter and granulated sugar. Using an electric mixer on medium speed, beat them together for about 1-2 minutes. You’re not trying to cream it until fluffy and pale like traditional butter; you just want it to be well-combined and smooth. You’ll notice it will look a little gritty, and that’s perfectly fine.
Step 3: Pour in the plant-based milk, vanilla extract, and almond extract (if using). Beat again on medium speed until everything is fully incorporated and the mixture looks relatively smooth. It might look a bit curdled or separated at this point, but don’t panic—this is normal with some vegan butters and it will all come together once you add the flour.
Step 4: Now, with your mixer on low speed, gradually add the dry flour mixture to the wet ingredients. Mix just until a soft dough forms and no dry streaks of flour remain. The dough will be quite soft and maybe even a little sticky—this is exactly what we want for tender cookies.
Step 5: Turn the dough out onto a piece of plastic wrap. Shape it into a flat disc—this makes it chill faster and is easier to roll out later. Wrap it tightly and refrigerate for at least 30 minutes. This chilling step is crucial for firming up the dough so it doesn’t stick to your rolling pin and holds its shape when cut.
Step 6: Preheat your oven to 350°F (175°C) and line your baking sheets with parchment paper. Lightly flour your work surface and rolling pin. Take only half the dough from the fridge at a time, keeping the rest chilled. Roll the dough out to about 1/4-inch thickness. If it cracks at the edges, just press it back together—it’s very forgiving.
Step 7: Dip your cookie cutters in a little flour to prevent sticking, then press them firmly into the dough. Transfer the cut-out shapes to your prepared baking sheet, leaving about an inch between them. If you like, you can sprinkle the tops with a little extra granulated sugar for a sparkly finish before baking.
Step 8: Bake for 8-10 minutes. The trick is to pull them out when the edges are just barely starting to turn a very light golden brown. The centers should still look soft and set, but not colored. They will firm up significantly as they cool on the baking sheet.
Step 9: Allow the cookies to cool on the baking sheet for 5 minutes before carefully transferring them to a wire rack to cool completely. This resting period on the hot pan is part of the cooking process and helps them set up perfectly. Once completely cool, they’re ready to decorate or devour!
Storage & Freshness Guide
- Fridge: Store dough disc wrapped tightly for up to 3 days.
- Freezer: Freeze baked cookies or dough for up to 3 months.
- Reviving: Thaw frozen cookies at room temperature; refresh baked cookies in a 300°F oven for 2–3 minutes.
Serving Suggestions
Complementary Dishes
- A glass of chilled oat milk — The creamy, neutral flavor of oat milk is a classic and comforting pairing that lets the simple cookie shine.
- A warm cup of chai tea — The warm spices in chai—cinnamon, cardamom, cloves—create a beautiful flavor dance with the sweet, vanilla notes of the cookie.
- A scoop of vegan vanilla ice cream — Create an instant cookie sandwich or simply crumble a cookie over the top for a fantastic textural contrast of creamy and crumbly.
Drinks
- Hot Cocoa — A rich, dairy-free hot chocolate is a match made in heaven. Dunking one of these sturdy cookies into the warm cocoa is a pure joy.
- Cold Brew Coffee — The smooth, low-acidity flavor of cold brew won’t overpower the cookie’s subtlety, making for a refreshing and balanced treat.
- Sparkling Apple Cider — The effervescence and slight tartness of the cider cut through the sweetness of the cookie beautifully, cleansing the palate between bites.
Something Sweet
- Vegan Lemon Bars — The bright, zesty punch of lemon provides a fantastic counterpoint to the sweet, buttery flavor of the sugar cookies, creating a well-rounded dessert plate.
- Chocolate-Dipped Strawberries — For a fancier spread, the rich chocolate and fresh fruit offer a different kind of sweetness that complements rather than competes.
- A simple fruit compote — Warm berries cooked down with a little sugar make a wonderful, saucy accompaniment for dipping or drizzling, adding a fresh fruit element.
Top Mistakes to Avoid
- Mistake: Using vegan butter that’s too soft or melted. If your fat is too warm, the dough will be greasy and difficult to roll out, and the cookies will spread way too much in the oven. You want it just soft enough to indent when pressed, not squishy.
- Mistake: Skipping the chilling time. I’ve messed this up before too, in a hurry, and ended up with cookie blobs. Chilling solidifies the fat, which is what allows the cookies to hold their intricate shapes. It’s the most important step for aesthetics.
- Mistake: Rolling the dough too thin or too thick. A 1/4-inch thickness is the sweet spot. Too thin, and the cookies can burn quickly and become brittle. Too thick, and they’ll be doughy in the middle and won’t have that perfect texture contrast.
- Mistake: Over-baking. These cookies continue to cook and set on the hot baking sheet after you take them out of the oven. If you wait for them to look golden brown all over, they’ll be dry and crunchy once cooled. Look for just a hint of color on the bottom edges.
Expert Tips
- Tip: Re-roll your scraps smartly. When you gather the dough scraps to re-roll, try to handle them as little as possible. Just press them together gently rather than kneading, and chill the new disc for 10 minutes before rolling again. This prevents the cookies from becoming tough.
- Tip: Use a ruler for even thickness. For perfectly uniform cookies that bake evenly, place two wooden dowels or chopsticks of the same thickness on either side of your dough ball. Roll your pin over them—it will stop you from rolling too thin and ensure every cookie is the same.
- Tip: For a shiny, sugary top without icing, lightly brush the unbaked cookies with a tiny bit of plant-based milk and then sprinkle with coarse or sanding sugar. It gives them a beautiful, professional-looking sparkle and a delightful crunch.
- Tip: Freeze the cut-outs. For the absolute sharpest edges on your shapes, place the entire baking sheet with the cut-out cookies into the freezer for 5-10 minutes right before baking. This extra-chill guarantees zero spread.
FAQs
Can I make this dough ahead of time?
Absolutely, and it often turns out even better! You can wrap the dough disc tightly and refrigerate it for up to 3 days. The flavor has more time to develop, and the dough becomes even easier to handle. If it’s too hard to roll straight from the fridge, let it sit on the counter for 5-10 minutes to become pliable. You can also freeze the dough for up to 3 months; just thaw it overnight in the fridge before using.
Why did my cookies spread too much?
This is almost always a temperature issue. The most common culprits are: your vegan butter was too soft when you started, the dough wasn’t chilled for long enough, or your oven temperature is running low. An oven thermometer is a cheap and invaluable tool to check. Also, make sure you’re using a block-style vegan butter, as the softer tub varieties have a higher water content that encourages spreading.
What’s the best way to decorate these vegan cookies?
A simple powdered sugar glaze is fantastic—just mix sifted powdered sugar with a tiny bit of plant-based milk and vanilla or almond extract until it’s a thick but pourable consistency. For a classic royal icing without egg whites, look for a “vean royal icing” recipe that uses aquafaba (the liquid from a can of chickpeas) as the base. It whips up just like meringue and dries hard and smooth.
Can I use a different type of flour, like whole wheat?
You can, but it will change the texture and flavor. For a 100% whole wheat version, the cookies will be denser, nuttier, and more crumbly. I’d recommend starting with a 50/50 blend of all-purpose and whole wheat flour to see if you like the result. Avoid using gluten-free flour blends unless the recipe is specifically designed for them, as the results can be unpredictable.
How should I store these cookies, and how long do they last?
Once completely cooled, store them in an airtight container at room temperature. They’ll stay fresh and delicious for about 5-7 days. If you’ve iced them with a hard royal icing, you can place a piece of parchment paper between layers to prevent sticking. They also freeze beautifully for up to 2 months; just thaw at room temperature before serving.


Vegan Sugar Cookies: Easy Holiday Cookie Decorating
Vegan Sugar Cookies are the ultimate easy vegan cookies for the holidays. Get soft, buttery, and perfectly crisp treats with these simple Christmas baking ideas.
Ingredients
For the Ingredients
-
285 g all-purpose flour
-
1/2 tsp baking powder
-
1/4 tsp salt
-
113 g vegan butter (slightly softened)
-
100 g granulated sugar (plus more for sprinkling)
-
60 mL plant-based milk (unsweetened, unflavored)
-
1 tsp vanilla extract
-
1/4 tsp almond extract (optional, but highly recommended)
Instructions
-
In a medium bowl, whisk together the all-purpose flour, baking powder, and salt. Set this dry mixture aside for now.01
-
In your large mixing bowl, combine the slightly softened vegan butter and granulated sugar. Using an electric mixer on medium speed, beat them together for about 1-2 minutes.02
-
Pour in the plant-based milk, vanilla extract, and almond extract (if using). Beat again on medium speed until everything is fully incorporated and the mixture looks relatively smooth.03
-
With your mixer on low speed, gradually add the dry flour mixture to the wet ingredients. Mix just until a soft dough forms and no dry streaks of flour remain.04
-
Turn the dough out onto a piece of plastic wrap. Shape it into a flat disc. Wrap it tightly and refrigerate for at least 30 minutes.05
-
Preheat your oven to 350°F (175°C) and line your baking sheets with parchment paper. Lightly flour your work surface and rolling pin. Take only half the dough from the fridge at a time, keeping the rest chilled. Roll the dough out to about 1/4-inch thickness.06
-
Dip your cookie cutters in a little flour to prevent sticking, then press them firmly into the dough. Transfer the cut-out shapes to your prepared baking sheet, leaving about an inch between them. If you like, you can sprinkle the tops with a little extra granulated sugar for a sparkly finish before baking.07
-
Bake for 8-10 minutes. The trick is to pull them out when the edges are just barely starting to turn a very light golden brown. The centers should still look soft and set, but not colored.08
-
Allow the cookies to cool on the baking sheet for 5 minutes before carefully transferring them to a wire rack to cool completely.09
Not what you're looking for?


