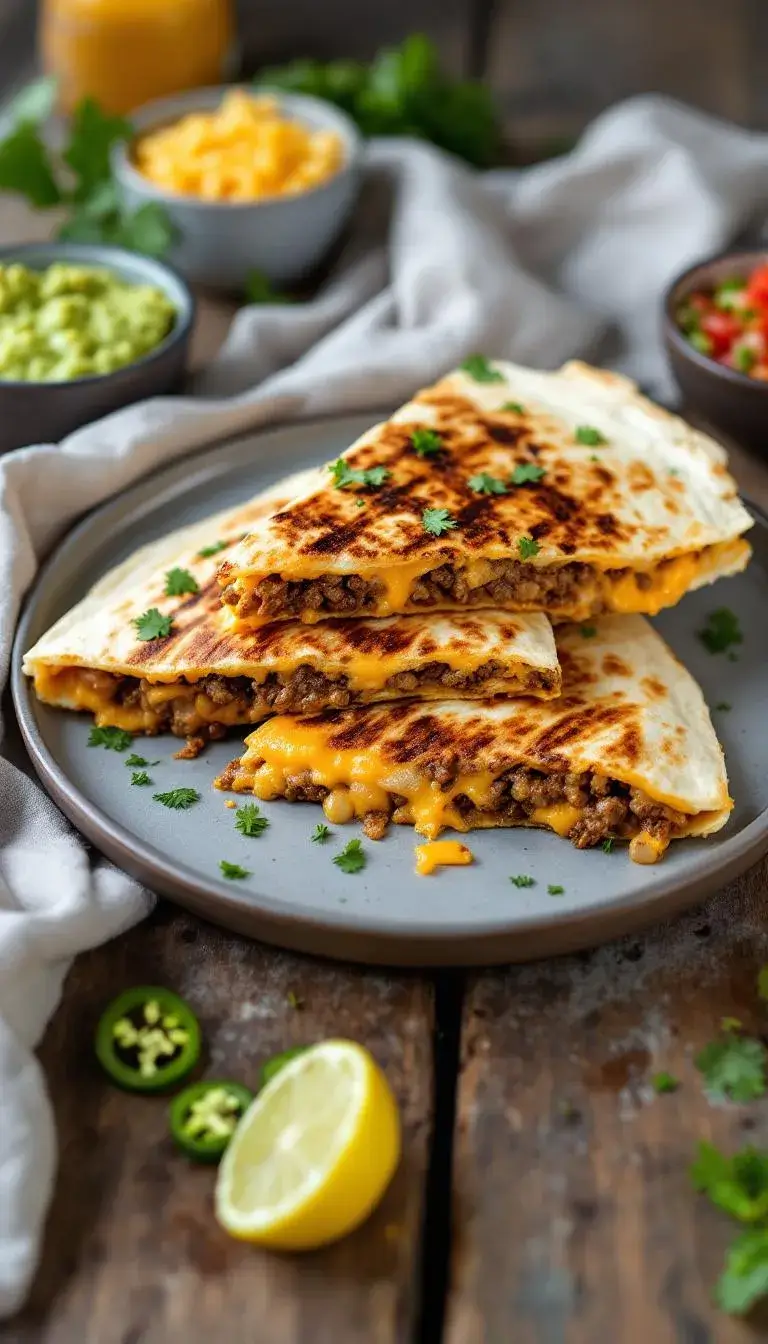
Let me tell you about the magic that happens when crispy tortillas meet juicy ground beef and rivers of melted cheese. These Cheesy Beef Quesadillas aren’t just food – they’re edible happiness wrapped in a golden package. I still remember the first time I made these for my college buddies during football season – the pan was empty before the first commercial break.
Looking for Cheesy Beef Quesadillas inspiration? You'll love what we have! Explore more Ground Beef recipes or discover our Christmas Cookie favorites.


Why This Recipe Works
- 15-minute filling that comes together in one pan (less dishes = more happiness)
- Endless customization – throw in whatever makes your taste buds dance (I’m partial to roasted poblanos)
- The crispy secret my abuelita taught me: butter + patience (medium heat is your friend)
- Budget-friendly without tasting like it – stretch it further with beans if you’re feeding a crowd
- Freezer goldmine – make extras for those “I can’t adult today” moments
The Story Behind the Sauce
These beauties trace back to Mexican “quesadillas de carne molida,” where Spanish cheese traditions married local flavors. The Tex-Mex version we know today became a diner staple in the 1950s – imagine some brilliant cook thinking “What if we put hamburger meat in these?” Genius.
Essential Ingredients & Tools
For the Filling (The Flavor Foundation)
- 1 lb ground beef (80/20 blend – we want those juicy bits)
- 1 small onion, diced (it’s amazing how this humble veg transforms when cooked)
- 2 garlic cloves, minced (or ½ tsp powder in a pinch – no judgment here)
- The spice trinity: 1 tsp each cumin, chili powder, and paprika (smoked paprika if you’re feeling fancy)
- 1 tbsp olive oil (or vegetable oil if that’s what you have)
- Salt and pepper to taste
For Assembly (The Fun Part)
- 8 flour tortillas (8-inch – the Goldilocks size)
- 2 cups shredded cheese (Monterey Jack is my ride-or-die, but mix it up)
- 2 tbsp butter (the crispy-maker – salted for extra flavor oomph)
- Optional add-ins: ½ cup diced tomatoes (pat them dry!), ¼ cup chopped cilantro, jalapeños
Tools You’ll Need
- Large skillet (cast iron is ideal but any heavy-bottom pan works)
- Thin spatula (a fish spatula works wonders for flipping)
- Pastry brush (or just use your fingers to spread butter)
- Wooden spoon (for breaking up that beef)
Serves 4 hungry humans | 10 min prep | 20 min cook | 30 min total
How to Make Cheesy Beef Quesadillas
- Building Flavor Foundations
Heat 1 tbsp olive oil in your skillet over medium-high. Add 1 small diced onion and cook until they go from sharp to sweet (about 3 minutes). Add 2 minced garlic cloves and stir just until fragrant – about 30 seconds. Burnt garlic turns bitter, and we’re all about that balanced flavor.
- Beefy Goodness
Crumble in your 1 lb ground beef like you’re sprinkling flavor confetti. Cook until no pink remains (5-6 min), then drain most fat (keep about 1 tbsp for flavor). Here’s why: that little bit of fat helps crisp the tortillas later and carries all those delicious spice flavors. Stir in 1 tsp each cumin, chili powder, and paprika – this is where the magic happens. Let it cool slightly so it doesn’t steam your tortillas into sogginess.
- Assembly Line
Lay out 8 flour tortillas and sprinkle 2 cups shredded cheese on half (leave a ½-inch border – cheese escapees burn and make flipping messy). Add beef filling (about 3 tbsp), fold, and press gently. Pro tip from my kitchen fails: brush tortillas with 2 tbsp melted butter before filling for ultimate crispness. The butter creates a moisture barrier and gives that perfect golden color.
- Golden Perfection
Melt ½ tbsp butter in skillet over medium heat (not high – patience, grasshopper). Cook quesadillas 2-3 minutes per side until golden. If cheese isn’t melting, cover briefly (30 sec max) to steam. Why medium heat? Too high burns the outside before the cheese melts; too low makes them greasy.
- The Grand Finale
Transfer to a wire rack instead of piling them up – this keeps them crispy all over. Slice into wedges and serve immediately. That first bite of crispy, cheesy, beefy goodness? Pure bliss.
Pro Technique
The Butter Brush Trick
My game-changer: brush tortillas with 2 tbsp melted butter before filling. It creates a crispy barrier that keeps sogginess at bay. Focus on the edges – they’re the crispy crown jewels. This technique also enhances flavor through the Maillard reaction – that fancy term for the delicious browning that happens when proteins and sugars heat up.
The Lid Maneuver
If your cheese is being stubborn, cover the skillet briefly. The steam helps melt without making the tortilla limp. Just don’t overdo it – we’re making quesadillas, not tortilla soup. Remove the lid immediately after 30 seconds to let any moisture escape.
Chef’s Wisdom
Filling Philosophy
More isn’t always better. Overstuffing leads to breakage and uneven cooking. Stick to about ⅓ cup total filling per tortilla. If adding ½ cup tomatoes (which I love), pat them dry unless you enjoy soggy tortillas (spoiler: no one does). The moisture will steam the tortilla from the inside out.
Heat Management
Medium heat is the sweet spot. Too high burns the outside before the cheese melts; too low gives you limp quesadillas. Test with a water droplet – if it sizzles gently, you’re golden. If it evaporates immediately, your pan’s too hot; if it just sits there, too cold.
Storage & Freshness Guide
Fridge Storage
Store cooled quesadillas with parchment between layers (prevents sticking). They’ll keep for 3 days. Reheat in a skillet to restore that glorious crispness – about 2-3 minutes per side over medium heat.
Freezer Friendly
Wrap individually in foil, then freeze in bags for up to a month. Reheat from frozen in a skillet (4-5 min per side) or air fryer (5-6 min at 350°F). No need to thaw – the direct heat revives them beautifully.
Safety First
Don’t leave them out more than 2 hours. Bacteria love the “danger zone” between 40°F and 140°F. When reheating, make sure the center hits 165°F – use a food thermometer if you’re unsure.
Nutrition Profile
- 520 calories
- 28g protein
- 32g carbs
- 32g fat
- 3g fiber
Ingredient Variations and Their Impact
Protein Swaps
- Turkey/chicken: Leaner but can dry out. Add 1 tbsp olive oil or 2 tbsp salsa to keep moist.
- Black beans: Mash half with the beef for extra fiber and to stretch servings. Boost flavor with extra cumin and smoked paprika.
Cheese Adventures
- Pepper Jack: For those who like it spicy. Balance with cool sour cream.
- Oaxaca: Authentic Mexican melting cheese with beautiful stretch.
Tortilla Alternatives
- Corn tortillas: Gluten-free option. Double-layer them with cheese in between to prevent splitting.
- Spinach wraps: For color and extra nutrients.
Perfect Pairings
Complementary Dishes
- Fresh Pico de Gallo: The bright acidity of diced tomatoes, onions, and lime juice cuts through the richness of the quesadillas. The crunch adds nice textural contrast too.
- Mexican Rice: The subtle sweetness of tomato-infused rice with peas makes a hearty side that complements the spiced beef beautifully.
Drinks
- Cold Beer: A crisp lager or Mexican cerveza balances the bold flavors. The carbonation acts like a palate cleanser between bites.
- Horchata: This creamy cinnamon-rice drink cools the palate if you’ve kicked up the heat with jalapeños.
Something Sweet
- Churros: Crispy cinnamon-sugar sticks dipped in chocolate sauce make a decadent dessert that continues the Mexican theme.
- Mango Sorbet: Light and refreshing with tropical notes that pair surprisingly well with the spices in the quesadillas.
FAQs
- Can I prep ahead?
Absolutely! Cook the filling up to 2 days in advance; store it separately from tortillas and cheese. Assemble just before cooking to prevent sogginess. For quicker meals, freeze uncooked assembled quesadillas – cook from frozen, adding 1-2 mins per side.
- Why are mine soggy?
Likely too much filling or low heat. Medium heat + moderate filling = crispy perfection. Also check that your add-ins aren’t too wet – pat dry ingredients like tomatoes before adding.
- Best melting cheese?
Monterey Jack or Oaxaca melt like dreams. Avoid pre-shredded – that anti-caking powder ruins the texture. For extra meltiness, add a slice of American cheese (it contains sodium citrate, a natural melting agent).
- Baking option?
400°F for 10 mins, flipping halfway. Good for batches but not quite as crispy. For better results, place on a wire rack over the baking sheet to allow air circulation.
- Reheating without skillet?
Air fryer at 350°F for 3-4 mins brings back the crunch beautifully. Microwave will make them rubbery – only use if you’re desperate, and always finish with a quick toast in a dry pan.


The Ultimate Cheesy Beef Quesadillas That’ll Make You Say “Olé!”
Make the best Cheesy Beef Quesadillas with this easy recipe—juicy beef, melty cheese, and crispy tortillas in 30 minutes. Perfect for busy weeknights!
Ingredients
For the Filling
-
1 lb ground beef (80/20 blend)
-
1 small onion (diced)
-
2 cloves garlic (minced)
-
1 tsp cumin
-
1 tsp chili powder
-
1 tsp paprika
-
1 tbsp olive oil
-
Salt and pepper (to taste)
For Assembly
-
8 flour tortillas (8-inch)
-
2 cups shredded Monterey Jack cheese
-
2 tbsp butter
-
½ cup diced tomatoes (Optional, patted dry)
-
¼ cup chopped cilantro (Optional)
Instructions
-
Heat 1 tbsp olive oil in skillet over medium-high. Cook 1 small diced onion 3 minutes until soft. Add 2 minced garlic cloves, cook 30 seconds.01
-
Add 1 lb ground beef, breaking up clumps. Cook 5-6 minutes until no pink remains. Drain excess fat, leaving 1 tbsp. Stir in 1 tsp each cumin, chili powder, and paprika.02
-
Brush one side of each tortilla with 2 tbsp melted butter. On unbuttered side, sprinkle 2 cups shredded cheese on half, leaving ½-inch border. Top with 3 tbsp beef mixture and optional add-ins. Fold over.03
-
Melt ½ tbsp butter in clean skillet over medium heat. Cook quesadillas 2-3 minutes per side until golden and cheese melts.04
-
Transfer to wire rack, slice, and serve immediately.05
Not what you're looking for?