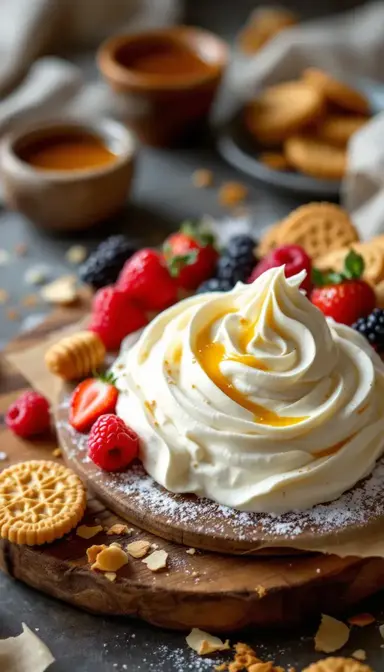
There’s something magical about a scoop of truly great vanilla ice cream. That first bite—creamy, fragrant, and just sweet enough—transports me back to childhood summers and ice cream cones dripping down my fingers. But here’s the truth I’ve learned after years of recipe testing: most store-bought versions pale in comparison to what you can make at home.
This isn’t just any vanilla ice cream recipe. It’s the kind that makes people close their eyes and murmur “wow” after the first spoonful. The secret? A rich custard base infused with real vanilla beans, slowly churned to perfection. It’s the difference between a mass-produced chocolate bar and hand-tempered artisanal chocolate—both might be called chocolate, but only one makes your taste buds sing.
Craving a delicious Vanilla Ice Cream? You've come to the right spot! From Dessert Recipes favorites to amazing Breakfast & Brunch recipes, there's something here for everyone.

Why This Recipe Works
The Custard Base
Most homemade ice cream fails fall into two camps: icy and hard or thin and forgettable. The custard base—enriched with egg yolks—is your insurance against both. Those yolks create a luxurious texture that clings to your spoon, while the careful cooking process ensures no scrambled egg surprises.
The science behind it: egg yolks contain lecithin, an emulsifier that binds fat and water molecules together. This prevents large ice crystals from forming during freezing. I learned this the hard way when I once skipped the yolks—the result was more ice than cream.
Real Vanilla Matters
I’ll never forget the first time I scraped a fresh vanilla bean into cream. The tiny black specks released an aroma so complex—floral, sweet, almost buttery—that my kitchen smelled like a Parisian patisserie. While good extract works in a pinch, the bean’s flavor compounds infuse differently, creating layers rather than a single note.
Pro tip: If using extract, always add it after cooking. Heat evaporates its delicate aromas, leaving you with a flat flavor. For maximum impact, use both—steep a bean in the dairy, then amplify with a teaspoon of extract post-chill.
Slow and Steady Wins the Race
Rushing ice cream is like trying to bake a cake in half the time—you might get something edible, but not something extraordinary. The overnight chill allows flavors to marry and gives the fat molecules time to arrange themselves for maximum creaminess. Patience here is rewarded with every silky scoop.
Here’s why aging matters: cold liquid holds less air, which means smaller ice crystals during churning. I once tried skipping this step—the ice cream tasted good but had a slightly grainy texture that betrayed my impatience.
Essential Ingredients & Tools
Ingredients
- 2 cups heavy cream (36-40% fat for richness; substitute with coconut cream for dairy-free)
- 1 cup whole milk (balances fat content; 2% milk works but yields a lighter texture)
- 3/4 cup granulated sugar (dissolves evenly; reduce to 1/2 cup for less sweetness)
- 1 vanilla bean, split and scraped (Madagascar Bourbon beans preferred; or 1 tbsp pure vanilla extract)
- 6 large egg yolks (thickens custard; ensures scoopable texture)
- 1/8 tsp fine sea salt (enhances flavor without tasting salty)
Tools
- Medium heavy-bottomed saucepan (even heat distribution prevents scorching)
- Whisk (for smooth incorporation of yolks)
- Fine-mesh sieve (strains out cooked egg bits)
- Instant-read thermometer (170°F is the magic number for perfect custard)
- Ice cream maker (no fancy model needed—even basic machines work)
- Airtight container (prevents freezer burn; a loaf pan covered in plastic wrap works in a pinch)
How to Make The Ultimate Homemade Vanilla Ice Cream
- Infuse the dairy: In your saucepan, combine 2 cups heavy cream, 1 cup whole milk, 3/4 cup granulated sugar, and the scraped vanilla bean (seeds and pod). Heat over medium-low until steaming (175°F), stirring occasionally. This gentle heat extracts maximum flavor without boiling off vanilla’s delicate compounds.
- Temper the yolks: In a separate bowl, whisk 6 large egg yolks until smooth. Slowly drizzle in 1 cup of the hot cream mixture while whisking constantly—this gradual introduction prevents curdling. Pro tip: Warm your mixing bowl with hot water first to reduce temperature shock.
- Cook to nappé: Return the mixture to the saucepan. Cook over low heat, stirring constantly, until it thickens enough to coat the back of a spoon (170°F). Drag your finger through it—if the line holds, it’s ready. This stage ensures proper emulsification for a silky texture.
- Strain and chill: Remove the vanilla pod (save it for vanilla sugar!). Strain through a fine-mesh sieve into a clean bowl. Press plastic wrap directly onto the surface to prevent a skin. Chill for at least 4 hours, but overnight is ideal—this aging step is non-negotiable for premium texture.
- Churn: Pour the chilled custard into your ice cream maker. Churn for 20-25 minutes until it reaches soft-serve consistency. Over-churning introduces too much air, making it fluffy rather than dense.
- Freeze: Transfer to an airtight container, smoothing the top. Press parchment paper directly onto the surface before sealing—this blocks air exposure. Freeze for 4+ hours. For easiest scooping, let it sit at room temperature for 5-10 minutes first.
Chef’s Wisdom
The Vanilla Decision
Vanilla beans offer unmatched complexity, but high-quality extract (look for “bourbon vanilla” on the label) makes a worthy shortcut. For hybrid richness, steep a bean in the dairy, then add 1 tsp extract post-chill.
Sugar Science
Sugar isn’t just for sweetness—it lowers the freezing point, preventing icy textures. For a softer scoop, replace 2 tbsp sugar with corn syrup or honey. Diabetics can use allulose, but avoid erythritol (it crystallizes).
Storage Wisdom
Store with parchment pressed directly on the surface in an airtight container. For long-term storage, vacuum-seal if possible. If ice cream freezes solid, let it soften slightly, then blend with 1 tbsp milk per cup to restore creaminess.
Perfect Pairings
Complementary Dishes
- Warm Apple Pie: The contrast between hot, spiced apples and cold, creamy ice cream is timeless. The vanilla’s floral notes highlight the pie’s cinnamon warmth.
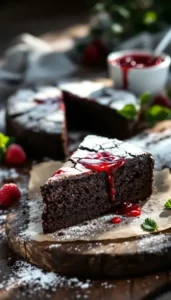
- Flourless Chocolate Cake: A scoop melts into the cake’s dense crumb, creating a self-saucing effect. Opt for high-cocoa chocolate to balance sweetness.
Drinks
- Late-Harvest Riesling: Its honeyed apricot flavors mirror vanilla’s sweetness, while acidity cuts through the cream.
- Espresso (Affogato): Pouring hot espresso over a scoop creates a luxurious bitter-sweet contrast. Use a dark roast for depth.
Something Sweet
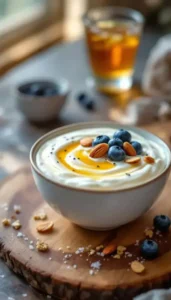
- Macerated Berries: Toss strawberries with a touch of sugar and lemon juice. Their bright acidity lightens the richness.
- Salted Caramel Sauce: A drizzle adds buttery-salt complexity. Sprinkle flaky sea salt on top for texture.
In a world of over-the-top dessert trends, a perfectly executed vanilla ice cream remains the ultimate test of a cook’s skill. This recipe distills years of trial and error into a foolproof method for creamy, fragrant perfection. Whether enjoyed alone or as the foundation for endless variations, it proves that sometimes, simplicity done well is the most impressive feat of all.


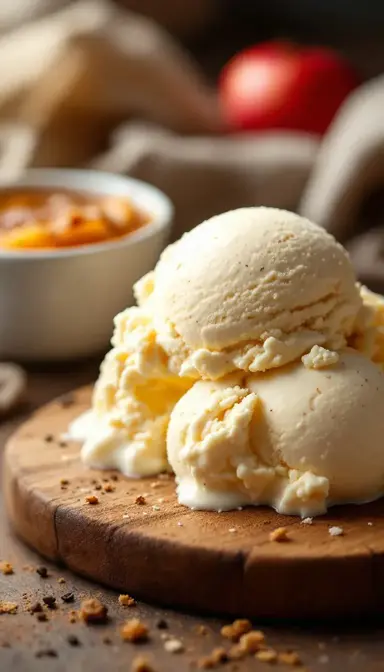
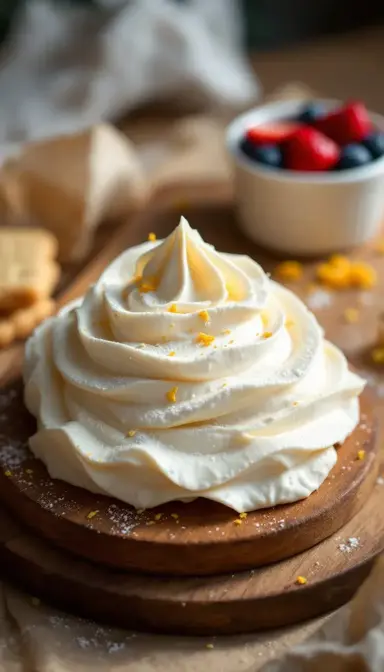
The Ultimate Homemade Vanilla Ice Cream Recipe
Make the creamiest homemade Vanilla Ice Cream with real vanilla beans. Perfectly smooth, rich, and better than store-bought. Get the foolproof recipe now!
Ingredients
Main
-
2 cups heavy cream
-
1 cup whole milk
-
3/4 cup granulated sugar
-
1 vanilla bean (split and scraped (or 1 tbsp pure vanilla extract))
-
6 large egg yolks
-
1/8 tsp fine sea salt
Instructions
-
Heat 2 cups heavy cream, 1 cup whole milk, 3/4 cup granulated sugar, and vanilla bean (seeds and pod) until steaming (175°F).01
-
Temper 6 large egg yolks by slowly whisking in 1 cup hot cream mixture.02
-
Return to saucepan; cook until thickened (170°F).03
-
Strain, chill for 4+ hours.04
-
Churn in ice cream maker for 20-25 minutes.05
-
Freeze in airtight container for 4+ hours before serving.06
Not what you're looking for?