There’s something about the holidays that makes me want to turn my kitchen into a cozy bakery, and these Almond Joy Thumbprint Cookies are my favorite place to start. To me, they’re a bite-sized trip to paradise, combining chewy coconut, rich chocolate, and a crunchy almond in a fun, homemade treat that feels both nostalgic and special. If you’re looking for truly unique Christmas cookies that bring a smile, you’ve found them.
As you gather your Christmas dessert ideas this year, I hope you’ll add these to your list. They are wonderfully easy Christmas treats that come together without any fuss, making them perfect for festive gatherings or wrapping up as last-minute gifts. Whether you’re a seasoned pro or just dipping your toes into holiday baking, this recipe is a lovely addition to your collection of Christmas baking ideas. It’s a simple, joyful way to create memorable Christmas sweets that everyone adores.
So if you’re searching for delicious holiday treats that truly capture the spirit of the season, let these coconut cookies be your answer. They offer all the comfort of a classic candy bar in a fresh, homemade form, and I promise they’ll make your holiday baking feel like a sweet, sweet success.
Nothing beats a great Almond Joy Thumbprint Cookies. Whether you're a fan of Christmas Cookie or want to try something from our Drinks selection, keep scrolling!


Why You’ll Love This Almond Joy Thumbprint Cookies
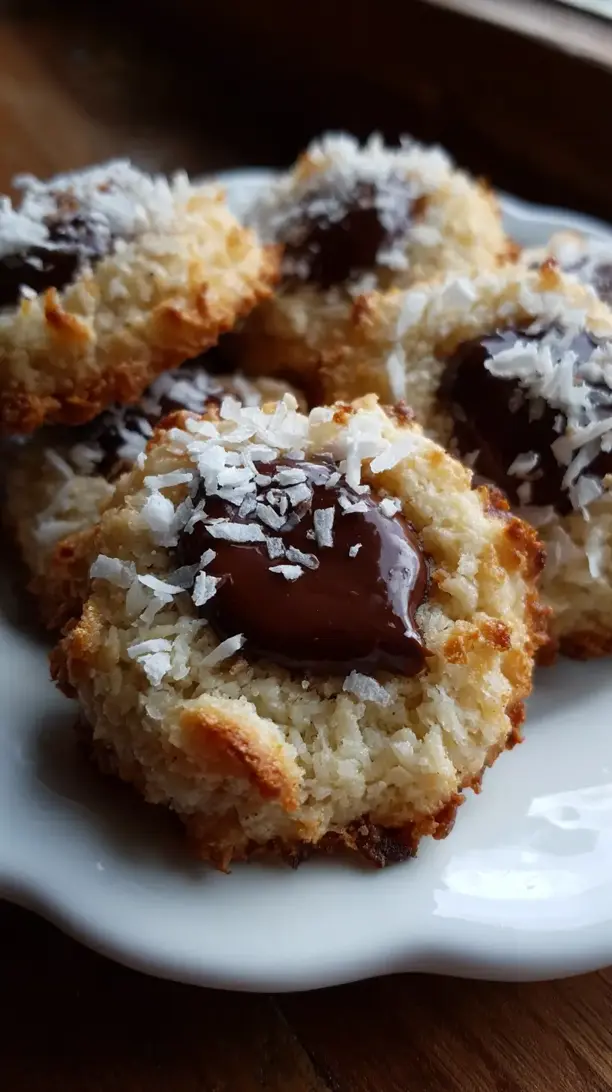
- Three textures: Chewy coconut, smooth chocolate, and crunchy almond in every bite.
- Simple to make: One-bowl dough and fun thumbprint shaping.
- Special appearance: Bakery-quality look perfect for gifting or treats.
- Nostalgic flavor: Classic chocolate-coconut-almond combination everyone loves.
Ingredients & Tools
- 115 g unsalted butter, softened
- 100 g granulated sugar
- 1 large egg, separated (you’ll use the white for coating)
- 1 tsp vanilla extract
- 1/4 tsp almond extract
- 125 g all-purpose flour
- 1/4 tsp baking powder
- 1/4 tsp salt
- 120 g sweetened shredded coconut
- 85 g semi-sweet chocolate chips
- 2 tbsp heavy cream
- 24 whole almonds, toasted
Tools: Stand mixer or hand mixer, medium mixing bowl, baking sheets, parchment paper, small bowls for egg white and coconut, small saucepan or microwave-safe bowl.
Notes: Room temperature butter is essential for creamy dough. Toasting almonds unlocks their nutty aroma and adds depth.
Nutrition (per serving)
| Calories: | 125 kcal |
| Protein: | 1.5 g |
| Fat: | 8 g |
| Carbs: | 13 g |
| Fiber: | 1 g |
Serves: 24 | Prep Time: 25 minutes | Cook Time: 12 minutes | Total Time: 45 minutes (plus cooling)
Before You Start: Tips & Ingredient Notes
- Butter temperature is key. Your butter should be soft enough that you can easily make an indentation with your finger, but not so soft that it’s oily or melted. This ensures the dough is the right consistency for rolling and holding its shape.
- Why separate the egg? The egg white acts as a natural glue for the shredded coconut. It helps the coconut adhere beautifully to the outside of the cookie ball, creating that classic, snowy look and toasting up perfectly in the oven.
- Don’t skip toasting the almonds. Toasting them for just 5-7 minutes in a 350°F (175°C) oven until fragrant makes a world of difference. It enhances their flavor dramatically and adds a crucial crunch that raw almonds just can’t provide.
- Measure your flour correctly. For the best results, spoon your flour into the measuring cup and level it off with a knife. Scooping directly from the bag can pack in too much flour, leading to a drier, crumbly cookie.
How to Make Almond Joy Thumbprint Cookies
Step 1: Start by preheating your oven to 350°F (175°C) and lining your baking sheets with parchment paper. In the bowl of a stand mixer fitted with the paddle attachment, or using a hand mixer, cream together the softened butter and granulated sugar on medium speed for about 2-3 minutes. You’re looking for the mixture to become pale, light, and fluffy. This step is crucial for incorporating air into your cookies, giving them a lovely texture.
Step 2: Add the egg yolk (reserve the white in a small bowl!), vanilla extract, and almond extract to the butter mixture. Mix on low speed until everything is just combined. It might look a little curdled at first, but that’s okay—it will come together once you add the dry ingredients. Scrape down the sides of the bowl to make sure everything is evenly incorporated.
Step 3: In a separate medium bowl, whisk together the all-purpose flour, baking powder, and salt. With your mixer on low speed, gradually add the dry ingredients to the wet ingredients. Mix only until the flour streaks have disappeared and a soft dough has formed. You’ll notice the dough will be quite soft but not sticky.
Step 4: Now, place your reserved egg white in one small bowl and the shredded coconut in another. Scoop out about 1 tablespoon of dough and roll it into a smooth ball between your palms. Lightly dip the ball into the egg white, rolling it around to coat, then immediately roll it in the shredded coconut until it’s fully covered. Place the coconut-covered ball on the prepared baking sheet and repeat with the remaining dough, spacing the balls about 2 inches apart.
Step 5: Here comes the fun part—making the thumbprint! Using your thumb, the back of a rounded 1/4 teaspoon measuring spoon, or the end of a wooden spoon, gently press an indentation into the center of each cookie ball. Don’t be shy, but don’t press all the way to the baking sheet either. You’re creating a well for that delicious chocolate filling later.
Step 6: Bake the cookies for 10-12 minutes, or until the coconut on the outside is lightly toasted and the edges of the cookies are just starting to turn a golden brown. The centers will still look soft, which is what you want. As soon as you remove the baking sheet from the oven, you might notice the indentations have puffed up a bit. Use the same spoon or tool to gently redefine the wells while the cookies are still hot and pliable.
Step 7: Let the cookies cool on the baking sheet for 5 minutes before transferring them to a wire rack to cool completely. This is important because the cookies are very fragile when hot. They need to be fully cool before you add the chocolate, otherwise it will just melt and run everywhere.
Step 8: While the cookies cool, make the chocolate ganache. Place the chocolate chips and heavy cream in a microwave-safe bowl. Heat in 20-second intervals, stirring well after each burst, until the chocolate is completely melted and the mixture is smooth and glossy. Alternatively, you can do this in a small saucepan over low heat, stirring constantly.
Step 9: Once the cookies are completely cool and the ganache is smooth, spoon about ½ teaspoon of the chocolate mixture into each cookie’s indentation. The ganache should be thick enough to sit nicely without overflowing. Immediately place a toasted almond on top of the chocolate in each cookie. Let the chocolate set at room temperature, which will take about an hour, or you can pop them in the fridge for 15 minutes to speed things up.
Storage & Freshness Guide
- Fridge: Store in an airtight container for up to 1 week.
- Freezer: Freeze unfilled cookies for up to 3 months; thaw before filling.
- Reviving: Briefly warm in oven at 300°F for 3-5 minutes to refresh crispness.
Serving Suggestions
Complementary Dishes
- A simple fruit platter with oranges and berries — The bright, acidic fruit cuts through the richness of the chocolate and coconut beautifully, cleansing the palate between bites.
- A scoop of vanilla bean ice cream — Serve a couple of cookies slightly warmed next to a scoop of ice cream for an incredible à la mode dessert that feels truly decadent.
- A cheese board with soft brie and crisp apples — The salty, creamy cheese provides a fantastic savory counterpoint that makes the sweet cookies taste even more delightful.
Drinks
- A glass of cold milk — It’s a classic for a reason. The creaminess of the milk is the perfect partner for the chocolate and toasty coconut flavors.
- A cup of strong black coffee — The bitterness of the coffee balances the sweetness of the cookie and highlights the deep notes of the dark chocolate.
- A rich hot chocolate — Double down on the chocolate! A warm mug of cocoa turns this into the ultimate cozy, comforting treat for a chilly evening.
Something Sweet
- Chewy caramel candies — The buttery, salty-sweet flavor of caramel complements the coconut and almond trio perfectly, adding another layer of complexity to your dessert spread.
- Lemon bars — The sharp, tangy zestiness of a good lemon bar provides a brilliant contrast that makes you appreciate the deep, nutty sweetness of the cookies even more.
- Fresh strawberries dipped in chocolate — It continues the chocolate theme but introduces a fresh, juicy element that feels light and refreshing alongside the richer cookies.
Top Mistakes to Avoid
- Mistake: Using melted butter. If your butter is melted or too soft, your dough will be greasy and will spread way too much in the oven. You’ll lose the lovely thumbprint shape and end up with flat, crispy cookies instead of soft, chewy ones.
- Mistake: Skipping the egg white wash. I’ve tried to shortcut this before and just press the coconut into the dough. It doesn’t work well. The egg white is essential for getting that even, generous coating of coconut that toasts up so nicely.
- Mistake: Filling the thumbprints while the cookies are warm. The chocolate will instantly melt into a messy puddle and soak into the warm cookie. Patience is key here—wait for them to cool completely for a neat, defined chocolate center.
- Mistake: Overbaking the cookies. They continue to cook on the hot baking sheet after you take them out of the oven. You want them to be just golden around the edges for the best chewy texture. Overbaked cookies become dry and crumbly.
Expert Tips
- Tip: Chill your dough if it’s too soft. If your kitchen is warm and the dough feels sticky or is difficult to roll, just pop it in the fridge for 15-20 minutes. This will firm up the butter and make the rolling and coating process much cleaner and easier.
- Tip: Use a measuring spoon for uniform indentations. The rounded back of a 1/4 teaspoon measure is the perfect size and shape for creating consistent, neat wells in every single cookie. It’s my go-to tool for this job.
- Tip: Refresh the coconut look after baking. If some of the coconut didn’t toast as evenly as you’d like, you can sprinkle a tiny pinch of fresh, untoasted coconut over the warm chocolate ganache. It adds a beautiful visual texture.
- Tip: Gently toast your own coconut. For an even deeper flavor, spread your shredded coconut on a baking sheet and toast it at 350°F for 3-5 minutes before using it to coat the cookies. Let it cool completely first. It adds an incredible nuttiness.
FAQs
Can I make these cookies ahead of time?
Absolutely! You have a couple of options. You can prepare the dough balls, coat them in coconut, and freeze them on a baking sheet before transferring to a freezer bag. Bake from frozen, adding 1-2 minutes to the bake time. Alternatively, you can bake and fill the cookies completely. They store beautifully in an airtight container at room temperature for up to 4 days, though the coconut is crispiest on day one.
Can I use milk chocolate instead of semi-sweet?
You sure can, but keep in mind it will make the final cookie much sweeter. Semi-sweet chocolate provides a nice balance against the sweet cookie and coconut. If you use milk chocolate, the ganache might also be a bit softer at room temperature. Dark chocolate is another fantastic option if you prefer a less sweet, more intense chocolate flavor.
My thumbprints puffed up in the oven! What did I do wrong?
You didn’t do anything wrong—this is totally normal! The baking powder does its job and causes the cookies to rise. The trick is to act quickly. As soon as the cookies come out of the oven, take your tool (the spoon end or your thumb) and gently press the indentations back in. The cookies are soft and pliable at this stage, so it’s easy to reshape them.
I don’t have almond extract. Can I leave it out?
You can, but you’ll lose a layer of that classic Almond Joy flavor. The almond extract really makes the coconut taste more pronounced and authentic. If you have to skip it, just use a total of 1 ½ teaspoons of vanilla extract instead. The cookies will still be delicious, just a little less complex.
How do I get the chocolate to set faster?
If you’re impatient (like me!), the refrigerator is your best friend. Once you’ve filled the cookies with ganache and placed the almonds on top, arrange them on a baking sheet and pop them in the fridge for about 15 minutes. The cool air will firm up the chocolate quickly. Just let them come back to room temperature before serving for the best texture.


Almond Joy Thumbprint Cookies: Easy Holiday Treats
Almond Joy Thumbprint Cookies are the perfect holiday baking project. This easy thumbprint cookie recipe yields festive, bite-sized treats packed with coconut, chocolate, and a crunchy almond.
Ingredients
For the cookie dough:
-
115 g unsalted butter (softened)
-
100 g granulated sugar
-
1 large egg (separated (you'll use the white for coating))
-
1 tsp vanilla extract
-
1/4 tsp almond extract
-
125 g all-purpose flour
-
1/4 tsp baking powder
-
1/4 tsp salt
-
120 g sweetened shredded coconut
For the chocolate ganache and topping:
-
85 g semi-sweet chocolate chips
-
2 tbsp heavy cream
-
24 whole almonds (toasted)
Instructions
-
Start by preheating your oven to 350°F (175°C) and lining your baking sheets with parchment paper. In the bowl of a stand mixer fitted with the paddle attachment, or using a hand mixer, cream together the softened butter and granulated sugar on medium speed for about 2-3 minutes. You’re looking for the mixture to become pale, light, and fluffy. This step is crucial for incorporating air into your cookies, giving them a lovely texture.01
-
Add the egg yolk (reserve the white in a small bowl!), vanilla extract, and almond extract to the butter mixture. Mix on low speed until everything is just combined. It might look a little curdled at first, but that’s okay—it will come together once you add the dry ingredients. Scrape down the sides of the bowl to make sure everything is evenly incorporated.02
-
In a separate medium bowl, whisk together the all-purpose flour, baking powder, and salt. With your mixer on low speed, gradually add the dry ingredients to the wet ingredients. Mix only until the flour streaks have disappeared and a soft dough has formed. You’ll notice the dough will be quite soft but not sticky.03
-
Now, place your reserved egg white in one small bowl and the shredded coconut in another. Scoop out about 1 tablespoon of dough and roll it into a smooth ball between your palms. Lightly dip the ball into the egg white, rolling it around to coat, then immediately roll it in the shredded coconut until it’s fully covered. Place the coconut-covered ball on the prepared baking sheet and repeat with the remaining dough, spacing the balls about 2 inches apart.04
-
Here comes the fun part—making the thumbprint! Using your thumb, the back of a rounded 1/4 teaspoon measuring spoon, or the end of a wooden spoon, gently press an indentation into the center of each cookie ball. Don’t be shy, but don’t press all the way to the baking sheet either. You’re creating a well for that delicious chocolate filling later.05
-
Bake the cookies for 10-12 minutes, or until the coconut on the outside is lightly toasted and the edges of the cookies are just starting to turn a golden brown. The centers will still look soft, which is what you want. As soon as you remove the baking sheet from the oven, you might notice the indentations have puffed up a bit. Use the same spoon or tool to gently redefine the wells while the cookies are still hot and pliable.06
-
Let the cookies cool on the baking sheet for 5 minutes before transferring them to a wire rack to cool completely. This is important because the cookies are very fragile when hot. They need to be fully cool before you add the chocolate, otherwise it will just melt and run everywhere.07
-
While the cookies cool, make the chocolate ganache. Place the chocolate chips and heavy cream in a microwave-safe bowl. Heat in 20-second intervals, stirring well after each burst, until the chocolate is completely melted and the mixture is smooth and glossy. Alternatively, you can do this in a small saucepan over low heat, stirring constantly.08
-
Once the cookies are completely cool and the ganache is smooth, spoon about ½ teaspoon of the chocolate mixture into each cookie’s indentation. The ganache should be thick enough to sit nicely without overflowing. Immediately place a toasted almond on top of the chocolate in each cookie. Let the chocolate set at room temperature, which will take about an hour, or you can pop them in the fridge for 15 minutes to speed things up.09
Not what you're looking for?


