Love Baked Chicken Thighs? So do we! If you're into Chicken Recipes or curious about Chicken Thigh Recipes, you'll find plenty of inspiration below.


Why You’ll Love This Baked Chicken Thighs
- Effortless cooking: Once in the oven, you’re free to relax or prep sides.
- Crispy skin: Patting skin dry and a hot oven create a shatteringly crisp texture.
- Juicy & flavorful: Thighs stay moist and savory even if slightly overcooked.
- Endlessly customizable: A blank canvas for your favorite spices, herbs, or glazes.
Ingredients & Tools
- 6 bone-in, skin-on chicken thighs (about 1.5 to 2 pounds total)
- 1 ½ tablespoons olive oil or avocado oil
- 1 teaspoon kosher salt (or ¾ teaspoon fine sea salt)
- 1 teaspoon freshly cracked black pepper
- 1 teaspoon garlic powder
- ½ teaspoon smoked paprika (optional, for color and a hint of smoke)
Tools: A large rimmed baking sheet, wire rack (highly recommended!), tongs, paper towels
Notes: Using a wire rack isn’t mandatory but lifts chicken for even crisping. Patting chicken dry is the secret to crackling skin.
Nutrition (per serving)
| Calories: | 310 kcal |
| Protein: | 25 g |
| Fat: | 22 g |
| Carbs: | 1 g |
| Fiber: | 0 g |
Serves: 3-4 | Prep Time: 10 minutes | Cook Time: 35-40 minutes | Total Time: 45-50 minutes
Before You Start: Tips & Ingredient Notes
- Why bone-in, skin-on? The bone acts as a natural heat conductor, cooking the meat more evenly and keeping it incredibly juicy. The skin, when rendered properly, provides a protective layer and becomes a delicious, crispy treat.
- The power of patting dry. This might seem like a small step, but it’s non-negotiable for crispy skin. Any surface moisture will steam the skin instead of letting it crisp up, so take a minute with those paper towels.
- Don’t be shy with the seasoning. Chicken thighs can handle—and truly benefit from—a generous amount of salt and pepper. Season every nook and cranny, including underneath the skin if you’re feeling adventurous.
- Let the chicken rest. I know it’s tempting to dig right in, but giving the thighs 5-10 minutes to rest after baking allows the juices to redistribute throughout the meat, ensuring every single bite is moist.
How to Make Baked Chicken Thighs
Step 1: Preheat your oven to 425°F (220°C). This high heat is crucial for rendering the fat quickly and creating that initial blast of heat for a crispy exterior. While the oven heats up, take your chicken thighs and pat them completely dry on both sides with paper towels. Be thorough here—you’ll notice the skin looks matte and almost papery when it’s properly dry.
Step 2: Place the dried chicken thighs in a large bowl. Drizzle with the olive oil and use your hands to rub it evenly all over each piece, making sure to coat both the skin and the underside. The oil helps the seasoning stick and promotes even browning and crisping.
Step 3: In a small bowl, whisk together the kosher salt, black pepper, garlic powder, and smoked paprika (if using). Sprinkle this seasoning mix generously over all sides of the chicken thighs, again using your hands to press it gently into the skin and flesh. Don’t forget the sides!
Step 4: Arrange the seasoned chicken thighs skin-side up on a wire rack set inside a rimmed baking sheet. The rack is key for airflow. If you don’t have one, you can place them directly on the baking sheet, but you may want to flip them halfway through cooking to help the bottom crisp up.
Step 5: Place the baking sheet in the preheated oven and bake for 35-40 minutes. You’ll hear the fat sizzling away happily. The chicken is done when the skin is deep golden brown and crispy, and the internal temperature registers 165°F (74°C) in the thickest part of the thigh, not touching the bone.
Step 6: Once perfectly cooked, carefully remove the baking sheet from the oven. Using tongs, transfer the chicken thighs to a clean plate or cutting board. This is the hardest part—let them rest for at least 5-10 minutes before serving. This allows the intense heat to settle and the juices to be reabsorbed, guaranteeing maximum succulence.
Storage & Freshness Guide
- Fridge: Store leftovers in an airtight container for up to 3 days.
- Freezer: Freeze in a single layer then transfer to a bag for up to 3 months.
- Reviving: Reheat in a 375°F oven or air fryer to restore crispiness.
Serving Suggestions
Complementary Dishes
- Creamy Garlic Mashed Potatoes — The ultimate comfort food pairing. The rich, creamy potatoes are a perfect vehicle for sopping up any delicious juices from the chicken.
- Simple Roasted Broccoli or Asparagus — You can roast these in the same oven while the chicken cooks. The caramelized, slightly charred edges of the veggies complement the savory chicken beautifully.
- A Crisp, Bright Salad — Something with a sharp vinaigrette, like an arugula salad with lemon and parmesan, cuts through the richness of the chicken and cleanses the palate.
Drinks
- A Crisp Chardonnay or Pinot Gris — The bright acidity and slight citrus notes in these white wines provide a lovely contrast to the savory, fatty qualities of the chicken skin.
- A Light Pale Ale or Lager — The carbonation and mild bitterness of a cold beer are fantastic for cutting through the richness and making each bite of chicken feel fresh again.
- Sparkling Water with Lemon — A non-alcoholic option that does a similar job—the bubbles and citrus cleanse the palate beautifully between bites.
Something Sweet
- Warm Apple Crumble with Vanilla Ice Cream — The warm, spiced apples and cool, creamy ice cream are a classic, homey dessert that feels like a natural extension of this comforting meal.
- Dark Chocolate Pots de Crème — For a more elegant finish, these rich, silky chocolate custards are intensely satisfying without being overly heavy.
- Lemon Sorbet — A scoop of sharp, refreshing lemon sorbet is the perfect palate-cleanser after a savory, rich dinner and feels incredibly light.
Top Mistakes to Avoid
- Mistake: Not patting the skin dry. This is the number one reason for soggy, rubbery skin. Moisture is the enemy of crispiness, so a little effort with paper towels goes an incredibly long way.
- Mistake: Crowding the pan. If the thighs are too close together, they’ll steam each other instead of roasting. Give them some space for the hot air to circulate and work its magic on all sides.
- Mistake: Underseasoning. Chicken thighs have a robust flavor that can stand up to—and needs—a good amount of seasoning. Be generous with your salt and spices, both on top and underneath.
- Mistake: Skipping the rest time. I’ve messed this up before too, cutting into a thigh straight from the oven only to watch the precious juices run out onto the plate. Letting it rest keeps those juices in the meat.


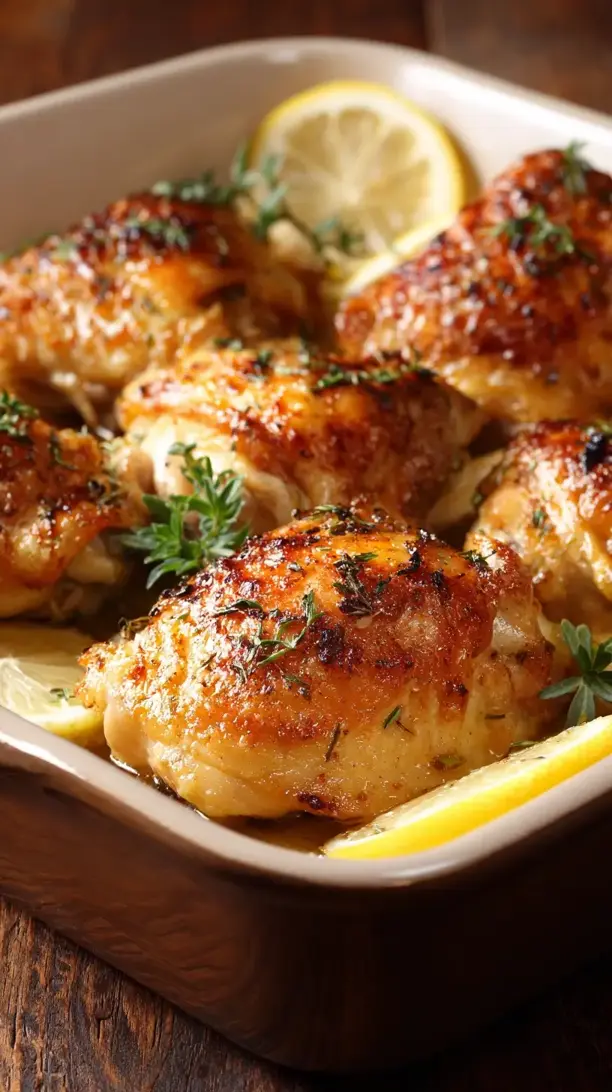
Baked Chicken Thighs
Learn how to make perfect Baked Chicken Thighs with crispy skin and juicy meat every time. This easy, foolproof recipe is your new go-to dinner. Get the recipe now!
Ingredients
For the Ingredients
-
6 bone-in, skin-on chicken thighs (about 1.5 to 2 pounds total)
-
1 ½ tablespoons olive oil or avocado oil
-
1 teaspoon kosher salt (or ¾ teaspoon fine sea salt)
-
1 teaspoon freshly cracked black pepper
-
1 teaspoon garlic powder
-
½ teaspoon smoked paprika (optional, for color and a hint of smoke)
Instructions
-
Preheat your oven to 425°F (220°C). This high heat is crucial for rendering the fat quickly and creating that initial blast of heat for a crispy exterior. While the oven heats up, take your chicken thighs and pat them completely dry on both sides with paper towels. Be thorough here—you’ll notice the skin looks matte and almost papery when it’s properly dry.01
-
Place the dried chicken thighs in a large bowl. Drizzle with the olive oil and use your hands to rub it evenly all over each piece, making sure to coat both the skin and the underside. The oil helps the seasoning stick and promotes even browning and crisping.02
-
In a small bowl, whisk together the kosher salt, black pepper, garlic powder, and smoked paprika (if using). Sprinkle this seasoning mix generously over all sides of the chicken thighs, again using your hands to press it gently into the skin and flesh. Don’t forget the sides!03
-
Arrange the seasoned chicken thighs skin-side up on a wire rack set inside a rimmed baking sheet. The rack is key for airflow. If you don’t have one, you can place them directly on the baking sheet, but you may want to flip them halfway through cooking to help the bottom crisp up.04
-
Place the baking sheet in the preheated oven and bake for 35-40 minutes. You’ll hear the fat sizzling away happily. The chicken is done when the skin is deep golden brown and crispy, and the internal temperature registers 165°F (74°C) in the thickest part of the thigh, not touching the bone.05
-
Once perfectly cooked, carefully remove the baking sheet from the oven. Using tongs, transfer the chicken thighs to a clean plate or cutting board. This is the hardest part—let them rest for at least 5-10 minutes before serving. This allows the intense heat to settle and the juices to be reabsorbed, guaranteeing maximum succulence.06
Not what you're looking for?


