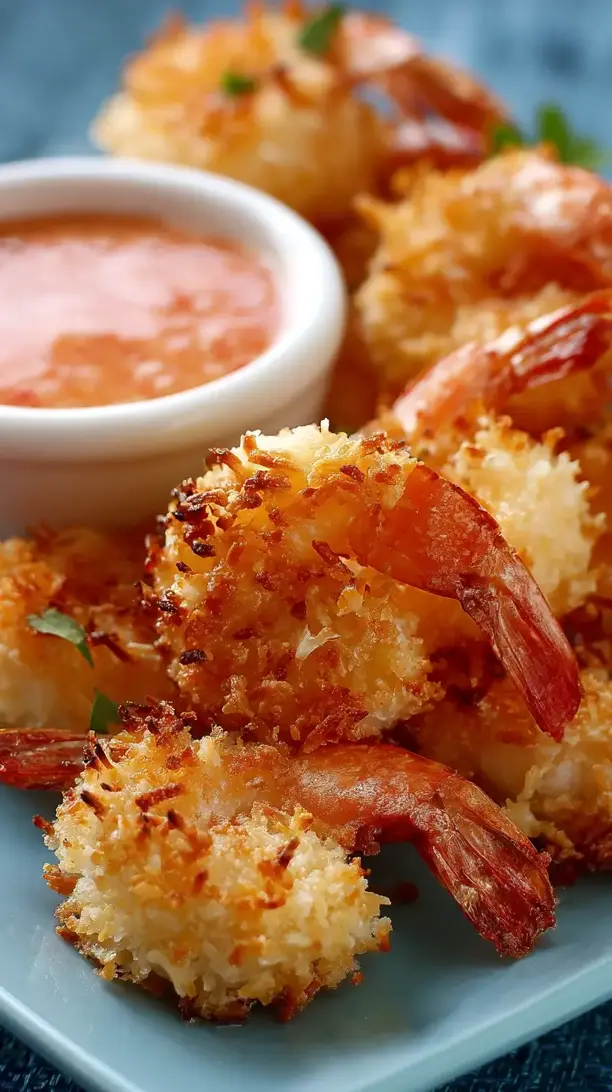
Baked coconut shrimp delivers that irresistible sweet, crispy coating and juicy shrimp without deep-frying. This version is surprisingly simple and much cleaner to make at home. You’ll love these golden, crunchy beauties straight from the oven—perfect for appetizers, dinners, or parties.
Love Baked Coconut Shrimp? So do we! If you're into Snacks or curious about Christmas Cookie, you'll find plenty of inspiration below.


Why You’ll Love This Baked Coconut Shrimp
- Easier than frying: No messy oil splatter or lingering greasy smell.
- Incredible flavor & texture: Sweet coconut and savory shrimp with a satisfying crunch.
- Fancy yet simple: Impressive for guests but easy enough for weeknights.
- Versatile serving: Great as an appetizer, on salads, or as a main dish.
Ingredients & Tools
- 450 g large raw shrimp, peeled and deveined (tails on or off)
- 120 g all-purpose flour
- 1 tsp garlic powder
- 1/2 tsp smoked paprika
- 1/2 tsp salt
- 1/4 tsp black pepper
- 2 large eggs
- 1 tbsp water
- 100 g panko breadcrumbs
- 150 g unsweetened shredded coconut
- Avocado oil spray or cooking spray
Tools: Rimmed baking sheet, wire rack (highly recommended), three shallow bowls, whisk, tongs
Notes: Using a wire rack allows air to circulate for crispiness on all sides. Don’t skip the smoked paprika—it adds subtle depth.
Nutrition (per serving)
| Calories: | 320 kcal |
| Protein: | 24 g |
| Fat: | 16 g |
| Carbs: | 20 g |
| Fiber: | 3 g |
Serves: 4 | Prep Time: 20 minutes | Cook Time: 12–15 minutes | Total Time: 35 minutes
Before You Start: Tips & Ingredient Notes
- What’s the deal with the shrimp size? I really recommend using large (21/25 count) shrimp. They’re the perfect bite-size and won’t overcook before the coating gets golden. If they’re frozen, just thaw them completely in the fridge overnight and pat them super dry—this is non-negotiable for the coating to stick.
- Unsweetened vs. sweetened coconut? Always go for unsweetened, shredded coconut. The sweetened kind can burn more easily in the oven and makes the dish overly sweet. You want the natural coconut flavor to shine, not a sugary coating.
- Why panko and shredded coconut together? Panko gives you that amazing, airy crunch, while the coconut provides flavor and texture. Using just coconut can sometimes be a bit dense or overly rich. The combination is the secret to the perfect bite.
- Is a wire rack really necessary? Honestly, it makes a huge difference. If you don’t have one, you can bake them directly on a parchment-lined sheet, but flip them halfway through. The rack just guarantees maximum crispiness on all sides with no flipping required.
How to Make Baked Coconut Shrimp
Step 1: First, get your station ready. Preheat your oven to 200°C (400°F) and place a wire rack inside a rimmed baking sheet. Give the rack a quick spray with oil. Now, set up your three shallow bowls. In the first, whisk together the flour, garlic powder, smoked paprika, salt, and pepper. In the second, whisk the eggs with the tablespoon of water until they’re smooth and uniform. In the third, combine the panko breadcrumbs and shredded coconut, mixing them with your fingers to distribute everything evenly.
Step 2: Time to coat the shrimp! Working with one shrimp at a time, hold it by the tail (if you left it on) and dredge it fully in the flour mixture. Make sure it’s coated on all sides, then tap off any excess. Next, dip it into the egg wash, letting the extra drip back into the bowl. Finally, press it firmly into the panko-coconut mixture, rolling it and pressing gently to make sure a good, even layer adheres. You’ll notice the texture starts to feel really promising already.
Step 3: Place the coated shrimp in a single layer on the prepared wire rack. Make sure they aren’t touching each other—this is key for even cooking and crispiness. Once they’re all lined up, give them a generous, even spray with the avocado oil. This will help them brown and crisp up beautifully in the oven, mimicking that fried effect without all the oil.
Step 4: Bake for 12 to 15 minutes. You’re looking for a deep, golden-brown color on the coconut coating and the shrimp to be opaque and firm to the touch. The aroma in your kitchen will be absolutely incredible—toasty, sweet, and savory all at once. If you have a particularly large shrimp, they might need a minute or two longer, but be careful not to overdo it, or the shrimp can become tough.
Step 5: As soon as they come out of the oven, let them rest on the rack for just a minute or two. This allows the coating to set and become extra crispy. Serve them immediately while they’re hot and wonderfully crunchy. They’re best fresh from the oven, as the coconut can soften a bit if they sit for too long.
Storage & Freshness Guide
- Fridge: Cool completely, store in airtight container for up to 3 days.
- Freezer: Freeze in single layer on baking sheet, then transfer to freezer bag for up to 2 months.
- Reviving: Reheat on wire rack at 190°C (375°F) for 5–8 minutes to re-crisp.
Serving Suggestions
Complementary Dishes
- A simple mango-avocado salad — The creamy avocado and sweet, juicy mango provide a fresh, cool contrast to the hot, crunchy shrimp. It’s a flavor and texture combination that just sings.
- Coconut or jasmine rice — The subtle floral notes of jasmine rice or the slight sweetness of coconut rice make a fantastic, fluffy bed for the shrimp, soaking up any dipping sauces beautifully.
- Grilled pineapple spears — The caramelized, smoky-sweet flavor of grilled pineapple is a phenomenal partner for the coconut shrimp, enhancing the tropical vibe of the whole meal.
Drinks
- A crisp, citrusy Sauvignon Blanc — The high acidity and notes of grapefruit and lime in the wine cut through the richness of the shrimp and refresh your palate between bites.
- A classic Mojito or a Ginger Beer Mocktail — The mint and lime in a mojito or the spicy kick of ginger beer provide a zesty, bubbly counterpoint that balances the sweet and savory flavors perfectly.
Something Sweet
- Pineapple upside-down cake — It’s a classic for a reason. The buttery, caramelized pineapple and cherry topping continues the tropical theme and ends the meal on a wonderfully comforting note.
- Coconut macaroons dipped in chocolate — Doubling down on the coconut flavor is a delight here. The chewy, sweet macaroons feel like a natural, elegant progression from the main course.
Top Mistakes to Avoid
- Mistake: Not drying the shrimp thoroughly. Any extra moisture on the shrimp will create steam, which prevents the coating from sticking properly and can lead to a soggy, rather than crispy, final product. Pat them dry with paper towels until they feel completely matte.
- Mistake: Skipping the press when coating. Just rolling the shrimp in the panko-coconut mix won’t give you a substantial enough crust. You need to gently press the coating onto the shrimp to ensure it adheres well and creates a satisfying, thick crunch in every bite.
- Mistake: Crowding the baking sheet. If the shrimp are too close together, they’ll steam each other instead of baking. This is the fastest way to end up with a soft, less-crispy coating. Give them their personal space on the rack!
- Mistake: Overbaking the shrimp. Shrimp cook very quickly and can go from juicy to rubbery in a matter of minutes. Pull them out as soon as the coating is golden and the shrimp are pink and opaque. They continue to cook a little from residual heat after coming out of the oven.
Expert Tips
- Tip: Use your left hand for dry ingredients and your right for wet. This is a little pro-hack to avoid ending up with “club hands”—where all your fingers are caked in a gloopy mixture. Designate one hand for the flour and panko bowls and the other for the egg wash to keep the process much cleaner.
- Tip: For extra flavor, toast the coconut and panko first. Spread the panko and shredded coconut on a baking sheet and toast in a 180°C (350°F) oven for 5-7 minutes, until lightly golden and fragrant. Let it cool completely before using. This deepens the nutty flavor and can give you an even crispier result.
- Tip: Make a double batch for meal prep. These shrimp reheat surprisingly well! Let them cool completely, then store them in an airtight container in the fridge. To reheat, pop them back on a wire rack in a 190°C (375°F) oven for 5-8 minutes to re-crisp. They’re fantastic on salads throughout the week.
- Tip: Get creative with the seasoning. Feel free to add a pinch of cayenne to the flour for a little heat, or some lime zest to the panko-coconut mix for a bright, zesty kick. This recipe is a wonderful canvas for your own flavor experiments.
FAQs
Can I use frozen cooked shrimp for this recipe?
I wouldn’t recommend it, honestly. Pre-cooked shrimp are already fully cooked, so by the time the coconut coating is golden and crispy in the oven, the shrimp inside will be severely overcooked, tough, and rubbery. Starting with raw shrimp ensures the inside stays juicy and tender while the outside gets perfectly crisp.
Can I make these gluten-free?
Absolutely! This recipe is very adaptable. Simply swap the all-purpose flour for your favorite gluten-free 1:1 baking flour blend. For the panko, use gluten-free panko-style breadcrumbs, which are widely available now. The method and cooking time remain exactly the same, and you’ll still get a fantastic, crispy result.
What’s the best dipping sauce for coconut shrimp?
Oh, the possibilities! A classic sweet chili sauce is always a winner, providing a sweet and slightly spicy kick. A simple orange marmalade mixed with a bit of Dijon mustard makes a fantastic sweet and tangy option. For a creamy choice, try mixing Greek yogurt or sour cream with lime juice, cilantro, and a touch of honey.
Why did my coating fall off?
This usually happens for one of two reasons. First, the shrimp weren’t dry enough before starting the coating process. Second, the coating steps were rushed—you really need to let the excess flour and egg wash drip off thoroughly before moving to the next step. A firm press in the final panko-coconut mixture also locks everything in place.
Can I air fry the coconut shrimp instead?
You sure can! Air frying is a fantastic alternative. Arrange the coated shrimp in a single layer in your air fryer basket, spray with oil, and cook at 200°C (400°F) for about 8-10 minutes, flipping halfway through. They’ll get incredibly crispy, often even crispier than the oven-baked version, and in less time.


Baked Coconut Shrimp
Make crispy, golden Baked Coconut Shrimp without deep-frying! This easy recipe delivers incredible flavor and texture. Get the simple recipe now!
Ingredients
For the Shrimp:
-
450 g large raw shrimp (peeled and deveined (tails on or off))
-
Avocado oil spray or cooking spray
For the Flour Mixture:
-
120 g all-purpose flour
-
1 tsp garlic powder
-
1/2 tsp smoked paprika
-
1/2 tsp salt
-
1/4 tsp black pepper
For the Egg Wash:
-
2 large eggs
-
1 tbsp water
For the Coating:
-
100 g panko breadcrumbs
-
150 g unsweetened shredded coconut
Instructions
-
First, get your station ready. Preheat your oven to 200°C (400°F) and place a wire rack inside a rimmed baking sheet. Give the rack a quick spray with oil. Now, set up your three shallow bowls. In the first, whisk together the flour, garlic powder, smoked paprika, salt, and pepper. In the second, whisk the eggs with the tablespoon of water until they’re smooth and uniform. In the third, combine the panko breadcrumbs and shredded coconut, mixing them with your fingers to distribute everything evenly.01
-
Time to coat the shrimp! Working with one shrimp at a time, hold it by the tail (if you left it on) and dredge it fully in the flour mixture. Make sure it’s coated on all sides, then tap off any excess. Next, dip it into the egg wash, letting the extra drip back into the bowl. Finally, press it firmly into the panko-coconut mixture, rolling it and pressing gently to make sure a good, even layer adheres. You’ll notice the texture starts to feel really promising already.02
-
Place the coated shrimp in a single layer on the prepared wire rack. Make sure they aren’t touching each other—this is key for even cooking and crispiness. Once they’re all lined up, give them a generous, even spray with the avocado oil. This will help them brown and crisp up beautifully in the oven, mimicking that fried effect without all the oil.03
-
Bake for 12 to 15 minutes. You’re looking for a deep, golden-brown color on the coconut coating and the shrimp to be opaque and firm to the touch. The aroma in your kitchen will be absolutely incredible—toasty, sweet, and savory all at once. If you have a particularly large shrimp, they might need a minute or two longer, but be careful not to overdo it, or the shrimp can become tough.04
-
As soon as they come out of the oven, let them rest on the rack for just a minute or two. This allows the coating to set and become extra crispy. Serve them immediately while they’re hot and wonderfully crunchy. They’re best fresh from the oven, as the coconut can soften a bit if they sit for too long.05
Not what you're looking for?


