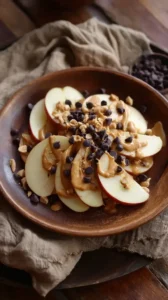
Store-bought chips are often greasy and overly salty, but homemade Baked Sweet Potato Chips are a vibrant, crispy, and naturally sweet snack. The key is thin, uniform slicing and patient baking for perfect crispiness without frying. These Baked Sweet Potato Chips are a healthy, versatile treat you’ll want to make weekly.
Looking for Baked Sweet Potato Chips inspiration? You'll love what we have! Explore more Snacks recipes or discover our Appetizer Recipes favorites.


Why You’ll Love This Baked Sweet Potato Chips
- Healthy & Light: Baking uses minimal oil for a lighter, crunchy alternative to fried chips.
- Naturally Sweet Flavor: Sweet potatoes caramelize slightly in the oven for a delicious taste.
- Incredibly Versatile: Keep them simple with salt or get creative with spices.
- Amazing Aroma: Your kitchen will smell warm and comforting as they roast.
Ingredients & Tools
- 2 large sweet potatoes (about 500-600 g total), scrubbed clean
- 1 tablespoon olive oil or avocado oil
- 1/2 teaspoon fine sea salt, plus more to taste
- 1/4 teaspoon optionally, black pepper or smoked paprika
Tools: A mandoline slicer (highly recommended!), two large baking sheets, parchment paper, a large bowl, and a clean kitchen towel.
Notes: Pick firm, smooth-skinned sweet potatoes without soft spots. A neutral oil helps crisp them without overpowering flavor.
Nutrition (per serving)
| Calories: | 112 kcal |
| Protein: | 1.5 g |
| Fat: | 3.5 g |
| Carbs: | 20 g |
| Fiber: | 3 g |
Serves: 4 | Prep Time: 15 minutes | Cook Time: 25-35 minutes | Total Time: 45 minutes
Before You Start: Tips & Ingredient Notes
- Why a mandoline slicer? For truly crisp chips, uniform thickness is non-negotiable. A mandoline gives you paper-thin, even slices that all cook at the same rate. If you use a knife, it’s incredibly difficult to achieve this, and you’ll likely end up with a mix of burnt and chewy chips.
- To peel or not to peel? I almost never peel my sweet potatoes for this recipe. The skin adds extra fiber and a lovely rustic texture. Just give them a really good scrub under running water to remove any dirt.
- Don’t skip the drying step. After you slice the potatoes, patting them dry with a kitchen towel is a crucial, often-overlooked step. Removing that surface moisture is what allows them to get crispy instead of steaming in the oven.
- The oil is for crispness, not for frying. You only need a light, even coating of oil. The goal is to help the exterior dehydrate and crisp up, not to saturate the chips. A little really does go a long way here.
How to Make Baked Sweet Potato Chips
Step 1: First, preheat your oven to 200°C (400°F) and line your baking sheets with parchment paper. This is key for easy cleanup and to prevent any sticking. While the oven heats up, take your scrubbed sweet potatoes and, using a mandoline slicer, carefully slice them into very thin rounds, ideally about 1/8-inch (3 mm) thick. You’ll notice that consistency is everything here—the thinner and more uniform they are, the more evenly they’ll bake.
Step 2: Now, transfer all those beautiful orange slices into a large, dry bowl. Take a clean kitchen towel and gently pat them dry, absorbing as much of the starchy surface moisture as you can. This might feel like a small step, but it’s the secret weapon for crispiness. Once they’re drier, drizzle the tablespoon of oil over them.
Step 3: Time to get your hands in there! Use your fingers to toss the slices thoroughly, ensuring every single chip gets a very light, sheer coating of oil. You shouldn’t see any pools of oil in the bowl—just a gentle gloss on the potatoes. Now, sprinkle over your salt and any other optional seasonings, and toss one more time to distribute everything evenly.
Step 4: Arrange the slices in a single layer on your prepared baking sheets. It is absolutely vital that they are not overlapping or crowded. If they are piled on top of each other, they’ll steam and become soft and chewy instead of crisp. You might need to bake in batches, and that’s perfectly okay—patience pays off!
Step 5: Place the baking sheets in the preheated oven and bake for about 15 minutes. After this time, you’ll want to rotate the trays (front to back, and top to bottom rack if using two) for even cooking. Then, continue baking for another 10-20 minutes. Keep a very close eye on them during the final few minutes, as they can go from perfectly golden to burnt very quickly.
Step 6: The chips are done when the edges are curled and they have a deep, golden-orange color with some slightly darker brown spots. They will also feel firm and crisp to the touch. Pull them out of the oven and immediately transfer them to a wire rack or a bowl. Letting them cool directly on the hot baking sheet can cause them to continue cooking and potentially burn.
Step 7: As the chips cool, they will continue to crisp up. This is the final magic! Give them a taste and, if you like, sprinkle with a tiny bit more salt while they’re still warm. Serve them once they’ve reached room temperature for the ultimate crispy, light, and delicious snack.
Storage & Freshness Guide
- Fridge: Not recommended; store at room temperature in an airtight container.
- Freezer: Freezing is not advised as it makes chips soggy.
- Reviving: If chips soften, re-crisp in a hot oven for a few minutes.
Serving Suggestions
Complementary Dishes
- A juicy burger or grilled chicken sandwich — The sweet, crisp chips are a fantastic textural contrast to a soft, savory main and are so much more interesting than fries.
- A big, vibrant salad — Crumble a handful of these chips over a salad with a tangy vinaigrette for an instant crunch factor that beats any store-bought crouton.
- Your favorite dip — Serve them with a cool, creamy garlic herb yogurt dip or a spicy sriracha mayo for a party-perfect appetizer platter.
Drinks
- A crisp, cold lager or pale ale — The bitterness of the beer cuts beautifully through the natural sweetness of the chips, creating a perfectly balanced bite.
- Sparkling water with a squeeze of lime — The effervescence and citrusy zing cleanse the palate between handfuls, making each chip taste as exciting as the first.
- Iced herbal tea, like peppermint or hibiscus — A refreshing, non-alcoholic option that complements the earthy sweetness without overpowering it.
Something Sweet
- A small bowl of vanilla bean ice cream — The contrast between the warm, earthy chips (if served fresh) and the cold, creamy sweetness is a surprisingly delightful way to end a meal.
- Dark chocolate-dipped strawberries — They continue the theme of a fruit-forward, not-too-sweet treat that feels indulgent but still relatively light.
- A simple fruit salad — A mix of fresh berries and orange segments provides a juicy, fresh counterpoint to the crispy, dehydrated texture of the chips.
Top Mistakes to Avoid
- Mistake: Slicing the potatoes too thick. If your slices are more than 1/8-inch thick, they will bake up soft and chewy in the middle rather than becoming crisp all the way through. I’ve messed this up before, and you end up with roasted sweet potato slices, not chips.
- Mistake: Crowding the baking sheet. This is the number one reason for soggy chips. When the slices are overlapping, the moisture they release gets trapped and steams them. They need space for the hot air to circulate and dry them out.
- Mistake: Not watching them closely at the end. The line between perfectly crisp and burnt is very thin. Set a timer and check them every couple of minutes once you pass the 20-minute mark. They can darken in a flash.
- Mistake: Skipping the pat-dry step. That surface starch and water is the enemy of crispness. Taking one minute to dry the slices will dramatically improve your final result.
Expert Tips
- Tip: Soak the slices in water. For an even crispier chip, after slicing, submerge the sweet potato rounds in a bowl of cold water for 30 minutes. This pulls out excess surface starch. Then, drain, pat them *very* dry, and proceed with the recipe. It’s an extra step, but the crunch is next-level.
- Tip: Use convection/fan bake if you have it. The circulating hot air in a convection oven is fantastic for dehydrating the chips evenly and quickly, leading to a more reliable crisp. Just reduce the temperature by 15°C (25°F) and keep a close eye on the time.
- Tip: Season after baking. While a little salt before baking is fine, for more delicate spices (like cayenne or herbs), sprinkle them on as soon as the chips come out of the oven. The residual heat will toast the spices without burning them.
- Tip: Don’t store them until completely cool. If you put warm chips in a container, the trapped steam will make them lose their crispness. Let them cool fully on a wire rack before transferring to an airtight container.
FAQs
Why are my sweet potato chips not crispy?
This almost always comes down to one of three things: the slices were too thick, the baking sheet was overcrowded, or they weren’t baked long enough. Remember, you’re essentially dehydrating them at a low-ish temperature. If they’re bendy when they come out, they needed more time. Also, ensure you patted them thoroughly dry before adding oil, as any residual moisture will steam them.
Can I make these in an air fryer?
Absolutely! An air fryer works wonderfully for this. The process is the same: slice thin, pat dry, toss with a tiny bit of oil, and cook in a single layer at 180°C (350°F). They’ll cook faster, usually in about 10-15 minutes, so check on them frequently. You may need to cook in smaller batches, but the result is just as crispy and delicious.
How should I store leftover baked sweet potato chips?
Once the chips are completely cooled to room temperature, transfer them to a paper bag or an airtight container lined with a paper towel. The paper towel will absorb any residual moisture that might make them soft. They are best eaten within 1-2 days. If they lose their crunch, you can briefly pop them back in a hot oven for a few minutes to re-crisp.
Can I use different types of oil?
Yes, you can. A neutral oil with a high smoke point is best. Avocado oil, light olive oil, or even refined coconut oil are great choices. Avoid extra virgin olive oil if your oven runs hot, as it can smoke, and strongly flavored oils like sesame or unrefined coconut oil will overpower the sweet potato’s delicate flavor.
Are the chips supposed to be chewy in the middle?
No, a perfectly baked sweet potato chip should be crisp all the way through, similar to a store-bought potato chip but with a slightly more delicate texture. If you’re getting a chewy center, it’s a sure sign that your slices were cut too thick. Don’t be discouraged—just aim for thinner slices on your next batch!


Baked Sweet Potato Chips
Learn how to make perfectly crispy Baked Sweet Potato Chips at home with this easy recipe. A healthy, delicious snack for any occasion. Get the recipe now!
Ingredients
For the Ingredients & Tools
-
2 large sweet potatoes (about 500-600 g total, scrubbed clean)
-
1 tablespoon olive oil or avocado oil
-
1/2 teaspoon fine sea salt (plus more to taste)
-
1/4 teaspoon black pepper or smoked paprika (optional)
Instructions
-
First, preheat your oven to 200°C (400°F) and line your baking sheets with parchment paper. This is key for easy cleanup and to prevent any sticking. While the oven heats up, take your scrubbed sweet potatoes and, using a mandoline slicer, carefully slice them into very thin rounds, ideally about 1/8-inch (3 mm) thick. You’ll notice that consistency is everything here—the thinner and more uniform they are, the more evenly they’ll bake.01
-
Now, transfer all those beautiful orange slices into a large, dry bowl. Take a clean kitchen towel and gently pat them dry, absorbing as much of the starchy surface moisture as you can. This might feel like a small step, but it’s the secret weapon for crispiness. Once they’re drier, drizzle the tablespoon of oil over them.02
-
Time to get your hands in there! Use your fingers to toss the slices thoroughly, ensuring every single chip gets a very light, sheer coating of oil. You shouldn’t see any pools of oil in the bowl—just a gentle gloss on the potatoes. Now, sprinkle over your salt and any other optional seasonings, and toss one more time to distribute everything evenly.03
-
Arrange the slices in a single layer on your prepared baking sheets. It is absolutely vital that they are not overlapping or crowded. If they are piled on top of each other, they’ll steam and become soft and chewy instead of crisp. You might need to bake in batches, and that’s perfectly okay—patience pays off!04
-
Place the baking sheets in the preheated oven and bake for about 15 minutes. After this time, you’ll want to rotate the trays (front to back, and top to bottom rack if using two) for even cooking. Then, continue baking for another 10-20 minutes. Keep a very close eye on them during the final few minutes, as they can go from perfectly golden to burnt very quickly.05
-
The chips are done when the edges are curled and they have a deep, golden-orange color with some slightly darker brown spots. They will also feel firm and crisp to the touch. Pull them out of the oven and immediately transfer them to a wire rack or a bowl. Letting them cool directly on the hot baking sheet can cause them to continue cooking and potentially burn.06
-
As the chips cool, they will continue to crisp up. This is the final magic! Give them a taste and, if you like, sprinkle with a tiny bit more salt while they’re still warm. Serve them once they’ve reached room temperature for the ultimate crispy, light, and delicious snack.07
Not what you're looking for?


