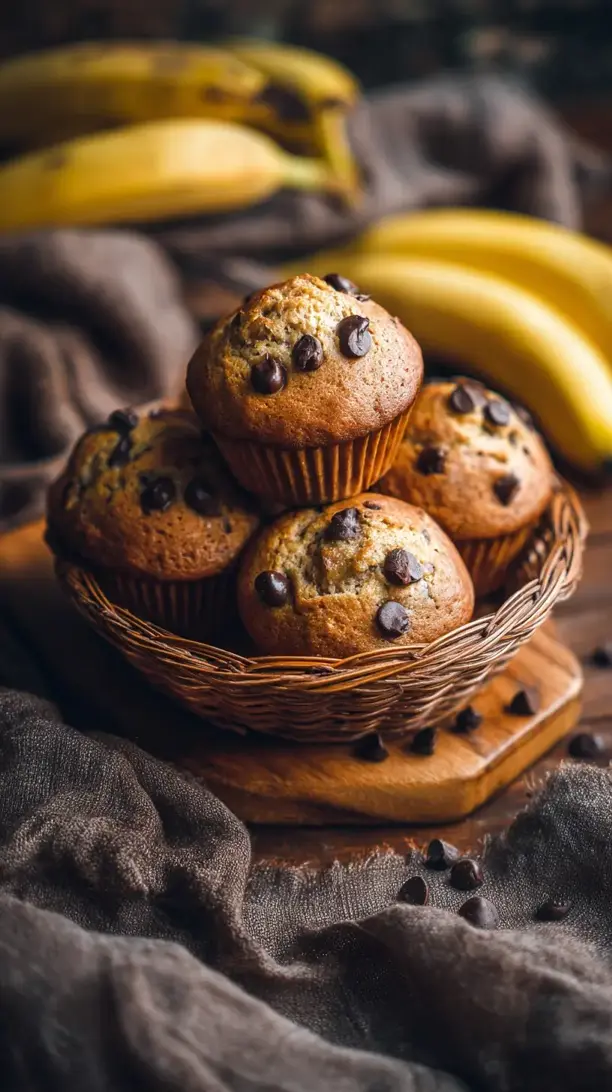
There’s something deeply comforting about the smell of banana bread baking in the oven. These Banana Bread Muffins capture everything we love about a classic loaf—moist, tender crumb, deep banana flavor, subtle spice—in a perfectly portable, individual serving. They’re a game-changer for busy mornings, lunchboxes, or an afternoon pick-me-up.
Looking for Banana Bread Muffins inspiration? You'll love what we have! Explore more Snacks recipes or discover our Chicken Thigh Recipes favorites.


Why You’ll Love This Banana Bread Muffins
Perfectly portable: Ideal for on-the-go snacking or lunchboxes.
Incredibly moist: Stays soft and tender for days.
Faster to bake: Ready in about half the time of a loaf.
Endlessly adaptable: Great base for chocolate chips, nuts, or swirls.
Ingredients & Tools
- 3 large, very ripe bananas (about 1 ½ cups mashed)
- 2 large eggs, at room temperature
- ½ cup (120 ml) neutral oil (like vegetable or canola)
- ⅓ cup (80 g) sour cream or plain yogurt
- 1 teaspoon vanilla extract
- 1 ½ cups (300 g) granulated sugar
- 2 cups (250 g) all-purpose flour
- 1 teaspoon baking soda
- ½ teaspoon baking powder
- 1 teaspoon ground cinnamon
- ½ teaspoon salt
- 1 cup mix-ins like chocolate chips or walnuts (optional)
Tools: 12-cup muffin tin, paper liners or non-stick spray, two mixing bowls, whisk, spatula, ice cream or cookie scoop (highly recommended!)
Notes: Use very ripe, black-speckled bananas for deepest flavor. Sour cream ensures a tender crumb.
Nutrition (per serving)
| Calories: | 285 kcal |
| Protein: | 4 g |
| Fat: | 11 g |
| Carbs: | 45 g |
| Fiber: | 1.5 g |
Serves: 12 | Prep Time: 15 minutes | Cook Time: 20-22 minutes | Total Time: 40 minutes
Before You Start: Tips & Ingredient Notes
- How ripe is “ripe” for the bananas? You’re aiming for bananas that are heavily speckled with black, or even completely brown. The peel should feel thin and the fruit inside should be very soft and sweet. This provides maximum flavor and moisture.
- Why room temperature eggs and sour cream? Cold ingredients can cause the batter to seize up a bit, leading to a denser texture. Taking the chill off your dairy helps everything emulsify smoothly for a lighter, more uniform crumb.
- Can I substitute the oil? You can use an equal amount of melted, cooled butter for a richer flavor. The texture will be slightly more cake-like, but still utterly delicious. I don’t recommend applesauce here, as it can make the muffins a bit gummy.
- What’s the deal with the sour cream? The acidity in sour cream (or yogurt) tenderizes the gluten in the flour, resulting in a supremely soft muffin. It also reacts with the baking soda to give a better rise. It’s a little trick that makes a huge difference.
How to Make Banana Bread Muffins
Step 1: Prep your station and preheat the oven. Start by preheating your oven to 425°F (220°C). This might seem high for muffins, but it’s the secret to getting that beautiful, domed top. The initial blast of heat helps the muffins rise quickly before the structure sets. While it heats, line a 12-cup muffin tin with paper liners or grease it thoroughly with non-stick spray.
Step 2: Mash the bananas and mix the wet ingredients. In a large bowl, peel your very ripe bananas and mash them well with a fork. You want them relatively smooth, with just a few small lumps for texture. To the bananas, add the room temperature eggs, oil, sour cream, and vanilla extract. Whisk everything together until it’s completely combined and looks smooth and creamy. You’ll notice the mixture will be a pale, creamy yellow color.
Step 3: Whisk the dry ingredients. In a separate, medium-sized bowl, whisk together the flour, sugar, baking soda, baking powder, cinnamon, and salt. This is a crucial step—whisking ensures the leavening agents and salt are evenly distributed throughout the flour, which prevents you from getting a bitter bite of baking soda in one muffin and a flat muffin from another.
Step 4: Combine wet and dry ingredients. Pour the dry ingredient mixture into the bowl with the wet ingredients. Use a spatula to gently fold them together. The trick is to stop mixing as soon as you no longer see streaks of flour. A few small lumps in the batter are perfectly fine—over-mixing is the enemy of a tender muffin and will lead to a tough, tunneled texture.
Step 5: Fold in your mix-ins. If you’re using chocolate chips or walnuts, now is the time to add them. Sprinkle them over the batter and fold gently just 2-3 times to incorporate. You want them evenly distributed without overworking the batter.
Step 6: Portion the batter. Using a large cookie scoop or a ¼-cup measuring cup, divide the batter evenly among the 12 prepared muffin cups. Each cup should be filled almost to the top. This generous filling is key to getting that lovely, oversized muffin top. For a little extra sparkle, you can sprinkle the tops with a bit of coarse sugar.
Step 7: The two-temperature bake. Place the muffin tin in the preheated 425°F (220°C) oven and bake for 5 minutes. Then, without opening the door, reduce the oven temperature to 350°F (175°C) and continue to bake for another 15-17 minutes. You’ll know they’re done when the tops are golden brown and a toothpick inserted into the center of a muffin comes out clean or with a few moist crumbs attached.
Step 8: Cool properly. Let the muffins cool in the pan for about 5 minutes. This allows them to set up enough to handle. Then, carefully transfer them to a wire rack to cool completely. This step prevents the bottoms from getting steamy and soggy. I know it’s hard to wait, but try to let them cool for at least 15 minutes before diving in—the flavor really settles in as they cool.
Storage & Freshness Guide
- Fridge: Store in an airtight container up to 5 days.
- Freezer: Wrap individually and freeze up to 3 months.
- Reviving: Warm in air fryer or oven at 350°F for 2–3 minutes to refresh.
Serving Suggestions
Complementary Dishes
- A bowl of fresh fruit salad — The bright, acidic notes from berries and citrus cut through the sweetness of the muffins beautifully, creating a perfectly balanced breakfast or snack.
- Crispy, salty bacon or sausage — There’s nothing quite like the classic sweet-and-salty combo. A bite of muffin followed by a bite of savory bacon is pure breakfast bliss.
- A sharp cheddar cheese omelet — The rich, savory flavor of the eggs and cheese provides a wonderful contrast to the spiced sweetness of the muffins, making for a truly satisfying meal.
Drinks
- A strong cup of black coffee — The bitterness of the coffee is the ultimate partner for the sweet, spiced muffin, enhancing all the warm flavors and waking up your palate.
- A glass of cold milk — It’s a timeless pairing for a reason. The creaminess of the milk is incredibly soothing and complements the soft, cakey texture perfectly.
- Chai tea latte — The warm spices in a chai latte—cinnamon, cardamom, cloves—echo the spices in the muffin, creating a wonderfully cozy and harmonious flavor experience.
Something Sweet
- Vanilla bean ice cream — For the ultimate dessert, serve a warm muffin split open with a scoop of melting vanilla ice cream on top. The contrast in temperatures and textures is absolutely divine.
- A dollop of whipped cream cheese frosting — Transform your muffin into a cupcake-like treat with a tangy, sweet swirl of frosting on top. It feels indulgent and special.
- A drizzle of salted caramel sauce — This takes the banana flavor to a whole new level of decadence, adding a buttery, salty-sweet complexity that’s just irresistible.
Top Mistakes to Avoid
- Mistake: Using under-ripe bananas. Yellow bananas simply don’t have the same concentration of sugar or flavor. Your muffins will taste bland and starchy rather than deeply banana-y and sweet.
- Mistake: Over-mixing the batter. Once you add the flour, mix only until it’s just combined. Over-working the gluten will make your muffins tough, chewy, and cause large, undesirable tunnels inside.
- Mistake: Not filling the muffin cups enough. If you’re shy and only fill them ⅔ of the way, you’ll end up with flat-topped muffins. Be brave and fill them almost to the top for that beautiful, classic domed shape.
- Mistake: Skipping the initial high-temperature bake. Starting in a super hot oven gives the muffins an immediate lift, creating that perfect dome. Baking at one steady, lower temperature will result in flatter tops.
Expert Tips
- Tip: Freeze ripe bananas for later. If your bananas are ripening faster than you can use them, just peel them, pop them in a zip-top bag, and freeze. Thaw them at room temperature when you’re ready to bake—they’ll be extra soft and watery, which is perfect for this recipe.
- Tip: Use a cookie scoop for perfect portions. A large spring-loaded ice cream or cookie scoop is the easiest, cleanest way to portion batter evenly into the tin. This ensures all your muffins bake at the same rate and are the same size.
- Tip: Add a flavor boost with a streusel topping. Whisk together ¼ cup flour, ¼ cup brown sugar, 2 tbsp melted butter, and a pinch of cinnamon until crumbly. Sprinkle over the batter before baking for a delightful crunchy texture.
- Tip: Revive day-old muffins in the air fryer. If your muffins have lost their fresh-baked magic, pop them in an air fryer at 350°F for 2-3 minutes. The circulating hot air will crisp up the exterior and make the inside warm and soft again, like they just came out of the oven.
FAQs
Can I make these muffins ahead of time?
Absolutely! These muffins are fantastic for making ahead. Once completely cooled, store them in an airtight container at room temperature for up to 3 days. For longer storage, you can freeze them for up to 3 months. I like to wrap each one individually in plastic wrap and then place them all in a large freezer bag. Just thaw at room temperature or warm gently in the oven or microwave.
Why did my muffins turn out dense and gummy?
This is almost always a sign of over-mixing. When you work the flour too much, you develop the gluten, which gives the muffins a bread-like, tough texture. Remember, a few lumps in the batter are your friend! Another culprit could be inaccurate measuring—be sure to spoon your flour into the measuring cup and level it off, rather than scooping directly from the bag, which can pack in too much flour.
Can I make this recipe into a loaf of banana bread instead?
You can, but the baking time and method will need to change. Pour the batter into a greased 9×5-inch loaf pan and bake at 350°F (175°C) for about 55-65 minutes, or until a toothpick inserted in the center comes out clean. You’ll lose the domed top, but you’ll gain a classic, sliceable loaf.
My bananas aren’t ripe enough. What can I do?
If you’re in a pinch, you can try to speed-ripen them. Place whole, unpeeled bananas on a baking sheet and bake in a 300°F (150°C) oven for 15-20 minutes, until the skins are black and shiny. Let them cool before using. This will soften them and make them sweeter, though the flavor won’t be quite as deep as with naturally ripened bananas.
Can I make these dairy-free or gluten-free?
Yes, with a few simple swaps! For dairy-free, use a plant-based yogurt instead of sour cream. For gluten-free, use a 1:1 gluten-free all-purpose flour blend. Be aware that the texture might be slightly different, but it will still be delicious. I’ve had great success with both modifications.


Banana Bread Muffins
Make the best moist & fluffy Banana Bread Muffins with this easy recipe. Perfect for breakfast on-the-go or a quick snack. Bake a batch today!
Ingredients
For the Muffins
-
3 large, very ripe bananas (about 1 ½ cups mashed)
-
2 large eggs (at room temperature)
-
½ cup neutral oil (like vegetable or canola)
-
⅓ cup sour cream or plain yogurt
-
1 teaspoon vanilla extract
-
1 ½ cups granulated sugar
-
2 cups all-purpose flour
-
1 teaspoon baking soda
-
½ teaspoon baking powder
-
1 teaspoon ground cinnamon
-
½ teaspoon salt
-
1 cup mix-ins like chocolate chips or walnuts (optional)
Instructions
-
Prep your station and preheat the oven. Start by preheating your oven to 425°F (220°C). This might seem high for muffins, but it’s the secret to getting that beautiful, domed top. The initial blast of heat helps the muffins rise quickly before the structure sets. While it heats, line a 12-cup muffin tin with paper liners or grease it thoroughly with non-stick spray.01
-
Mash the bananas and mix the wet ingredients. In a large bowl, peel your very ripe bananas and mash them well with a fork. You want them relatively smooth, with just a few small lumps for texture. To the bananas, add the room temperature eggs, oil, sour cream, and vanilla extract. Whisk everything together until it’s completely combined and looks smooth and creamy. You’ll notice the mixture will be a pale, creamy yellow color.02
-
Whisk the dry ingredients. In a separate, medium-sized bowl, whisk together the flour, sugar, baking soda, baking powder, cinnamon, and salt. This is a crucial step—whisking ensures the leavening agents and salt are evenly distributed throughout the flour, which prevents you from getting a bitter bite of baking soda in one muffin and a flat muffin from another.03
-
Combine wet and dry ingredients. Pour the dry ingredient mixture into the bowl with the wet ingredients. Use a spatula to gently fold them together. The trick is to stop mixing as soon as you no longer see streaks of flour. A few small lumps in the batter are perfectly fine—over-mixing is the enemy of a tender muffin and will lead to a tough, tunneled texture.04
-
Fold in your mix-ins. If you’re using chocolate chips or walnuts, now is the time to add them. Sprinkle them over the batter and fold gently just 2-3 times to incorporate. You want them evenly distributed without overworking the batter.05
-
Portion the batter. Using a large cookie scoop or a ¼-cup measuring cup, divide the batter evenly among the 12 prepared muffin cups. Each cup should be filled almost to the top. This generous filling is key to getting that lovely, oversized muffin top. For a little extra sparkle, you can sprinkle the tops with a bit of coarse sugar.06
-
The two-temperature bake. Place the muffin tin in the preheated 425°F (220°C) oven and bake for 5 minutes. Then, without opening the door, reduce the oven temperature to 350°F (175°C) and continue to bake for another 15-17 minutes. You’ll know they’re done when the tops are golden brown and a toothpick inserted into the center of a muffin comes out clean or with a few moist crumbs attached.07
-
Cool properly. Let the muffins cool in the pan for about 5 minutes. This allows them to set up enough to handle. Then, carefully transfer them to a wire rack to cool completely. This step prevents the bottoms from getting steamy and soggy. I know it’s hard to wait, but try to let them cool for at least 15 minutes before diving in—the flavor really settles in as they cool.08
Not what you're looking for?


