Beer can chicken breast brings all the fun and flavor of the classic method to a smaller, faster-cooking cut. The beer steams from within, keeping the white meat incredibly juicy while the skin turns crackling crisp. It’s a fantastic way to elevate a simple dinner into something special with minimal effort.
Love Beer Can Chicken Breast? So do we! If you're into Chicken Breast Recipes or curious about Chicken Thigh Recipes, you'll find plenty of inspiration below.


Why You’ll Love This Beer Can Chicken Breast
- Unbelievably juicy: Steam from the beer bastes the meat from the inside out.
- Total showstopper: Looks impressive and sparks conversation with minimal effort.
- Deep, complex flavor: Beer infuses subtle sweetness while the rub forms a savory crust.
- Hands-off cooking: Set it up on the grill or oven, then walk away until it’s done.
Ingredients & Tools
- 2 large bone-in, skin-on chicken breasts (about 1 to 1.2 lbs or 450-550 g each)
- 1 can (12 oz or 355 ml) of beer (lager, pilsner, or ale work best)
- 2 tbsp olive oil or avocado oil
- 1 tbsp brown sugar
- 2 tsp smoked paprika
- 1.5 tsp garlic powder
- 1.5 tsp onion powder
- 1 tsp kosher salt
- 1/2 tsp black pepper, freshly ground
- 1/2 tsp dried thyme or rosemary
Tools: A grill (gas or charcoal) or oven, a sturdy roasting pan or disposable aluminum pan, and instant-read thermometer.
Notes: Don’t skip the bone-in, skin-on part—the bone conducts heat for even cooking, and the skin crisps beautifully. A standard lager provides a clean, malty base.
Nutrition (per serving)
| Calories: | 380 kcal |
| Protein: | 48 g |
| Fat: | 18 g |
| Carbs: | 4 g |
| Fiber: | 1 g |
Serves: 2 | Prep Time: 10 minutes | Cook Time: 35-45 minutes | Total Time: 50-60 minutes
Before You Start: Tips & Ingredient Notes
- Why bone-in and skin-on? This is non-negotiable for the best results. The bone protects the meat from direct, aggressive heat, leading to a more tender and evenly cooked interior. The skin crisps up beautifully, locking in all the juices.
- What if I don’t drink the beer? No problem at all! You only use about half the can for cooking, and the alcohol completely evaporates, leaving behind just the flavor. A non-alcoholic beer will work perfectly fine here, too.
- Can I make my own spice rub? Absolutely, and I encourage it! The blend here is a classic starting point, but feel free to add a pinch of cayenne for heat, some cumin for earthiness, or even a little coffee rub for depth.
- Is the beer can stable? It can feel a little wobbly at first, but the chicken’s own weight and the two points of contact (the bottom of the breasts) create a surprisingly stable tripod. Just be gentle when moving it.
How to Make Beer Can Chicken Breast
Step 1: First, get your chicken ready. Pat the chicken breasts completely dry with paper towels. This is the single most important step for getting crispy skin—any moisture on the surface will just steam the skin instead of letting it crisp up. Use your fingers to gently loosen the skin from the meat over the breast, creating a little pocket. This isn’t essential, but it allows some of the seasoning to get directly onto the meat.
Step 2: Now, make and apply the rub. In a small bowl, mix together the brown sugar, smoked paprika, garlic powder, onion powder, salt, pepper, and dried thyme. Drizzle the olive oil over the chicken breasts and rub it all over, making sure to get some under the loosened skin. Then, generously sprinkle the spice rub onto all sides of the chicken, massaging it into the skin and into the crevices. Let it sit for 10-15 minutes while you preheat your grill or oven.
Step 3: Prepare the “beer can stand.” Preheat your grill for indirect medium heat (about 375°F/190°C) or your oven to the same temperature. Open your can of beer and pour out (or drink!) about half of it. You can also add a clove of crushed garlic, a sprig of fresh herbs, or a teaspoon of your dry rub directly into the beer can for an extra flavor boost.
Step 4: It’s assembly time! Carefully lower one chicken breast onto the beer can, cavity-side down, so the can is inserted and holding the breast upright. The two bottom ends of the breast and the can itself should form a stable tripod. Place this setup in the center of a roasting pan if using an oven, or directly on the grill grates over indirect heat.
Step 5: Time to cook. Close the grill lid or oven door and let the chicken roast. You’ll start to smell that amazing aroma after about 20 minutes. The chicken is done when the skin is a deep golden brown and crispy, and an instant-read thermometer inserted into the thickest part of the breast (without touching the bone) reads 165°F (74°C). This usually takes 35 to 45 minutes.
Step 6: The grand finale: resting. This step is crucial, so don’t rush it! Using tongs (and maybe an oven mitt for stability), very carefully lift the entire chicken-and-can contraption and place it on a cutting board. Let it rest for a full 10 minutes. The beer will be incredibly hot, so just leave it as is. This allows the juices to redistribute throughout the meat, ensuring every single bite is moist.
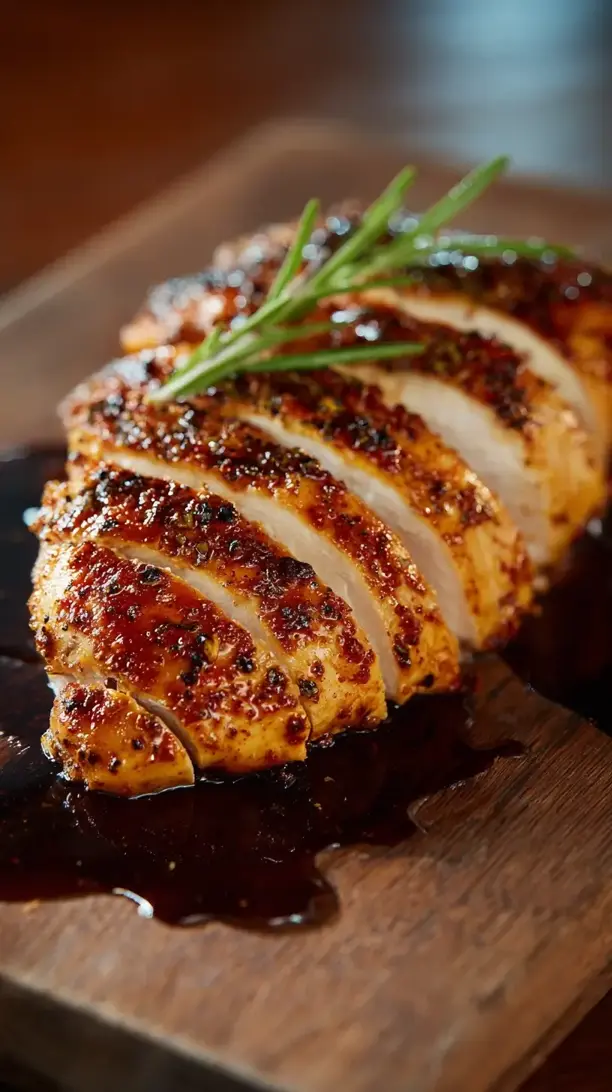
Step 7: Carefully remove the chicken from the can. Hold the base of the chicken breast with tongs and gently twist and lift it off the can. Be cautious, as hot steam and liquid might escape. Discard the beer can and its contents. Carve the chicken and serve immediately, spooning any accumulated juices from the pan over the top.
Storage & Freshness Guide
- Fridge: Store leftovers in an airtight container for up to 3 days.
- Freezer: Wrap tightly and freeze for up to 3 months. Thaw in fridge before reheating.
- Reviving: Reheat in a 350°F oven until warm to restore crispness.
Serving Suggestions
Complementary Dishes
- Classic Creamy Coleslaw — The cool, crunchy, and slightly tangy slaw provides a fantastic textural and temperature contrast to the warm, rich chicken.
- Grilled Corn on the Cob — Smear it with chili-lime butter for a sweet and smoky side that matches the backyard BBQ vibe perfectly.
- Garlic & Herb Smashed Potatoes — Crispy on the outside and fluffy within, they’re the ideal vehicle for sopping up any of the delicious chicken juices.
Drinks
- A Crisp Pilsner — It’s the perfect pairing, echoing the flavors used in the cooking process and cleansing the palate with its refreshing carbonation.
- Smoky Mezcal Paloma — The smokiness of the mezcal complements the paprika rub, while the grapefruit adds a bright, citrusy zing that cuts through the richness.
Something Sweet
- Grilled Peach Sundaes — Halved peaches grilled until caramelized, then topped with a scoop of vanilla ice cream. The warm, juicy fruit is a sublime ending.
- Simple Berry Cobbler — A warm, bubbly cobbler with a biscuit-like topping feels homey and satisfying, especially when served with a dollop of whipped cream.
Top Mistakes to Avoid
- Mistake: Not patting the chicken dry. You’ll end up with rubbery, pale skin instead of the crackling, golden-brown crust you’re after. Moisture is the enemy of crispiness here.
- Mistake: Rushing the resting period. If you cut into the chicken right away, all those precious, painstakingly retained juices will just run out onto the cutting board, leaving the meat drier. Be patient!
- Mistake: Using a rub with too much sugar. A little brown sugar is great for color and a hint of caramelization, but too much will cause the skin to burn long before the inside is cooked through.
- Mistake: Not using a thermometer. Guessing doneness is a surefire way to end up with either undercooked or overcooked chicken. An instant-read thermometer is your best friend for perfect results every single time.
Expert Tips
- Tip: Brine your chicken breasts for ultimate juiciness. For an extra layer of insurance against dryness, soak the chicken in a simple brine (1/4 cup salt dissolved in 4 cups water) for 2-4 hours in the fridge before patting dry and seasoning. It makes the meat incredibly flavorful and moist.
- Tip: Create a flavor-infused beer base. Before placing the chicken, add extra aromatics to the beer can. A smashed garlic clove, a few slices of onion, a sprig of fresh rosemary, or even a strip of lemon zest will steam up and perfume the meat from the inside.
- Tip: Get creative with your “can.” While a beer can is classic, you can use a sturdy jar or a special ceramic chicken roaster. Just fill it about halfway with beer, broth, or even apple cider for a different flavor profile.
- Tip: Crisp the skin at the end. If the skin isn’t quite as crispy as you’d like after it hits the target temperature, carefully move it directly over the heat source (on the grill) or under the broiler (in the oven) for just 60-90 seconds, watching it like a hawk to prevent burning.
FAQs
Can I make beer can chicken breast in the oven?
Absolutely, and it works wonderfully! The method is exactly the same. Just preheat your oven to 375°F (190°C) and place the chicken-on-a-can in a roasting pan to catch any drips. The results are just as juicy and flavorful, though you might miss a little of the smokiness from the grill. It’s a perfect year-round option.
What’s the best beer to use?
You want a beer that’s fairly neutral and not too bitter or dark. A standard American lager or pilsner is perfect because it provides a mild, malty sweetness without overpowering the chicken. Avoid super hoppy IPAs or heavy stouts, as their strong, bitter flavors can become concentrated and unpleasant during cooking.
Is it safe to cook with a beer can?
When handled properly, yes. The key is to ensure the can is not coated with any BPA-containing liner (many modern cans are BPA-free). The internal temperature of the chicken is more than enough to kill any bacteria. The main safety concern is handling the hot can after cooking—always use tongs and oven mitts, and be mindful of hot steam when removing the chicken.
Can I use boneless, skinless chicken breasts?
I really wouldn’t recommend it. The bone acts as an insulator for gentle, even cooking, and the skin is vital for protecting the delicate meat and creating that signature crispy texture. Without them, the breast is much more likely to dry out and won’t stand upright properly on the can.
How do I know when the chicken is done?
The only way to know for sure is with an instant-read meat thermometer. Insert it into the thickest part of the breast, making sure not to touch the bone. When it reads 165°F (74°C), you’re good to go. The juices should also run clear, and the legs (if it had any!) would wiggle freely, but the thermometer is the most reliable guide.


Beer Can Chicken Breast
Make the juiciest Beer Can Chicken Breast with crispy skin using this easy recipe. Perfect for grilling or oven roasting. Get the simple steps now!
Ingredients
For the Ingredients
-
2 large bone-in, skin-on chicken breasts (about 1 to 1.2 lbs or 450-550 g each)
-
1 can beer (12 oz or 355 ml, lager, pilsner, or ale work best)
-
2 tbsp olive oil or avocado oil
-
1 tbsp brown sugar
-
2 tsp smoked paprika
-
1.5 tsp garlic powder
-
1.5 tsp onion powder
-
1 tsp kosher salt
-
0.5 tsp black pepper (freshly ground)
-
0.5 tsp dried thyme or rosemary
Instructions
-
First, get your chicken ready. Pat the chicken breasts completely dry with paper towels. This is the single most important step for getting crispy skin—any moisture on the surface will just steam the skin instead of letting it crisp up. Use your fingers to gently loosen the skin from the meat over the breast, creating a little pocket. This isn't essential, but it allows some of the seasoning to get directly onto the meat.01
-
Now, make and apply the rub. In a small bowl, mix together the brown sugar, smoked paprika, garlic powder, onion powder, salt, pepper, and dried thyme. Drizzle the olive oil over the chicken breasts and rub it all over, making sure to get some under the loosened skin. Then, generously sprinkle the spice rub onto all sides of the chicken, massaging it into the skin and into the crevices. Let it sit for 10–15 minutes while you preheat your grill or oven.02
-
Prepare the "beer can stand." Preheat your grill for indirect medium heat (about 375°F/190°C) or your oven to the same temperature. Open your can of beer and pour out (or drink!) about half of it. You can also add a clove of crushed garlic, a sprig of fresh herbs, or a teaspoon of your dry rub directly into the beer can for an extra flavor boost.03
-
It's assembly time! Carefully lower one chicken breast onto the beer can, cavity-side down, so the can is inserted and holding the breast upright. The two bottom ends of the breast and the can itself should form a stable tripod. Place this setup in the center of a roasting pan if using an oven, or directly on the grill grates over indirect heat.04
-
Time to cook. Close the grill lid or oven door and let the chicken roast. You’ll start to smell that amazing aroma after about 20 minutes. The chicken is done when the skin is a deep golden brown and crispy, and an instant-read thermometer inserted into the thickest part of the breast (without touching the bone) reads 165°F (74°C). This usually takes 35 to 45 minutes.05
-
The grand finale: resting. This step is crucial, so don't rush it! Using tongs (and maybe an oven mitt for stability), very carefully lift the entire chicken-and-can contraption and place it on a cutting board. Let it rest for a full 10 minutes. The beer will be incredibly hot, so just leave it as is. This allows the juices to redistribute throughout the meat, ensuring every single bite is moist.06
-
Carefully remove the chicken from the can. Hold the base of the chicken breast with tongs and gently twist and lift it off the can. Be cautious, as hot steam and liquid might escape. Discard the beer can and its contents. Carve the chicken and serve immediately, spooning any accumulated juices from the pan over the top.07
Not what you're looking for?


