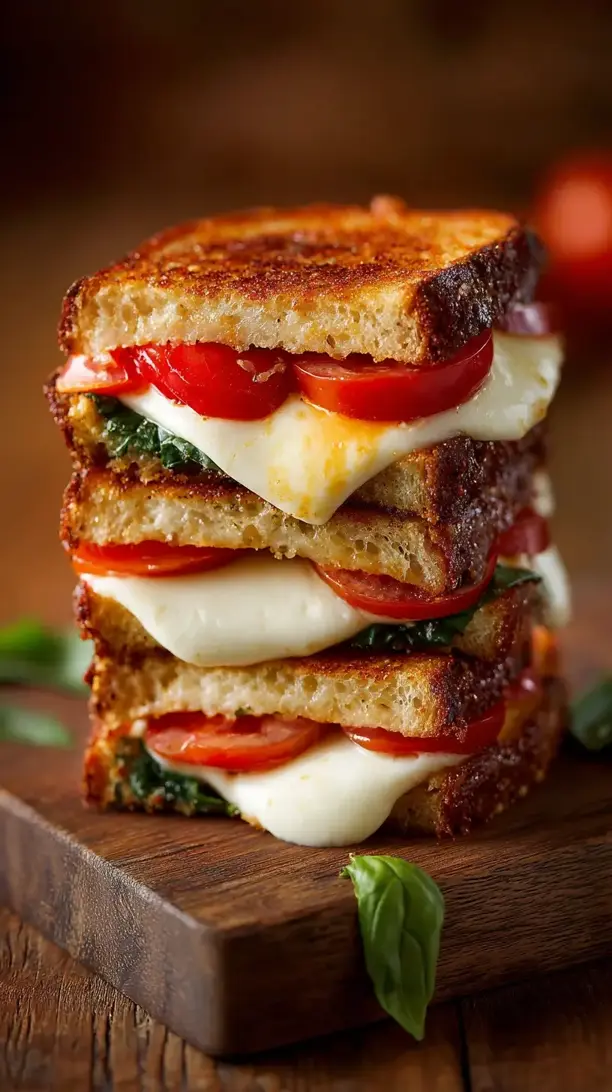
This Caprese Grilled Cheese transforms the classic salad into a warm, melty sandwich. It’s a quick, satisfying meal that feels both comforting and fresh. You’ll love this elevated grilled cheese for its perfect combination of juicy tomato, fresh mozzarella, and basil.
Nothing beats a great Caprese Grilled Cheese. Whether you're a fan of Dinner Ideas or want to try something from our Christmas Cookie selection, keep scrolling!


Why You’ll Love This Caprese Grilled Cheese
- Quick & satisfying: Ready in 15 minutes for ultimate comfort.
- Dreamy textures: Crispy bread, stretchy cheese, juicy tomato, and fresh basil.
- Endlessly adaptable: Easy to customize with pesto, balsamic, or avocado.
- Fancy without effort: Impressive enough for guests, simple enough for any day.
Ingredients & Tools
- 4 slices of good-quality sourdough or artisan bread
- 8 oz fresh mozzarella cheese, sliced
- 1 large ripe tomato, sliced
- 1/4 cup fresh basil leaves
- 2 tbsp unsalted butter, softened
- 1 tbsp extra virgin olive oil
- 1/4 tsp garlic powder (optional)
- Salt and black pepper to taste
Tools: A large skillet or griddle, spatula
Notes: Quality ingredients shine here—use fresh mozzarella and ripe, in-season tomatoes. Choose sturdy bread to prevent sogginess.
Nutrition (per serving)
| Calories: | 520 kcal |
| Protein: | 24 g |
| Fat: | 28 g |
| Carbs: | 42 g |
| Fiber: | 3 g |
Serves: 2 | Prep Time: 5 minutes | Cook Time: 10 minutes | Total Time: 15 minutes
Before You Start: Tips & Ingredient Notes
- Get your mozzarella right. You want fresh mozzarella, the kind that comes packed in water. It has a higher moisture content than the low-moisture, block-style cheese, which gives you that incredible, luxurious melt. Pat the slices dry with a paper towel so your bread doesn’t get wet.
- Don’t forget to season your tomatoes. A little sprinkle of salt and pepper on the tomato slices before they go into the sandwich does wonders. It draws out some of their natural juices and intensifies their flavor, making every bite more vibrant.
- Butter vs. Mayonnaise for toasting? I’m a butter purist for this recipe—it gives a richer, more classic flavor and a beautiful golden color. But if you’re in a rush, mayonnaise spreads easily straight from the jar and also creates a fantastically crisp crust. You really can’t go wrong with either.
- Choose your bread wisely. A sturdy, thick-sliced bread is non-negotiable. Sourdough is my top pick for its tangy flavor and robust structure, but a good country white or a hearty multigrain works beautifully too. Just avoid anything too thin or soft that might tear or become soggy.
How to Make Caprese Grilled Cheese
Step 1: Start by prepping all your ingredients. Slice your tomato into 1/4-inch thick rounds and give them a light seasoning with salt and pepper. Slice your fresh mozzarella into similar thickness—you want even layers for consistent melting. Gently wash and pat dry your basil leaves. Having everything ready to go makes the assembly process smooth and quick.
Step 2: Now, assemble your sandwiches. Lay out two slices of bread. Layer the mozzarella slices on one side, followed by the seasoned tomato slices, and then a generous handful of fresh basil leaves. Top with the second slice of bread. Press down gently to help everything hold together.
Step 3: It’s time to butter up. Spread the softened butter evenly on the outside of each sandwich—on one side of each slice of bread. You want a nice, thin, even layer. This is what’s going to create that iconic, crispy, golden-brown crust. For an extra flavor boost, you can mix a little garlic powder into the butter before spreading.
Step 4: Heat your skillet over medium-low heat. Yes, medium-low! This is the secret to a perfect grilled cheese. You want the heat gentle enough to melt the cheese thoroughly without burning the bread. Add a tiny drizzle of olive oil to the pan—this helps the butter and gives an even crispier finish.
Step 5: Carefully place your sandwiches in the preheated skillet. Cook for about 3-4 minutes, until the bottom is a deep golden brown and beautifully crisp. You’ll start to smell that wonderful, buttery aroma. Don’t be tempted to press down on the sandwich with your spatula—this can squeeze out the precious melted cheese!
Step 6: Now for the flip. Carefully turn the sandwiches over. They should feel sturdy. Cook for another 3-4 minutes on the second side. If you’re worried the cheese isn’t melting fast enough, you can cover the skillet with a lid for a minute or two to trap the heat and speed up the melting process. You’re looking for that same gorgeous golden color on the other side.
Step 7: The final test for doneness. Lift a corner and peek inside—the cheese should be completely melted and gloriously stretchy, and the tomatoes should be warmed through. If you see unmelted cheese, just give it another minute. When they’re perfect, transfer the sandwiches to a cutting board.
Step 8: Let them rest for just a minute before slicing. I know it’s hard to wait, but this allows the cheese to set slightly so it doesn’t all ooze out the second you cut into it. Then, slice diagonally—because it just tastes better that way—and serve immediately.
Storage & Freshness Guide
- Fridge: Store assembled uncooked sandwiches wrapped tightly in plastic for up to 1 day.
- Freezer: Not recommended; texture of tomatoes and bread suffers.
- Reviving: Reheat in a toaster oven or air fryer to re-crisp the bread.
Serving Suggestions
Complementary Dishes
- A simple arugula salad — The peppery bite of arugula dressed with just a squeeze of lemon juice and a drizzle of olive oil cuts through the richness of the sandwich beautifully.
- Creamy tomato soup — This is the ultimate classic pairing for a reason. The tangy, creamy soup is a perfect dip for the crispy, cheesy sandwich, creating the ultimate comfort food experience.
- Oven-baked sweet potato fries — Their natural sweetness provides a lovely contrast to the savory, herby notes of the sandwich, and they’re a healthier alternative to regular fries.
Drinks
- A crisp Italian Pinot Grigio — Its light, citrusy notes complement the fresh basil and tomato without overpowering the delicate flavors of the mozzarella.
- Sparkling water with lemon — The bubbles and acidity are incredibly refreshing and help cleanse the palate between those wonderfully rich, cheesy bites.
- An iced herbal tea — Think peppermint or a lemon verbena; its cool, refreshing quality balances the warm, gooey interior of the sandwich perfectly.
Something Sweet
- Lemon sorbet — After a rich and savory meal, a scoop of bright, tart lemon sorbet is the perfect palate cleanser and a light, refreshing way to end.
- Dark chocolate almond biscotti — The bitter notes of dark chocolate and the crunch of the biscotti provide a sophisticated, not-too-sweet finish that doesn’t feel heavy.
- Fresh berries with a dollop of whipped cream — Simple, fresh, and effortless. The natural sweetness and slight acidity of the berries are a delightful contrast to the meal you just enjoyed.
Top Mistakes to Avoid
- Mistake: Using too high heat. Impatience is the enemy of a good grilled cheese. High heat will give you burnt, blackened bread on the outside while the cheese inside remains stubbornly unmelted. Low and slow is the only way to go.
- Mistake: Overstuffing the sandwich. It’s tempting to load it up with extra cheese and tomatoes, but this makes the sandwich difficult to flip and can lead to a cold center. A balanced, single layer of each ingredient is all you need.
- Mistake: Using wet tomatoes. If your tomato slices are too juicy or you don’t pat your mozzarella dry, you’re introducing excess moisture that will steam the bread from the inside, resulting in a sad, soggy sandwich instead of a crisp one.
- Mistake: Constantly pressing down with the spatula. I’ve messed this up before too, thinking it would help the cheese melt. All it really does is push the filling out and compress the bread, preventing that light, airy texture we’re after.
Expert Tips
- Tip: Grate your own cheese from a block for a different experience. While fresh mozzarella is classic, sometimes using low-moisture, whole-milk mozzarella that you grate yourself gives you an even more intense, stringy pull and a stronger cheese flavor. It’s a great alternative if that’s what you have on hand.
- Tip: Add a flavor-packed spread. Before assembling, try spreading a thin layer of basil pesto or sun-dried tomato paste on the inside of the bread. It adds a huge punch of flavor and an extra layer of moisture that keeps the sandwich interesting.
- Tip: Use a lid to create a mini-oven. If your cheese isn’t melting as quickly as your bread is browning, simply place a lid over the skillet for the last minute or two of cooking. This traps the heat and steam, melting the cheese perfectly without further browning the bread.
- Tip: Let it rest before cutting. I know, the wait is agony. But giving your grilled cheese just 60 seconds off the heat allows the molten cheese to set slightly. This means when you cut it, you get a clean, beautiful slice instead of a cheesy landslide.
FAQs
Can I make this Caprese Grilled Cheese ahead of time?
You can assemble the sandwiches ahead of time, wrap them tightly in plastic wrap, and keep them in the fridge for a few hours before cooking. However, I don’t recommend cooking them in advance. Grilled cheese is truly at its best when eaten immediately—that contrast between the hot, melty inside and the crisp, buttery outside is the whole point. If you must reheat, a toaster oven or air fryer will work better than a microwave to re-crisp the bread.
What’s the best bread to use for grilled cheese?
You want a bread with a sturdy crust and a soft, but not too airy, crumb. Sourdough is my absolute favorite for its tangy flavor and robust structure. A good country white, brioche (for a richer sandwich), or a hearty multigrain also work wonderfully. The key is that it needs to be strong enough to hold the filling without falling apart and thick enough to not get soggy.
My cheese isn’t melting! What did I do wrong?
This almost always comes down to heat. If the heat is too high, the bread burns before the cheese has a chance to melt. Make sure you’re cooking over a steady medium-low heat. Also, check your cheese—fresh mozzarella should melt beautifully, but if it’s straight from the fridge, it will take longer. Letting it sit out for 10-15 minutes before assembling can help. Using a lid to trap heat, as mentioned in the tips, is a great fix.
Can I add meat to this recipe, like prosciutto?
Absolutely! A couple of slices of thinly sliced prosciutto would be a fantastic addition, adding a salty, savory depth that pairs wonderfully with the other ingredients. Just layer it in with the tomatoes and basil. You could also use cooked, crumbled bacon or even some sliced grilled chicken for a more substantial meal. The recipe is very forgiving and adaptable.
How do I prevent the sandwich from getting soggy?
Sogginess is usually caused by excess moisture. The two main culprits are wet tomatoes and moist cheese. Always pat your fresh mozzarella slices dry with a paper towel. For the tomatoes, use a serrated knife to slice them cleanly and, if they’re particularly watery, you can even lay them on a paper towel for a minute to absorb some juice before assembling. Also, don’t skip salting the tomatoes—it enhances flavor and can actually help draw out some moisture.


Caprese Grilled Cheese
Make the best Caprese Grilled Cheese in just 15 minutes! This easy recipe combines fresh mozzarella, tomato, and basil for a gourmet twist. Get the recipe now!
Ingredients
For the Ingredients
-
4 slices good-quality sourdough or artisan bread
-
8 oz fresh mozzarella cheese (sliced)
-
1 large ripe tomato (sliced)
-
1/4 cup fresh basil leaves
-
2 tbsp unsalted butter (softened)
-
1 tbsp extra virgin olive oil
-
1/4 tsp garlic powder (optional)
-
Salt and black pepper (to taste)
Instructions
-
Start by prepping all your ingredients. Slice your tomato into 1/4-inch thick rounds and give them a light seasoning with salt and pepper. Slice your fresh mozzarella into similar thickness—you want even layers for consistent melting. Gently wash and pat dry your basil leaves. Having everything ready to go makes the assembly process smooth and quick.01
-
Now, assemble your sandwiches. Lay out two slices of bread. Layer the mozzarella slices on one side, followed by the seasoned tomato slices, and then a generous handful of fresh basil leaves. Top with the second slice of bread. Press down gently to help everything hold together.02
-
It’s time to butter up. Spread the softened butter evenly on the outside of each sandwich—on one side of each slice of bread. You want a nice, thin, even layer. This is what’s going to create that iconic, crispy, golden-brown crust. For an extra flavor boost, you can mix a little garlic powder into the butter before spreading.03
-
Heat your skillet over medium-low heat. Yes, medium-low! This is the secret to a perfect grilled cheese. You want the heat gentle enough to melt the cheese thoroughly without burning the bread. Add a tiny drizzle of olive oil to the pan—this helps the butter and gives an even crispier finish.04
-
Carefully place your sandwiches in the preheated skillet. Cook for about 3-4 minutes, until the bottom is a deep golden brown and beautifully crisp. You’ll start to smell that wonderful, buttery aroma. Don’t be tempted to press down on the sandwich with your spatula—this can squeeze out the precious melted cheese!05
-
Now for the flip. Carefully turn the sandwiches over. They should feel sturdy. Cook for another 3-4 minutes on the second side. If you’re worried the cheese isn’t melting fast enough, you can cover the skillet with a lid for a minute or two to trap the heat and speed up the melting process. You’re looking for that same gorgeous golden color on the other side.06
-
The final test for doneness. Lift a corner and peek inside—the cheese should be completely melted and gloriously stretchy, and the tomatoes should be warmed through. If you see unmelted cheese, just give it another minute. When they’re perfect, transfer the sandwiches to a cutting board.07
-
Let them rest for just a minute before slicing. I know it’s hard to wait, but this allows the cheese to set slightly so it doesn’t all ooze out the second you cut into it. Then, slice diagonally—because it just tastes better that way—and serve immediately.08
Not what you're looking for?


