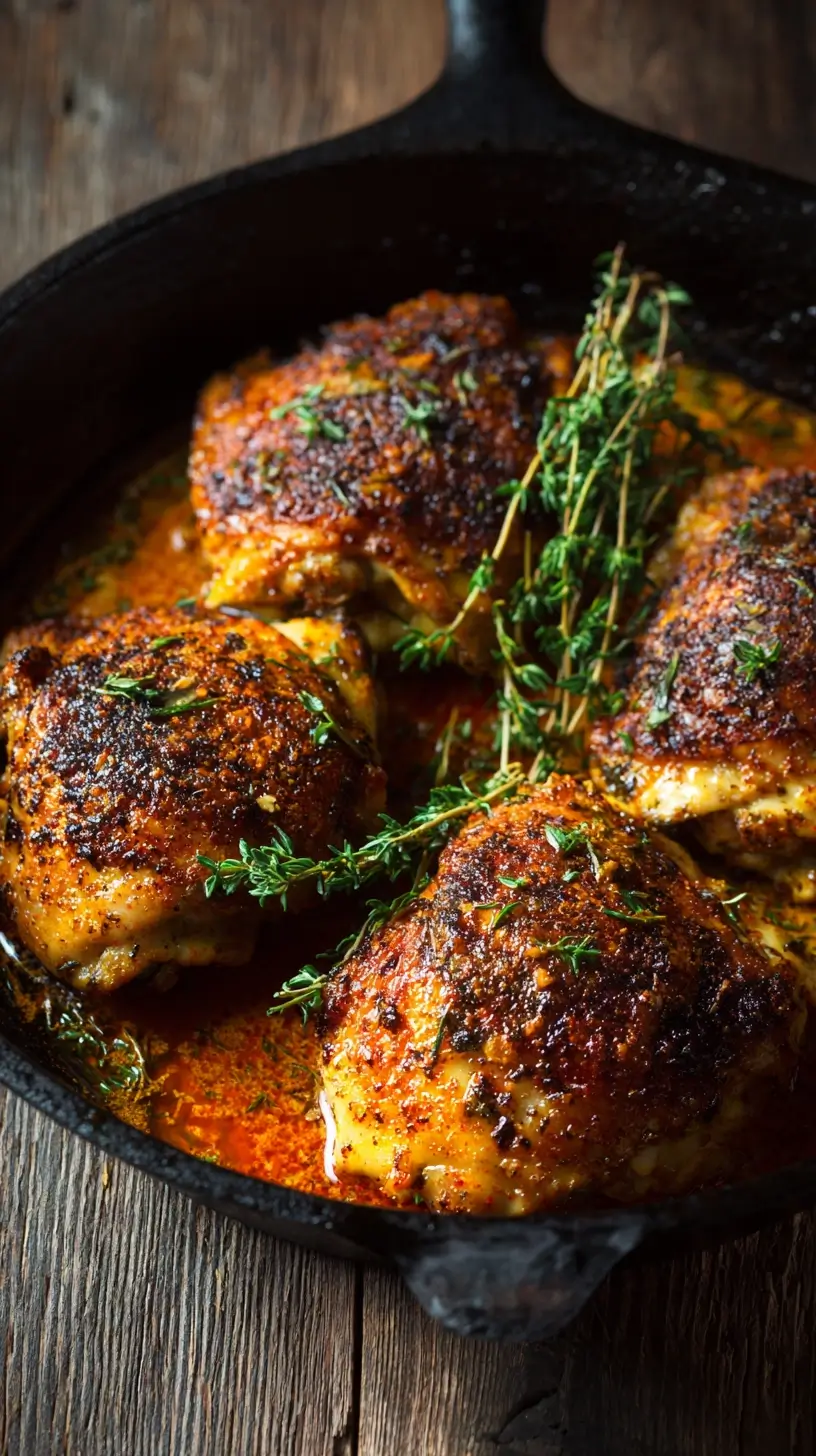
There’s something magical about cooking chicken thighs in a cast iron skillet. You get incredibly crispy skin and impossibly juicy, tender meat with minimal effort. These Cast Iron Chicken Thighs are a weeknight hero that feel far more special than the work required.
Nothing beats a great Cast Iron Chicken Thighs. Whether you're a fan of Chicken Thigh Recipes or want to try something from our Desserts selection, keep scrolling!


Why You’ll Love This Cast Iron Chicken Thighs
- Crispy Skin: The cast iron skillet creates shatteringly crisp, golden skin.
- Juicy Meat: Chicken thighs stay moist and flavorful every time.
- One-Pan Wonder: Sear the chicken and make a pan sauce in the same skillet.
- Versatile Canvas: Perfect with simple salt and pepper or global spice rubs.
Ingredients & Tools
- 4-6 bone-in, skin-on chicken thighs (about 1.5 lbs / 680 g)
- 1 tbsp olive oil or avocado oil
- 1 tsp kosher salt
- 1/2 tsp freshly ground black pepper
- 1 tsp smoked paprika (optional, for color and depth)
- 2 cloves garlic, lightly smashed
- 2-3 sprigs fresh thyme or rosemary (optional)
- 2 tbsp unsalted butter (for basting, optional but highly recommended)
Tools: A 10-inch or 12-inch cast iron skillet, tongs, an instant-read thermometer.
Notes: The quality of your chicken thighs really matters here—look for ones with plump, evenly sized pieces and skin that isn’t torn. The bone and skin are your secret weapons for flavor and moisture, so don’t be tempted to use boneless, skinless for this particular method.
Nutrition (per serving)
| Calories: | 320 kcal |
| Protein: | 28 g |
| Fat: | 22 g |
| Carbs: | 1 g |
| Fiber: | 0 g |
Serves: 4 | Prep Time: 5 minutes | Cook Time: 25 minutes | Total Time: 30 minutes
Before You Start: Tips & Ingredient Notes
- Pat that skin DRY. This is the single most important step for crispy skin. Use paper towels to thoroughly pat the skin dry. Any moisture will steam the skin instead of letting it crisp up beautifully.
- Don’t be shy with the salt. Season your chicken generously and, if you have time, do it at least 30 minutes before cooking. Salting ahead draws out moisture, which then gets reabsorbed, seasoning the meat deeply and helping the skin dry out even more.
- Let the chicken come to room temp. Taking the chicken out of the fridge 20-30 minutes before cooking helps it cook more evenly. A cold chicken thigh will seize up in the hot pan and can cook unevenly.
- Preheat your skillet properly. A properly preheated cast iron is non-negotiable. You want it hot enough that the chicken sizzles aggressively the moment it touches the surface. This immediately starts the crisping process and prevents sticking.
How to Make Cast Iron Chicken Thighs
Step 1: Start by preparing your chicken. Use several paper towels to pat the chicken thighs completely dry, paying special attention to the skin side. This is your crispy-skin secret weapon. Place them on a plate and season both sides very generously with the salt, pepper, and smoked paprika if you’re using it. Let them sit while you preheat the pan.
Step 2: Place your cast iron skillet over medium-high heat and let it preheat for a good 4-5 minutes. You’ll know it’s ready when a few drops of water flicked onto the surface dance and evaporate instantly. Add the oil and swirl it around—it should shimmer and look thin almost immediately.
Step 3: Carefully place the chicken thighs in the hot skillet, skin-side down. You should hear a confident, steady sizzle. Arrange them so they aren’t crowded; you might need to work in batches. Now, this is crucial: resist the urge to move them! Let them cook undisturbed for 12-15 minutes. This allows the fat to render and the skin to become deeply golden and crisp.
Step 4: After the initial sear, you can peek underneath. The skin should be a beautiful mahogany brown and should release from the pan easily. If it sticks, it needs a little more time. Once perfectly crisp, flip the thighs over using tongs. They will now be skin-side up. Add the smashed garlic cloves and herb sprigs to the fat in the pan around the chicken.
Step 5: Reduce the heat to medium and continue to cook for another 8-10 minutes. If you’re basting, add the butter to the pan now. Tilt the skillet slightly and, using a spoon, continuously scoop the hot, fragrant butter and pan drippings over the top of the chicken. This adds an incredible richness and helps the meat cook evenly.
Step 6: The best way to know when the chicken is done is with an instant-read thermometer. Insert it into the thickest part of the thigh, avoiding the bone. You’re looking for an internal temperature of 165°F (74°C). The juices should also run clear. Once done, transfer the chicken to a clean plate or cutting board to rest for at least 5 minutes. This allows the juices to redistribute throughout the meat, ensuring every bite is succulent.
Storage & Freshness Guide
- Fridge: Store leftovers in an airtight container for up to 3 days.
- Freezer: Freeze in a single layer then transfer to a freezer bag for up to 3 months.
- Reviving: Reheat in a 375°F oven or toaster oven until warm to restore crispiness.
Serving Suggestions
Complementary Dishes
- Creamy Parmesan Polenta — The soft, creamy texture is the perfect vehicle for sopping up the delicious pan juices. It’s a comforting and elegant combination that feels restaurant-quality.
- Simple Arugula Salad with Lemon Vinaigrette — The peppery arugula and bright, acidic dressing cut through the richness of the chicken beautifully, balancing the whole plate.
- Garlicky Sautéed Greens — Sauté kale, spinach, or Swiss chard right in the same pan after the chicken is done, wilting them in all those flavorful chicken drippings and bits.
Drinks
- A Crisp, Unoaked Chardonnay — The bright acidity and citrus notes complement the savory, fatty chicken without overpowering it. It’s a classic pairing for a reason.
- A Pale Ale or Lager — The slight bitterness and carbonation are fantastic for cutting through the richness and cleansing the palate between bites of that crispy skin.
Something Sweet
- Lemon Sorbet — After a rich and savory meal, a few scoops of bright, tart lemon sorbet are incredibly refreshing and light. It’s the perfect palate cleanser.
- Dark Chocolate Pots de Crème — For a more decadent finish, the deep, bittersweet notes of dark chocolate provide a lovely contrast to the savory, herby notes of the main course.
Top Mistakes to Avoid
- Moving the chicken too soon. This is the biggest culprit for torn, sticky skin. You need to let it sear undisturbed to form a crust that will naturally release from the pan. I’ve messed this up before too, and patience is the only cure.
- Using a cold pan. If your skillet isn’t properly preheated, the chicken will start to steam and boil in its own juices instead of searing. You’ll end up with pale, rubbery skin and less flavor.
- Crowding the pan. If you pack too many thighs into the skillet, the temperature will drop dramatically, and the chicken will steam instead of sear. Give each piece some breathing room for the best results.
- Skipping the rest time. Slicing into the chicken right away will cause all those precious, flavorful juices to run out onto the cutting board, leaving you with drier meat. Let it rest—it’s worth the wait.
Expert Tips
- Tip: For extra-crispy skin, try a light dusting. After patting the chicken dry, you can sprinkle a very small amount (about 1/2 tsp total) of cornstarch or baking powder over the skin. This helps draw out moisture and promotes browning and blistering for an even more phenomenal crunch.
- Tip: Make a quick pan sauce. After removing the chicken, pour off most of the fat, leaving the browned bits. Add a splash of white wine or chicken broth to deglaze the pan, scraping up all the fond. Let it reduce by half, then swirl in a couple tablespoons of cold butter off the heat for a silky, incredible sauce.
- Tip: Use the rendered fat. Don’t discard the golden fat left in the pan! It’s liquid gold. Strain it and use it to roast potatoes, fry eggs, or sauté vegetables. It’s packed with chicken flavor and is a fantastic cooking fat.
- Tip: Finish in the oven for larger batches. If you’re cooking a lot of thighs and don’t want to crowd the pan, you can sear them skin-side down on the stovetop and then flip and transfer the entire skillet to a 400°F (200°C) oven to finish cooking through, about 10-15 minutes.
FAQs
Can I use boneless, skinless chicken thighs?
You absolutely can, but the method and result will be different. You’ll lose the incredible crispy skin, which is a hallmark of this recipe. Boneless thighs will cook much faster, so reduce the cooking time significantly—about 4-5 minutes per side. They are still delicious and juicy, but you’re making a different, quicker weeknight dish.
Why is my chicken skin sticking to the pan?
This almost always means the pan wasn’t hot enough when you added the chicken, or you moved the chicken too early. The skin needs time to form a crust that will release naturally. If it’s sticking, just let it cook for another minute or two and try again. A properly preheated and seasoned cast iron skillet should release the chicken easily when it’s ready.
How do I know when the chicken is done without a thermometer?
While a thermometer is the most reliable method, you can also pierce the thigh at its thickest point with a knife or skewer. The juices that run out should be completely clear, not pink or red. Additionally, the meat should feel firm to the touch, and the leg bone might wiggle a bit more freely when it’s cooked through.
Can I make this ahead of time?
You can prep the chicken by drying and seasoning it up to a day in advance, keeping it covered in the fridge. This actually helps dry the skin out even more! However, for the best texture, cook it just before serving. Reheated crispy skin will inevitably soften, though the meat will still taste great.
My chicken is burning before it cooks through. What happened?
This usually means your heat is too high. While you need a hot pan to start, if the skin is browning too quickly, the heat is likely excessive. After the initial sear, don’t be afraid to reduce the heat to medium or even medium-low to allow the inside to cook through without burning the exterior. Cast iron holds heat incredibly well, so it often requires less heat than you think.


Cast Iron Chicken Thighs
Learn how to make perfect Cast Iron Chicken Thighs with crispy skin and juicy meat. This easy one-pan recipe is ready in 30 minutes. Get the recipe now!
Ingredients
For the Ingredients & Tools
-
4-6 bone-in, skin-on chicken thighs (about 1.5 lbs / 680 g)
-
1 tbsp olive oil or avocado oil
-
1 tsp kosher salt
-
1/2 tsp freshly ground black pepper
-
1 tsp smoked paprika (optional, for color and depth)
-
2 cloves garlic (lightly smashed)
-
2-3 sprigs fresh thyme or rosemary (optional)
-
2 tbsp unsalted butter (for basting, optional but highly recommended)
Instructions
-
Start by preparing your chicken. Use several paper towels to pat the chicken thighs completely dry, paying special attention to the skin side. This is your crispy-skin secret weapon. Place them on a plate and season both sides very generously with the salt, pepper, and smoked paprika if you’re using it. Let them sit while you preheat the pan.01
-
Place your cast iron skillet over medium-high heat and let it preheat for a good 4-5 minutes. You’ll know it’s ready when a few drops of water flicked onto the surface dance and evaporate instantly. Add the oil and swirl it around—it should shimmer and look thin almost immediately.02
-
Carefully place the chicken thighs in the hot skillet, skin-side down. You should hear a confident, steady sizzle. Arrange them so they aren’t crowded; you might need to work in batches. Now, this is crucial: resist the urge to move them! Let them cook undisturbed for 12-15 minutes. This allows the fat to render and the skin to become deeply golden and crisp.03
-
After the initial sear, you can peek underneath. The skin should be a beautiful mahogany brown and should release from the pan easily. If it sticks, it needs a little more time. Once perfectly crisp, flip the thighs over using tongs. They will now be skin-side up. Add the smashed garlic cloves and herb sprigs to the fat in the pan around the chicken.04
-
Reduce the heat to medium and continue to cook for another 8-10 minutes. If you’re basting, add the butter to the pan now. Tilt the skillet slightly and, using a spoon, continuously scoop the hot, fragrant butter and pan drippings over the top of the chicken. This adds an incredible richness and helps the meat cook evenly.05
-
The best way to know when the chicken is done is with an instant-read thermometer. Insert it into the thickest part of the thigh, avoiding the bone. You’re looking for an internal temperature of 165°F (74°C). The juices should also run clear. Once done, transfer the chicken to a clean plate or cutting board to rest for at least 5 minutes. This allows the juices to redistribute throughout the meat, ensuring every bite is succulent.06
Not what you're looking for?


