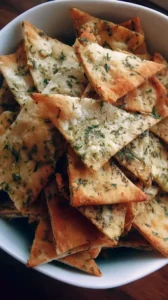
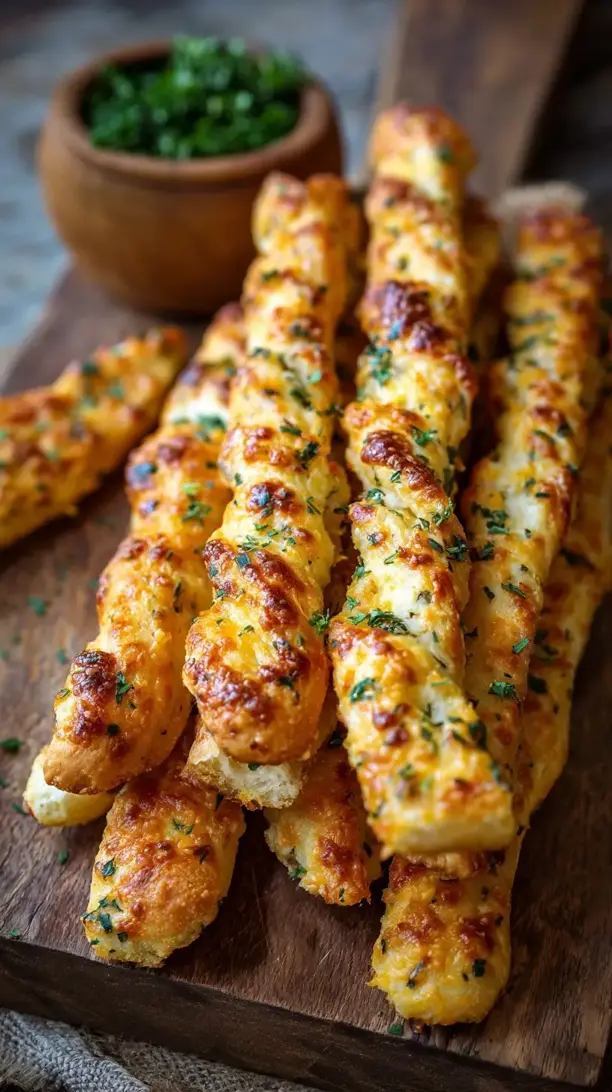
There’s something incredibly comforting about the smell of freshly baked Cheddar Herb Breadsticks wafting through your kitchen. They’re wonderfully soft and chewy on the inside with a golden, crisp exterior and a savory, cheesy pull. This recipe is surprisingly simple and delivers a fun, dippable, and utterly irresistible treat.
Looking for Cheddar Herb Breadsticks inspiration? You'll love what we have! Explore more Savory Snacks recipes or discover our Chicken Recipes favorites.


Why You’ll Love This Cheddar Herb Breadsticks
- Savory & flavorful: Generous sharp cheddar and fresh herbs infuse every bite.
- Simple to make: Forgiving yeast dough with straightforward steps and huge payoff.
- Perfect texture: Soft, tender interior with a delicate, golden crust.
- Extremely versatile: Perfect with soup, salad, or as a party appetizer.
Ingredients & Tools
- 360 g all-purpose flour
- 7 g instant yeast (one standard packet)
- 1 ½ tsp granulated sugar
- 1 tsp fine sea salt
- 240 ml warm water (around 43°C/110°F)
- 2 tbsp olive oil, plus more for brushing
- 120 g sharp cheddar cheese, freshly grated
- 2 tbsp mixed fresh herbs, finely chopped (I use a combination of rosemary, thyme, and parsley)
- 1 large garlic clove, minced (optional, for extra savoriness)
- For topping: flaky sea salt and extra grated cheddar
Tools: A stand mixer with a dough hook is helpful but not essential (you can knead by hand!), a large mixing bowl, a baking sheet, and parchment paper.
Notes: The quality of your cheddar really matters here—since it’s a starring ingredient, a good, sharp block that you grate yourself will melt better and provide a much richer flavor than pre-shredded cheese. And those fresh herbs? They make all the difference, lending a brightness that dried herbs just can’t match.
Nutrition (per serving)
| Calories: | 180 kcal |
| Protein: | 6 g |
| Fat: | 7 g |
| Carbs: | 23 g |
| Fiber: | 1 g |
Serves: 10 | Prep Time: 20 minutes | Cook Time: 15 minutes | Total Time: 1 hour 35 minutes (includes rising)
Before You Start: Tips & Ingredient Notes
- Grate your own cheese. Pre-shredded cheese is coated with anti-caking agents like potato starch or cellulose, which can prevent it from melting smoothly into the dough. Taking a minute to grate a block of cheddar yourself ensures a gooey, uniform cheesy distribution and a much better texture.
- Get your water temperature right. The water for activating the yeast should feel warm to the touch, like a pleasant bath, but not hot. If it’s too hot, it can kill the yeast; too cold, and it won’t activate properly. A thermometer isn’t strictly necessary, but it can give you confidence if you’re new to baking with yeast.
- Use fresh herbs for the best flavor. While you can use dried in a pinch, the flavor will be more muted and earthy. Fresh rosemary and thyme provide a vibrant, aromatic punch that truly elevates these breadsticks from good to unforgettable. A little goes a long way!
- Don’t rush the rise. The first rise, or proof, is crucial for developing flavor and creating that light, airy texture. Let the dough sit in a warm, draft-free spot until it has truly doubled in size. This might take longer on a cool day, and that’s perfectly okay—patience is a key ingredient here.
How to Make Cheddar Herb Breadsticks
Step 1: Activate the Yeast. In the bowl of your stand mixer or a large mixing bowl, combine the warm water, sugar, and instant yeast. Give it a quick stir and let it sit for about 5-10 minutes. You’ll know it’s ready when the mixture becomes frothy and cloudy on top—this is the yeast waking up and getting ready to work its magic in your dough.
Step 2: Combine the Dry Ingredients. In a separate bowl, whisk together the flour and salt. This ensures the salt is evenly distributed throughout the flour, which helps regulate the yeast’s activity and guarantees consistent seasoning in every bite of your finished breadsticks.
Step 3: Make the Dough. Pour the olive oil into the yeast mixture. If you’re using a stand mixer, attach the dough hook and gradually add the flour mixture on low speed until a shaggy dough forms. If mixing by hand, use a wooden spoon. Once combined, increase the speed to medium (or turn the dough out onto a floured surface) and knead for 5-7 minutes. You’re looking for a smooth, slightly tacky but not sticky dough that springs back slowly when you poke it.
Step 4: Incorporate the Cheese and Herbs. Now for the fun part! Reduce the mixer speed to low (or continue kneading by hand) and gradually add the grated cheddar, fresh herbs, and minced garlic if using. It might feel like a lot to incorporate, but just keep kneading until the cheese and herbs are evenly distributed throughout the dough, creating lovely marbled streaks.
Step 5: First Rise. Shape the dough into a ball. Lightly oil the same mixing bowl you used (no need to wash it!), place the dough ball inside, and turn it over to coat it lightly in oil. Cover the bowl with a clean kitchen towel or plastic wrap and let it rise in a warm place for about 1 hour, or until doubled in size. A sunny spot on the counter or an oven with the light on works perfectly.
Step 6: Shape the Breadsticks. Once risen, punch the dough down gently to release the air. Turn it out onto a lightly floured surface. Using your hands or a rolling pin, shape and stretch the dough into a rough rectangle, about 10×12 inches in size. Using a pizza cutter or a sharp knife, cut the dough into roughly 1-inch wide strips. You should get about 10 strips.
Step 7: Second Rise and Preheat. Carefully transfer the strips to a parchment-lined baking sheet, leaving a little space between them as they will expand. Cover them loosely with the towel again and let them rest for 15-20 minutes while you preheat your oven to 220°C (425°F). This short rest allows the gluten to relax, ensuring your breadsticks bake up light and not tough.
Step 8: Bake to Golden Perfection. Just before baking, you can brush the tops of the breadsticks lightly with a bit more olive oil and sprinkle with flaky sea salt and extra cheddar if you like. Bake for 12-15 minutes, or until they are puffed, golden brown, and firm to the touch. Your kitchen will smell absolutely incredible.
Step 9: Cool and Serve. Remove the baking sheet from the oven and let the breadsticks cool on the pan for at least 5 minutes before serving. This brief cooling period helps them set and makes them easier to handle. They are best enjoyed warm, when the cheese is still wonderfully soft and stretchy.
Storage & Freshness Guide
- Fridge: Store cooled breadsticks in an airtight container for up to 3 days.
- Freezer: Freeze baked breadsticks in a single layer, then transfer to a freezer bag for up to 3 months.
- Reviving: Reheat in a toaster oven or conventional oven at 350°F for 5-7 minutes to restore crispness.
Serving Suggestions
Complementary Dishes
- A hearty tomato soup or stew — The ultimate comfort food pairing. These breadsticks are perfect for dipping and soaking up every last bit of a rich, brothy soup.
- A crisp, green garden salad — The savory, cheesy breadsticks provide a wonderful contrast to the fresh, acidic notes of a vinaigrette-dressed salad, making for a complete and satisfying meal.
- Your favorite pasta dish — Serve them alongside a bowl of spaghetti marinara or a creamy fettuccine Alfredo. They act as the perfect edible utensil for twirling pasta and add a delightful textural element.
Drinks
- A crisp, cold lager or pilsner — The carbonation and slight bitterness of the beer cut through the richness of the cheese beautifully, cleansing the palate between each delicious bite.
- A glass of unoaked Chardonnay — The bright acidity and citrus notes in the wine complement the herbal flavors in the breadsticks and balance the savory cheddar perfectly.
- Sparkling water with a lemon wedge — A non-alcoholic option that still provides a refreshing, palate-cleansing fizz that contrasts nicely with the soft, savory bread.
Something Sweet
- A simple fruit galette — The buttery, flaky pastry filled with seasonal fruit like apples or berries offers a sweet and slightly tart finish that feels just right after the savory main event.
- Dark chocolate truffles — A few pieces of rich, intense dark chocolate are a fantastic way to end the meal, providing a deep, bittersweet counterpoint to the herby, cheesy notes.
- Lemon sorbet — Its bright, clean, and refreshing citrus flavor is the perfect palate cleanser and provides a light, sweet ending that doesn’t feel too heavy.
Top Mistakes to Avoid
- Mistake: Using cold ingredients. Starting with cold water or cold cheese can slow down the yeast activation and make the dough harder to work with. Ensuring your water is warm and your ingredients are at room temperature helps the dough come together smoothly and rise properly.
- Mistake: Over-flouring the dough. It’s tempting to keep adding flour if the dough feels sticky, but resist! A slightly tacky dough is what you want for soft, tender breadsticks. Adding too much flour will make them dense and dry. I’ve messed this up before too, and the difference is noticeable.
- Mistake: Skipping the second rise. That short 15-minute rest after shaping is not just idle time. It allows the gluten to relax, which prevents the breadsticks from becoming tough and chewy. It also gives them a final puff, leading to a lighter final texture.
- Mistake: Overbaking. Keep a close eye on them in the final few minutes of baking. You want a golden-brown color, not a deep brown. Overbaking will dry them out and make the cheese taste bitter. They continue to cook a little from residual heat after coming out of the oven.
Expert Tips
- Tip: Add an extra flavor boost with infused oil. Before brushing the tops before baking, try warming your olive oil with a sprig of rosemary and a crushed garlic clove for a few minutes. Strain it and use this infused oil for an even deeper, more aromatic flavor.
- Tip: Twist them for a professional look. For that classic breadstick appearance, gently hold each end of a dough strip and twist it in opposite directions a few times before placing it on the baking sheet. This creates more surface area for a crispier exterior.
- Tip: Re-crisp leftovers perfectly. If you have leftovers (a rare occurrence in my house!), the best way to revive them is in a toaster oven or a conventional oven at 180°C (350°F) for 5-7 minutes. The microwave will make them soft and steamy.
- Tip: Experiment with your cheese blend. While sharp cheddar is fantastic, don’t be afraid to mix in a little Gruyère for nuttiness, or some pepper jack for a subtle kick. Just keep the total cheese quantity about the same for the best dough structure.
FAQs
Can I make the dough ahead of time?
Absolutely, you can! After the first rise, punch the dough down, wrap it tightly in plastic wrap, and store it in the refrigerator for up to 24 hours. When you’re ready to bake, let the dough sit at room temperature for about 30 minutes to take the chill off, then proceed with shaping and the second rise. The cold fermentation can actually develop even more flavor.
Can I freeze these breadsticks?
Yes, they freeze beautifully. Once the baked breadsticks have cooled completely, place them in a single layer on a baking sheet to freeze solid (this prevents them from sticking together), then transfer to a freezer bag for up to 3 months. To reheat, bake from frozen in a 190°C (375°F) oven for 8-12 minutes until warm and crisp.
My dough didn’t rise. What went wrong?
This is usually due to the yeast. Either the water was too hot and killed the yeast, or the yeast was old and no longer active. Always check the expiration date on your yeast, and make sure your water is just warm, not hot. If your kitchen is particularly cold, the rise will just take longer—try placing the bowl in a slightly warmed oven (turned off) with the light on.
Can I use dried herbs instead of fresh?
You can, but the flavor will be more subtle and earthy. The general rule is to use one-third the amount of dried herbs since they are more concentrated. So, for 2 tablespoons of fresh, you would use about 2 teaspoons of dried. I’d still recommend fresh if you can, but dried will work in a pinch.
Why are my breadsticks tough?
Tough breadsticks are often the result of over-kneading the dough or using too much flour. You want to knead just until the dough is smooth and elastic. Overworking the dough develops too much gluten, leading to a chewy, tough texture. Remember, a slightly sticky dough is better than a dry one!


Cheddar Herb Breadsticks
Make soft, cheesy Cheddar Herb Breadsticks at home with this easy recipe. Perfect for soups, salads, or as a snack. Bake your batch today!
Ingredients
For the breadsticks:
-
360 g all-purpose flour
-
7 g instant yeast (one standard packet)
-
1 ½ tsp granulated sugar
-
1 tsp fine sea salt
-
240 ml warm water (around 43°C/110°F)
-
2 tbsp olive oil (plus more for brushing)
-
120 g sharp cheddar cheese (freshly grated)
-
2 tbsp mixed fresh herbs (finely chopped (I use a combination of rosemary, thyme, and parsley))
-
1 large clove garlic (minced, optional, for extra savoriness)
For topping:
-
flaky sea salt
-
extra grated cheddar
Instructions
-
In the bowl of your stand mixer or a large mixing bowl, combine the warm water, sugar, and instant yeast. Give it a quick stir and let it sit for about 5-10 minutes. You’ll know it’s ready when the mixture becomes frothy and cloudy on top—this is the yeast waking up and getting ready to work its magic in your dough.01
-
In a separate bowl, whisk together the flour and salt. This ensures the salt is evenly distributed throughout the flour, which helps regulate the yeast's activity and guarantees consistent seasoning in every bite of your finished breadsticks.02
-
Pour the olive oil into the yeast mixture. If you’re using a stand mixer, attach the dough hook and gradually add the flour mixture on low speed until a shaggy dough forms. If mixing by hand, use a wooden spoon. Once combined, increase the speed to medium (or turn the dough out onto a floured surface) and knead for 5-7 minutes. You’re looking for a smooth, slightly tacky but not sticky dough that springs back slowly when you poke it.03
-
Reduce the mixer speed to low (or continue kneading by hand) and gradually add the grated cheddar, fresh herbs, and minced garlic if using. It might feel like a lot to incorporate, but just keep kneading until the cheese and herbs are evenly distributed throughout the dough, creating lovely marbled streaks.04
-
Shape the dough into a ball. Lightly oil the same mixing bowl you used (no need to wash it!), place the dough ball inside, and turn it over to coat it lightly in oil. Cover the bowl with a clean kitchen towel or plastic wrap and let it rise in a warm place for about 1 hour, or until doubled in size. A sunny spot on the counter or an oven with the light on works perfectly.05
-
Once risen, punch the dough down gently to release the air. Turn it out onto a lightly floured surface. Using your hands or a rolling pin, shape and stretch the dough into a rough rectangle, about 10x12 inches in size. Using a pizza cutter or a sharp knife, cut the dough into roughly 1-inch wide strips. You should get about 10 strips.06
-
Carefully transfer the strips to a parchment-lined baking sheet, leaving a little space between them as they will expand. Cover them loosely with the towel again and let them rest for 15-20 minutes while you preheat your oven to 220°C (425°F). This short rest allows the gluten to relax, ensuring your breadsticks bake up light and not tough.07
-
Just before baking, you can brush the tops of the breadsticks lightly with a bit more olive oil and sprinkle with flaky sea salt and extra cheddar if you like. Bake for 12-15 minutes, or until they are puffed, golden brown, and firm to the touch. Your kitchen will smell absolutely incredible.08
-
Remove the baking sheet from the oven and let the breadsticks cool on the pan for at least 5 minutes before serving. This brief cooling period helps them set and makes them easier to handle. They are best enjoyed warm, when the cheese is still wonderfully soft and stretchy.09
Not what you're looking for?


