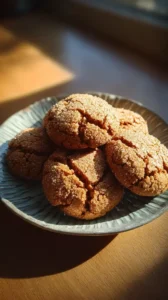
There’s something truly special about the scent of cookies baking during the holidays, isn’t there? I love pulling a golden pan from the oven, especially when it’s filled with these warm, nutty Chestnut Flour Christmas Cookies. Their soft, cake-like texture feels like a cozy hug, making them a standout among unique Christmas cookies and the ultimate comfort food recipe.
If you’re looking for wonderful Christmas baking ideas, this holiday baking project is a delightful addition to your collection of Christmas cookies recipes. These Italian-inspired treats naturally become a cherished part of your Christmas sweets spread, offering a deliciously different option for all your Christmas dessert ideas.
Whether you’re catering to dietary needs or simply craving something wonderfully nutty, these gluten-free cookies are a simple joy to make. I find they are the ideal holiday treats to share, embodying the spirit of the season in every soft, flavorful bite.
Craving a delicious Chestnut Flour Christmas Cookies? You've come to the right spot! From Christmas Cookie favorites to amazing Breakfast & Brunch recipes, there's something here for everyone.

Why You’ll Love This Chestnut Flour Christmas Cookies
- Unique nutty flavor: Chestnut flour brings a warm, earthy sweetness that’s deeply festive.
- Soft, tender texture: They’re delightfully cake-like and almost melt in your mouth.
- Incredible aroma: Your kitchen will smell like holiday magic while they bake.
- Simple to make: A straightforward creamed butter dough for bakers of all levels.
Ingredients & Tools
- 200 g chestnut flour
- 150 g all-purpose flour
- 150 g unsalted butter, softened
- 100 g granulated sugar
- 1 large egg, at room temperature
- 1 tsp pure vanilla extract
- 1/2 tsp baking powder
- 1/4 tsp fine sea salt
- Optional: Powdered sugar, for dusting
Tools: A stand mixer or electric hand mixer, baking sheets, parchment paper, a sifter or fine-mesh sieve, and a cooling rack.
Notes: Use room temperature butter and egg for a smooth dough. Ensure your chestnut flour is fresh and smells sweet, not musty.
Nutrition (per serving)
| Calories: | 145 kcal |
| Protein: | 2 g |
| Fat: | 7 g |
| Carbs: | 19 g |
| Fiber: | 1 g |
Serves: 18 | Prep Time: 20 minutes | Cook Time: 12 minutes | Total Time: 32 minutes
Before You Start: Tips & Ingredient Notes
- Why room temperature ingredients matter so much. When your butter and egg are at the same cool room temperature, they emulsify beautifully, trapping air and creating a lighter, more tender cookie. Cold butter won’t cream properly, and a cold egg can cause the batter to curdle.
- Don’t skip sifting the chestnut flour. Chestnut flour can be a bit clumpy and dense. Sifting it with the all-purpose flour not only removes any lumps but also aerates the mixture, contributing to that lovely, soft texture we’re after.
- The secret to perfectly shaped cookies. This dough is quite soft. After you’ve portioned it, I highly recommend chilling the baking sheet for 10-15 minutes before the cookies go into the oven. This prevents them from spreading too much and helps them keep their beautiful, rounded shape.
- How to know when they’re perfectly baked. These cookies won’t turn a dark brown. You’re looking for the edges to be just set and very lightly golden. The centers might still look a tiny bit soft—that’s perfect! They’ll firm up as they cool on the baking sheet.
How to Make Chestnut Flour Christmas Cookies
Step 1: Start by preheating your oven to 350°F (175°C) and lining your baking sheets with parchment paper. This is a simple step, but it guarantees easy cleanup and prevents any sticking. Now, take your sifter or fine-mesh sieve and place it over a medium bowl. Add both the chestnut flour and the all-purpose flour, along with the baking powder and salt. Sift everything together. You’ll notice how this incorporates the leavening evenly and gives the flour mixture a lovely, light texture. Set this bowl aside for now.
Step 2: In the bowl of your stand mixer fitted with the paddle attachment (or in a large bowl using a hand mixer), combine the softened butter and granulated sugar. Beat them together on medium-high speed for a good 2-3 minutes. The trick is to keep going until the mixture becomes noticeably paler in color and has a fluffy, almost whipped consistency. This step is crucial for creating a light cookie, as you’re beating tiny air bubbles into the fat. Scrape down the sides of the bowl with a spatula to make sure everything is well combined.
Step 3: With the mixer running on low speed, add the room-temperature egg and the vanilla extract. Mix just until they are fully incorporated, which should only take about 30 seconds. You’ll see the mixture might look a little curdled at first, but it will smooth out as the egg blends in. Again, scrape down the bowl to ensure a homogeneous mixture. The aroma at this point, with the vanilla mingling with the butter, is just wonderful.
Step 4: It’s time to bring in the dry ingredients. With the mixer on the lowest possible speed, gradually add the sifted flour mixture to the wet ingredients. Mix only until the flour streaks have just disappeared and a soft dough has formed. Be careful not to overmix! Overworking the dough at this stage can develop the gluten in the all-purpose flour and lead to a tougher cookie. A few remaining flour patches are okay—you can fold them in gently with a spatula by hand.
Step 5: Now, using a cookie scoop or a tablespoon, portion the dough into roughly 1-inch balls. Roll them gently between your palms to smooth them out, but don’t compact them too much. Place the dough balls about 2 inches apart on your prepared baking sheets. They don’t spread a huge amount, but they do need a little room to breathe. For the best shape, pop the entire baking sheet into the refrigerator for a quick 10-15 minute chill before baking.
Step 6: Bake the cookies, one sheet at a time, in the preheated oven for 10-12 minutes. You’re looking for the edges to be set and just barely starting to turn a light golden tan. The centers will still look quite soft and puffed—that’s exactly what you want. They will deflate slightly and set perfectly as they cool. The rich, nutty scent filling your kitchen is your first sign of success.
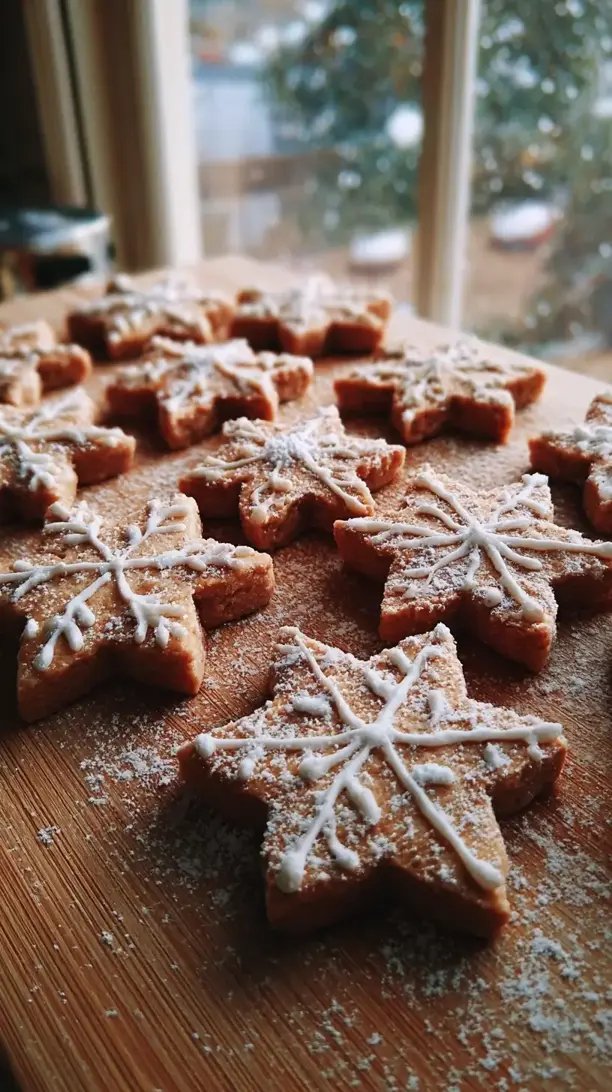
Step 7: As soon as you take the baking sheet out of the oven, let the cookies rest on the hot sheet for 5 minutes. This allows them to firm up enough to handle without falling apart. Then, using a spatula, carefully transfer them to a wire cooling rack to cool completely. This step is vital for achieving that perfect tender-yet-sturdy texture. Once they are completely cool, you can give them a beautiful snowy dusting with powdered sugar.
Storage & Freshness Guide
- Fridge: Store in an airtight container for up to 1 week.
- Freezer: Freeze baked cookies or dough balls for up to 2 months.
- Reviving: Warm briefly in a 300°F oven to refresh crispness.
Serving Suggestions
Complementary Dishes
- A simple cheese board with aged Gouda and fig jam — The sweet, nutty notes of the cheese and the fruity jam create a stunning flavor contrast with the earthy cookies, making for a sophisticated appetizer or dessert course.
- A bowl of rich vanilla bean panna cotta — The creamy, silky texture of the panna cotta is a dream alongside the crumbly, cake-like cookie, offering a delightful play of textures and temperatures.
- Candied orange peel or spiced nuts — These little bites provide a chewy or crunchy counterpoint and their bright or spicy flavors cut through the cookie’s richness beautifully.
Drinks
- A pot of strong Earl Grey tea — The bergamot in the tea is a classic companion to nutty flavors, creating a fragrant and elegant pairing that feels just right for the holidays.
- Vin Santo or a sweet Marsala wine — These traditional Italian dessert wines have a nutty, caramelized character that mirrors the chestnut flour perfectly, making each sip and bite a harmonious experience.
- Spiced hot chocolate with a cinnamon stick — For a truly cozy and indulgent moment, the deep chocolate and warm spices are a heavenly match for the cookies’ soft, nutty sweetness.
Something Sweet
- Dark chocolate and ginger truffles — The intense, bitter dark chocolate and the spicy kick of ginger provide a bold contrast that makes the subtle flavor of the chestnut cookies shine even brighter.
- Poached pears in red wine — The soft, wine-poached pears with their complex spiced syrup offer a light, fruity finale that doesn’t overpower the delicate cookies.
- A small scoop of honey and walnut gelato — This combines creamy, cold, and crunchy elements that echo the nutty theme of the cookies, creating a perfectly cohesive and delicious end to a meal.
Top Mistakes to Avoid
- Mistake: Using cold butter and eggs. This is the number one reason for a dense, greasy cookie. Cold ingredients don’t emulsify, so the dough can’t hold the air you beat into it, resulting in a flat and heavy texture instead of light and tender.
- Mistake: Overmixing the dough after adding the flour. Once the flour is in, you’re on a timer. Mix just until combined. Overmixing develops gluten, which is great for bread but will make your cookies tough and chewy instead of soft and crumbly.
- Mistake: Skipping the chill time for the dough. I know, it’s tempting to just pop them straight in the oven. But that quick 10-minute chill solidifies the butter, which prevents excessive spreading and helps the cookies keep their lovely, plump shape.
- Mistake: Overbaking the cookies. Because of their dark color, it’s hard to judge doneness by sight alone. Rely on the timer and the set-edges/soft-center test. An overbaked chestnut cookie will be dry and lose its delicate magic.
Expert Tips
- Tip: Weigh your flour for absolute precision. Measuring cups can be incredibly inconsistent. For the most reliable results every single time, use a kitchen scale. This is especially important with a unique flour like chestnut, which can be packed down easily.
- Tip: Roll the dough balls in coarse sugar before baking. For a little extra sparkle and a delightful crunchy texture, roll the chilled dough balls in demerara or turbinado sugar right before they go in the oven. It creates a beautiful, festive look and a wonderful textural contrast.
- Tip: Add a hint of citrus zest. For a bright, aromatic lift, try folding the finely grated zest of one orange or lemon into the dough along with the dry ingredients. The citrus notes cut through the richness and complement the nuttiness beautifully.
- Tip: Make an icebox log for slice-and-bake convenience. Instead of portioning into balls, you can shape the soft dough into a log, wrap it in parchment, and chill it thoroughly. Then, you can simply slice off rounds and bake whenever the cookie craving strikes!
FAQs
Can I make these cookies gluten-free?
Absolutely! You can replace the 150g of all-purpose flour with a good 1:1 gluten-free baking blend. Just make sure the blend contains xanthan gum, which helps mimic the structure that gluten provides. The texture might be a touch more crumbly, but the fantastic chestnut flavor will still be the star of the show. I’ve had great success with brands like Bob’s Red Mill or King Arthur Measure for Measure.
My chestnut flour smells a bit musty. Is it still okay to use?
Honestly, I would not recommend using it. Fresh chestnut flour should have a sweet, nutty, almost earthy aroma—it should smell pleasant and inviting. A musty or off smell is a sign that the oils in the flour have likely gone rancid, which will impart a bitter flavor to your cookies and ruin the entire batch. It’s always best to source your chestnut flour from a store with good turnover.
Can I freeze the dough or the baked cookies?
You can do both, which is fantastic for getting a head start on holiday baking! The dough balls freeze beautifully; just place them on a parchment-lined sheet until solid, then transfer to a freezer bag. Bake from frozen, adding 1-2 minutes to the baking time. Fully baked and cooled cookies can also be frozen in an airtight container for up to 2 months. Thaw at room temperature.
Why are my cookies flat and spread out too much?
This usually points to two common issues. First, your butter was likely too warm when you creamed it, or the dough wasn’t chilled before baking. Warm butter melts too quickly in the oven, causing spread. Second, you might have accidentally used too little flour. If you use measuring cups, fluff your flour first, then spoon it into the cup and level it off—don’t scoop directly from the bag, as that packs in too much.
Can I add mix-ins like chocolate chips or nuts?
Of course! While I love them plain, they are a wonderful canvas for additions. Fold in about 100g of finely chopped dark chocolate, toasted hazelnuts, or even a handful of dried cranberries right at the end of mixing. Just be mindful that heavier add-ins might cause the tender cookies to spread a tiny bit more, so a thorough chill before baking is even more important.


Chestnut Flour Christmas Cookies: A Gluten-Free Holiday Treat
Chestnut Flour Christmas Cookies are a cozy, nutty holiday treat. Try this unique Christmas cookie recipe for a soft, comforting dessert that feels like a fireside hug.
Ingredients
For the Ingredients
-
200 g chestnut flour
-
150 g all-purpose flour
-
150 g unsalted butter (softened)
-
100 g granulated sugar
-
1 large egg (at room temperature)
-
1 tsp pure vanilla extract
-
1/2 tsp baking powder
-
1/4 tsp fine sea salt
-
0 Powdered sugar (for dusting)
Instructions
-
Start by preheating your oven to 350°F (175°C) and lining your baking sheets with parchment paper. Now, take your sifter or fine-mesh sieve and place it over a medium bowl. Add both the chestnut flour and the all-purpose flour, along with the baking powder and salt. Sift everything together. Set this bowl aside for now.01
-
In the bowl of your stand mixer fitted with the paddle attachment (or in a large bowl using a hand mixer), combine the softened butter and granulated sugar. Beat them together on medium-high speed for a good 2-3 minutes. Scrape down the sides of the bowl with a spatula to make sure everything is well combined.02
-
With the mixer running on low speed, add the room-temperature egg and the vanilla extract. Mix just until they are fully incorporated, which should only take about 30 seconds. Again, scrape down the bowl to ensure a homogeneous mixture.03
-
With the mixer on the lowest possible speed, gradually add the sifted flour mixture to the wet ingredients. Mix only until the flour streaks have just disappeared and a soft dough has formed. A few remaining flour patches are okay—you can fold them in gently with a spatula by hand.04
-
Using a cookie scoop or a tablespoon, portion the dough into roughly 1-inch balls. Roll them gently between your palms to smooth them out, but don't compact them too much. Place the dough balls about 2 inches apart on your prepared baking sheets. For the best shape, pop the entire baking sheet into the refrigerator for a quick 10-15 minute chill before baking.05
-
Bake the cookies, one sheet at a time, in the preheated oven for 10-12 minutes. You're looking for the edges to be set and just barely starting to turn a light golden tan. The centers will still look quite soft and puffed—that's exactly what you want.06
-
As soon as you take the baking sheet out of the oven, let the cookies rest on the hot sheet for 5 minutes. Then, using a spatula, carefully transfer them to a wire cooling rack to cool completely. Once they are completely cool, you can give them a beautiful snowy dusting with powdered sugar.07
Not what you're looking for?


