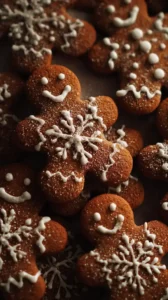
There’s something magical about the scent of ginger and spice wafting through the kitchen—it instantly feels like home. For me, baking a batch of these Chewy Molasses Crinkles is one of the great joys of the season. They’re the ultimate cozy, old-fashioned cookie, with a soft, fudgy center and that beautiful crackled sugar top that promises pure comfort in every bite. If you’re looking for classic christmas cookies recipes to add to your repertoire, this is a wonderful place to start.
I consider this easy recipe a cornerstone of my holiday baking each year, reliably turning out the most delightful christmas sweets. Their rich, spiced flavor makes them a perfect christmas dessert idea to share on a chilly evening. Whether you’re searching for inspired christmas baking ideas or simply need a batch of easy christmas treats for a cookie swap, these ginger molasses cookies never disappoint.
Really, these cookies are more than just a dessert; they’re a warm, edible hug. As a beloved comfort food recipe, they have become my quintessential holiday treats, evoking so much nostalgia and joy. I hope they find a cherished spot in your own festive traditions, too.
Craving a delicious Chewy Molasses Crinkles? You've come to the right spot! From Christmas Cookie favorites to amazing Desserts recipes, there's something here for everyone.


Why You’ll Love This Chewy Molasses Crinkles
- Perfect Chewy Texture: Crisp edges give way to a soft, fudgy center that stays chewy.
- Warm Spice Profile: Ginger, cinnamon, and cloves create a cozy, aromatic flavor.
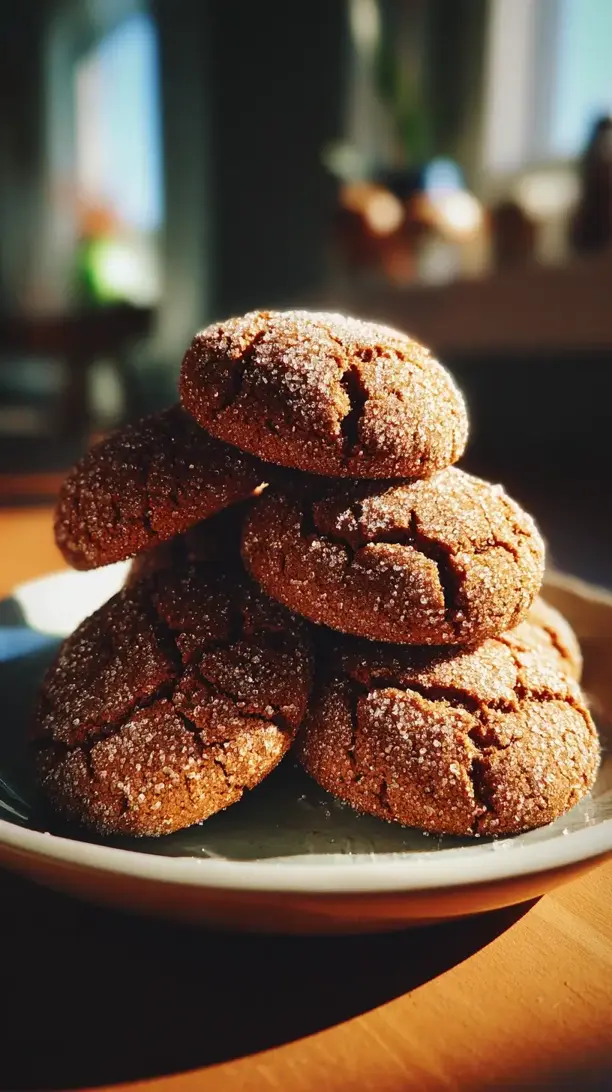
- Beautiful Crackled Top: Rolling in sugar creates a showstopping, crackled appearance.
- Simple to Master: Straightforward method for bakers of all levels.
Ingredients & Tools
- 230 g (1 cup) unsalted butter, softened
- 200 g (1 cup) granulated sugar, plus ½ cup extra for rolling
- 100 g (½ cup) light brown sugar, packed
- 1 large egg, at room temperature
- 80 ml (¼ cup) unsulphured molasses (not blackstrap!)
- 320 g (2 ½ cups) all-purpose flour
- 2 tsp baking soda
- 2 tsp ground ginger
- 1 ½ tsp ground cinnamon
- ½ tsp ground cloves
- ½ tsp salt
Tools: Stand mixer or hand mixer, mixing bowls, whisk, rubber spatula, baking sheets, parchment paper or silicone baking mats, a 1.5-tablespoon cookie scoop (highly recommended!).
Notes: Use unsulphured molasses for a milder, sweeter flavor; blackstrap is too bitter. A cookie scoop ensures even sizing and uniform baking.
Nutrition (per serving)
| Calories: | 150 kcal |
| Protein: | 1.5 g |
| Fat: | 6 g |
| Carbs: | 23 g |
| Fiber: | 0.5 g |
Serves: 24 | Prep Time: 20 minutes | Cook Time: 10-12 minutes | Total Time: 1 hour 30 minutes (includes chilling)
Before You Start: Tips & Ingredient Notes
- Don’t Skip the Chill. This dough absolutely must be chilled for at least an hour. This solidifies the fat, which prevents the cookies from spreading too much in the oven. It also allows the flour to fully hydrate, resulting in a chewier texture and a more developed flavor.
- Butter Temperature is Everything. Your butter should be “softened,” not melted or greasy. The perfect test: press your finger into the stick of butter. It should leave an indentation but the butter should still hold its shape. This is crucial for creaming properly and creating air pockets for lift.
- Choose Your Molasses Wisely. I’ll say it again because it’s that important—use unsulphured molasses. It’s lighter in color and flavor, and it’s what gives these cookies their signature taste. Blackstrap molasses is much stronger and more bitter, and it will make your cookies taste, well, a bit medicinal.
- Measure Your Flour Correctly. The most common mistake in cookie baking is using too much flour. For the most accuracy, use a kitchen scale. If you’re using cups, fluff your flour with a spoon, spoon it into your measuring cup, and level it off with a knife. Don’t scoop directly from the bag!
How to Make Chewy Molasses Crinkles
Step 1: Cream the Butter and Sugars. In the bowl of your stand mixer fitted with the paddle attachment (or using a hand mixer), beat the softened butter, 1 cup of granulated sugar, and the brown sugar on medium speed for about 2-3 minutes. You’re looking for the mixture to become light, pale, and fluffy. This step is not just about mixing; it’s about incorporating air into the dough, which helps with the cookie’s structure and texture. Scrape down the sides of the bowl with a spatula to ensure everything is evenly combined.
Step 2: Add the Wet Ingredients. Beat in the egg until it’s fully incorporated, then pour in the molasses. Mix on medium-low until the molasses is completely blended in. The batter might look a little curdled at this point—that’s perfectly normal, so don’t panic! It will all come together once you add the dry ingredients. You’ll notice the rich, dark color and that incredible molasses aroma starting to come through.
Step 3: Combine the Dry Ingredients. In a separate, medium-sized bowl, whisk together the flour, baking soda, ginger, cinnamon, cloves, and salt. Whisking is important here—it ensures the leavening and spices are evenly distributed throughout the flour, so you don’t get a bitter bite of baking soda in one cookie. This is your spice base, and the smell alone is heavenly.
Step 4: Bring the Dough Together. With your mixer on low speed, gradually add the dry ingredients to the wet ingredients. Mix just until the flour streaks disappear and a soft, sticky dough forms. Be careful not to overmix! Overworking the dough develops gluten, which can lead to tough cookies. The dough will be quite soft and tacky—this is exactly what you want for a chewy result.
Step 5: The Essential Chill. Cover the bowl with plastic wrap and refrigerate the dough for at least 1 hour, or up to 2 days. This step is non-negotiable. Chilling firms up the dough, making it easier to handle and roll. More importantly, it prevents the cookies from spreading into flat puddles in the oven, ensuring that perfect thick-and-chewy texture.
Step 6: Preheat and Prep. About 20 minutes before you’re ready to bake, preheat your oven to 350°F (175°C). Line two baking sheets with parchment paper or silicone baking mats. Place the remaining ½ cup of granulated sugar in a small bowl. This setup makes the assembly line go smoothly.
Step 7: Scoop and Roll. Using your cookie scoop, portion out the dough into 1.5-tablespoon-sized balls. Roll each ball between your palms to smooth it out, then roll it generously in the granulated sugar until it’s completely coated. The sugar coating is what creates that gorgeous, crackled top as the cookie expands in the oven. Place the dough balls about 2 inches apart on the prepared baking sheets.
Step 8: Bake to Perfection. Bake for 10-12 minutes. The cookies are done when the tops are crackled and the edges are set. The centers will still look soft and slightly underdone—this is the key to chewiness! They will firm up as they cool. For an even bake, rotate your baking sheets halfway through the cooking time.
Step 9: Cool and Enjoy. Let the cookies cool on the baking sheet for 5 minutes. This allows them to set up enough to handle without falling apart. Then, transfer them to a wire rack to cool completely. Or, you know, enjoy a few warm ones straight from the pan with a cold glass of milk. I won’t tell.
Storage & Freshness Guide
- Fridge: Store baked cookies in an airtight container at room temperature for up to 5 days.
- Freezer: Freeze unbaked dough balls on a tray, then transfer to a bag; bake from frozen, adding 1-2 minutes.
- Reviving: Add a piece of bread to the storage container to maintain chewiness; warm briefly in microwave if desired.
Serving Suggestions
Complementary Dishes
- A simple vanilla ice cream — The cold, creamy sweetness is a dream paired with the warm, spicy cookies. You can even make mini ice cream sandwiches for a next-level treat.
- A sharp cheddar cheese plate — This might sound strange, but trust me, the classic pairing of apple pie with cheddar applies here too. The salty, sharp cheese beautifully complements the deep molasses and spice flavors.
- Spiced apple cider — Served warm, it doubles down on the cozy, autumnal spices and makes the whole experience feel like a holiday gathering.
Drinks
- A tall glass of cold whole milk — It’s the classic for a reason. The creaminess cuts through the spice and richness of the cookie perfectly.
- Dark roast coffee or a chai latte — The bitterness of the coffee or the spiced notes in the chai create a wonderful flavor harmony that makes each bite of cookie even more satisfying.
- Earl Grey tea — The bergamot in the tea adds a lovely citrusy, floral note that plays surprisingly well with the ginger and molasses.
Something Sweet
- Pumpkin pie — Serve a cookie on the side of a slice for a double dose of spice and everything nice. The textures and flavors are a match made in heaven.
- A rich chocolate mousse — The dark, silky chocolate provides a decadent contrast to the spicy, chewy cookie, creating a truly sophisticated dessert duo.
- Poached pears — Lightly poached in a syrup with cinnamon and a splash of wine, they offer a fresh, fruity counterpoint that cleanses the palate between bites of cookie.
Top Mistakes to Avoid
- Mistake: Using melted butter. This is the number one reason cookies spread too much. Melted butter doesn’t trap air during creaming, and it causes the dough to be too loose, resulting in flat, greasy cookies instead of soft, puffy ones.
- Mistake: Skipping the chilling step. I’ve messed this up before too, thinking I could save time. Warm dough spreads rapidly in the oven. Chilling is what gives you control over the final shape and that coveted chewy texture.
- Mistake: Overbaking the cookies. They continue to cook on the hot baking sheet after you take them out of the oven. If you wait for them to look “done” in the center, you’ve gone too far. You want those centers to be soft for maximum chew.
- Mistake: Using blackstrap molasses. It’s just too intense and bitter for this recipe. It will overpower all the other delicate spices and leave a harsh aftertaste. Stick with the lighter, unsulphured kind.
Expert Tips
- Tip: For an extra sparkly finish, use coarse sugar for rolling. The larger sugar crystals don’t melt completely in the oven, giving the cookies a beautiful, sparkling, crunchy exterior that contrasts wonderfully with the soft interior.
- Tip: Make the dough ahead of time. This dough actually benefits from a longer rest. You can refrigerate it for up to 2 days, and the flavors will deepen and meld together, resulting in an even more complex and delicious cookie.
- Tip: Freeze unbaked dough balls for fresh cookies anytime. After rolling the dough balls in sugar, place them on a parchment-lined tray and freeze solid. Then transfer to a zip-top bag. You can bake them straight from the freezer, just adding 1-2 minutes to the baking time.
- Tip: Slightly underfill your baking sheets. Baking in smaller batches ensures even air circulation and heat distribution, which leads to more consistent browning and that perfect crinkle on every single cookie.
FAQs
Can I make these cookies without a mixer?
Absolutely! You can make them by hand, it just takes a bit more elbow grease. Use a sturdy wooden spoon and a large bowl. Really put your back into creaming the butter and sugars until the mixture lightens in color. For the dry ingredients, switch to a folding motion with a spatula to avoid overmixing. The key is to ensure the butter is properly softened to make the hand-mixing process manageable.
Why didn’t my cookies crinkle?
The crinkle comes from a contrast in the dough’s surface. The outside, coated in sugar, sets quickly in the heat, while the inside continues to rise and expand, cracking the surface. If you didn’t get crinkles, the dough was likely too warm when it went into the oven, or it wasn’t chilled long enough. Another culprit could be old baking soda, which has lost its leavening power and won’t create the necessary lift.
How do I store these to keep them chewy?
The enemy of a chewy cookie is air. Once they are completely cool, store them in an airtight container at room temperature. For extra insurance, you can toss a piece of bread or a terra cotta brown sugar saver into the container. The cookies will absorb the moisture from the bread/saver, which helps maintain their soft, chewy texture for up to 5 days.
Can I use fresh ginger instead of ground?
You can, but the flavor profile will be different. Fresh ginger provides a brighter, more pungent “heat,” while ground ginger gives a warmer, earthier spice. If you want to try it, finely grate about one tablespoon of fresh ginger and add it with the wet ingredients. I wouldn’t replace all the ground ginger, though—maybe use half ground and half fresh for a more complex flavor.
My dough is really sticky, even after chilling. What did I do wrong?
You likely did nothing wrong! This is a high-moisture dough, and it’s meant to be a bit sticky. If it’s too difficult to handle, you can pop it back in the fridge for another 15-30 minutes. You can also lightly flour your hands when rolling the balls to prevent sticking, but try not to incorporate too much extra flour into the dough itself, as it can make the cookies drier.


Chewy Molasses Crinkles: An Easy Holiday Cookie Recipe
Chewy Molasses Crinkles are the ultimate cozy holiday treat. This classic molasses cookie recipe yields soft, spiced cookies with a crackled top, perfect for your Christmas baking.
Ingredients
For the Ingredients
-
230 g unsalted butter (softened)
-
1 cup unsalted butter (softened)
-
200 g granulated sugar (plus ½ cup extra for rolling)
-
1 cup granulated sugar (plus ½ cup extra for rolling)
-
100 g light brown sugar (packed)
-
½ cup light brown sugar (packed)
-
1 large egg (at room temperature)
-
80 ml unsulphured molasses (not blackstrap!)
-
¼ cup unsulphured molasses (not blackstrap!)
-
320 g all-purpose flour
-
2 ½ cups all-purpose flour
-
2 tsp baking soda
-
2 tsp ground ginger
-
1 ½ tsp ground cinnamon
-
½ tsp ground cloves
-
½ tsp salt
Instructions
-
In the bowl of your stand mixer fitted with the paddle attachment (or using a hand mixer), beat the softened butter, 1 cup of granulated sugar, and the brown sugar on medium speed for about 2-3 minutes. You’re looking for the mixture to become light, pale, and fluffy. This step is not just about mixing; it’s about incorporating air into the dough, which helps with the cookie's structure and texture. Scrape down the sides of the bowl with a spatula to ensure everything is evenly combined.01
-
Beat in the egg until it’s fully incorporated, then pour in the molasses. Mix on medium-low until the molasses is completely blended in. The batter might look a little curdled at this point—that’s perfectly normal, so don’t panic! It will all come together once you add the dry ingredients. You’ll notice the rich, dark color and that incredible molasses aroma starting to come through.02
-
In a separate, medium-sized bowl, whisk together the flour, baking soda, ginger, cinnamon, cloves, and salt. Whisking is important here—it ensures the leavening and spices are evenly distributed throughout the flour, so you don’t get a bitter bite of baking soda in one cookie. This is your spice base, and the smell alone is heavenly.03
-
With your mixer on low speed, gradually add the dry ingredients to the wet ingredients. Mix just until the flour streaks disappear and a soft, sticky dough forms. Be careful not to overmix! Overworking the dough develops gluten, which can lead to tough cookies. The dough will be quite soft and tacky—this is exactly what you want for a chewy result.04
-
Cover the bowl with plastic wrap and refrigerate the dough for at least 1 hour, or up to 2 days. This step is non-negotiable. Chilling firms up the dough, making it easier to handle and roll. More importantly, it prevents the cookies from spreading into flat puddles in the oven, ensuring that perfect thick-and-chewy texture.05
-
About 20 minutes before you're ready to bake, preheat your oven to 350°F (175°C). Line two baking sheets with parchment paper or silicone baking mats. Place the remaining ½ cup of granulated sugar in a small bowl. This setup makes the assembly line go smoothly.06
-
Using your cookie scoop, portion out the dough into 1.5-tablespoon-sized balls. Roll each ball between your palms to smooth it out, then roll it generously in the granulated sugar until it’s completely coated. The sugar coating is what creates that gorgeous, crackled top as the cookie expands in the oven. Place the dough balls about 2 inches apart on the prepared baking sheets.07
-
Bake for 10-12 minutes. The cookies are done when the tops are crackled and the edges are set. The centers will still look soft and slightly underdone—this is the key to chewiness! They will firm up as they cool. For an even bake, rotate your baking sheets halfway through the cooking time.08
-
Let the cookies cool on the baking sheet for 5 minutes. This allows them to set up enough to handle without falling apart. Then, transfer them to a wire rack to cool completely. Or, you know, enjoy a few warm ones straight from the pan with a cold glass of milk. I won't tell.09
Not what you're looking for?


