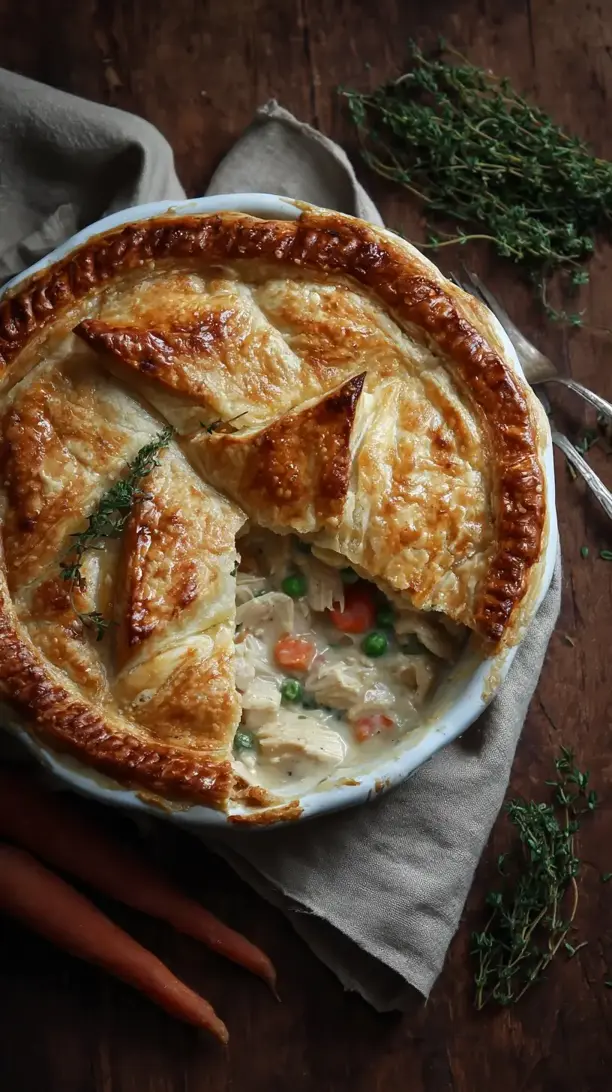
This homemade chicken pot pie delivers deep comfort with its golden, flaky crust and rich, creamy filling. It’s a nostalgic, soul-satisfying meal perfect for cozy dinners. After years of tweaking, this chicken pot pie recipe balances a velvety sauce, tender vegetables, and a perfectly shattering crust.
Looking for Chicken Pot Pie inspiration? You'll love what we have! Explore more Chicken Recipes recipes or discover our Christmas Cookie favorites.


Why You’ll Love This Chicken Pot Pie
- Comfort in every bite: Buttery crust and creamy filling define cozy.
- Flexible ingredients: Easily swap vegetables based on season or preference.
- Make-ahead magic: Assemble ahead or freeze for easy weeknight meals.
- Crowd-pleasing simplicity: Straightforward steps yield impressively homemade results.
Ingredients & Tools
- 1 batch homemade pie crust (or 2 store-bought pie crusts)
- 500 g boneless, skinless chicken thighs or breast, cubed
- 2 tbsp olive oil or butter
- 1 medium onion, finely chopped
- 2 carrots, diced
- 2 stalks celery, diced
- 2 cloves garlic, minced
- 100 g frozen peas
- 60 g all-purpose flour
- 480 ml chicken broth
- 120 ml heavy cream or whole milk
- 1 tsp dried thyme
- 1 bay leaf (optional)
- Salt and black pepper to taste
- 1 egg, beaten (for egg wash)
Tools: 9-inch pie dish, large skillet or Dutch oven, rolling pin, pastry brush, mixing bowls
Notes: Chicken thighs add richer flavor, but breast works too. Heavy cream ensures a luxurious, silky filling.
Nutrition (per serving)
| Calories: | 520 kcal |
| Protein: | 28 g |
| Fat: | 29 g |
| Carbs: | 36 g |
| Fiber: | 4 g |
Serves: 6 | Prep Time: 30 minutes | Cook Time: 40 minutes | Total Time: 1 hour 10 minutes
Before You Start: Tips & Ingredient Notes
- Chicken thighs or breast? Thighs stay juicier during baking, but if you prefer breast, just be careful not to overcook it when browning. Either way, you’ll get a delicious result.
- Homemade vs. store-bought crust. Honestly, a homemade crust is flakier and more buttery, but a good-quality store-bought crust works in a pinch. If you’re short on time, no shame in taking that shortcut.
- Don’t rush the roux. When making the sauce base, cook the flour and fat until it’s lightly golden—this removes the raw flour taste and gives the filling a nutty depth.
- Veggie texture matters. You want the carrots and celery to be tender but not mushy. Sauté them until they just start to soften, as they’ll cook further in the oven.
- Season as you go. Taste the filling before assembling the pie. It should be well-seasoned, since the crust is relatively neutral. A dash of black pepper at the end brightens everything up.
How to Make Chicken Pot Pie
Step 1: Preheat your oven to 200°C (400°F). If you’re making your own pie crust, roll out one disc to fit your pie dish, gently pressing it in. Trim any excess dough hanging over the edges. Prick the bottom with a fork a few times—this helps prevent air bubbles. If using store-bought, just unroll and fit it into the dish. You’ll notice it might be a bit stiff, but it’ll soften up as it bakes.
Step 2: In a large skillet or Dutch oven, heat the olive oil or butter over medium-high heat. Add the cubed chicken, seasoning with a pinch of salt and pepper. Cook until lightly browned on all sides, about 5–7 minutes. You don’t need to cook it through completely—it’ll finish in the oven. Remove the chicken from the skillet and set it aside.
Step 3: In the same skillet, add the onion, carrots, and celery. Sauté for about 5–6 minutes, until the onions are translucent and the veggies have softened slightly. Stir in the minced garlic and cook for another minute until fragrant. You’ll notice the kitchen starting to smell amazing—that’s the foundation of your filling coming together.
Step 4: Sprinkle the flour over the vegetables and stir continuously for about 1–2 minutes. This forms the roux, which will thicken the filling. The mixture should look pasty and lightly golden. Slowly pour in the chicken broth, stirring constantly to avoid lumps. Add the thyme and bay leaf if using, and bring to a gentle simmer.
Step 5: Once the mixture has thickened slightly, stir in the heavy cream or milk. Return the cooked chicken to the skillet, along with the frozen peas. Simmer for another 3–4 minutes, until the filling is creamy and cohesive. Taste and adjust seasoning—it should be savory and well-balanced. Remove the bay leaf if you used it.
Step 6: Pour the filling into the prepared pie crust. Roll out the second disc of dough and place it over the filling. Crimp the edges together with your fingers or a fork to seal. Cut a few small slits in the top crust to allow steam to escape. Brush the top with the beaten egg—this gives you that beautiful, glossy golden finish.
Step 7: Bake for 35–40 minutes, or until the crust is deeply golden and the filling is bubbling through the vents. Let the pie rest for at least 10–15 minutes before slicing. Honestly, this waiting period is tough, but it allows the filling to set so you get clean slices.
Storage & Freshness Guide
- Fridge: Store leftovers in an airtight container for up to 3 days.
- Freezer: Freeze baked or unbaked pie tightly wrapped for up to 3 months.
- Reviving: Reheat slices in the oven at 180°C (350°F) for 15–20 minutes until warm.
Serving Suggestions
Complementary Dishes
- A simple green salad with a tangy vinaigrette — The crisp, acidic notes cut through the richness of the pie and refresh your palate between bites.
- Garlic mashed potatoes — Yes, more carbs, but the creamy potatoes are a cozy partner that soaks up any extra filling deliciously.
- Roasted green beans with almonds — Their slight crunch and nutty flavor provide a lovely textural contrast to the soft, savory pie.
Drinks
- A crisp Chardonnay or unoaked white wine — The bright acidity balances the creamy filling, while the subtle fruit notes complement the chicken and herbs.
- Sparkling apple cider — Its gentle fizz and slight sweetness make it a family-friendly option that still feels celebratory.
- Earl Grey tea — A warm cup of tea with its bergamot aroma is surprisingly cozy alongside the pie, especially on a rainy day.
Something Sweet
- Warm apple crumble with vanilla ice cream — The spiced apples and cool cream continue the comfort theme, ending the meal on a happy, familiar note.
- Lemon bars — Their zesty, tangy sweetness provides a bright contrast that cleanses the palate after the hearty main course.
- Dark chocolate brownies — Rich, fudgy, and deeply chocolatey, they satisfy any lingering cravings for something indulgent.
Top Mistakes to Avoid
- Overcooking the chicken before baking. Since the pie bakes for nearly 40 minutes, the chicken will continue to cook in the filling. If you brown it too much initially, it can become dry and tough.
- Using watery vegetables. Vegetables like zucchini or mushrooms release a lot of liquid when cooked. If you include them, sauté them first to drive off excess moisture, or your filling could turn out soupy.
- Not letting the pie rest after baking. I know it’s tempting to dive right in, but if you slice it too soon, the filling will run everywhere. Give it at least 10 minutes to set up.
- Skimping on seasoning. The pie crust is fairly neutral, so the filling needs to carry the flavor. Taste and adjust the salt, pepper, and herbs until it’s deeply savory.
Expert Tips
- Tip: For an extra-flaky crust, freeze your butter and use ice-cold water when making the dough. The little pockets of cold butter create steam during baking, resulting in those beautiful, delicate layers.
- Tip: If your filling seems too thick after adding the broth, just add a splash more broth or cream. If it’s too thin, let it simmer a bit longer—the flour will continue to thicken it as it cooks.
- Tip: Brush the bottom crust with a thin layer of beaten egg white before adding the filling. This creates a barrier that helps prevent a soggy bottom—a game-changer for pot pie perfection.
- Tip: Want to make individual pot pies? Divide the filling among oven-safe ramekins, top with smaller rounds of pastry, and bake for 20–25 minutes. They’re adorable and perfect for portion control.
FAQs
Can I make chicken pot pie ahead of time?
Absolutely! You can assemble the entire pie, cover it tightly, and refrigerate it for up to 24 hours before baking. Just add a few extra minutes to the baking time if it’s going into the oven cold. You can also freeze the unbaked pie for up to 3 months—wrap it well in foil and plastic, then bake from frozen, adding about 15–20 minutes to the bake time.
What can I use instead of heavy cream?
Whole milk or half-and-half will work, though the filling will be a bit less rich. For a dairy-free option, canned coconut milk adds a subtle sweetness that pairs surprisingly well with the savory herbs. Just avoid skim milk, as it can make the sauce watery.
Why is my bottom crust soggy?
This usually happens if the filling is very wet or if the bottom crust isn’t pre-baked a bit. To prevent it, you can blind-bake the bottom crust for 10 minutes before adding the filling, or brush it with egg white as a barrier. Also, make sure your filling isn’t too liquidy before assembling.
Can I use frozen vegetables?
Yes, but thaw and drain them first to avoid excess moisture. I often use a mix of frozen peas and carrots for convenience. If you’re using frozen onions or celery, sauté them from frozen to evaporate some of the water they release.
How do I store and reheat leftovers?
Store any leftover pie in the refrigerator for up to 3 days. Reheat individual slices in the oven at 180°C (350°F) for about 15–20 minutes, until warmed through. Avoid the microwave if you can—it tends to make the crust soft. The pie also freezes well after baking; just thaw overnight in the fridge before reheating.


Chicken Pot Pie
Make the ultimate comfort food with this classic Chicken Pot Pie recipe. Flaky crust and a creamy, savory filling make it a family favorite. Get the recipe now!
Ingredients
For the crust and filling:
-
1 batch homemade pie crust (or 2 store-bought pie crusts)
-
500 g boneless, skinless chicken thighs or breast, cubed
-
2 tbsp olive oil or butter
-
1 medium onion, finely chopped
-
2 carrots, diced
-
2 stalks celery, diced
-
2 cloves garlic, minced
-
100 g frozen peas
-
60 g all-purpose flour
-
480 ml chicken broth
-
120 ml heavy cream or whole milk
-
1 tsp dried thyme
-
1 bay leaf (optional)
-
Salt and black pepper (to taste)
-
1 egg, beaten (for egg wash)
Instructions
-
Preheat your oven to 200°C (400°F). If you’re making your own pie crust, roll out one disc to fit your pie dish, gently pressing it in. Trim any excess dough hanging over the edges. Prick the bottom with a fork a few times—this helps prevent air bubbles. If using store-bought, just unroll and fit it into the dish. You’ll notice it might be a bit stiff, but it’ll soften up as it bakes.01
-
In a large skillet or Dutch oven, heat the olive oil or butter over medium-high heat. Add the cubed chicken, seasoning with a pinch of salt and pepper. Cook until lightly browned on all sides, about 5–7 minutes. You don’t need to cook it through completely—it’ll finish in the oven. Remove the chicken from the skillet and set it aside.02
-
In the same skillet, add the onion, carrots, and celery. Sauté for about 5–6 minutes, until the onions are translucent and the veggies have softened slightly. Stir in the minced garlic and cook for another minute until fragrant. You’ll notice the kitchen starting to smell amazing—that’s the foundation of your filling coming together.03
-
Sprinkle the flour over the vegetables and stir continuously for about 1–2 minutes. This forms the roux, which will thicken the filling. The mixture should look pasty and lightly golden. Slowly pour in the chicken broth, stirring constantly to avoid lumps. Add the thyme and bay leaf if using, and bring to a gentle simmer.04
-
Once the mixture has thickened slightly, stir in the heavy cream or milk. Return the cooked chicken to the skillet, along with the frozen peas. Simmer for another 3–4 minutes, until the filling is creamy and cohesive. Taste and adjust seasoning—it should be savory and well-balanced. Remove the bay leaf if you used it.05
-
Pour the filling into the prepared pie crust. Roll out the second disc of dough and place it over the filling. Crimp the edges together with your fingers or a fork to seal. Cut a few small slits in the top crust to allow steam to escape. Brush the top with the beaten egg—this gives you that beautiful, glossy golden finish.06
-
Bake for 35–40 minutes, or until the crust is deeply golden and the filling is bubbling through the vents. Let the pie rest for at least 10–15 minutes before slicing. Honestly, this waiting period is tough, but it allows the filling to set so you get clean slices.07
Not what you're looking for?


