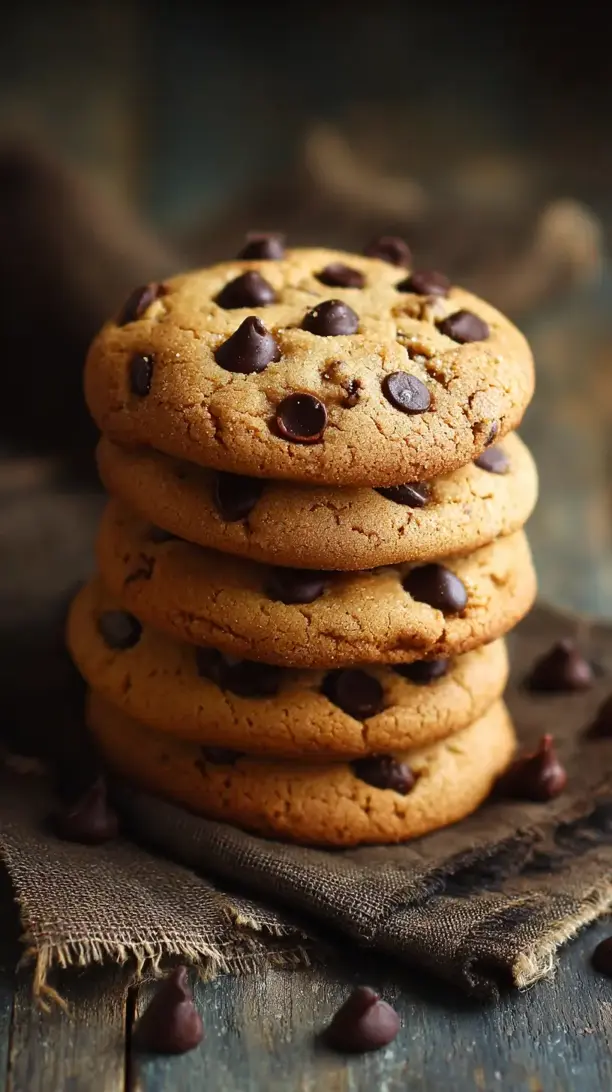
There’s something magical about a truly great chocolate chip cookie. This version delivers crisp edges, a soft, chewy center, and deep caramel notes. It’s the ultimate chocolate chip cookies recipe you’ll bake again and again.
If you're looking for the perfect Chocolate Chip Cookies, you're in the right place. Whether you love Snacks or want to explore our Breakfast & Brunch collection, we've got you covered.


Why You’ll Love This Chocolate Chip Cookies
- Perfect texture: Crisp edges and a soft, chewy center in every bite.
- Complex flavor: Brown sugar adds rich caramel and butterscotch notes.
- Incredibly versatile: A forgiving base for your favorite mix-ins.
- Heavenly aroma: Fills your kitchen with butter, vanilla, and melting chocolate.
Ingredients & Tools
- 225 g unsalted butter, softened
- 150 g light brown sugar, packed
- 100 g granulated sugar
- 2 large eggs, at room temperature
- 2 tsp pure vanilla extract
- 280 g all-purpose flour
- 1 tsp baking soda
- 1 tsp fine sea salt
- 350 g semi-sweet chocolate chips or chunks
Tools: A stand mixer or electric hand mixer, mixing bowls, a baking sheet, parchment paper or a silicone baking mat, and a cookie scoop (highly recommended!).
Notes: Using room temperature eggs and properly softened butter is non-negotiable. Chopping a chocolate bar creates lovely, melty pools.
Nutrition (per serving)
| Calories: | 220 kcal |
| Protein: | 3 g |
| Fat: | 11 g |
| Carbs: | 29 g |
| Fiber: | 1 g |
Serves: 24 | Prep Time: 15 minutes | Cook Time: 10-12 minutes | Total Time: 1 hour 25 minutes (includes chilling)
Before You Start: Tips & Ingredient Notes
- Why chill the dough? This is the single most important step for a thick, chewy cookie. Chilling solidifies the butter, which prevents the cookies from spreading too thin and burning in the oven. It also allows the flour to fully hydrate, leading to a more complex, caramelized flavor.
- What does “softened butter” really mean? It should be cool to the touch but yield easily when you press it. If it’s greasy or shiny, it’s too warm. The ideal is about 65°F (18°C). This creates the perfect environment for creaming with the sugar to incorporate tiny air bubbles for lift.
- Can I use all granulated sugar? You could, but you’d lose the signature chew and molasses-y depth. Brown sugar contains molasses, which attracts and retains moisture. This is what gives our cookies their soft, bendy texture and rich color.
- Is a cookie scoop necessary? Honestly, it’s a game-changer. It ensures all your cookies are the same size, which means they’ll bake evenly. No more half-burnt, half-doughy batches! It also makes the process incredibly quick and clean.
How to Make Chocolate Chip Cookies
Step 1: Cream the Butter and Sugars. In the bowl of your stand mixer fitted with the paddle attachment, combine the softened butter, brown sugar, and granulated sugar. Beat on medium speed for a full 2-3 minutes, until the mixture is very pale, fluffy, and well-combined. You’ll notice the texture change—it should look almost like a smooth, light paste. Scrape down the sides of the bowl with a spatula to ensure everything is incorporated.
Step 2: Add the Eggs and Vanilla. With the mixer on low, add the eggs one at a time, mixing until each is fully absorbed before adding the next. Then, pour in the vanilla extract. Mix just until combined. The mixture might look a little curdled at this point—that’s perfectly normal and will come together once you add the dry ingredients.
Step 3: Combine the Dry Ingredients. In a separate medium bowl, whisk together the flour, baking soda, and salt. This isn’t just mixing; you’re aerating the flour and ensuring the leavening is evenly distributed, which prevents bitter spots of baking soda in your finished cookies.
Step 4: Bring the Dough Together. With the mixer on low, gradually add the dry ingredients to the wet ingredients. Mix only until the last streaks of flour disappear. It’s crucial not to overmix here, as that can develop the gluten in the flour and lead to tough cookies. The dough will be quite thick.
Step 5: Fold in the Chocolate. Switch to a sturdy spatula and gently fold in the chocolate chips or chunks. Make sure they’re evenly distributed throughout the dough. You’ll have a beautifully speckled, stiff dough that smells amazing already.
Step 6: Chill the Dough. This is the patience-testing part! Cover the bowl with plastic wrap and refrigerate for at least 1 hour, or ideally up to 24 hours. If you’re in a rush, you can pop the scooped dough balls onto a baking sheet and freeze for 30 minutes. The dough will firm up significantly.
Step 7: Scoop and Bake. Preheat your oven to 375°F (190°C) and line baking sheets with parchment paper. Using a cookie scoop (about 1.5 tablespoons), portion the dough onto the sheets, leaving about 2 inches between each for spreading. Bake for 10-12 minutes, until the edges are set and golden brown but the centers still look soft and slightly underdone.
Step 8: The Cool Down. As soon as you remove the baking sheet from the oven, lift it and gently tap it on the countertop. This helps deflate the cookies just slightly for a more even texture. Let the cookies cool on the hot baking sheet for 5 full minutes—they’ll continue to cook from the residual heat—before transferring them to a wire rack to cool completely.
Storage & Freshness Guide
- Fridge: Store dough in an airtight container up to 3 days.
- Freezer: Freeze dough balls in a zip-top bag up to 3 months; bake from frozen.
- Reviving: Add a bread slice to the cookie container to keep them soft for days.
Serving Suggestions
Complementary Dishes
- A cold glass of milk — It’s a classic for a reason. The creamy, cold milk is the perfect partner to cut through the richness of the warm, melty chocolate.
- Vanilla bean ice cream — Sandwich a scoop between two warm cookies for the ultimate ice cream sandwich. The contrast of temperatures and textures is simply divine.
Drinks
- Dark roast coffee — The bitter notes of a strong coffee beautifully complement the sweetness of the cookie, creating a well-balanced flavor experience.
- Earl Grey tea — The bergamot in the tea adds a lovely citrusy, floral note that dances wonderfully with the deep vanilla and chocolate flavors.
Something Sweet
- Simple fruit salad — A refreshing mix of berries and mint provides a bright, acidic counterpoint that cleanses the palate after the indulgent cookies.
Top Mistakes to Avoid
- Mistake: Using melted butter. This is the fastest route to a flat, greasy cookie. Creaming softened butter with sugar is essential for creating structure and that perfect, slightly cakey chew.
- Mistake: Skipping the chill time. I’ve messed this up before too, in a moment of impatient hunger. Trust me, warm dough spreads rapidly, resulting in thin, crispy, and often burnt cookies. The chill is non-negotiable for thickness.
- Mistake: Overbaking. The cookies should look a little underdone when you take them out. They continue to cook on the hot baking sheet. If you wait for them to look “done” in the oven, you’ll end up with dry, crunchy cookies.
- Mistake: Using old baking soda. If your baking soda has been open for more than 6 months, it’s likely lost its potency. Your cookies won’t rise properly and can taste a bit “off.” Test it by adding a pinch to vinegar; if it doesn’t bubble vigorously, it’s time for a new box.
Expert Tips
- Tip: Weigh your flour. Scooping with a measuring cup can pack in too much flour, leading to dry, cakey cookies. For absolute precision, use a kitchen scale. If you must use cups, fluff the flour with a spoon, spoon it into the cup, and level it off.
- Tip: Make a “puddle” test for butter. Not sure if your butter is the right temperature? Press it with your finger. It should make an indentation but not sink all the way through. If it’s liquid at all, it’s too warm.
- Tip: Create bakery-style cookies. For those gorgeous, textured tops, tear the chilled dough balls in half and smoosh them back together with the rough sides facing up just before baking. It creates craggy edges and a professional look.
- Tip: Freeze dough balls for later. After scooping, place the dough balls on a parchment-lined tray and freeze solid. Then, transfer to a zip-top bag. You can bake frozen cookies anytime, just add 1-2 minutes to the baking time.
FAQs
Can I make the dough ahead of time?
Absolutely, and I highly recommend it! The flavor actually deepens. You can keep the covered dough in the refrigerator for up to 3 days. The slow hydration and fermentation (yes, really!) create more complex, almost toffee-like flavors. Just let the dough sit at room temperature for 15-20 minutes before scooping if it’s too hard to handle.
Why did my cookies come out cakey?
This usually points to too much flour or overmixing. Remember to weigh your flour or use the “spoon and level” method. Also, mix the dough only until the ingredients are just combined. Overmixing develops gluten, which gives a bread-like, cakey texture instead of a tender, chewy one.
Can I use milk chocolate or dark chocolate?
Of course! This recipe is a fantastic canvas for your chocolate preferences. Milk chocolate will make them sweeter, while a 70% dark chocolate will provide a more intense, bittersweet contrast. I love using a mix of semi-sweet and dark chunks for the best of both worlds.
My cookies are too flat. What happened?
Flat cookies are typically caused by butter that was too warm or dough that wasn’t chilled. The butter melts before the structure has a chance to set. Next time, ensure your butter is just softened, not melted, and don’t skip that crucial chilling step. Also, check that your baking soda is fresh.
How do I store them to keep them soft?
The trick is to lock in moisture. Once completely cool, store the cookies in an airtight container at room temperature. For extra softness, you can add a piece of bread to the container—the cookies will draw moisture from the bread, staying soft for days (the bread will get hard, but your cookies will be perfect!).


Chocolate Chip Cookies
Bake the perfect Chocolate Chip Cookies with crisp edges and a soft, chewy center. This easy recipe is your new go-to. Get the recipe now!
Ingredients
For the Ingredients & Tools
-
225 g unsalted butter (softened)
-
150 g light brown sugar (packed)
-
100 g granulated sugar
-
2 large eggs (at room temperature)
-
2 tsp pure vanilla extract
-
280 g all-purpose flour
-
1 tsp baking soda
-
1 tsp fine sea salt
-
350 g semi-sweet chocolate chips or chunks
Instructions
-
In the bowl of your stand mixer fitted with the paddle attachment, combine the softened butter, brown sugar, and granulated sugar. Beat on medium speed for a full 2-3 minutes, until the mixture is very pale, fluffy, and well-combined. You’ll notice the texture change—it should look almost like a smooth, light paste. Scrape down the sides of the bowl with a spatula to ensure everything is incorporated.01
-
With the mixer on low, add the eggs one at a time, mixing until each is fully absorbed before adding the next. Then, pour in the vanilla extract. Mix just until combined. The mixture might look a little curdled at this point—that’s perfectly normal and will come together once you add the dry ingredients.02
-
In a separate medium bowl, whisk together the flour, baking soda, and salt. This isn't just mixing; you're aerating the flour and ensuring the leavening is evenly distributed, which prevents bitter spots of baking soda in your finished cookies.03
-
With the mixer on low, gradually add the dry ingredients to the wet ingredients. Mix only until the last streaks of flour disappear. It’s crucial not to overmix here, as that can develop the gluten in the flour and lead to tough cookies. The dough will be quite thick.04
-
Switch to a sturdy spatula and gently fold in the chocolate chips or chunks. Make sure they’re evenly distributed throughout the dough. You’ll have a beautifully speckled, stiff dough that smells amazing already.05
-
Cover the bowl with plastic wrap and refrigerate for at least 1 hour, or ideally up to 24 hours. If you’re in a rush, you can pop the scooped dough balls onto a baking sheet and freeze for 30 minutes. The dough will firm up significantly.06
-
Preheat your oven to 375°F (190°C) and line baking sheets with parchment paper. Using a cookie scoop (about 1.5 tablespoons), portion the dough onto the sheets, leaving about 2 inches between each for spreading. Bake for 10-12 minutes, until the edges are set and golden brown but the centers still look soft and slightly underdone.07
-
As soon as you remove the baking sheet from the oven, lift it and gently tap it on the countertop. This helps deflate the cookies just slightly for a more even texture. Let the cookies cool on the hot baking sheet for 5 full minutes—they’ll continue to cook from the residual heat—before transferring them to a wire rack to cool completely.08
Not what you're looking for?


