There’s something magical about a cookie that feels like a warm, sophisticated hug. I think that every time I pull a tray of these Chocolate Hazelnut Thumbprints from the oven. They begin as pure, buttery bliss and finish with a rich, dark chocolate heart—a combination that makes my entire kitchen smell like happiness. For me, this is what joyful holiday baking is all about. It’s a simple, satisfying project that yields elegant cookies, perfect for your collection of Christmas cookies recipes and offering a lovely twist on the usual lineup of holiday cookies for Christmas.
I love sharing these as a standout option when friends ask for Christmas baking ideas. That tender, crumbly hazelnut shortbread cradling a dollop of ganache truly makes for unique Christmas cookies. They always earn a special spot on the platter and have become one of my most-requested holiday treats. Whether arranged on a vintage plate or packed in a gift tin, they are a wonderful Christmas dessert idea that feels both festive and comforting.
What I adore most, though, is how this comfort food recipe respects your time. You can make the dough ahead, so a batch of these beautiful cookies is never far away, making your seasonal celebrations feel effortlessly delicious.
If you're looking for the perfect Chocolate Hazelnut Thumbprints, you're in the right place. Whether you love Christmas Cookie or want to explore our Crockpot Recipes collection, we've got you covered.


Why You’ll Love This Chocolate Hazelnut Thumbprints
- Incredible texture: Crumbly hazelnut shortbread meets a luxuriously soft chocolate center.
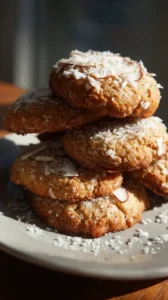
- Impressive appearance: They look bakery-perfect with golden edges and glossy chocolate wells.
- Toasty flavor: Finely ground toasted hazelnuts infuse the entire cookie with deep, warm flavor.
- Make-ahead friendly: Dough logs can be prepared days in advance for easy slice-and-bake convenience.
Ingredients & Tools
- 150 g raw hazelnuts
- 225 g unsalted butter, at room temperature
- 100 g granulated sugar
- 1 tsp pure vanilla extract
- 1/4 tsp fine sea salt
- 280 g all-purpose flour
- 150 g dark chocolate, finely chopped
- 120 ml heavy cream
- 1 tbsp unsalted butter, for the ganache
- A pinch of flaky sea salt for finishing (optional, but highly recommended)
Tools: A food processor or high-powered blender, a stand mixer or electric hand mixer, a baking sheet, parchment paper, a small saucepan, and a small spoon or a piping bag.
Notes: The quality of your hazelnuts and chocolate really shines here, so don’t skimp. Using a good dark chocolate (around 60-70% cacao) for the ganache ensures it sets with a satisfying snap and isn’t overly sweet.
Nutrition (per serving)
| Calories: | 180 kcal |
| Protein: | 2 g |
| Fat: | 12 g |
| Carbs: | 17 g |
| Fiber: | 1 g |
Serves: 24 cookies | Prep Time: 30 minutes | Cook Time: 12 minutes | Total Time: 1 hour 30 minutes (includes chilling)
Before You Start: Tips & Ingredient Notes
- Toast your own hazelnuts. This is non-negotiable for the best flavor. Toasting unlocks their oils and gives them that deep, nutty aroma. You’ll notice the smell changes from mild to wonderfully fragrant—that’s your cue they’re done.
- Properly softened butter is key. Your butter should be cool to the touch but yield easily when you press it. If it’s melty and greasy, the dough will spread too much. The trick is to leave it out for about 45-60 minutes before you begin.
- Don’t rush the dough chilling. This step is what prevents your beautiful thumbprint wells from collapsing and spreading into flat disks in the oven. A firm, cold dough is your best friend for maintaining that perfect shape.
- Chop your chocolate finely. For a super smooth ganache, you want the chocolate pieces to be small and uniform so they melt evenly when the hot cream is poured over. A serrated bread knife is actually fantastic for this task.
How to Make Chocolate Hazelnut Thumbprints
Step 1: First, toast your hazelnuts. Preheat your oven to 175°C (350°F). Spread the raw hazelnuts in a single layer on a baking sheet and toast for 8-10 minutes, until they’re fragrant and the skins are starting to crack. You’ll see them darken slightly. Let them cool for a few minutes, then transfer them to a clean kitchen towel. Rub them vigorously in the towel—most of the bitter skins will flake right off. Don’t worry about getting every last bit; a few specks are fine.
Step 2: Once the hazelnuts are mostly skinless and cool, pop them into your food processor. Pulse until they form a fine, sandy meal. Be careful not to over-process, or you’ll start making hazelnut butter! You want a texture similar to coarse sand. Set this aside for now.
Step 3: Now, for the cookie dough. In the bowl of a stand mixer fitted with the paddle attachment (or using a hand mixer), cream together the softened butter and granulated sugar on medium speed for about 2-3 minutes. It should become pale and fluffy. Scrape down the sides of the bowl, then beat in the vanilla extract and salt until just combined.
Step 4: Reduce the mixer speed to low and gradually add the ground hazelnuts and all-purpose flour. Mix only until the dough just comes together and no dry streaks of flour remain. It will be soft but should hold its shape when pinched. Overmixing at this stage can make the cookies tough.
Step 5: Turn the dough out onto a piece of plastic wrap, shape it into a disc, and wrap it tightly. Chill in the refrigerator for at least 30 minutes. This firms up the butter, making the dough much easier to handle and shape. You’ll notice it’s less sticky and more cohesive.
Step 6: Preheat your oven to 190°C (375°F) and line a baking sheet with parchment paper. Scoop out tablespoon-sized portions of dough and roll them into smooth balls. Place them about 2 inches apart on the prepared baking sheet. Now, use your thumb, the end of a wooden spoon, or the back of a small measuring spoon to make a deep, wide indentation in the center of each ball.
Step 7: Bake for 10-12 minutes, until the cookies are set and the edges are just starting to turn a light golden brown. The indentations might have puffed up a little. As soon as you remove the tray from the oven, immediately re-press the indentations with your tool of choice—this is the secret to keeping that perfect well for the chocolate!
Step 8: Let the cookies cool on the baking sheet for 5 minutes before transferring them to a wire rack to cool completely. They need to be completely cool before you add the ganache, or it will just melt and run right off.
Step 9: While the cookies cool, make the chocolate ganache. Place the finely chopped dark chocolate in a heatproof bowl. Heat the heavy cream in a small saucepan over medium heat until it just begins to simmer—you’ll see small bubbles form around the edges. Pour the hot cream over the chocolate, add the tablespoon of butter, and let it sit undisturbed for 2-3 minutes.
Step 10: After it has sat, slowly whisk the mixture from the center outward until it becomes a smooth, glossy, and unified ganache. Let it cool for about 5-10 minutes to thicken slightly; it should be pourable but not runny. You can then spoon or pipe it into the cooled cookie wells. Finish with a tiny sprinkle of flaky sea salt on top of each one for a sublime sweet-and-salty contrast.
Storage & Freshness Guide
- Fridge: Store in an airtight container for up to 5 days.
- Freezer: Freeze baked cookies in a single layer, then transfer to an airtight container for up to 1 month.
- Reviving: Bring to room temperature before serving, or warm briefly in a 300°F oven for 3-4 minutes.
Serving Suggestions
Complementary Dishes
- A simple cheese board — The salty, creamy notes of a good aged cheddar or a soft brie provide a fantastic savory counterpoint to the sweet, nutty cookies, cleansing the palate between bites.
- Clementine segments or pear slices — The bright, fresh acidity and juiciness of citrus or pear cut through the richness of the chocolate and butter, making the whole experience feel lighter and more balanced.
Drinks
- Espresso or a strong Americano — The bitter, intense coffee is a classic partner for dark chocolate and hazelnuts, enhancing their deep flavors without adding more sweetness.
- A glass of tawny port or a rich red wine — The berry and nutty notes in a good port or a Cabernet Sauvignon mirror the flavors in the cookie, creating a wonderfully sophisticated pairing for a grown-up dessert moment.
Something Sweet
- Vanilla bean ice cream — Serving a cookie slightly warmed with a scoop of cold, creamy vanilla ice cream melting into the chocolate center is pure, simple decadence. It turns the cookie into a full-blown dessert.
- Candied orange peel — The chewy, bittersweet citrus candy provides a different texture and a vibrant flavor pop that plays beautifully against the deep chocolate and nutty base.
Top Mistakes to Avoid
- Mistake: Using warm dough. If your dough isn’t properly chilled, the butter will melt too quickly in the oven, causing the cookies to spread and your carefully made thumbprint wells to close up. I’ve messed this up before too, and you end up with flat, puffy cookies instead of defined ones.
- Mistake: Not re-pressing the indentations. The cookies naturally puff a bit as they bake. If you don’t take the 10 seconds to gently re-press the wells as soon as they come out of the oven, they will be too shallow to hold a satisfying amount of ganache.
- Mistake> Over-baking the cookies. You want the edges just lightly golden. If you wait for them to be brown all over, the hazelnuts can taste bitter and the cookie will be dry and crumbly instead of tender.
- Mistake: Pouring ganache onto warm cookies. The chocolate will not set properly and will seep into the cookie, making a mess. Patience is a virtue here—wait for them to be completely cool to the touch.
Expert Tips
- Tip: For perfectly uniform cookies every time, use a small cookie scoop to portion the dough. It’s faster, cleaner, and ensures they all bake at the same rate.
- Tip: If your dough is too crumbly to roll into balls, it might be a bit too cold. Let it sit at room temperature for 5-10 minutes to become more pliable. The warmth of your hands will also help smooth the balls.
- Tip: To get a super smooth, professional-looking ganache fill, transfer the slightly cooled ganache to a piping bag fitted with a small round tip. You can then neatly fill each well without any drips down the sides.
- Tip: For a fun twist, you can roll the dough balls in some additional finely chopped hazelnuts before making the indentation and baking. This adds extra crunch and visual appeal.
FAQs
Can I make these cookies ahead of time?
Absolutely, and I highly recommend it! The dough logs can be wrapped tightly and refrigerated for up to 3 days, or frozen for a month—just slice and bake from frozen, adding a minute or two to the baking time. You can also freeze the fully baked and filled cookies in a single layer, then transfer to an airtight container. They thaw perfectly in about 20 minutes.
My ganache is too runny. What happened?
This usually means the cream was too hot or the ratio was off. If it’s too runny, just let it sit at room temperature for a bit longer, stirring occasionally, until it thickens to a pipeable consistency. You can also pop it in the fridge for 5-minute intervals, stirring each time, but be careful not to let it set completely.
Can I use a different type of nut?
You can, though the flavor profile will change. Toasted almonds or pecans would be lovely substitutes. Just make sure to grind them to the same fine, sandy consistency for the best texture in the dough.
Why did my cookies spread so much?
The most common culprits are butter that was too soft or warm, or dough that wasn’t chilled sufficiently. Remember, cold dough going into a hot oven is the secret to minimal spreading. Also, double-check your measurements—too much butter or not enough flour will also cause spreading.
Can I use Nutella instead of making ganache?
You can, for a quicker version. However, Nutella can be quite soft and sweet. For best results, if using Nutella, I’d suggest warming it slightly to make it pipeable, but be aware it won’t set with the same firm, glossy finish as a proper dark chocolate ganache.


Chocolate Hazelnut Thumbprints: Easy Holiday Cookies
Chocolate Hazelnut Thumbprints are the ultimate holiday treat. This easy thumbprint cookie recipe yields elegant, nutty cookies perfect for your Christmas dessert table.
Ingredients
For the Cookies:
-
150 g raw hazelnuts
-
225 g unsalted butter (at room temperature)
-
100 g granulated sugar
-
1 tsp pure vanilla extract
-
0.25 tsp fine sea salt
-
280 g all-purpose flour
For the Ganache:
-
150 g dark chocolate (finely chopped)
-
120 ml heavy cream
-
1 tbsp unsalted butter (for the ganache)
-
flaky sea salt (a pinch for finishing (optional, but highly recommended))
Instructions
-
First, toast your hazelnuts. Preheat your oven to 175°C (350°F). Spread the raw hazelnuts in a single layer on a baking sheet and toast for 8-10 minutes, until they’re fragrant and the skins are starting to crack. You’ll see them darken slightly. Let them cool for a few minutes, then transfer them to a clean kitchen towel. Rub them vigorously in the towel—most of the bitter skins will flake right off. Don't worry about getting every last bit; a few specks are fine.01
-
Once the hazelnuts are mostly skinless and cool, pop them into your food processor. Pulse until they form a fine, sandy meal. Be careful not to over-process, or you’ll start making hazelnut butter! You want a texture similar to coarse sand. Set this aside for now.02
-
Now, for the cookie dough. In the bowl of a stand mixer fitted with the paddle attachment (or using a hand mixer), cream together the softened butter and granulated sugar on medium speed for about 2-3 minutes. It should become pale and fluffy. Scrape down the sides of the bowl, then beat in the vanilla extract and salt until just combined.03
-
Reduce the mixer speed to low and gradually add the ground hazelnuts and all-purpose flour. Mix only until the dough just comes together and no dry streaks of flour remain. It will be soft but should hold its shape when pinched. Overmixing at this stage can make the cookies tough.04
-
Turn the dough out onto a piece of plastic wrap, shape it into a disc, and wrap it tightly. Chill in the refrigerator for at least 30 minutes. This firms up the butter, making the dough much easier to handle and shape. You’ll notice it’s less sticky and more cohesive.05
-
Preheat your oven to 190°C (375°F) and line a baking sheet with parchment paper. Scoop out tablespoon-sized portions of dough and roll them into smooth balls. Place them about 2 inches apart on the prepared baking sheet. Now, use your thumb, the end of a wooden spoon, or the back of a small measuring spoon to make a deep, wide indentation in the center of each ball.06
-
Bake for 10-12 minutes, until the cookies are set and the edges are just starting to turn a light golden brown. The indentations might have puffed up a little. As soon as you remove the tray from the oven, immediately re-press the indentations with your tool of choice—this is the secret to keeping that perfect well for the chocolate!07
-
Let the cookies cool on the baking sheet for 5 minutes before transferring them to a wire rack to cool completely. They need to be completely cool before you add the ganache, or it will just melt and run right off.08
-
While the cookies cool, make the chocolate ganache. Place the finely chopped dark chocolate in a heatproof bowl. Heat the heavy cream in a small saucepan over medium heat until it just begins to simmer—you’ll see small bubbles form around the edges. Pour the hot cream over the chocolate, add the tablespoon of butter, and let it sit undisturbed for 2-3 minutes.09
-
After it has sat, slowly whisk the mixture from the center outward until it becomes a smooth, glossy, and unified ganache. Let it cool for about 5-10 minutes to thicken slightly; it should be pourable but not runny. You can then spoon or pipe it into the cooled cookie wells. Finish with a tiny sprinkle of flaky sea salt on top of each one for a sublime sweet-and-salty contrast.10
Not what you're looking for?


