There’s something about a classic thumbprint jam cookie that feels like a hug from the past. I picture my grandmother’s kitchen, the scent of butter and sugar in the air, and the simple joy of pressing my thumb into a soft mound of dough. That’s the magic of this easy thumbprint cookie recipe: a buttery, melt-in-your-mouth shortbread base cradling a sweet, jewel-like jam center. It’s the ultimate comfort food recipe, turning any ordinary afternoon into something special.
For me, these cookies are also the heart of holiday baking. Whenever I’m sorting through my favorite christmas cookies recipes or dreaming up christmas baking ideas, this classic always makes the list. They are the perfect, delightful christmas sweets to package up for friends, and a lifesaver when you need last-minute christmas dessert ideas. Truly, they are a star among holiday treats.
So, as you plan your lineup of holiday cookies christmas this year, I hope you’ll remember these little gems. They’re more than just a cookie; they’re a little piece of handmade joy, perfect for sharing warmth and sweetness all season long.
Nothing beats a great Classic Thumbprint Jam Cookies. Whether you're a fan of Christmas Cookie or want to try something from our Chicken Recipes selection, keep scrolling!


Why You’ll Love This Classic Thumbprint Jam Cookies
- Perfect texture: Melt-in-your-mouth shortbread with a sticky jam center.
- Customizable flavors: Use any jam you like for endless variety.
- Simple to make: No fancy tools—just fun, hands-on shaping.
- Beautiful results: They look professional but are easy to assemble.
Ingredients & Tools
- 225 g unsalted butter, softened at room temperature
- 100 g granulated sugar
- 1 large egg yolk
- 2 tsp pure vanilla extract
- 250 g all-purpose flour
- ¼ tsp fine sea salt
- Approx. ½ cup jam of your choice (raspberry and apricot are classics!)
Tools: Stand mixer or electric hand mixer, baking sheets, parchment paper, a small spoon or piping bag for the jam
Notes: Use good-quality butter and vanilla for best flavor. The egg yolk ensures a rich, tender crumb, and salt balances sweetness.
Nutrition (per serving)
| Calories: | 145 kcal |
| Protein: | 1 g |
| Fat: | 8 g |
| Carbs: | 18 g |
| Fiber: | 0.5 g |
Serves: 24 cookies | Prep Time: 20 minutes | Cook Time: 12-15 minutes | Total Time: 35 minutes (plus chilling)
Before You Start: Tips & Ingredient Notes
- Butter temperature is everything. Your butter needs to be properly softened—cool to the touch but easily indented with your finger. If it’s melted or too warm, your dough will spread like crazy in the oven. If it’s too cold, it won’t cream properly with the sugar.
- Don’t skip the egg yolk. It might seem like a small component, but that single yolk adds incredible richness and helps bind the dough without making it tough. It’s the secret to that perfect, melt-in-your-mouth shortbread texture.
- Choose your jam wisely. A thicker jam or preserves works best as it won’t bubble over as much. If your jam is very runny, you can simmer it in a small pan for a few minutes to thicken it up before using it.
- Chilling the dough is not a suggestion. I know it’s tempting to skip this step, but a quick chill in the fridge firms up the butter and prevents the cookies from spreading flat. It ensures your thumbprints hold their shape beautifully.
How to Make Classic Thumbprint Jam Cookies
Step 1: Start by creaming your butter and sugar. In the bowl of your stand mixer fitted with the paddle attachment, beat the softened butter and granulated sugar together on medium-high speed for a good 2-3 minutes. You’re looking for a mixture that is pale, light, and fluffy. This step is crucial because it incorporates air into the dough, which contributes to that lovely tender texture. Scrape down the sides of the bowl with a spatula to make sure everything is evenly mixed.
Step 2: Add the wet ingredients. With the mixer on low, add the egg yolk and vanilla extract. Mix just until they are fully incorporated and the mixture looks smooth again. You’ll notice the color might deepen slightly and the aroma of the vanilla will start to come through. Be careful not to overmix at this stage—you just want everything combined.
Step 3: Incorporate the dry ingredients. In a separate bowl, whisk together the flour and salt. With your mixer on low speed, gradually add the flour mixture to the butter mixture. Mix only until the flour streaks have disappeared and a soft dough has formed. The moment the dough comes together, stop the mixer. Overmixing is the enemy of a tender shortbread!
Step 4: Chill the dough. Turn the dough out onto a piece of plastic wrap, shape it into a flat disc, and wrap it tightly. Pop it into the refrigerator for at least 30 minutes, or up to an hour. This firms up the butter, making the dough easier to handle and ensuring your cookies won’t spread too much.
Step 5: Shape the cookies. Preheat your oven to 350°F (175°C) and line your baking sheets with parchment paper. Scoop out tablespoon-sized portions of dough and roll them into smooth balls between your palms. Place them about 2 inches apart on your prepared baking sheets.
Step 6: Make the thumbprints. Now for the fun part! Using your thumb, the back of a small rounded teaspoon, or even the end of a thick wooden spoon, gently press an indentation into the center of each dough ball. Don’t press all the way to the baking sheet—you just want a nice, clear well to hold the jam.
Step 7: Fill with jam. Spoon a small amount of your chosen jam into each indentation. A little goes a long way here—you want just enough to fill the well without overflowing, or it will bubble over and create a mess in the oven. A small teaspoon or a piping bag gives you the most control.
Step 8: Bake to perfection. Bake for 12 to 15 minutes, or until the edges of the cookies are just starting to turn a very light golden brown. The centers should still look soft and pale. You’ll see the jam bubbling away happily—that’s exactly what you want!
Step 9: Cool completely. Let the cookies cool on the baking sheet for 5 minutes before transferring them to a wire rack to cool completely. This is the hardest part—waiting! The jam centers will be molten lava hot, and the cookies are very fragile when warm, so patience is key.
Storage & Freshness Guide
- Fridge: Not recommended—refrigeration can dry out the cookies.
- Freezer: Freeze unfilled dough balls or baked cookies in an airtight container for up to 3 months.
- Reviving: Warm baked cookies briefly in a 300°F oven for 3–5 minutes to refresh crispness.
Serving Suggestions
Complementary Dishes
- A simple cheese board — The salty, sharp notes of a good aged cheddar or creamy brie create a fantastic sweet-and-savory contrast with the fruity cookies.
- A bowl of vanilla bean ice cream — Crumble a warm cookie over the top for an instant, decadent dessert that feels incredibly special with minimal effort.
- Fresh fruit salad — A light, bright fruit salad helps balance the richness of the buttery cookies and makes the whole spread feel more complete.
Drinks
- A glass of cold milk — It’s the ultimate classic pairing for a reason. The creaminess of the milk is the perfect partner for the crumbly, sweet cookie.
- Earl Grey tea — The bergamot in the tea complements the fruity jam beautifully, creating a sophisticated and cozy afternoon treat.
- Black coffee — The bitterness of a strong brew cuts through the sweetness of the jam and butter, making for a perfectly balanced bite.
Something Sweet
- Lemon bars — The bright, tart flavor of a good lemon bar provides a zesty counterpoint that keeps your palate refreshed between bites of the richer thumbprint cookies.
- Dark chocolate truffles — A single, intensely chocolatey truffle alongside a cookie offers a luxurious, two-part dessert experience that feels truly indulgent.
- Poached pears — A lightly spiced, wine-poached pear feels elegant and light, continuing the fruit theme without being overly sweet.
Top Mistakes to Avoid
- Mistake: Using melted butter. This is the number one reason cookies spread. If your butter is oily or liquid, your dough will be too soft and your thumbprints will lose their shape, turning into flat, greasy puddles instead of defined cookies.
- Mistake: Overfilling the jam wells. It’s so tempting to add a heaping spoonful, but when the jam heats up, it bubbles and expands. Too much jam will spill over the sides, creating a sticky, burnt mess on your baking sheet and making the cookies difficult to remove.
- Mistake: Skipping the dough chill. I’ve messed this up before too, thinking I could save time. Warm dough spreads rapidly in the oven. That 30-minute chill is what gives the cookies their structure and prevents them from merging into one giant cookie sheet.
- Mistake: Overbaking. You’re looking for a hint of gold on the edges, not an all-over tan. Overbaked shortbread becomes hard and loses its delicate, melting quality. They continue to firm up as they cool, so take them out when they still look a little soft.
Expert Tips
- Tip: Use a cork for perfect prints. The end of a wine cork is often the perfect size and shape for creating a neat, uniform indentation in each cookie ball. It’s a little pro-hack that makes the process faster and gives you a more professional look.
- Tip: Give your jam a stir. Before filling the cookies, give your jam a vigorous stir with a spoon. This breaks it up and makes it easier to spoon or pipe, ensuring a smoother application and a more even bake.
- Tip: Roll dough balls in sugar or nuts. For an extra layer of texture and flavor, roll your shaped dough balls in coarse sugar or finely chopped nuts before making the thumbprint. It adds a delightful crunch and visual appeal.
- Tip: Bake one sheet at a time. For the most even baking and browning, resist the urge to bake two sheets at once. The trapped heat can cause uneven cooking and prevent the cookies from setting properly. Your patience will be rewarded!
FAQs
Can I make the dough ahead of time?
Absolutely! You can prepare the dough, wrap it tightly, and keep it in the refrigerator for up to 3 days. You can also freeze the shaped, unfilled dough balls on a baking sheet before transferring them to a freezer bag. When you’re ready to bake, let them thaw just enough to make the thumbprint, fill, and bake. You may need to add a minute or two to the baking time if they go in cold.
My jam bubbled over a lot. What happened?
This usually means the jam was either too runny or you simply used a bit too much. Next time, try thickening your jam by cooking it down for a few minutes in a small saucepan and letting it cool slightly. And remember, a scant half-teaspoon is usually plenty to fill the well without overflowing when it expands in the oven’s heat.
Can I use other fillings besides jam?
Of course! Get creative. Lemon curd is a fantastic, tangy alternative. You could also use a thick chocolate ganache, dulce de leche, or even a small square of baked marzipan. Just make sure your filling is relatively thick so it doesn’t seep into the dough or run all over the pan.
Why are my cookies dry and crumbly?
This is typically a sign of overmixing the dough once the flour was added, or potentially over-measuring the flour. When you add the flour, mix only until it’s just combined. And when measuring flour, fluff it up in the bag, spoon it into your measuring cup, and level it off with a knife for the most accurate results.
How should I store these cookies?
Once completely cooled, store them in an airtight container at room temperature. Place parchment paper between layers to keep them from sticking together. They’ll stay fresh and delicious for about 4-5 days. I don’t recommend refrigerating them, as it can cause them to dry out and lose their lovely texture.


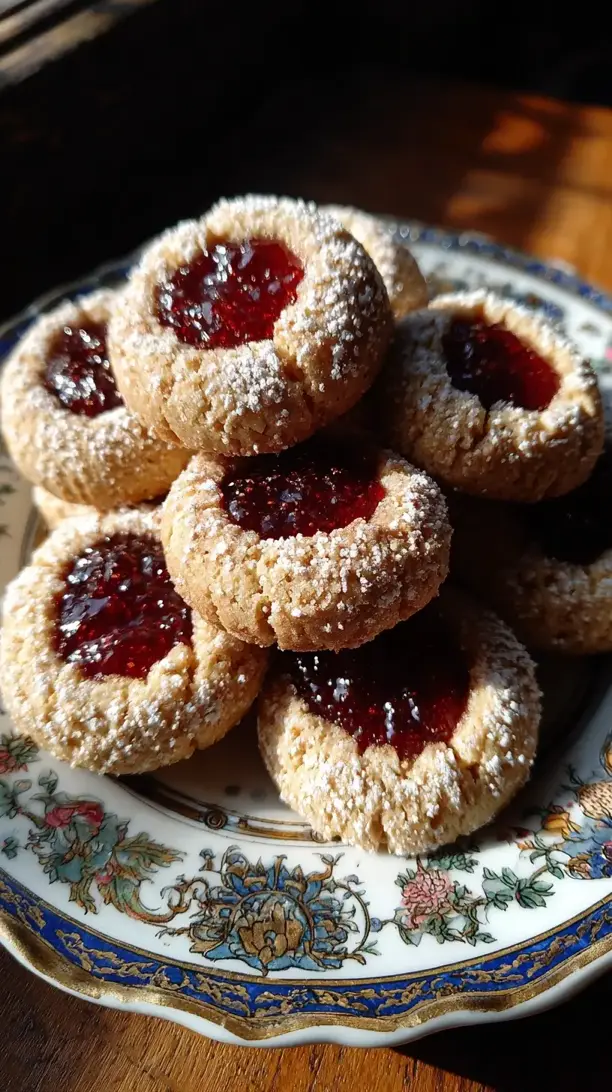
Classic Thumbprint Jam Cookies: An Easy Holiday Treat
Classic Thumbprint Jam Cookies are the ultimate holiday treat. This easy thumbprint cookie recipe yields buttery, jam-filled bites perfect for your Christmas cookie platter.
Ingredients
For the Ingredients
-
225 g unsalted butter (softened at room temperature)
-
100 g granulated sugar
-
1 large egg yolk
-
2 tsp pure vanilla extract
-
250 g all-purpose flour
-
¼ tsp fine sea salt
-
½ cup jam of your choice
Instructions
-
Start by creaming your butter and sugar. In the bowl of your stand mixer fitted with the paddle attachment, beat the softened butter and granulated sugar together on medium-high speed for a good 2-3 minutes. You’re looking for a mixture that is pale, light, and fluffy. This step is crucial because it incorporates air into the dough, which contributes to that lovely tender texture. Scrape down the sides of the bowl with a spatula to make sure everything is evenly mixed.01
-
Add the wet ingredients. With the mixer on low, add the egg yolk and vanilla extract. Mix just until they are fully incorporated and the mixture looks smooth again. You’ll notice the color might deepen slightly and the aroma of the vanilla will start to come through. Be careful not to overmix at this stage—you just want everything combined.02
-
Incorporate the dry ingredients. In a separate bowl, whisk together the flour and salt. With your mixer on low speed, gradually add the flour mixture to the butter mixture. Mix only until the flour streaks have disappeared and a soft dough has formed. The moment the dough comes together, stop the mixer. Overmixing is the enemy of a tender shortbread!03
-
Chill the dough. Turn the dough out onto a piece of plastic wrap, shape it into a flat disc, and wrap it tightly. Pop it into the refrigerator for at least 30 minutes, or up to an hour. This firms up the butter, making the dough easier to handle and ensuring your cookies won't spread too much.04
-
Shape the cookies. Preheat your oven to 350°F (175°C) and line your baking sheets with parchment paper. Scoop out tablespoon-sized portions of dough and roll them into smooth balls between your palms. Place them about 2 inches apart on your prepared baking sheets.05
-
Make the thumbprints. Now for the fun part! Using your thumb, the back of a small rounded teaspoon, or even the end of a thick wooden spoon, gently press an indentation into the center of each dough ball. Don't press all the way to the baking sheet—you just want a nice, clear well to hold the jam.06
-
Fill with jam. Spoon a small amount of your chosen jam into each indentation. A little goes a long way here—you want just enough to fill the well without overflowing, or it will bubble over and create a mess in the oven. A small teaspoon or a piping bag gives you the most control.07
-
Bake to perfection. Bake for 12 to 15 minutes, or until the edges of the cookies are just starting to turn a very light golden brown. The centers should still look soft and pale. You’ll see the jam bubbling away happily—that’s exactly what you want!08
-
Cool completely. Let the cookies cool on the baking sheet for 5 minutes before transferring them to a wire rack to cool completely. This is the hardest part—waiting! The jam centers will be molten lava hot, and the cookies are very fragile when warm, so patience is key.09
Not what you're looking for?


