There’s something truly magical about a dessert that feels like a sweet, snowy hug, especially during the holidays. I think of these Coconut Snowball Truffles as little bites of edible magic, with their creamy, melt-in-your-mouth center and fluffy coconut coating. They’re my go-to comfort recipe when I want to create something special without turning on the oven, making them a perfect addition to your holiday baking lineup.
If you’re searching for unique Christmas cookies or standout Christmas sweets, this easy recipe is a dream. They come together so quickly, which is a lifesaver when you need a stunning platter of Christmas dessert ideas or a last-minute batch of easy Christmas treats. Honestly, they’ve saved my sanity more than once when I needed impressive holiday treats without the fuss.
So, as you gather all your Christmas baking ideas this season, I hope you’ll add these truffles to your list. They’re the kind of effortless, joyful recipe that makes holiday memories sweeter, and they always earn a spot among my favorite easy Christmas treats.
Love Coconut Snowball Truffles? So do we! If you're into Christmas Cookie or curious about Appetizers & Snacks, you'll find plenty of inspiration below.


Why You’ll Love This Coconut Snowball Truffles
- No-Bake Easy: No oven needed—everything happens on your countertop.
- Melt-in-Mouth Texture: Creamy center with a chewy, sweet coconut coating.
- Endlessly Customizable: A perfect blank canvas for your flavor experiments.
- Impressive Look: They look like they came from a fancy chocolatier.
Ingredients & Tools
- 200 g sweetened condensed milk (that’s about half a standard can)
- 200 g desiccated coconut, plus an extra 100 g for rolling
- 150 g icing sugar (also called confectioners’ sugar)
- 100 g unsalted butter, softened at room temperature
- 1 tsp vanilla extract or vanilla bean paste
- A tiny pinch of fine sea salt
Tools: A medium mixing bowl, a sturdy spatula or wooden spoon, a baking sheet, parchment paper.
Notes: Use fresh, finely shredded desiccated coconut for the best snowy look and tender bite. The pinch of salt is essential for balancing the sweetness.
Nutrition (per serving)
| Calories: | 145 kcal |
| Protein: | 1 g |
| Fat: | 9 g |
| Carbs: | 16 g |
| Fiber: | 1 g |
Serves: 20 truffles | Prep Time: 25 minutes | Chill Time: 1 hour | Total Time: 1 hour 25 minutes
Before You Start: Tips & Ingredient Notes
- Butter Temperature is Key. Your butter must be properly softened. If it’s too cold, your mixture will be lumpy; if it’s melted, it will be greasy. It should yield gently to a finger press.
- Don’t Skip the Chill. This is the most crucial step for easy rolling. The mixture needs time to firm up in the fridge, otherwise you’ll have a sticky situation on your hands—literally.
- Weigh Your Ingredients. For confections like this, a kitchen scale is your best friend for accuracy. It ensures the perfect texture every single time.
- Desiccated vs. Shredded Coconut. Desiccated coconut is finely ground and unsweetened, giving a smoother coating. Sweetened shredded coconut is longer and stringier. I prefer desiccated for that classic snowball look.
How to Make Coconut Snowball Truffles
Step 1: In your medium mixing bowl, combine the softened butter and icing sugar. Use your spatula or a wooden spoon to beat them together until the mixture is smooth, pale, and well-combined. You’ll notice it starts to look a little fluffy—this is what you want! There should be no visible streaks of butter.
Step 2: Now, pour in the sweetened condensed milk and add the vanilla extract and that all-important pinch of salt. Mix everything vigorously until it’s completely homogenous. The mixture will be quite soft and loose at this stage, which is perfectly normal. Don’t worry, it will firm up.
Step 3: Here comes the coconut! Gradually add the 200 grams of desiccated coconut to the wet mixture. Stir until every last bit is incorporated. The dough will thicken significantly and become less sticky, pulling away from the sides of the bowl. It should be soft but manageable.
Step 4: Cover the bowl with plastic wrap and press it directly onto the surface of the dough. This prevents a skin from forming. Chill it in the refrigerator for at least 1 hour. This step is non-negotiable—it transforms the dough from sticky to rollable.
Step 5: After chilling, line a baking sheet with parchment paper. Place your extra 100 grams of desiccated coconut in a shallow bowl. Using a small cookie scoop or a teaspoon, portion out the dough and roll it between your palms into neat, 1-inch balls. The dough should be firm and not stick to your hands.
Step 6: Roll each ball in the reserved coconut, pressing gently to ensure an even, snowy coating. Place each finished truffle on your prepared baking sheet. If the dough starts to get too soft and sticky while you’re working, just pop the whole batch back in the fridge for 10-15 minutes to firm up again.
Step 7: Once all your truffles are shaped and coated, you can enjoy them immediately for a slightly softer texture. For a firmer, more classic truffle bite, let them set in the fridge for another 30 minutes before serving. Store any leftovers—if you have any!—in an airtight container in the fridge.
Storage & Freshness Guide
- Fridge: Store in an airtight container for up to 1 week.
- Freezer: Freeze in a single layer, then transfer to a freezer bag for up to 3 months.
- Reviving: Thaw frozen truffles overnight in the fridge before serving.
Serving Suggestions
Complementary Dishes
- A Simple Fruit Platter — The bright, fresh acidity of berries or citrus segments cuts through the richness of the truffles beautifully, cleansing the palate between bites.
- A Cheese Board with Mild Cheeses — A soft, creamy brie or a mild cheddar provides a lovely savory counterpoint that makes the sweet coconut taste even more pronounced.
Drinks
- Hot Coffee or Espresso — The bitter notes of a strong coffee are the perfect partner for these very sweet treats, creating a balanced and sophisticated flavor experience.
- A Crisp White Wine — A glass of something like a Sauvignon Blanc or a Prosecco offers a bubbly, acidic contrast that makes each bite of truffle feel new again.
Something Sweet
- Dark Chocolate-Dipped Orange Slices — The combination of bitter chocolate and zesty citrus is a classic for a reason, and it complements the tropical coconut vibe perfectly.
- Lemon Sorbet — A small scoop of tangy, refreshing sorbet is like a burst of sunshine next to the creamy, snowy truffles. It’s a fantastic palate cleanser.
Top Mistakes to Avoid
- Mistake: Using cold butter. This will prevent the ingredients from emulsifying properly, leaving you with a grainy, lumpy mixture instead of a smooth, creamy one. Patience with softening your butter is a virtue here.
- Mistake: Skipping the chilling time. I’ve messed this up before too, thinking I could just power through the stickiness. You can’t. The chilled dough is what makes rolling those perfect little spheres possible without it turning into a gloopy mess.
- Mistake: Over-rolling the truffles. Once they’re coated, just set them down. If you keep handling them, the heat from your hands will start to melt the butter and make the coconut coating look greasy instead of pristine and snowy.
Expert Tips
- Tip: Toast your coconut for rolling. Spread the coconut for the coating on a baking sheet and toast it in a 350°F (175°C) oven for 5-7 minutes, until lightly golden. Let it cool completely before using. This adds a incredible nutty, deep flavor that takes these truffles to a whole new level.
- Tip: Use a cookie scoop for uniformity. A small (1-inch) spring-loaded cookie scoop isn’t just for cookies. It’s the secret to getting all your truffles the exact same size, which makes them look professional and ensures they all set at the same rate.
- Tip: Add a flavor infusion. Try steeping a tablespoon of the condensed milk with a chai tea bag for 10 minutes before using it. Or add a quarter teaspoon of almond extract along with the vanilla for a marzipan-like twist. Get creative!
- Tip: For a firmer truffle, use less condensed milk. If you know you prefer a denser, less soft truffle, reduce the condensed milk by a tablespoon. The texture will be less melt-in-your-mouth and more substantial.
FAQs
Can I make these truffles dairy-free?
Absolutely! You can easily make a delicious dairy-free version. Simply substitute the butter with a high-quality vegan butter block (not the spreadable kind from a tub), and use a canned coconut milk that has been simmered and reduced by half to mimic the thick, sweet consistency of sweetened condensed milk. The flavor will be wonderfully coconut-forward.
How far in advance can I make them?
These truffles are fantastic for making ahead. They will keep beautifully in an airtight container in the refrigerator for up to one week. For longer storage, you can freeze them for up to three months. Just place them in a single layer on a baking sheet to freeze solid first, then transfer to a freezer bag. Thaw in the fridge overnight.
My mixture is too soft even after chilling. What happened?
This usually means your kitchen was very warm or you might have been a little generous with the condensed milk. Don’t panic! Just chill it for another 30-45 minutes. If it’s still too soft, you can work with it by dusting your hands with a little extra icing sugar to prevent sticking while rolling.
Can I use coconut oil instead of butter?
You can, but the texture will be different. Coconut oil sets much harder when chilled, so your truffles will be firmer and have a more pronounced coconut flavor. Use refined coconut oil if you don’t want a strong coconut taste, or unrefined if you do. The result is less creamy and more crumbly.
Why did my truffles turn out grainy?
A grainy texture is almost always due to the butter and sugar not being creamed together properly. Make sure your butter is truly softened (not melted) and that you beat it with the icing sugar until it’s completely smooth and no graininess remains before adding the other ingredients.


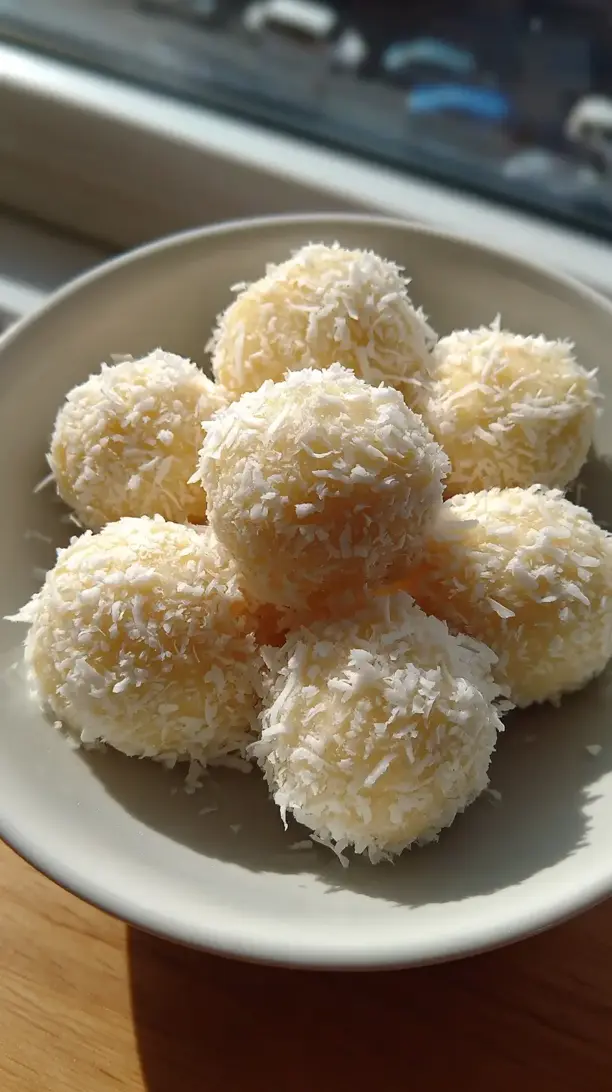
Coconut Snowball Truffles: An Easy No-Bake Holiday Treat
Coconut Snowball Truffles are the ultimate easy Christmas treat! This no bake truffles recipe delivers creamy, melt-in-your-mouth bites coated in sweet, fluffy coconut.
Ingredients
For the truffles:
-
200 g sweetened condensed milk
-
200 g desiccated coconut
-
150 g icing sugar
-
100 g unsalted butter (softened at room temperature)
-
1 tsp vanilla extract or vanilla bean paste
-
A tiny pinch fine sea salt
For rolling:
-
100 g desiccated coconut
Instructions
-
In your medium mixing bowl, combine the softened butter and icing sugar. Use your spatula or a wooden spoon to beat them together until the mixture is smooth, pale, and well-combined. You’ll notice it starts to look a little fluffy—this is what you want! There should be no visible streaks of butter.01
-
Now, pour in the sweetened condensed milk and add the vanilla extract and that all-important pinch of salt. Mix everything vigorously until it’s completely homogenous. The mixture will be quite soft and loose at this stage, which is perfectly normal. Don’t worry, it will firm up.02
-
Here comes the coconut! Gradually add the 200 grams of desiccated coconut to the wet mixture. Stir until every last bit is incorporated. The dough will thicken significantly and become less sticky, pulling away from the sides of the bowl. It should be soft but manageable.03
-
Cover the bowl with plastic wrap and press it directly onto the surface of the dough. This prevents a skin from forming. Chill it in the refrigerator for at least 1 hour. This step is non-negotiable—it transforms the dough from sticky to rollable.04
-
After chilling, line a baking sheet with parchment paper. Place your extra 100 grams of desiccated coconut in a shallow bowl. Using a small cookie scoop or a teaspoon, portion out the dough and roll it between your palms into neat, 1-inch balls. The dough should be firm and not stick to your hands.05
-
Roll each ball in the reserved coconut, pressing gently to ensure an even, snowy coating. Place each finished truffle on your prepared baking sheet. If the dough starts to get too soft and sticky while you’re working, just pop the whole batch back in the fridge for 10-15 minutes to firm up again.06
-
Once all your truffles are shaped and coated, you can enjoy them immediately for a slightly softer texture. For a firmer, more classic truffle bite, let them set in the fridge for another 30 minutes before serving. Store any leftovers—if you have any!—in an airtight container in the fridge.07
Not what you're looking for?


