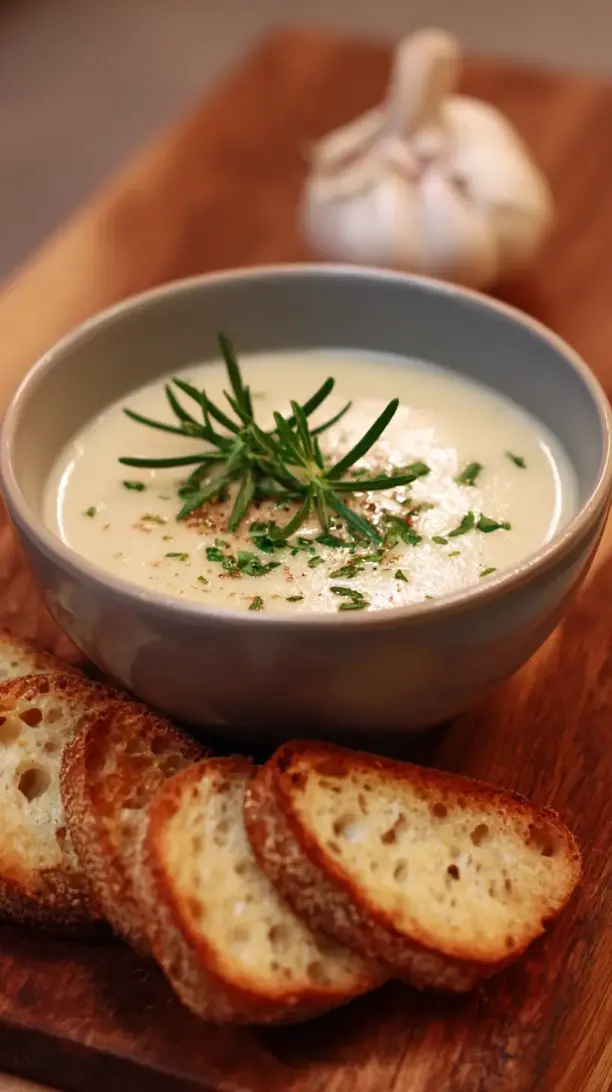
Roasting garlic transforms its sharp bite into a sweet, nutty, and caramelized base for this Creamy Roasted Garlic Soup. This velvety, comforting bowl feels luxurious yet is surprisingly simple to prepare. It’s the perfect warm embrace for a cozy weeknight or when you need a little extra comfort.
If you're looking for the perfect Creamy Roasted Garlic Soup, you're in the right place. Whether you love Soup Recipes or want to explore our Christmas Cookie collection, we've got you covered.


Why You’ll Love This Creamy Roasted Garlic Soup
- Deep, sweet flavor: Roasting unlocks garlic’s nutty, caramelized notes.
- Velvety texture: Blends into a luxuriously smooth and creamy consistency.
- Simple process: Mostly hands-off roasting, then a quick simmer and blend.
- Ultimate comfort: Warm, nourishing, and soul-soothing in every bowl.
Ingredients & Tools
- 3 whole heads of garlic
- 2 tablespoons olive oil, divided
- 1 large yellow onion, chopped
- 2 stalks celery, chopped
- 4 cups vegetable or chicken broth
- 1 large potato (russet or Yukon Gold), peeled and cubed
- 1/2 cup heavy cream or full-fat coconut milk for a dairy-free option
- 1 teaspoon fresh thyme leaves
- 1/2 teaspoon salt, or to taste
- 1/4 teaspoon black pepper, or to taste
- 1 bay leaf (optional, but recommended)
- For garnish: Fresh parsley, a drizzle of cream, or homemade croutons
Notes: Don’t skip the potato—it’s the natural thickener. Using whole heads of garlic is essential for foundational flavor.
Tools: A baking sheet, a large soup pot or Dutch oven, an immersion blender or standard countertop blender, aluminum foil.
Nutrition (per serving)
| Calories: | 280 kcal |
| Protein: | 5 g |
| Fat: | 18 g |
| Carbs: | 25 g |
| Fiber: | 3 g |
Serves: 4 | Prep Time: 15 minutes | Cook Time: 1 hour | Total Time: 1 hour 15 minutes
Before You Start: Tips & Ingredient Notes
- Don’t rush the roasting. This is the most critical step. The garlic needs time to become deeply golden and soft. If it’s not fully caramelized, the soup will lack that signature sweet, mellow flavor.
- What’s the best potato to use? A starchy russet will give you the creamiest, thickest result, while a Yukon Gold offers a buttery flavor and holds its shape a bit more. Honestly, you can’t go wrong with either for this application.
- Can I make it dairy-free? Absolutely! Full-fat coconut milk is a fantastic substitute for the heavy cream. It adds a similar richness and a very subtle, pleasant sweetness that actually complements the roasted garlic beautifully.
- Broth quality matters. Since there are so few ingredients, the flavor of your broth really shines through. Use a good-quality, low-sodium broth so you can control the final seasoning with salt yourself.
How to Make Creamy Roasted Garlic Soup
Step 1: First, let’s roast that garlic. Preheat your oven to 400°F (200°C). Slice about 1/4-inch off the top of each garlic head to expose the cloves. Place them on a piece of foil, drizzle with one tablespoon of the olive oil, and wrap them up into a little foil packet. Pop this onto a baking sheet and roast for 40-45 minutes, until the cloves are deeply golden, soft, and fragrant. You should be able to easily squeeze the paste out. Let them cool until you can handle them.
Step 2: While the garlic is cooling, start your soup base. In a large pot or Dutch oven, heat the remaining tablespoon of olive oil over medium heat. Add the chopped onion and celery and cook, stirring occasionally, for about 8-10 minutes until they’ve softened and become translucent. You’re not looking for color here, just tenderness—this builds a sweet foundation for the soup.
Step 3: Now, it’s time to incorporate our star ingredient. Squeeze the soft, caramelized garlic paste from each clove directly into the pot with the onions and celery. It might feel like a lot, but this is what it’s all about! Stir everything together for a minute until the garlic is fragrant and well-incorporated.
Step 4: Add the cubed potato, broth, thyme, bay leaf (if using), salt, and pepper to the pot. Give it a good stir, bring it to a boil, then immediately reduce the heat to a gentle simmer. Let it cook, uncovered, for about 20-25 minutes, or until the potato cubes are completely tender and easily pierced with a fork.
Step 5: This is the magic step! Remove the pot from the heat and fish out the bay leaf. Using an immersion blender, carefully blend the soup directly in the pot until it’s perfectly smooth and velvety. If you’re using a countertop blender, work in batches, filling the blender no more than halfway, and hold the lid down with a towel as hot soup can expand violently. Blend until completely smooth.
Step 6: Return the soup to the pot if you used a countertop blender. Stir in the heavy cream (or coconut milk) over low heat until everything is warmed through. Do not let it boil after adding the cream. This is your final chance to taste and adjust the seasoning—add more salt or pepper until it sings for you. And that’s it! Ladle into bowls, add your garnishes, and serve immediately.
Storage & Freshness Guide
- Fridge: Cool completely, store in airtight container for up to 3 days.
- Freezer: Freeze without cream for up to 3 months; add cream after thawing and reheating.
- Reviving: Reheat gently on stove; thin with broth or water if too thick.
Serving Suggestions
Complementary Dishes
- A crisp, green side salad with a sharp vinaigrette — The acidity and freshness cut through the soup’s richness beautifully, creating a perfectly balanced meal.
- Grilled cheese sandwich on sourdough — This is the ultimate comfort pairing. The crispy, buttery bread and melted cheese are a textural dream alongside the smooth soup.
- Crusty, warm artisan bread — Essential for dipping and scooping up every last bit of that velvety soup from the bottom of the bowl.
Drinks
- A crisp, unoaked Chardonnay or Sauvignon Blanc — The bright acidity and citrus notes in these wines provide a lovely contrast to the soup’s creamy, earthy flavors.
- A light, malty lager or pale ale — The carbonation cleanses the palate between bites, and the beer’s mild bitterness complements the sweetness of the roasted garlic.
- Sparkling water with a lemon wedge — A simple, non-alcoholic option that offers a refreshing, bubbly contrast to the soup’s decadent texture.
Something Sweet
- Lemon tart or bars — The bright, zesty lemon flavor is a fantastic palate-cleanser and provides a lovely, tangy finish after the savory soup.
- Dark chocolate truffles — A few pieces of rich, intense dark chocolate offer a sophisticated and simple way to end the meal on a decadent note.
- Shortbread cookies — Their buttery, crumbly simplicity is a gentle, not-too-sweet ending that doesn’t compete with the memory of the soup.
Top Mistakes to Avoid
- Mistake: Under-roasting the garlic. This is the number one error. If the garlic isn’t a deep, caramelized brown and easily squeezable, your soup will lack the essential sweet, mellow base and can taste bitter or harsh.
- Mistake: Blending the soup while it’s too full in the blender. Hot liquids expand rapidly, and the steam can blow the lid right off, creating a dangerous and messy situation. Always work in small, careful batches.
- Mistake: Boiling the soup after adding the cream. Bringing the soup to a rolling boil after the dairy is incorporated can cause it to curdle or separate, ruining that beautifully smooth texture you worked so hard to create.
- Mistake: Skipping the taste and adjust step at the end. Soups need seasoning, especially after dilution with broth and cream. Not tasting and adjusting the salt and pepper at the end can leave you with a bland final product.
Expert Tips
- Tip: Roast extra garlic. If you have the oven on, roast a few extra heads. The soft, sweet paste is incredible spread on bread, mixed into mashed potatoes, or stirred into pasta sauces later in the week.
- Tip: Let the soup rest. This soup’s flavor deepens and melds together beautifully if you let it sit for 20-30 minutes after finishing it, or even overnight in the fridge. It’s often even better the next day.
- Tip: For an extra-silky texture, strain it. If you want a truly restaurant-quality, ultra-smooth finish, pass the blended soup through a fine-mesh sieve. It’s an extra step, but it catches any tiny fibrous bits for an impossibly velvety texture.
- Tip: Add a Parmesan rind. If you have a rind of Parmesan cheese sitting in your fridge, toss it into the pot while the soup simmers. It will dissolve and add an incredible layer of savory, umami depth.
FAQs
Can I make this soup ahead of time?
Absolutely, and it might even be better! This soup is a fantastic make-ahead meal. Let it cool completely after cooking, then store it in an airtight container in the refrigerator for up to 3 days. The flavors have more time to meld and develop. When you’re ready to serve, gently reheat it on the stove over low heat, stirring occasionally. If it has thickened too much in the fridge, you can thin it out with a splash of broth or water.
How can I freeze creamy roasted garlic soup?
You can freeze it, but with one important caveat: if you used heavy cream, the dairy may separate slightly upon thawing, affecting the texture. For best freezing results, I recommend leaving the cream out. Make the soup up until the blending step, then cool and freeze it. When you’re ready to eat, thaw it, reheat it, and *then* stir in the fresh cream. If you used coconut milk, it freezes and reheats much more reliably.
My soup turned out too thick. How can I fix it?
No problem at all, this is an easy fix! Simply whisk in a little more broth, water, or even some extra cream until it reaches your desired consistency. Add the liquid a quarter-cup at a time, stirring well after each addition, so you don’t over-thin it. You’re basically just reconstituting it back to the perfect texture.
What can I use instead of potato as a thickener?
If you don’t have a potato or want to reduce the carbs, cauliflower is a brilliant substitute. Use an equal amount of fresh or frozen cauliflower florets. They will cook until tender and blend up into a similarly smooth and creamy soup base, though the flavor will be slightly more vegetal and less starchy.
Is the flavor of the roasted garlic very strong?
It’s strong in the best way possible—deep, complex, and aromatic—but not at all sharp or pungent like raw garlic. The roasting process completely transforms it, mellowing the sharp compounds and bringing out its natural sugars. The result is a sweet, nutty, and incredibly savory flavor that forms a rich backbone for the soup without being overpowering. Even those who are wary of garlic-heavy dishes tend to fall in love with this soup.


Creamy Roasted Garlic Soup
Learn how to make the best Creamy Roasted Garlic Soup with this easy recipe. It's rich, velvety, and the ultimate comfort food. Get the simple steps now!
Ingredients
For the soup:
-
3 whole heads garlic
-
2 tablespoons olive oil (divided)
-
1 large yellow onion (chopped)
-
2 stalks celery (chopped)
-
4 cups vegetable or chicken broth
-
1 large potato (russet or Yukon Gold, peeled and cubed)
-
1/2 cup heavy cream or full-fat coconut milk (for a dairy-free option)
-
1 teaspoon fresh thyme leaves
-
1/2 teaspoon salt (or to taste)
-
1/4 teaspoon black pepper (or to taste)
-
1 bay leaf (optional, but recommended)
For garnish:
-
Fresh parsley
-
a drizzle of cream
-
homemade croutons
Instructions
-
First, let’s roast that garlic. Preheat your oven to 400°F (200°C). Slice about 1/4-inch off the top of each garlic head to expose the cloves. Place them on a piece of foil, drizzle with one tablespoon of the olive oil, and wrap them up into a little foil packet. Pop this onto a baking sheet and roast for 40-45 minutes, until the cloves are deeply golden, soft, and fragrant. You should be able to easily squeeze the paste out. Let them cool until you can handle them.01
-
While the garlic is cooling, start your soup base. In a large pot or Dutch oven, heat the remaining tablespoon of olive oil over medium heat. Add the chopped onion and celery and cook, stirring occasionally, for about 8-10 minutes until they’ve softened and become translucent. You’re not looking for color here, just tenderness—this builds a sweet foundation for the soup.02
-
Now, it’s time to incorporate our star ingredient. Squeeze the soft, caramelized garlic paste from each clove directly into the pot with the onions and celery. It might feel like a lot, but this is what it’s all about! Stir everything together for a minute until the garlic is fragrant and well-incorporated.03
-
Add the cubed potato, broth, thyme, bay leaf (if using), salt, and pepper to the pot. Give it a good stir, bring it to a boil, then immediately reduce the heat to a gentle simmer. Let it cook, uncovered, for about 20-25 minutes, or until the potato cubes are completely tender and easily pierced with a fork.04
-
This is the magic step! Remove the pot from the heat and fish out the bay leaf. Using an immersion blender, carefully blend the soup directly in the pot until it’s perfectly smooth and velvety. If you’re using a countertop blender, work in batches, filling the blender no more than halfway, and hold the lid down with a towel as hot soup can expand violently. Blend until completely smooth.05
-
Return the soup to the pot if you used a countertop blender. Stir in the heavy cream (or coconut milk) over low heat until everything is warmed through. Do not let it boil after adding the cream. This is your final chance to taste and adjust the seasoning—add more salt or pepper until it sings for you. And that’s it! Ladle into bowls, add your garnishes, and serve immediately.06
Not what you're looking for?