There’s something about the scent of warm spices that instantly makes a kitchen feel like home. For me, these Crisp Molasses Cookies are that feeling baked into a treat—a nostalgic hug with crackly sugar tops and an aroma that wraps you in pure coziness. If you’re looking for a cornerstone recipe for your holiday baking, this easy one-bowl dough is it. It delivers all the charm of classic Christmas cookie recipes with minimal fuss, making them a perfect addition to your spread of holiday treats.
As one of the most beloved Christmas sweets, these cookies are the epitome of comfort. They come together so quickly, offering a simple path to a festive kitchen and answering your search for wonderful Christmas dessert ideas. That beautiful crisp texture and deep, spiced flavor are what make them a star on any holiday cookies Christmas platter.
Whether you’re filling tins for friends or simply need reliable and delicious Christmas baking ideas, this recipe is a timeless classic. It transforms simple ingredients into extraordinary holiday baking, proving that the best Christmas cookie ideas are often the ones that smell and taste like a memory.
Craving a delicious Crisp Molasses Cookies? You've come to the right spot! From Christmas Cookie favorites to amazing Dessert Recipes recipes, there's something here for everyone.

Why You’ll Love This Crisp Molasses Cookies
- Incredible texture: A crisp, sugary shell with a slightly chewy center.
- Complex, cozy flavor: Deep molasses balanced with warm spices.
- Dreamy aroma: Your kitchen will smell warm and inviting.
- Deceptively simple: A straightforward, one-bowl dough.
Ingredients & Tools
- 230 g all-purpose flour
- 1 tsp baking soda
- 1/2 tsp salt
- 2 tsp ground ginger
- 1 tsp ground cinnamon
- 1/4 tsp ground cloves
- 170 g unsalted butter, softened
- 150 g granulated sugar (plus extra for rolling)
- 1 large egg, at room temperature
- 80 ml unsulphured molasses
Tools: A large mixing bowl, a hand mixer or stand mixer, measuring spoons and cups, a baking sheet, and parchment paper.
Notes: Using room temperature butter and egg is non-negotiable. Don’t skip the extra sugar for rolling—it creates the crisp, crackly top.
Nutrition (per serving)
| Calories: | 120 kcal |
| Protein: | 1 g |
| Fat: | 5 g |
| Carbs: | 18 g |
| Fiber: | 0 g |
Serves: 24 cookies | Prep Time: 15 minutes | Cook Time: 10-12 minutes | Total Time: 27 minutes
Before You Start: Tips & Ingredient Notes
- What kind of molasses should I use? For the best flavor, always reach for unsulphured molasses. Sulphured molasses has a much sharper, more bitter taste that can overpower the other spices. Unsulphured is milder and sweeter, giving you that classic, warm cookie flavor.
- Why is room temperature butter so important? When your butter is properly softened (you can press a finger into it easily), it creams with the sugar to create tiny air pockets. This is the foundation for a cookie that spreads just right and has a lovely, light crispness.
- Can I adjust the spices? Absolutely! The ginger-cinnamon-clove combo is classic, but feel free to play. A pinch of black pepper or a dash of allspice can add a wonderful, subtle warmth. Just remember, a little goes a long way with these potent spices.
- Don’t skip the chilling step. I know, it’s tempting to bake them right away, but giving the dough a quick 15-minute rest in the fridge makes the cookies less likely to overspread and helps develop a richer, more concentrated flavor.
How to Make Crisp Molasses Cookies
Step 1: First, whisk your dry ingredients. In a medium bowl, whisk together the flour, baking soda, salt, ginger, cinnamon, and cloves. You want to make sure the baking soda and spices are evenly distributed throughout the flour—this ensures every single cookie has the perfect rise and spice level. It only takes a minute, but it’s a crucial step for consistency.
Step 2: Now, cream the butter and sugar. In your large mixing bowl, beat the softened butter and 150 grams of granulated sugar together on medium speed for about 2-3 minutes. You’re looking for a mixture that is light, pale, and fluffy. This process incorporates air, which is part of what gives the cookies their delightful texture. Scrape down the sides of the bowl with a spatula to make sure everything is well combined.
Step 3: Add the wet ingredients. Beat in the egg until it’s fully incorporated, then pour in the molasses. The molasses will make the mixture look a little separated or curdled—don’t panic! This is completely normal. Just mix it until it’s as smooth as you can get it. The rich, dark color of the dough will start to come through now, and the aroma will already be fantastic.
Step 4: Combine everything. Gradually add the flour mixture to the wet ingredients, mixing on low speed just until the flour disappears. You’ll notice the dough will be quite soft and sticky. Overmixing is the enemy of a tender cookie, so stop as soon as you no longer see dry streaks of flour. At this point, cover the bowl and pop it in the refrigerator for 15 minutes. This brief chill makes the dough much easier to handle.
Step 5: Preheat and prepare. While the dough chills, preheat your oven to 350°F (175°C) and line your baking sheets with parchment paper. Place some extra granulated sugar (about ½ cup) in a small bowl. This is your coating station!
Step 6: Shape and coat the cookies. Scoop out portions of dough—about 1 tablespoon each—and roll them between your palms into smooth balls. Roll each ball generously in the bowl of sugar until it’s completely coated. This sugary jacket is what creates that beautiful, crackled, crisp exterior as the cookies bake. Place the balls about 2 inches apart on your prepared baking sheet; they will spread.
Step 7: Bake to perfection. Bake for 10-12 minutes. The cookies are done when the tops are crackled and the edges look set. They might still look a little soft in the center—that’s exactly what you want for a crisp edge and a slightly chewy middle. You’ll notice your kitchen filling with the most incredible warm, spicy scent.
Step 8: Cool completely. Let the cookies cool on the baking sheet for 5 minutes before transferring them to a wire rack to cool completely. This resting period on the hot pan helps them set up. As they cool, they’ll become crisper. And then… it’s time to enjoy!
Storage & Freshness Guide
- Fridge: Not recommended; store at room temperature to maintain crispness.
- Freezer: Freeze baked cookies in an airtight container for up to 3 months.
- Reviving: Refresh in a 350°F oven for 3–5 minutes to restore crispness.
Serving Suggestions
Complementary Dishes
- A sharp cheddar cheese plate — The salty, sharp flavor of a good aged cheddar is a fantastic counterpoint to the deep sweetness of the molasses. It’s a classic pairing that feels both rustic and elegant.
- Spiced apple soup — If you’re feeling adventurous, a creamy, chilled spiced apple soup makes for a stunning starter. The cool, smooth soup and the crisp, warm cookie create a wonderful temperature and texture contrast.
Drinks
- Strong black coffee — There’s nothing quite like dunking a crisp molasses cookie into a hot cup of black coffee. The bitterness of the coffee cuts through the cookie’s sweetness perfectly, making for a truly sublime experience.
- Chai tea latte — The warm spices in a chai latte are a natural echo of the ginger and cinnamon in the cookie. It’s a cozy, comforting combination that feels like a warm blanket on a chilly day.
Something Sweet
- Vanilla bean ice cream — Crumble a cookie or two over a bowl of high-quality vanilla ice cream. The warm spices and crisp texture against the cold, creamy ice cream is a simple dessert that feels incredibly special.
- Poached pears — For a more sophisticated finish, serve these cookies alongside gently poached pears. The soft, wine-infused fruit and the crisp cookie are a match made in heaven.
Top Mistakes to Avoid
- Mistake: Using cold butter. If your butter is too cold, it won’t cream properly with the sugar. This means less air is incorporated, leading to a denser cookie that might not spread correctly in the oven. Patience is key—let it soften properly on the counter.
- Mistake: Skipping the sugar roll. I know it seems like an extra step, but rolling the dough balls in sugar is what creates that iconic crackly, sparkly top and extra-crisp exterior. Without it, you’ll have a much plainer-looking, softer cookie.
- Mistake: Overbaking. It’s easy to think a darker cookie is a better cookie, but with molasses, they can go from perfectly crisp to unpleasantly bitter very quickly. Take them out when the edges are set, even if the centers look soft. They firm up as they cool.
- Mistake: Not measuring the flour correctly. Scooping flour directly from the bag can pack it down, leading to too much flour in your dough. This results in dry, cakey cookies. Always spoon your flour into the measuring cup and level it off for accuracy.
Expert Tips
- Tip: Use a cookie scoop for uniformity. A small cookie or ice cream scoop (about 1 tablespoon capacity) is your best friend here. It ensures all your cookies are the same size, which means they’ll bake at the same rate and you’ll get a perfectly even batch.
- Tip: Let one baking sheet cool before reusing. If you’re baking in batches, never place dough balls onto a warm baking sheet. The heat will cause the butter to melt prematurely, making the cookies spread too much. Have a couple of sheets ready or let the used one cool completely.
- Tip: For an extra flavor boost, try brown sugar. While granulated sugar gives the best crispness, swapping half of it for light brown sugar will add a deeper, caramel-like note and a slightly chewier texture. It’s a delicious variation if you’re feeling experimental.
- Tip: Make the dough ahead. You can absolutely make the dough, roll it into balls, and freeze them on a parchment-lined tray. Once solid, transfer to a freezer bag. You can bake them straight from frozen, just add a minute or two to the baking time for fresh, warm cookies anytime.
FAQs
Why are my cookies cakey instead of crisp?
This usually happens for one of two reasons: too much flour or overmixing. If you pack your flour into the measuring cup, you’re inadvertently adding extra, which absorbs more moisture and creates a cakier texture. Also, once you add the flour, mix only until it’s just combined. Overmixing develops the gluten in the flour, leading to a tougher, more bread-like cookie. A light hand is essential for crispness.
Can I make these cookies chewy instead of crisp?
You can! For a chewier cookie, use all light brown sugar instead of granulated and reduce the baking time by a minute or two. The higher moisture content in brown sugar promotes chewiness. You’ll get a cookie that’s soft-baked with a slightly crisp edge. They’re delicious both ways, so it’s really a matter of personal preference.
My cookies spread too much and became one giant cookie. What went wrong?
This is a classic sign that your butter was too warm or your dough wasn’t chilled. If the butter is melty, the cookies will spread excessively in the oven. That quick 15-minute chill is crucial for solidifying the fat, which controls the spread. Also, make sure your baking soda is fresh—old baking soda loses its leavening power.
How should I store these to keep them crisp?
The key to maintaining crispness is keeping moisture out. Once the cookies are completely cool, store them in an airtight container at room temperature. You can even add a piece of bread to the container—it sounds counterintuitive, but the bread will release moisture that the cookies absorb, keeping the cookies crisp and the bread stale. Replace the bread every day or two.
Can I freeze the baked cookies?
Absolutely! These cookies freeze beautifully. Make sure they are completely cooled, then layer them between sheets of parchment paper in an airtight freezer-safe container or bag. They’ll keep for up to 3 months. You can thaw them at room temperature, or for that just-baked warmth and crispness, pop a frozen cookie directly into a 350°F oven for 3-5 minutes.


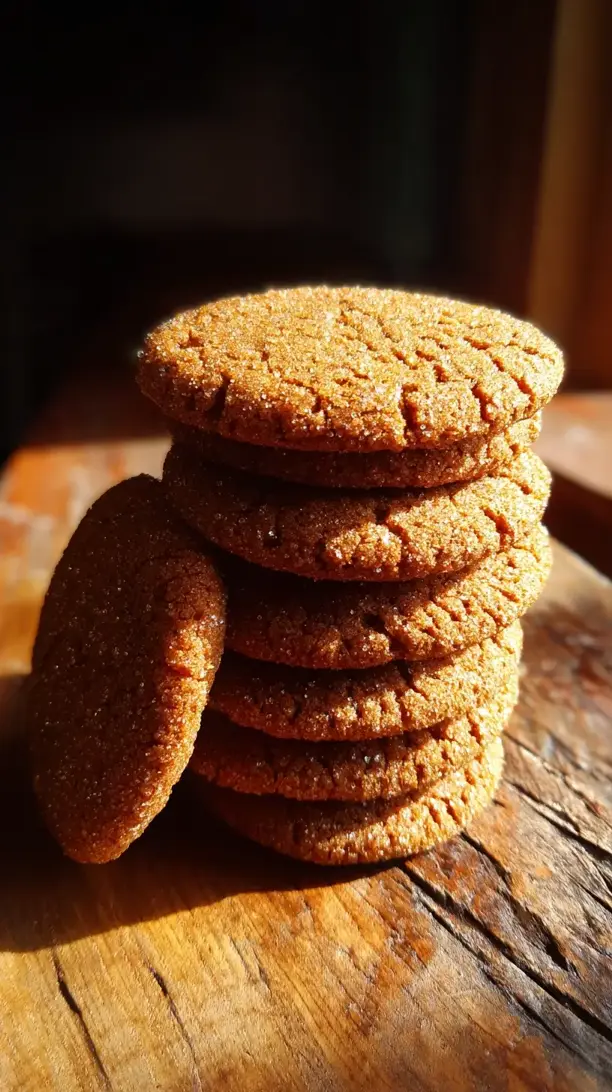
Crisp Molasses Cookies: An Easy One-Bowl Holiday Recipe
Crisp Molasses Cookies are the ultimate holiday treat. This easy molasses cookie recipe yields perfectly spiced, crackly-topped cookies that fill your home with festive cheer.
Ingredients
For the Ingredients & Tools
-
230 g all-purpose flour
-
1 tsp baking soda
-
1/2 tsp salt
-
2 tsp ground ginger
-
1 tsp ground cinnamon
-
1/4 tsp ground cloves
-
170 g unsalted butter (softened)
-
150 g granulated sugar (plus extra for rolling)
-
1 large egg (at room temperature)
-
80 ml unsulphured molasses
Instructions
-
First, whisk your dry ingredients. In a medium bowl, whisk together the flour, baking soda, salt, ginger, cinnamon, and cloves. You want to make sure the baking soda and spices are evenly distributed throughout the flour—this ensures every single cookie has the perfect rise and spice level. It only takes a minute, but it’s a crucial step for consistency.01
-
Now, cream the butter and sugar. In your large mixing bowl, beat the softened butter and 150 grams of granulated sugar together on medium speed for about 2-3 minutes. You’re looking for a mixture that is light, pale, and fluffy. This process incorporates air, which is part of what gives the cookies their delightful texture. Scrape down the sides of the bowl with a spatula to make sure everything is well combined.02
-
Add the wet ingredients. Beat in the egg until it’s fully incorporated, then pour in the molasses. The molasses will make the mixture look a little separated or curdled—don’t panic! This is completely normal. Just mix it until it’s as smooth as you can get it. The rich, dark color of the dough will start to come through now, and the aroma will already be fantastic.03
-
Combine everything. Gradually add the flour mixture to the wet ingredients, mixing on low speed just until the flour disappears. You’ll notice the dough will be quite soft and sticky. Overmixing is the enemy of a tender cookie, so stop as soon as you no longer see dry streaks of flour. At this point, cover the bowl and pop it in the refrigerator for 15 minutes. This brief chill makes the dough much easier to handle.04
-
Preheat and prepare. While the dough chills, preheat your oven to 350°F (175°C) and line your baking sheets with parchment paper. Place some extra granulated sugar (about ½ cup) in a small bowl. This is your coating station!05
-
Shape and coat the cookies. Scoop out portions of dough—about 1 tablespoon each—and roll them between your palms into smooth balls. Roll each ball generously in the bowl of sugar until it’s completely coated. This sugary jacket is what creates that beautiful, crackled, crisp exterior as the cookies bake. Place the balls about 2 inches apart on your prepared baking sheet; they will spread.06
-
Bake to perfection. Bake for 10-12 minutes. The cookies are done when the tops are crackled and the edges look set. They might still look a little soft in the center—that’s exactly what you want for a crisp edge and a slightly chewy middle. You’ll notice your kitchen filling with the most incredible warm, spicy scent.07
-
Cool completely. Let the cookies cool on the baking sheet for 5 minutes before transferring them to a wire rack to cool completely. This resting period on the hot pan helps them set up. As they cool, they’ll become crisper. And then… it’s time to enjoy!08
Not what you're looking for?


