This Crispy Baked Chicken delivers an irresistible golden crust and juicy interior without deep-frying. The secret is a clever coating technique and high-heat baking that mimics frying. It’s a surprisingly simple weeknight hero that makes everyone at the table genuinely happy.
Craving a delicious Crispy Baked Chicken? You've come to the right spot! From Chicken Recipes favorites to amazing Dessert Recipes recipes, there's something here for everyone.


Why You’ll Love This Crispy Baked Chicken
- Genuinely crispy without frying: Signature crunch and golden-brown color from the oven.
- Juiciness locked in: A quick brine ensures moist, tender meat.
- Incredibly versatile: Easily tweak the seasoning blend to match any flavor profile.
- Treat that’s secretly simple: Straightforward process builds kitchen confidence.
Ingredients & Tools
- 4 boneless, skinless chicken breasts (about 1.5 lbs / 680 g)
- 1 cup buttermilk
- 1 tbsp hot sauce (like Frank’s RedHot)
- 1 ½ cups all-purpose flour
- ⅔ cup panko breadcrumbs
- 2 tsp garlic powder
- 2 tsp paprika (smoked paprika is wonderful here)
- 1 tsp onion powder
- 1 tsp dried oregano or thyme
- 1 ½ tsp fine sea salt
- 1 tsp freshly ground black pepper
- ½ cup neutral oil (like canola or vegetable oil)
- Cooking spray or extra oil for the rack
Tools: A wire cooling rack, a rimmed baking sheet, three shallow bowls or plates, and tongs.
Notes: The buttermilk and hot sauce tenderize the chicken and help the coating stick. The panko creates craggy, extra-crispy bits.
Nutrition (per serving)
| Calories: | 420 kcal |
| Protein: | 35 g |
| Fat: | 18 g |
| Carbs: | 28 g |
| Fiber: | 2 g |
Serves: 4 | Prep Time: 20 minutes | Cook Time: 20 minutes | Total Time: 40 minutes
Before You Start: Tips & Ingredient Notes
- Pound your chicken breasts. This is a non-negotiable step for even cooking. Chicken breasts are often unevenly thick, and pounding them to an even ½-inch thickness ensures the outside doesn’t burn before the inside is cooked through.
- Don’t skip the wire rack. Baking the chicken on a wire rack set over a baking sheet is the single best way to get it crispy all over. It allows hot air to circulate completely, preventing a soggy bottom—which is the enemy of crispy baked chicken.
- The oil in the coating is the secret. Drizzling oil into the final flour mixture might seem odd, but it’s a pro-move. It creates little clumps that, when baked, mimic the craggy, ultra-crispy texture of deep-fried food.
- Let your coating ingredients come to room temp. If your buttermilk is ice-cold from the fridge, it can cause the oil in the coating to solidify slightly. Letting everything sit out for 15-20 minutes before you start makes the process smoother.
How to Make Crispy Baked Chicken
Step 1: Prepare the Chicken. Place each chicken breast between two pieces of plastic wrap or in a large zip-top bag. Using a rolling pin, meat mallet, or even a heavy skillet, gently pound the thickest parts until the entire breast is an even ½-inch thickness. This is crucial for uniform cooking. In a medium bowl, whisk together the buttermilk and hot sauce. Add the pounded chicken, turning to coat each piece thoroughly. Let it marinate for at least 15 minutes at room temperature, or for extra-tender chicken, cover and refrigerate for up to 4 hours.
Step 2: Create the Crispy Coating. In a large, shallow bowl or plate, whisk together the flour, panko breadcrumbs, garlic powder, paprika, onion powder, oregano, salt, and pepper. Now, here’s the magic step: drizzle the ½ cup of neutral oil over the flour mixture. Use a fork or your fingers to work the oil into the dry ingredients until it resembles coarse, wet sand with plenty of little clumps. These clumps are what will become your crispy, golden bits. Set up your station: one bowl with the marinated chicken, one with the flour/oil coating, and a clean plate for the coated chicken.
Step 3: Coat the Chicken. Preheat your oven to 425°F (220°C). Place a wire rack on top of a rimmed baking sheet and lightly grease it with cooking spray or a brush of oil. Working with one piece at a time, remove the chicken from the buttermilk, allowing the excess to drip off. Dredge it thoroughly in the flour mixture, pressing firmly to ensure every nook and cranny is packed with the clumpy coating. You really want to press it on there—this isn’t a gentle dusting. Place the coated chicken on the prepared wire rack. Repeat with all pieces.
Step 4: Bake to Perfection. Once all chicken is coated and on the rack, bake for 18-22 minutes. You’ll know it’s done when the exterior is a deep, golden brown and the internal temperature reaches 165°F (74°C) when checked with an instant-read thermometer inserted into the thickest part. The chicken should feel firm to the touch, and the aroma will be absolutely incredible. For extra browning on top, you can switch the oven to broil for the last 1-2 minutes, but watch it like a hawk to prevent burning!
Step 5: Rest and Serve. This is a vital step for juicy chicken. Remove the baking sheet from the oven and let the chicken rest on the rack for at least 5 minutes before slicing or serving. This allows the juices to redistribute throughout the meat. If you cut into it immediately, all those precious juices will run out, leaving you with drier chicken. The crust will still be wonderfully crisp after this short rest, I promise.
Storage & Freshness Guide
- Fridge: Store in an airtight container for up to 3 days.
- Freezer: Freeze on a baking sheet, then transfer to a freezer bag for up to 3 months.
- Reviving: Reheat in a 375°F oven or air fryer for 5–10 minutes to restore crispness.
Serving Suggestions
Complementary Dishes
- Creamy Garlic Mashed Potatoes — The ultimate comfort food pairing. The fluffy, creamy potatoes are a dreamy contrast to the crunchy chicken.
- A Bright, Vinegary Coleslaw — The crisp, tangy slaw cuts through the richness of the chicken beautifully and adds a refreshing crunch.
- Buttery Corn on the Cob — Sweet, juicy corn is a classic side that feels celebratory and complements the savory, herby notes in the chicken coating.
Drinks
- A Crisp Lager or Pale Ale — The carbonation and slight bitterness of a cold beer cleanse the palate and enhance the savory, fried-like quality of the chicken.
- Sparkling Water with Lemon — A non-alcoholic option that provides a bubbly, citrusy lift which is surprisingly perfect with the hearty, crispy crust.
- Iced Black Tea with Mint — The tannins and cool mint offer a refreshing balance, making each bite of chicken feel new and exciting.
Something Sweet
- Warm Apple Crumble with Vanilla Ice Cream — You’ve already got the cozy, baked thing going on. A warm, spiced apple dessert feels like a natural, comforting progression.
- Classic Banana Pudding — The cool, creamy, and nostalgic flavors of banana pudding are a fantastic, simple way to end this hearty meal on a sweet note.
- Lemon Sorbet — For a lighter finish, the sharp, clean taste of lemon sorbet is a palate-cleansing dream after the


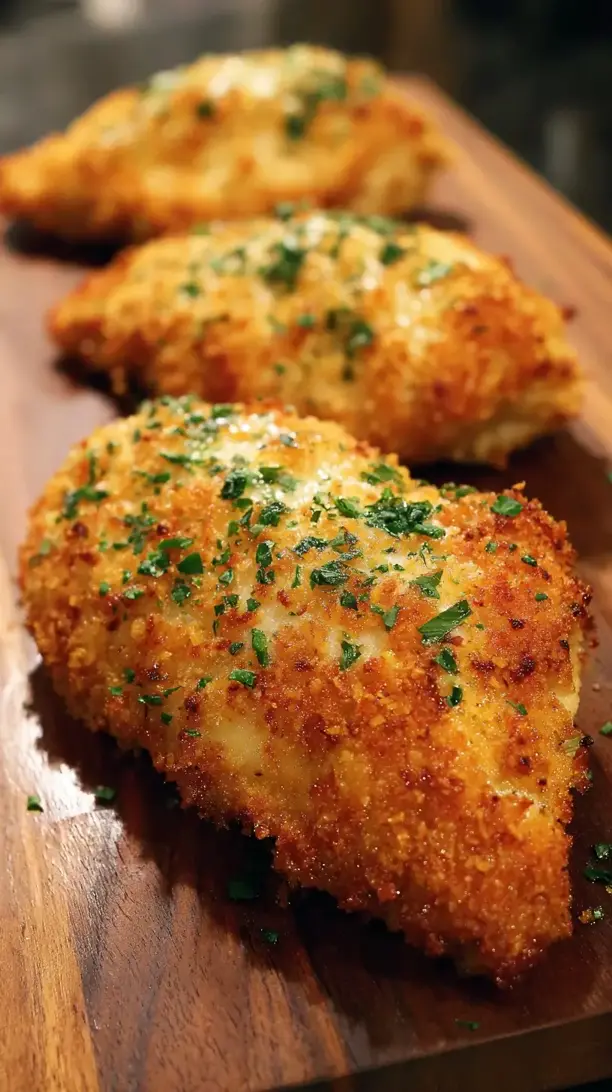
Crispy Baked Chicken
Make perfectly Crispy Baked Chicken with a golden crust and juicy meat—no frying needed! Get the easy, family-friendly recipe and serve it tonight.
Ingredients
For the Ingredients
-
4 boneless, skinless chicken breasts (about 1.5 lbs / 680 g)
-
1 cup buttermilk
-
1 tbsp hot sauce (like Frank's RedHot)
-
1 ½ cups all-purpose flour
-
⅔ cup panko breadcrumbs
-
2 tsp garlic powder
-
2 tsp paprika (smoked paprika is wonderful here)
-
1 tsp onion powder
-
1 tsp dried oregano or thyme
-
1 ½ tsp fine sea salt
-
1 tsp freshly ground black pepper
-
½ cup neutral oil (like canola or vegetable oil)
-
Cooking spray or extra oil (for the rack)
Instructions
-
Place each chicken breast between two pieces of plastic wrap or in a large zip-top bag. Using a rolling pin, meat mallet, or even a heavy skillet, gently pound the thickest parts until the entire breast is an even ½-inch thickness. This is crucial for uniform cooking. In a medium bowl, whisk together the buttermilk and hot sauce. Add the pounded chicken, turning to coat each piece thoroughly. Let it marinate for at least 15 minutes at room temperature, or for extra-tender chicken, cover and refrigerate for up to 4 hours.01
-
In a large, shallow bowl or plate, whisk together the flour, panko breadcrumbs, garlic powder, paprika, onion powder, oregano, salt, and pepper. Now, here’s the magic step: drizzle the ½ cup of neutral oil over the flour mixture. Use a fork or your fingers to work the oil into the dry ingredients until it resembles coarse, wet sand with plenty of little clumps. These clumps are what will become your crispy, golden bits. Set up your station: one bowl with the marinated chicken, one with the flour/oil coating, and a clean plate for the coated chicken.02
-
Preheat your oven to 425°F (220°C). Place a wire rack on top of a rimmed baking sheet and lightly grease it with cooking spray or a brush of oil. Working with one piece at a time, remove the chicken from the buttermilk, allowing the excess to drip off. Dredge it thoroughly in the flour mixture, pressing firmly to ensure every nook and cranny is packed with the clumpy coating. You really want to press it on there—this isn't a gentle dusting. Place the coated chicken on the prepared wire rack. Repeat with all pieces.03
-
Once all chicken is coated and on the rack, bake for 18-22 minutes. You’ll know it’s done when the exterior is a deep, golden brown and the internal temperature reaches 165°F (74°C) when checked with an instant-read thermometer inserted into the thickest part. The chicken should feel firm to the touch, and the aroma will be absolutely incredible. For extra browning on top, you can switch the oven to broil for the last 1-2 minutes, but watch it like a hawk to prevent burning!04
-
Remove the baking sheet from the oven and let the chicken rest on the rack for at least 5 minutes before slicing or serving. This allows the juices to redistribute throughout the meat. If you cut into it immediately, all those precious juices will run out, leaving you with drier chicken. The crust will still be wonderfully crisp after this short rest, I promise.05
Not what you're looking for?


