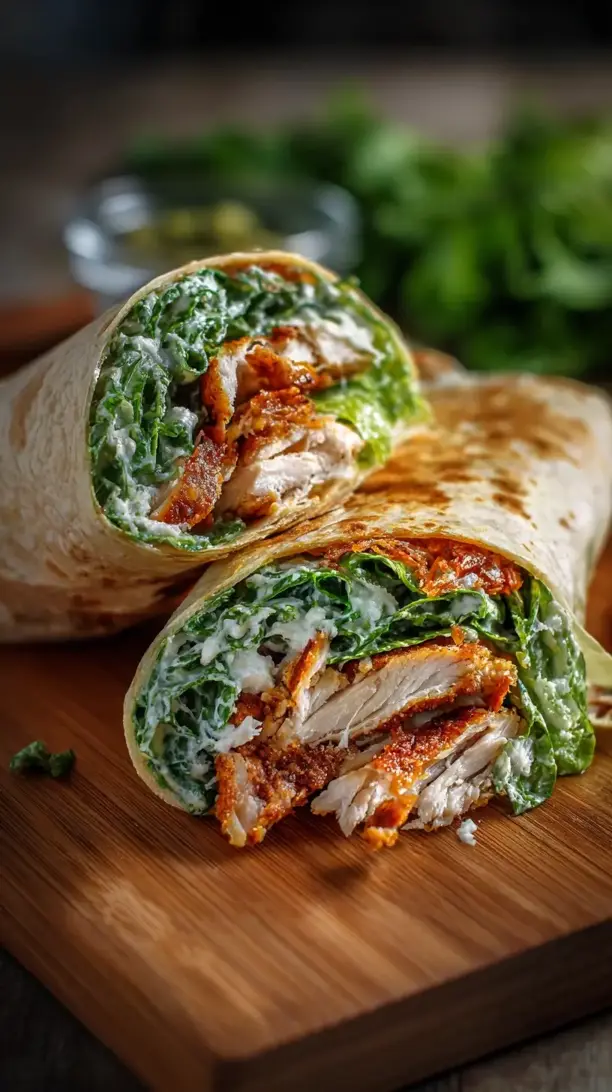
These Crispy Chicken Caesar Wraps deliver all the classic flavors in a handheld package. You get golden-brown chicken, crisp romaine, and creamy Caesar dressing bundled in a soft tortilla. Perfect for a quick lunch or easy dinner, these wraps offer fantastic texture and flavor in every bite.
Craving a delicious Crispy Chicken Caesar Wraps? You've come to the right spot! From Dinner Ideas favorites to amazing Crockpot Recipes recipes, there's something here for everyone.


Why You’ll Love This Crispy Chicken Caesar Wraps
- Handheld meal: No fork needed—perfect for on-the-go eating.
- Incredible texture: Hot, crispy chicken meets cool, crisp lettuce.
- Easy to customize: Swap greens or add heat with minimal effort.
- Quick assembly: Restaurant-quality wraps ready in under 30 minutes.
Ingredients & Tools
- 2 large boneless, skinless chicken breasts (about 1 lb or 450g)
- 1/2 cup grated Parmesan cheese, plus more for serving
- 1/3 cup mayonnaise
- 2 tbsp fresh lemon juice
- 2 cloves garlic, minced
- 1 tsp Dijon mustard
- 2 tsp Worcestershire sauce
- 3 tbsp olive oil, divided
- 1/2 cup panko breadcrumbs
- 1 tsp Italian seasoning
- 1/2 tsp each of salt and black pepper
- 1 large head of romaine lettuce, chopped
- 4 large low-carb tortilla wraps
Tools: A large skillet, two shallow bowls, a small mixing bowl, and a pair of tongs.
Notes: Use freshly grated Parmesan and fresh lemon juice for best flavor and texture.
Nutrition (per serving)
| Calories: | 485 kcal |
| Protein: | 35 g |
| Fat: | 32 g |
| Carbs: | 12 g |
| Fiber: | 5 g |
Serves: 4 | Prep Time: 15 minutes | Cook Time: 12 minutes | Total Time: 27 minutes
Before You Start: Tips & Ingredient Notes
- Pound your chicken to an even thickness. This is the single most important step for ensuring your chicken cooks quickly and evenly. No more burnt outside and raw inside! Just place the breasts between two pieces of plastic wrap and gently pound them until they’re about a half-inch thick.
- Don’t skip the toasting of the panko. Toasting the panko breadcrumbs in a bit of oil before breading the chicken is a game-changer. It gives them a head start, resulting in a much crispier, golden-brown crust that won’t get soggy from the dressing later on.
- Let your dressing ingredients come to room temperature. If your mayo is straight from the fridge, your dressing might not emulsify as well and can end up a bit gloppy. Letting everything sit out for 10-15 minutes makes for a much smoother, creamier Caesar.
- Dry your lettuce thoroughly. Any extra water clinging to your romaine will quickly make your wrap soggy. After washing, spin it in a salad spinner or pat it diligently with paper towels until it’s bone-dry. A little effort here pays off big time.
How to Make Crispy Chicken Caesar Wraps
Step 1: Prepare the Chicken and Breading Station. Start by placing your chicken breasts between two sheets of plastic wrap. Using the flat side of a meat mallet or a heavy rolling pin, gently pound them until they are an even 1/2-inch thickness. This is crucial for quick, uniform cooking. Pat them dry with a paper towel—this helps the coating stick. In one shallow bowl, combine the panko, Italian seasoning, half of the Parmesan, salt, and pepper. In another bowl, add 1 tablespoon of the olive oil. You’ll be dredging the chicken in the oil first, then the panko mixture.
Step 2: Toast the Panko for Maximum Crisp. This is our secret weapon! Heat a large skillet over medium heat and add the remaining 2 tablespoons of olive oil. Once the oil is shimmering, add the panko mixture from the bowl. Toast it, stirring frequently, for about 2-3 minutes until it turns a beautiful golden brown. Watch it closely—it can burn in a heartbeat. Transfer the toasted panko back to the bowl immediately. This step gives your chicken an unbeatable, deep crunch.
Step 3: Cook the Chicken to Golden Perfection. Using the same skillet (no need to wash it—all that flavor is still in there!), add a tiny bit more oil if it looks dry. Increase the heat to medium-high. Take your pounded chicken breasts and press them first into the plain olive oil, making sure they’re fully coated. Then, press them firmly into the toasted panko mixture, ensuring an even, generous crust on both sides. Carefully place the chicken in the hot skillet. Cook for 5-6 minutes per side, until the crust is deeply golden and the internal temperature reaches 165°F (74°C). The chicken should feel firm to the touch. Transfer to a cutting board and let it rest for a few minutes before slicing.
Step 4: Whisk Together the Simple Caesar Dressing. While the chicken rests, it’s dressing time. In your small mixing bowl, combine the mayonnaise, the remaining 1/2 cup of Parmesan, minced garlic, lemon juice, Dijon mustard, and Worcestershire sauce. Whisk it all together until it’s smooth and creamy. Taste it! This is your moment to adjust. Want more tang? Add a squeeze more lemon. Need more garlic? Go for it. The dressing should be thick, creamy, and packed with savory, cheesy flavor.
Step 5: Assemble the Wraps with Care. Lay your tortillas out on a clean surface. Take a generous handful of the thoroughly dried romaine lettuce and place it in the center of each tortilla, leaving a couple of inches of space at the bottom. Slice your rested chicken against the grain into thin strips. Divide the chicken strips evenly among the wraps, placing them on top of the lettuce. Now, drizzle a hearty amount of your homemade Caesar dressing over the chicken and lettuce. Don’t be shy! You want every component to be coated.
Step 6: Master the Wrap Fold. This is the final, crucial technique. Fold the bottom flap of the tortilla up and over the filling, tucking it in snugly. Then, fold the left and right sides inward, over the filling. Now, roll the whole package tightly away from you, creating a neat, secure burrito-style wrap. If you’re taking these on the go, you can wrap the bottom half in a piece of parchment paper or foil to keep everything contained. For serving at home, just slice them in half on a sharp diagonal—it looks so much more appealing.
Storage & Freshness Guide
- Fridge: Store components separately for up to 3 days; assembled wraps (without dressing) for 1 day.
- Freezer: Freeze cooked chicken slices for up to 3 months; do not freeze assembled wraps.
- Reviving: Reheat chicken in oven/air fryer at 375°F (190°C) for 5-7 minutes to restore crispiness.
Serving Suggestions
Complementary Dishes
- Oven-Roasted Asparagus — The earthy, slightly charred flavor of roasted asparagus is a fantastic, simple side that doesn’t compete with the wrap’s bold Caesar flavors.
- Zucchini Fritters with a Lemon Yogurt Dip — These add another layer of crispy texture and a fresh, tangy element that complements the creamy dressing beautifully.
- A Simple Tomato and Cucumber Salad — Sometimes you just need something light and acidic to cut through a rich meal. This salad does the job perfectly.
Drinks
- A Crisp Pinot Grigio — Its bright acidity and citrus notes are a classic pairing for anything with Caesar dressing, cleansing the palate between bites.
- Sparkling Water with Lemon — For a non-alcoholic option, the bubbles and citrus are incredibly refreshing and help balance the garlic and Parmesan.
- An Ice-Cold Light Beer — The crisp, clean finish of a lager or pilsner is a fantastic counterpoint to the savory, fried elements of the wrap.
Something Sweet
- Mixed Berry Parfaits — Layers of fresh berries and whipped cream provide a light, fruity, and not-too-heavy finish that feels just right after a savory wrap.
- Dark Chocolate-Dipped Strawberries — They’re elegant, simple, and the bittersweet chocolate is a wonderful contrast to the meal you just enjoyed.
- Lemon Sorbet — It’s the ultimate palate cleanser. Its sharp, bright flavor is the perfect reset after the rich and garlicky Caesar experience.
Top Mistakes to Avoid
- Overfilling the tortilla. It’s tempting to pack in as much as possible, but this is a surefire way to a busted wrap. Leave a good border so you have enough tortilla to fold and roll securely. Less is more here.
- Using wet lettuce. I’ve messed this up before too… that residual water from washing the romaine will seep into the tortilla and turn your lovely crispy wrap into a sad, soggy mess in minutes. Dry it like your meal depends on it.
- Not letting the chicken rest before slicing. If you slice into that chicken straight from the pan, all those precious juices will run out, leaving you with drier meat and a soggy breading. Let it sit for 5 minutes—it makes all the difference.
- Adding the dressing too early. If you toss the lettuce and chicken with the dressing and then let it sit while you finish other things, the lettuce will wilt and lose its crucial crunch. Dress the components right before you assemble the wrap.
Expert Tips
- Tip: Warm your tortillas briefly. Just 15-20 seconds in a dry, hot skillet or a few seconds in the microwave makes them infinitely more pliable and less likely to crack when you roll them. It’s a tiny step with a huge payoff.
- Tip: Add an anchovy to your dressing. Even if you think you don’t like them, mince one small anchovy fillet and whisk it into the dressing. It dissolves and adds an incredible depth of savory, umami flavor that is the true soul of a classic Caesar.
- Tip: Make a double batch of the crispy chicken. You can let the extra cooked chicken cool completely and store it in the fridge for up to 3 days. It’s perfect for quickly assembling another wrap for lunch or chopping up for a salad.
- Tip: Create a flavor barrier. Before you add the lettuce, spread a very thin layer of the Caesar dressing directly onto the tortilla. This creates a protective layer that helps prevent the tortilla from getting soggy from the wetter fillings.
FAQs
Can I make these wraps ahead of time?
You can, but with a specific strategy to avoid sogginess. Prep all the components separately—cook and slice the chicken, make the dressing, wash and dry the lettuce. Store everything in airtight containers in the fridge. Then, assemble the wraps right before you plan to eat them. If you must pre-assemble, avoid adding the dressing until the last minute and wrap them very tightly in parchment paper and then foil.
What’s the best way to reheat the chicken if I have leftovers?
To maintain the crispiness, the oven or an air fryer is your best friend. Avoid the microwave, as it will steam the crust and make it soft. Reheat the chicken slices in a 375°F (190°C) oven or air fryer for 5-7 minutes, until hot and re-crisped. It won’t be *quite* as perfect as fresh, but it’s a close second.
Can I use a different type of chicken?
Absolutely! Chicken thighs will work wonderfully and are actually more forgiving and juicy. You could also use pre-cooked rotisserie chicken to save time—just warm it through and crisp it up in the pan with a little oil before assembling. For a vegetarian version, crispy baked chickpeas or sliced halloumi cheese are fantastic substitutes.
My dressing is too thick. How can I thin it out?
This is an easy fix! Just whisk in a teaspoon of water, milk, or more lemon juice at a time until it reaches your desired consistency. Be careful not to add too much liquid at once, or it might break. You’re aiming for a drizzle-able, but still creamy, texture.
Why did my tortilla rip when I tried to roll it?
This usually happens for one of two reasons: the tortilla was too cold (see the tip about warming them up!) or it was overfilled. Another culprit can be low-quality tortillas that aren’t very flexible. Investing in a good brand of large, burrito-style tortillas makes the rolling process so much smoother.


Crispy Chicken Caesar Wraps
Make delicious Crispy Chicken Caesar Wraps in under 30 minutes! Golden chicken, crisp lettuce & creamy dressing in a soft tortilla. Get the easy recipe now!
Ingredients
For the Ingredients
-
2 large boneless, skinless chicken breasts (about 1 lb or 450g)
-
1/2 cup grated Parmesan cheese (plus more for serving)
-
1/3 cup mayonnaise
-
2 tbsp fresh lemon juice
-
2 cloves garlic (minced)
-
1 tsp Dijon mustard
-
2 tsp Worcestershire sauce
-
3 tbsp olive oil (divided)
-
1/2 cup panko breadcrumbs
-
1 tsp Italian seasoning
-
1/2 tsp salt and black pepper (each)
-
1 large head romaine lettuce (chopped)
-
4 large low-carb tortilla wraps
Instructions
-
Prepare the Chicken and Breading Station. Start by placing your chicken breasts between two sheets of plastic wrap. Using the flat side of a meat mallet or a heavy rolling pin, gently pound them until they are an even 1/2-inch thickness. This is crucial for quick, uniform cooking. Pat them dry with a paper towel—this helps the coating stick. In one shallow bowl, combine the panko, Italian seasoning, half of the Parmesan, salt, and pepper. In another bowl, add 1 tablespoon of the olive oil. You’ll be dredging the chicken in the oil first, then the panko mixture.01
-
Toast the Panko for Maximum Crisp. This is our secret weapon! Heat a large skillet over medium heat and add the remaining 2 tablespoons of olive oil. Once the oil is shimmering, add the panko mixture from the bowl. Toast it, stirring frequently, for about 2-3 minutes until it turns a beautiful golden brown. Watch it closely—it can burn in a heartbeat. Transfer the toasted panko back to the bowl immediately. This step gives your chicken an unbeatable, deep crunch.02
-
Cook the Chicken to Golden Perfection. Using the same skillet (no need to wash it—all that flavor is still in there!), add a tiny bit more oil if it looks dry. Increase the heat to medium-high. Take your pounded chicken breasts and press them first into the plain olive oil, making sure they’re fully coated. Then, press them firmly into the toasted panko mixture, ensuring an even, generous crust on both sides. Carefully place the chicken in the hot skillet. Cook for 5-6 minutes per side, until the crust is deeply golden and the internal temperature reaches 165°F (74°C). The chicken should feel firm to the touch. Transfer to a cutting board and let it rest for a few minutes before slicing.03
-
Whisk Together the Simple Caesar Dressing. While the chicken rests, it’s dressing time. In your small mixing bowl, combine the mayonnaise, the remaining 1/2 cup of Parmesan, minced garlic, lemon juice, Dijon mustard, and Worcestershire sauce. Whisk it all together until it’s smooth and creamy. Taste it! This is your moment to adjust. Want more tang? Add a squeeze more lemon. Need more garlic? Go for it. The dressing should be thick, creamy, and packed with savory, cheesy flavor.04
-
Assemble the Wraps with Care. Lay your tortillas out on a clean surface. Take a generous handful of the thoroughly dried romaine lettuce and place it in the center of each tortilla, leaving a couple of inches of space at the bottom. Slice your rested chicken against the grain into thin strips. Divide the chicken strips evenly among the wraps, placing them on top of the lettuce. Now, drizzle a hearty amount of your homemade Caesar dressing over the chicken and lettuce. Don’t be shy! You want every component to be coated.05
-
Master the Wrap Fold. This is the final, crucial technique. Fold the bottom flap of the tortilla up and over the filling, tucking it in snugly. Then, fold the left and right sides inward, over the filling. Now, roll the whole package tightly away from you, creating a neat, secure burrito-style wrap. If you’re taking these on the go, you can wrap the bottom half in a piece of parchment paper or foil to keep everything contained. For serving at home, just slice them in half on a sharp diagonal—it looks so much more appealing.06
Not what you're looking for?


