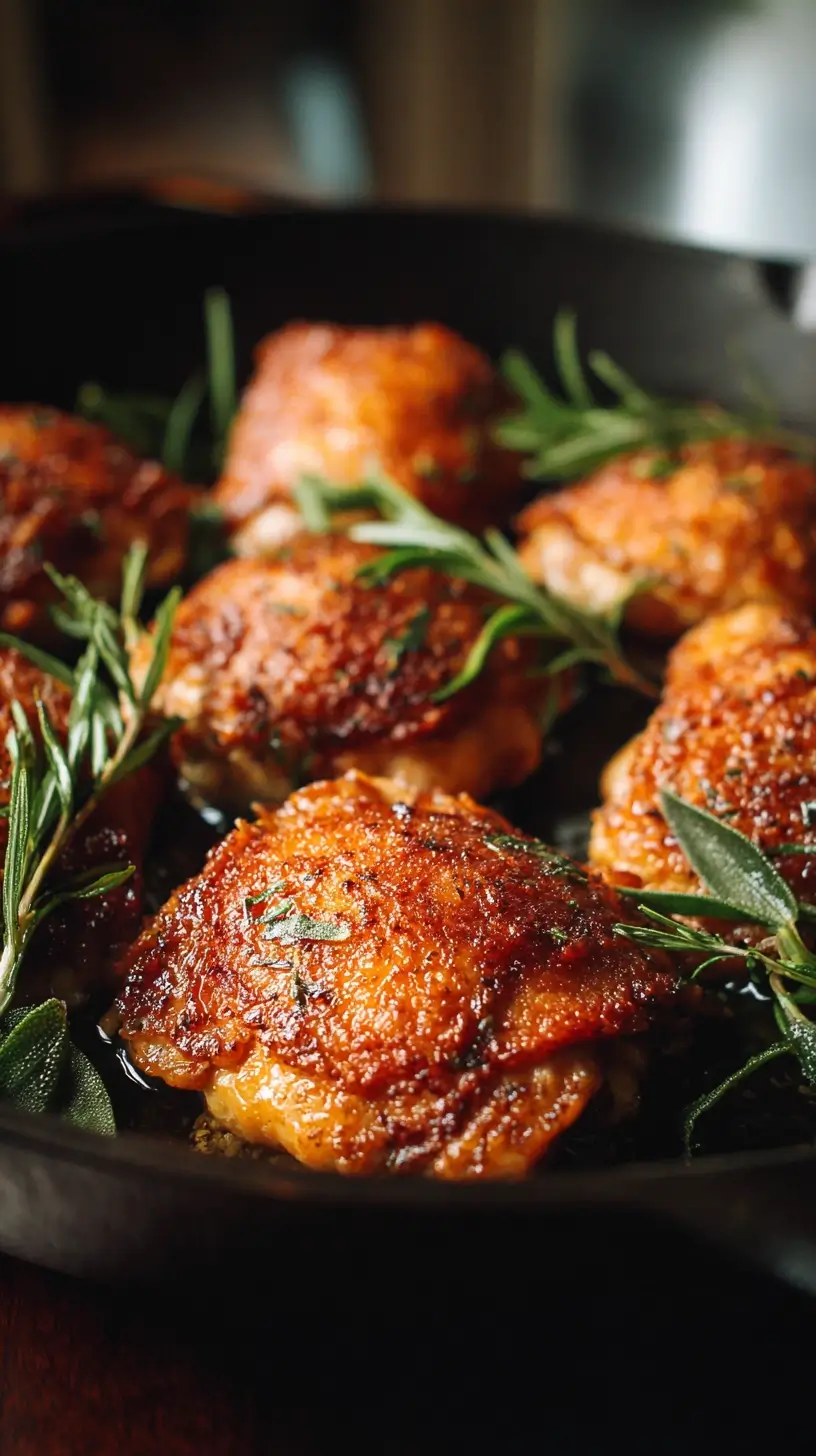
Perfectly crispy chicken thighs deliver shatteringly golden skin and impossibly juicy meat. This Crispy Chicken Thighs recipe uses a simple cold-pan start and weighted press for guaranteed results. It’s a weeknight hero with minimal effort and maximum payoff.
Looking for Crispy Chicken Thighs inspiration? You'll love what we have! Explore more Chicken Thigh Recipes recipes or discover our Appetizers & Snacks favorites.


Why You’ll Love This Crispy Chicken Thighs
- Foolproof Crispiness: Cold-pan start ensures skin renders slowly for crackling texture.
- Insanely Juicy Meat: Skin-side down cooking steaks meat in its own juices.
- Minimal Hands-On Time: Mostly passive cooking frees you up for sides.
- Endlessly Versatile: Perfect blank canvas for any spice rub or glaze.
Ingredients & Tools
- 4-6 bone-in, skin-on chicken thighs (about 1.5 lbs / 680 g total)
- 1 ½ tsp kosher salt
- 1 tsp freshly ground black pepper
- 1 tbsp neutral oil (like avocado or grapeseed)
- 2 cloves garlic, lightly smashed (optional)
- A few sprigs of fresh thyme or rosemary (optional)
Tools: A large, heavy-bottomed skillet (cast iron is ideal), a smaller skillet or bacon press for weighting, tongs, instant-read thermometer.
Notes: Quality chicken with a good fat layer under the skin and a heavy pan make a real difference.
Nutrition (per serving)
| Calories: | 320 kcal |
| Protein: | 28 g |
| Fat: | 22 g |
| Carbs: | 0 g |
| Fiber: | 0 g |
Serves: 4 | Prep Time: 5 minutes | Cook Time: 25 minutes | Total Time: 30 minutes
Before You Start: Tips & Ingredient Notes
- Patience is your secret weapon. Rushing this process is the number one reason for flabby skin. Trust the method, resist the urge to peek too often, and let the low-and-slow heat work its magic.
- Dry that skin! This is non-negotiable. Moisture is the enemy of crispiness. Take a few extra minutes to pat the skin bone-dry with paper towels—you’ll be rewarded with a texture that’s worth every second.
- Why start in a cold pan? It sounds counterintuitive, but placing the chicken in a cold pan allows the fat to render out gradually as the pan heats up. This gently fries the skin from the inside out, creating an unparalleled crispness.
- Don’t skip the weight. Using a smaller skillet or a bacon press to gently weigh down the chicken ensures maximum surface contact with the pan. This eliminates curling and gives you that beautiful, even, all-over golden brown sear.
How to Make Crispy Chicken Thighs
Step 1: Begin by preparing your chicken. Take the thighs out of the refrigerator about 20 minutes before cooking to take the chill off—this helps them cook more evenly. Use several paper towels to pat the skin and any visible moisture on the bone side completely dry. Be thorough here; you’ll notice the paper towels get quite damp. Season both sides generously with the salt and pepper, really working it into the skin.
Step 2: Place your large, heavy-bottomed skillet on the stove. Do not turn on the heat yet. Drizzle the neutral oil into the cold pan and then arrange the chicken thighs skin-side down in a single layer. They should fit snugly but not be overcrowded. Now, place a piece of parchment paper over the chicken, and then set your smaller, heavy skillet or bacon press directly on top to weight them down.
Step 3: Now, turn the burner on to medium-low heat. This is where the patience comes in. Let the chicken cook, undisturbed, for about 15-18 minutes. You’ll hear it start to sizzle gently as the fat renders. Resist the temptation to lift and peek! You’re waiting for the skin to become deeply golden brown and the edges to look crispy. You can carefully lift a corner to check progress after about 15 minutes.
Step 4: Once the skin is a beautiful, deep golden brown and looks incredibly crispy, remove the weight and parchment paper. Carefully flip the thighs over using tongs. If you’re using the garlic and herbs, add them to the rendered fat in the pan now. The aroma will become fragrant and amazing. Cook the chicken on the second side for another 5-7 minutes.
Step 5: To ensure perfect doneness, use an instant-read thermometer inserted into the thickest part of the thigh, avoiding the bone. You’re looking for an internal temperature of 165°F (74°C). The meat should feel firm to the touch and the juices should run clear. Once done, transfer the chicken to a wire rack set over a baking sheet to rest for 5 minutes—this keeps the bottom skin from getting steamy and soft.
Step 6: While the chicken rests, you can make a quick, easy pan sauce if you like. Spoon off most of the excess rendered fat, leaving about a tablespoon. Place the skillet back over medium heat, add a splash of white wine or chicken broth, and scrape up all those delicious browned bits from the bottom of the pan. Let it reduce slightly for a minute, then stir in a knob of cold butter for a glossy, rich finish.
Storage & Freshness Guide
- Fridge: Store in an airtight container for up to 3 days.
- Freezer: Not recommended; skin will lose crispiness.
- Reviving: Reheat on a wire rack at 375°F for 10–15 minutes to re-crisp.
Serving Suggestions
Complementary Dishes
- Creamy Parmesan Polenta — The soft, cheesy polenta is a dreamy bed for the crispy chicken and soaks up any pan juices beautifully.
- Garlicky Sautéed Greens — Something like kale or Swiss chard cooked with a bit of the rendered chicken fat adds a bitter, savory counterpoint.
- Simple Arugula Salad — A pile of peppery arugula with a sharp lemon vinaigrette cuts through the richness of the dish perfectly.
Drinks
- A Crisp Chardonnay — An unoaked or lightly oaked Chardonnay has enough body to match the chicken but enough acidity to cleanse the palate.
- A Pale Ale — The slight bitterness and carbonation of a good pale ale work wonderfully with the savory, fatty flavors of the crispy skin.
- Sparkling Water with Lemon — For a non-alcoholic option, the bubbles and citrus are incredibly refreshing against the rich, savory notes.
Something Sweet
- Lemon Sorbet — Its bright, clean, and tart flavor is the perfect palate-cleanser after such a savory and satisfying main course.
- Olive Oil Cake — A slice of moist, not-too-sweet olive oil cake continues the rustic, comforting theme in a delightful way.
- Dark Chocolate Bark with Sea Salt — A few pieces of high-quality dark chocolate provide a simple, elegant, and bittersweet ending.
Top Mistakes to Avoid
- Mistake: Not drying the skin thoroughly. Any surface moisture will steam the skin instead of letting it fry, leading to a rubbery, pale, and disappointing texture. I’ve messed this up before too, thinking a quick pat was enough—it’s not.
- Mistake: Using too high heat. It’s tempting to crank the stove to get things moving faster, but this will burn the skin before the fat has a chance to render out, leaving you with bitter, blackened spots and undercooked, greasy skin elsewhere.
- Mistake: Moving the chicken too soon. If you try to lift and check the chicken before a solid crust has formed, you’ll tear the delicate skin and it will stick to the pan. Trust the process and let it be.
- Mistake: Crowding the pan. If the thighs are too close together, they’ll steam each other. You need space for the moisture to evaporate so the skin can properly crisp up. Cook in batches if necessary.
Expert Tips
- Tip: Season under the skin. For an even more flavorful result, gently loosen the skin from the meat with your fingers and sprinkle a little salt and pepper directly onto the flesh. This seasons the meat from the inside out.
- Tip: Use the rendered fat. Don’t you dare pour that liquid gold down the drain! Strain it and keep it in a jar in the fridge. It’s incredible for roasting potatoes, sautéing vegetables, or making the most flavorful fried eggs.
- Tip: Finish in the oven for a crowd. If you’re doubling the recipe, you can get a great sear on the stovetop in batches and then transfer all the thighs to a 400°F (200°C) oven on a wire rack-set baking sheet to finish cooking through evenly.
- Tip: Add a final flourish. Right after the chicken comes out of the pan, while the skin is at its crispiest, try sprinkling it with a flaky finishing salt like Maldon or a dusting of smoked paprika for an extra layer of flavor and texture.
FAQs
Can I make this with boneless, skinless chicken thighs?
You can, but you won’t get the same crispy skin result, which is the star of this recipe. Boneless, skinless thighs will cook much faster and will be more about the juicy, seasoned meat. You’d need to adjust the cook time down significantly and won’t need the weighting step. They’re delicious, but it’s a different dish altogether.
My skin is sticking to the pan. What did I do wrong?
This almost always means you tried to move the chicken too early. A properly crisped skin will release from the pan naturally when it’s ready. If it’s sticking, just give it a few more minutes. The sound will change from a sticky sizzle to a looser, more active sizzle when it’s ready to flip. Forcing it will only tear the beautiful crust you’ve worked so hard to create.
Can I use chicken breasts instead?
I wouldn’t recommend it for this specific method. Chicken breasts are very lean and cook quite differently. They would likely dry out with the long, slow cooking on one side. This technique is really designed for the higher fat content and forgiving nature of thighs. Stick with thighs for the best, most reliable result.
How do I store and reheat leftovers?
Store any leftover chicken in an airtight container in the refrigerator for up to 3 days. To reheat while preserving the crispiness, avoid the microwave. Instead, place the thighs on a wire rack set over a baking sheet and warm them in a 375°F (190°C) oven for about 10-15 minutes, until hot. The air circulation will help re-crisp the skin.
Why is my chicken skin splattering so much?
A little splattering is normal—you’re rendering fat, after all! But excessive splattering usually points to residual moisture on the skin or too high heat. Make sure you’ve patted the skin impeccably dry and that you’re maintaining that steady medium-low temperature. Using a splatter screen can also be a huge help for keeping your stovetop clean.


Crispy Chicken Thighs
Learn the secret to perfectly Crispy Chicken Thighs every time with this easy cold-pan method. Get juicy meat and golden skin in 30 minutes. Try this recipe tonight!
Ingredients
For the Ingredients & Tools
-
4-6 bone-in, skin-on chicken thighs (about 1.5 lbs / 680 g total)
-
1 ½ tsp kosher salt
-
1 tsp freshly ground black pepper
-
1 tbsp neutral oil (like avocado or grapeseed)
-
2 cloves garlic (lightly smashed (optional))
-
A few sprigs fresh thyme or rosemary (optional)
Instructions
-
Begin by preparing your chicken. Take the thighs out of the refrigerator about 20 minutes before cooking to take the chill off—this helps them cook more evenly. Use several paper towels to pat the skin and any visible moisture on the bone side completely dry. Be thorough here; you’ll notice the paper towels get quite damp. Season both sides generously with the salt and pepper, really working it into the skin.01
-
Place your large, heavy-bottomed skillet on the stove. Do not turn on the heat yet. Drizzle the neutral oil into the cold pan and then arrange the chicken thighs skin-side down in a single layer. They should fit snugly but not be overcrowded. Now, place a piece of parchment paper over the chicken, and then set your smaller, heavy skillet or bacon press directly on top to weight them down.02
-
Now, turn the burner on to medium-low heat. This is where the patience comes in. Let the chicken cook, undisturbed, for about 15-18 minutes. You’ll hear it start to sizzle gently as the fat renders. Resist the temptation to lift and peek! You’re waiting for the skin to become deeply golden brown and the edges to look crispy. You can carefully lift a corner to check progress after about 15 minutes.03
-
Once the skin is a beautiful, deep golden brown and looks incredibly crispy, remove the weight and parchment paper. Carefully flip the thighs over using tongs. If you’re using the garlic and herbs, add them to the rendered fat in the pan now. The aroma will become fragrant and amazing. Cook the chicken on the second side for another 5-7 minutes.04
-
To ensure perfect doneness, use an instant-read thermometer inserted into the thickest part of the thigh, avoiding the bone. You’re looking for an internal temperature of 165°F (74°C). The meat should feel firm to the touch and the juices should run clear. Once done, transfer the chicken to a wire rack set over a baking sheet to rest for 5 minutes—this keeps the bottom skin from getting steamy and soft.05
-
While the chicken rests, you can make a quick, easy pan sauce if you like. Spoon off most of the excess rendered fat, leaving about a tablespoon. Place the skillet back over medium heat, add a splash of white wine or chicken broth, and scrape up all those delicious browned bits from the bottom of the pan. Let it reduce slightly for a minute, then stir in a knob of cold butter for a glossy, rich finish.06
Not what you're looking for?


