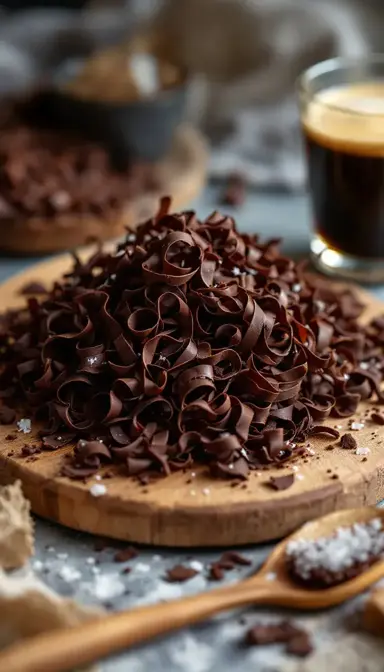
Let me tell you about the magic of dark chocolate shavings – those delicate, whisper-thin curls that can transform an ordinary dessert into something extraordinary. I still remember the first time I saw a pastry chef artfully draping them over a slice of Flourless Chocolate Cake. The way they caught the light, the promise of that rich cocoa flavor – it was love at first sight.
What makes these shavings so special? It’s that perfect balance between elegance and approachability. With just a bar of good chocolate and a simple kitchen tool, you can create a garnish that looks like it came from a Michelin-starred kitchen. Whether you’re dressing up weeknight ice cream or preparing a special occasion dessert, these shavings add that “wow” factor we all crave.
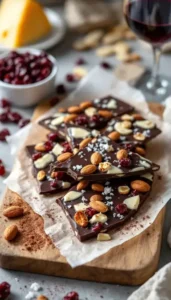
Craving a delicious Dark Chocolate Shavings? You've come to the right spot! From Dessert Recipes favorites to amazing Appetizers & Snacks recipes, there's something here for everyone.

Why This Recipe Works
- Quality matters: A 60-70% cocoa dark chocolate gives you that ideal bittersweet punch without overwhelming other flavors. The higher cocoa butter content in quality bars makes them easier to shave into perfect curls.
- Texture play: Those delicate curls provide the perfect contrast to creamy mousses or dense cakes. The way they melt slightly on your tongue creates a luxurious experience.
- Endless possibilities: From classic pairings to unexpected combinations, these shavings adapt to any dessert personality. They’re like the little black dress of garnishes – always appropriate.
Essential Ingredients & Tools
Ingredients for Dark Chocolate Shavings
- 1 bar (3.5 oz / 100g) high-quality dark chocolate (60–70% cocoa) (Valrhona or Guittard work great, but any good baking chocolate will do. Avoid chocolate chips – their stabilizers prevent clean curls.)
- Optional: ½ tsp coconut oil or cocoa butter (Only needed if your chocolate is too brittle. This acts like a “conditioner” for your chocolate.)
Tools You’ll Need
- Vegetable peeler or cheese plane (A basic $2 peeler works perfectly – no need for fancy equipment. In a pinch, a sharp knife held at an angle can work.)
- Parchment paper or chilled baking sheet (The chill helps prevent melting. No baking sheet? Use a dinner plate chilled in the freezer.)
- Rubber spatula (Keeps those delicate curls pristine. No spatula? Clean, dry fingers work in a pinch.)
- Cool, dry workspace (If your kitchen is warm, work near an open fridge door to maintain the perfect temperature.)
How to Make Dark Chocolate Shavings
- The Chill Factor
Pop your 1 bar (3.5 oz / 100g) dark chocolate in the fridge for about 10-15 minutes. You want it firm but not rock-hard – think of the texture of a cold stick of butter. I learned this the hard way when I once over-chilled my chocolate and ended up with crumbles instead of curls. The ideal temperature is about 60–65°F (15–18°C).
- Setting the Stage
Place your chocolate bar on a damp towel to prevent slipping. Angle it slightly away from you – this gives you better control. I like to imagine I’m a sculptor preparing my marble block. If you don’t have a damp towel, a silicone baking mat or even a paper towel underneath works too.
- The Art of the Shave
Hold your peeler at a 45-degree angle and pull toward you with steady pressure. Don’t press too hard – let the tool do the work. Rotate the bar occasionally to create different curl sizes. Some days I go for big, dramatic ribbons; other times I prefer delicate wisps that melt on the tongue. Pro tip: If your chocolate starts to soften, pop it back in the fridge for 5 minutes.
- The Grand Finale
Transfer your shavings to a chilled surface immediately. If your kitchen is warm (like mine gets in summer), I’ll sometimes work right next to the open fridge door to keep everything at the perfect temperature. Use a rubber spatula to gently move the curls – they’re fragile when warm.
Pro Technique
- Temperature is everything: If your chocolate starts to sweat, blot it gently with a paper towel before continuing. This prevents those unappetizing white streaks (called sugar bloom).
- Variety is the spice of life: Mix different curl sizes for visual interest on your desserts. Big curls make a statement, while small ones create a delicate dusting.
- Timing matters: Add shavings just before serving to maintain their perfect texture. On warm desserts, they’ll melt slightly for a gorgeous effect.
Storage & Freshness Guide
Store your shavings in an airtight container at cool room temperature (not the fridge – that condensation is the enemy of good chocolate). They’ll keep for up to 2 weeks this way. If you need to keep them longer, freeze them in a single layer first, then transfer to a container. They’ll maintain their quality for up to 3 months frozen.
Ingredient Variations and Their Impact
One of my favorite things about this technique is how adaptable it is. Try:
- Milk chocolate (30–50% cocoa) for a sweeter, more kid-friendly version. Add a pinch of sea salt to balance the sweetness.
- White chocolate with a hint of citrus zest for a bright contrast. Chill it twice as long as dark chocolate – it melts faster.
- Ruby chocolate for a stunning pink garnish that’ll wow your guests. Its natural berry notes pair beautifully with cheesecake.
- Flavored dark chocolate like orange or mint for an extra dimension. Just ensure any additions are finely ground so they don’t interfere with shaving.
Perfect Pairings
Complementary Dishes
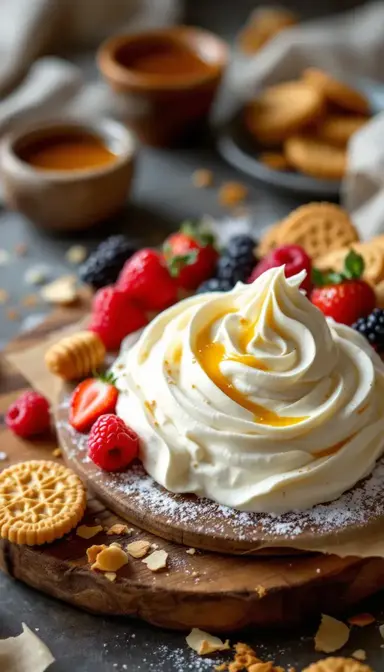
- Flourless chocolate cake: The shavings’ crisp texture contrasts beautifully with the cake’s dense richness. Scatter them generously on top right before serving for maximum impact.
- Poached Pears: A sprinkle of dark chocolate adds depth to the fruit’s delicate sweetness. For an extra touch, drizzle with the reduced poaching liquid.
Drinks
- Espresso: The bitterness of the coffee highlights the chocolate’s fruity undertones. Serve with shavings on the saucer for dipping – it’s an instant dessert.
- Cabernet Sauvignon: The wine’s tannins cut through the chocolate’s richness, creating a perfectly balanced bite. Try this pairing at your next dinner party.
Something Sweet
- Crème brûlée: Top the caramelized sugar crust with shavings for a bitter-sweet crunch that elevates this classic dessert.
- Vanilla Ice Cream: The simplicity of vanilla lets the chocolate’s complexity shine. Add a warm salted caramel sauce for the ultimate indulgence.


Dark Chocolate Shavings: The Secret Weapon for Showstopping Desserts
Learn how to make perfect Dark Chocolate Shavings with just a bar of chocolate and a peeler. Elevate desserts with this easy, elegant garnish. Try it tonight!
Ingredients
Dark Chocolate Shavings
-
1 bar high-quality dark chocolate (3.5 oz / 100g, 60–70% cocoa)
-
0.5 tsp coconut oil or cocoa butter (optional, only if chocolate is too brittle)
Instructions
-
Chill 1 bar (3.5 oz / 100g) dark chocolate in refrigerator for 10-15 minutes until firm but not brittle.01
-
Secure chocolate bar on a damp towel or non-slip surface.02
-
Using a vegetable peeler held at 45° angle, shave chocolate in long, smooth strokes.03
-
Rotate chocolate bar periodically to create varied curl sizes.04
-
Transfer shavings to a chilled parchment-lined surface immediately.05
Not what you're looking for?