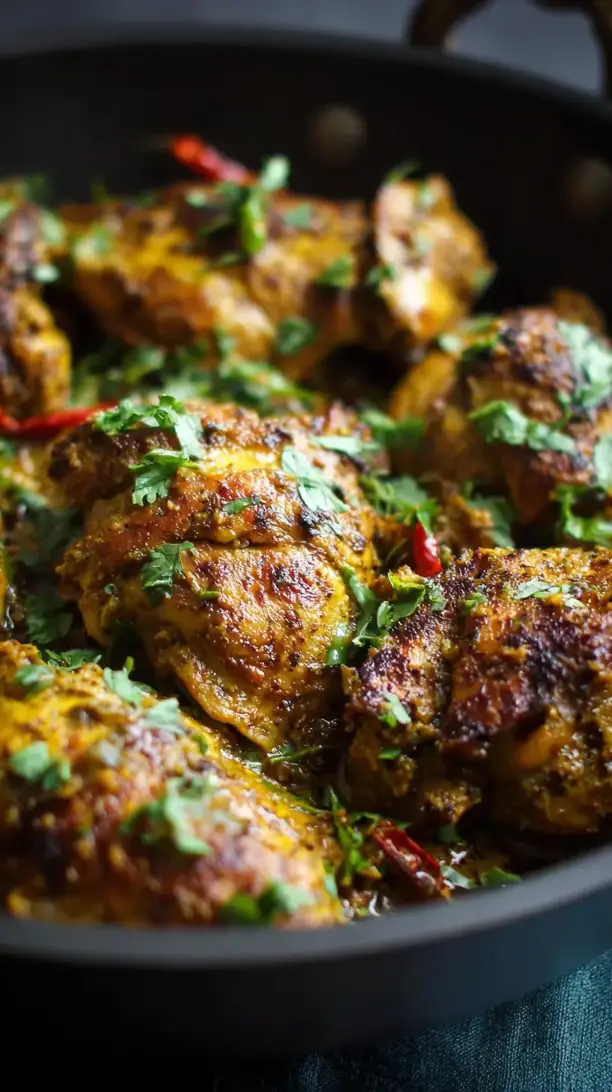
The warm, earthy aroma of garam masala makes this Garam Masala Chicken deeply comforting and aromatic. This one-pan wonder uses a good spice blend to create tender chicken in a rich, glossy sauce. It’s surprisingly simple yet tastes complex, perfect for weeknights or guests.
Love Garam Masala Chicken? So do we! If you're into Chicken Breast Recipes or curious about Chicken Thigh Recipes, you'll find plenty of inspiration below.


Why You’ll Love This Garam Masala Chicken
- Minimal effort: Garam masala delivers complex spice layers without measuring many jars.
- One-pan wonder: Everything cooks in a single skillet for easy cleanup.
- Juicy, tender chicken: Gentle simmering infuses spices without drying out the meat.
- Versatile base: Easy to adapt with different cuts, veggies, or heat levels.
Ingredients & Tools
- 1.5 lbs (680 g) boneless, skinless chicken thighs
- 2 tbsp vegetable oil or ghee
- 1 large yellow onion, finely chopped
- 4 garlic cloves, minced
- 1 tbsp fresh ginger, grated
- 1-2 green chilies, slit lengthwise (optional, for heat)
- 2 tbsp garam masala
- 1 tsp ground turmeric
- 1 tsp ground cumin
- 1 (14.5 oz / 400 g) can crushed tomatoes
- 1/2 cup (120 ml) plain yogurt, whisked until smooth
- 1/2 cup (120 ml) water or chicken broth
- 1 tsp salt, or to taste
- 1/4 cup fresh cilantro, chopped
- 1 tbsp fresh lemon juice
Tools: A large, heavy-bottomed skillet or Dutch oven with a lid.
Notes: The quality of your garam masala is key—it’s the star. Freshly grated ginger and creamy yogurt also make a world of difference.
Nutrition (per serving)
| Calories: | 380 kcal |
| Protein: | 35 g |
| Fat: | 22 g |
| Carbs: | 12 g |
| Fiber: | 3 g |
Serves: 4 | Prep Time: 15 minutes | Cook Time: 35 minutes | Total Time: 50 minutes
Before You Start: Tips & Ingredient Notes
- Don’t skip browning the chicken. This isn’t just for color—it creates a beautiful fond (those browned bits at the bottom of the pan) that will dissolve into your sauce, adding a ton of deep, savory flavor.
- Is your garam masala fresh? Spice blends lose their potency over time. Give yours a quick sniff—it should smell vibrant and aromatic. If it’s dull, it’s time for a new jar. This single ingredient carries the entire dish.
- Why use full-fat yogurt? Lower-fat yogurts can sometimes split or curdle when heated. Full-fat yogurt is more stable and will give your sauce a richer, creamier consistency without any graininess.
- Pat your chicken dry. This is a small but crucial step. Dry chicken thighs will achieve a much better sear than wet ones, which will just steam and turn gray. A good sear equals better flavor.
How to Make Garam Masala Chicken
Step 1: Pat the chicken thighs completely dry with paper towels and season them generously with a pinch of salt. Heat the oil or ghee in your large skillet over medium-high heat. Once the oil is shimmering, add the chicken thighs. You’ll hear a satisfying sizzle. Sear them for about 3-4 minutes per side, until they develop a beautiful golden-brown crust. Don’t crowd the pan—you might need to do this in two batches. Remove the chicken to a plate and set aside; it won’t be cooked through yet, and that’s perfectly fine.
Step 2: Reduce the heat to medium. In the same skillet, with all those delicious chicken drippings, add the finely chopped onion. Sauté for about 6-8 minutes, stirring occasionally, until the onions turn soft and translucent and just start to take on a light golden color. You’ll notice the aroma becoming sweet and fragrant. Now, add the minced garlic, grated ginger, and slit green chilies (if using). Cook for another minute, stirring constantly, until the raw smell of garlic disappears and everything becomes incredibly aromatic.
Step 3: This is the moment of magic. Push the onion mixture to one side of the pan and add the garam masala, turmeric, and cumin to the empty space. Let the spices toast in the hot oil for just 30 seconds. You’ll see them sizzle and smell their fragrance intensify dramatically—this blooming process unlocks their essential oils and deepens their flavor profile immensely.
Step 4: Now, stir the toasted spices into the onions until everything is well combined. Pour in the crushed tomatoes and the half cup of water or broth. Use your spoon to scrape up all the browned bits from the bottom of the pan—that’s pure flavor! Add the remaining salt, stir everything together, and let the sauce come to a gentle simmer.
Step 5: Carefully nestle the seared chicken thighs back into the simmering sauce, along with any juices that accumulated on the plate. Reduce the heat to low, cover the skillet with a lid, and let it cook for 20-25 minutes. The chicken will finish cooking through and become incredibly tender as it gently poaches in the spiced sauce.
Step 6: Once the chicken is cooked through, turn off the heat. Now, for the yogurt—this step prevents curdling. Take a spoonful of the warm sauce and stir it into the whisked yogurt in a small bowl. This tempers the yogurt, bringing it up to temperature slowly. Now, stir this tempered yogurt mixture back into the main skillet. The sauce should look creamy, glossy, and beautifully orange-red.
Step 7: Stir in the fresh lemon juice and half of the chopped cilantro. Give it a final taste and adjust the salt if needed. The lemon juice isn’t just for tang—it brightens all the spices and makes the entire dish pop. Garnish with the remaining cilantro just before serving.
Storage & Freshness Guide
- Fridge: Cool completely and store in an airtight container for 3–4 days.
- Freezer: Freeze in a sealed container for up to 3 months. Thaw in fridge before reheating.
- Reviving: Reheat gently on the stovetop with a splash of water if sauce has thickened.
Serving Suggestions
Complementary Dishes
- Steamed Basmati Rice — The fluffy, slightly fragrant grains are the perfect neutral canvas to soak up every last drop of the incredible sauce.
- Buttery Naan or Roti — There’s nothing quite like using a piece of warm, soft flatbread to scoop up tender pieces of chicken and sauce.
- Simple Cucumber Raita — A cool, creamy yogurt dip with cucumber and mint provides a refreshing contrast to the warm, spiced chicken.
Drinks
- A Crisp Indian Lager — The clean, effervescent quality of a beer like Kingfisher cuts through the richness of the dish beautifully.
- Sweet Mango Lassi — This creamy, yogurt-based drink is cooling and slightly sweet, balancing the spices and creating a wonderful flavor harmony.
- Iced Mint Tea — A less traditional but fantastic option, the herbal, refreshing notes of mint tea are a lovely palate cleanser between bites.
Something Sweet
- Gulab Jamun — These warm, syrup-soaked milk solids balls are a classic Indian dessert that provides a sweet, floral finish to the meal.
- Mango Kulfi — A dense, creamy Indian ice cream with intense mango flavor; its cold richness is the perfect ending after a spice-forward main.
- Coconut Barfi — A sweet, fudge-like coconut confection that’s not too heavy, offering a subtly sweet and textural contrast.
Top Mistakes to Avoid
- Mistake: Adding the spices to a cold pan. Toasting the garam masala in hot oil is non-negotiable. If the oil isn’t hot enough, the spices won’t “bloom,” and you’ll miss out on their full, aromatic potential, resulting in a flat-tasting sauce.
- Mistake: Stirring the yogurt directly into the hot pan. I’ve messed this up before too… adding cold yogurt directly to a simmering sauce will almost certainly cause it to curdle and look grainy. Tempering it first with a bit of warm sauce is the key to a smooth, creamy result.
- Mistake: Overcooking the chicken after adding the yogurt. Once the yogurt is in, the dish is essentially done. If you bring it back to a boil, you risk breaking the yogurt. Just warm it through gently off the heat.
- Mistake: Rushing the onions. If you don’t cook the onions until they’re properly soft and translucent, they can retain a harsh, raw bite that will throw off the entire flavor balance of your sauce. Patience is a virtue here.
Expert Tips
- Tip: Make your own garam masala blend. If you’re feeling adventurous, toasting whole spices like cinnamon sticks, cardamom pods, cloves, and cumin seeds then grinding them yourself will give you an unbelievably vibrant and fresh flavor that store-bought blends can’t match.
- Tip: Marinate the chicken for deeper flavor. For an extra layer of taste, you can marinate the chicken thighs in half of the yogurt, a tablespoon of the garam masala, and a pinch of salt for 30 minutes to an hour in the fridge before you start cooking.
- Tip: Use an immersion blender for a smoother sauce. If you prefer a completely smooth sauce, you can use an immersion blender to puree the onion-tomato base for a minute before adding the chicken back in. This creates a restaurant-style, velvety texture.
- Tip: Let it rest before serving. Like many stews and braises, this Garam Masala Chicken tastes even better if you let it sit off the heat for 10-15 minutes after cooking. This allows the flavors to meld together more completely and the chicken to reabsorb some of the juices.
FAQs
Can I use chicken breasts instead of thighs?
Absolutely, you can. Chicken breasts are leaner, so they can dry out more easily if overcooked. I’d recommend cutting them into smaller, bite-sized pieces and reducing the simmering time to about 10-12 minutes, just until they are cooked through. Keep a close eye on them to ensure they stay juicy and tender.
My sauce is too thin. How can I thicken it?
The easiest way is to simply continue simmering the sauce uncovered for an additional 5-10 minutes after the chicken is cooked, which will allow excess water to evaporate. Alternatively, you can mix a teaspoon of cornstarch with two tablespoons of cold water to create a slurry and stir that in, letting the sauce bubble for a minute until it thickens.
How long does leftover Garam Masala Chicken last?
Stored in an airtight container in the refrigerator, it will keep beautifully for 3-4 days. In fact, the flavors often deepen and improve overnight! Reheat it gently on the stovetop over low heat, adding a tiny splash of water if the sauce has thickened too much.
Can I make this dish ahead of time?
It’s an excellent make-ahead meal. You can complete the entire recipe, let it cool completely, and refrigerate it for up to two days. Gently reheat it on the stove before serving. This actually makes it a fantastic option for meal prep or entertaining, as it frees you up on the day you plan to serve it.
Is this recipe spicy?
The heat level is very controllable. The garam masala itself provides warmth rather than intense heat. The primary source of spice comes from the optional green chilies. For a mild dish, simply omit them. For medium heat, use one chili, and for a spicier kick, use two or leave the seeds in. You’re in the driver’s seat!


Garam Masala Chicken
Make this easy one-pan Garam Masala Chicken with tender chicken in a rich, creamy sauce. Ready in 50 minutes for a flavorful weeknight dinner. Get the recipe now!
Ingredients
For the Ingredients
-
1.5 lbs boneless, skinless chicken thighs
-
2 tbsp vegetable oil or ghee
-
1 large yellow onion (finely chopped)
-
4 garlic cloves (minced)
-
1 tbsp fresh ginger (grated)
-
1-2 green chilies (slit lengthwise (optional, for heat))
-
2 tbsp garam masala
-
1 tsp ground turmeric
-
1 tsp ground cumin
-
1 can crushed tomatoes (14.5 oz / 400 g)
-
0.5 cup plain yogurt (whisked until smooth)
-
0.5 cup water or chicken broth
-
1 tsp salt (or to taste)
-
0.25 cup fresh cilantro (chopped)
-
1 tbsp fresh lemon juice
Instructions
-
Pat the chicken thighs completely dry with paper towels and season them generously with a pinch of salt. Heat the oil or ghee in your large skillet over medium-high heat. Once the oil is shimmering, add the chicken thighs. You’ll hear a satisfying sizzle. Sear them for about 3-4 minutes per side, until they develop a beautiful golden-brown crust. Don’t crowd the pan—you might need to do this in two batches. Remove the chicken to a plate and set aside; it won’t be cooked through yet, and that’s perfectly fine.01
-
Reduce the heat to medium. In the same skillet, with all those delicious chicken drippings, add the finely chopped onion. Sauté for about 6-8 minutes, stirring occasionally, until the onions turn soft and translucent and just start to take on a light golden color. You’ll notice the aroma becoming sweet and fragrant. Now, add the minced garlic, grated ginger, and slit green chilies (if using). Cook for another minute, stirring constantly, until the raw smell of garlic disappears and everything becomes incredibly aromatic.02
-
This is the moment of magic. Push the onion mixture to one side of the pan and add the garam masala, turmeric, and cumin to the empty space. Let the spices toast in the hot oil for just 30 seconds. You’ll see them sizzle and smell their fragrance intensify dramatically—this blooming process unlocks their essential oils and deepens their flavor profile immensely.03
-
Now, stir the toasted spices into the onions until everything is well combined. Pour in the crushed tomatoes and the half cup of water or broth. Use your spoon to scrape up all the browned bits from the bottom of the pan—that’s pure flavor! Add the remaining salt, stir everything together, and let the sauce come to a gentle simmer.04
-
Carefully nestle the seared chicken thighs back into the simmering sauce, along with any juices that accumulated on the plate. Reduce the heat to low, cover the skillet with a lid, and let it cook for 20-25 minutes. The chicken will finish cooking through and become incredibly tender as it gently poaches in the spiced sauce.05
-
Once the chicken is cooked through, turn off the heat. Now, for the yogurt—this step prevents curdling. Take a spoonful of the warm sauce and stir it into the whisked yogurt in a small bowl. This tempers the yogurt, bringing it up to temperature slowly. Now, stir this tempered yogurt mixture back into the main skillet. The sauce should look creamy, glossy, and beautifully orange-red.06
-
Stir in the fresh lemon juice and half of the chopped cilantro. Give it a final taste and adjust the salt if needed. The lemon juice isn’t just for tang—it brightens all the spices and makes the entire dish pop. Garnish with the remaining cilantro just before serving.07
Not what you're looking for?


