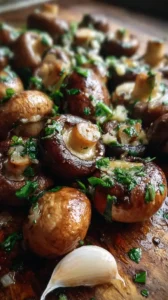
The aroma of garlic and herbs toasting is pure kitchen magic. These Garlic Herb Roasted Nuts are a quick, addictive snack that’s perfect for parties, gifting, or everyday munching. You’ll love how easily this recipe comes together with simple ingredients.
Nothing beats a great Garlic Herb Roasted Nuts. Whether you're a fan of Savory Snacks or want to try something from our Crockpot Recipes selection, keep scrolling!


Why You’ll Love This Garlic Herb Roasted Nuts
- Versatile & elegant: Perfect for cheese boards, salads, or straight-up snacking.
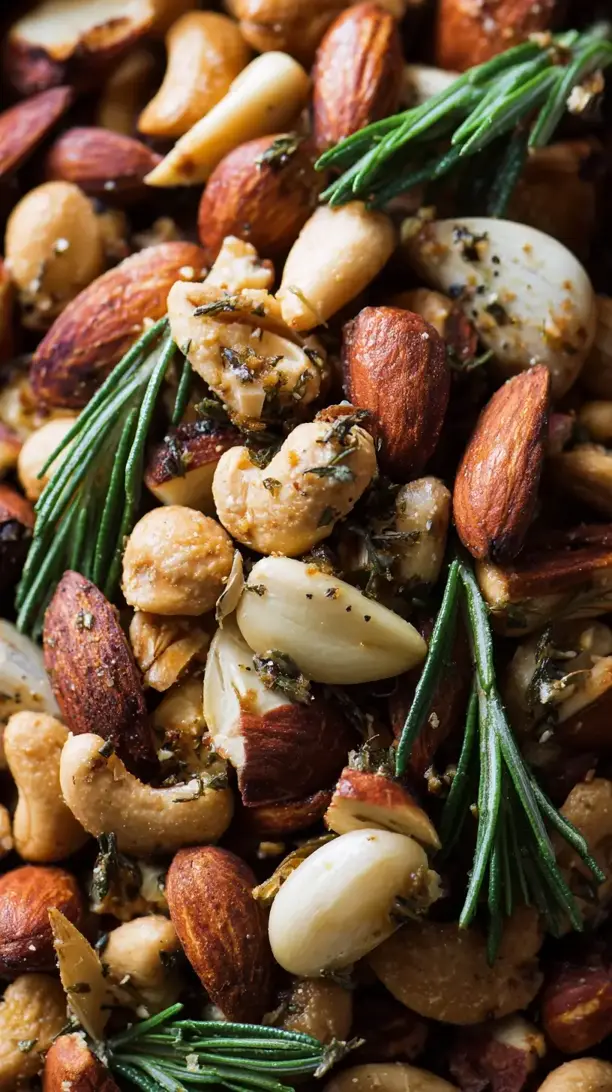
- Addictive savory flavor: Garlic, rosemary, and smoked paprika create a complex taste.
- Effortless to make: Just 5 minutes of active prep, then the oven does the work.
- Great for gifting: Package in a jar for a beautiful homemade present.
Ingredients & Tools
- 3 cups mixed raw nuts (I use almonds, cashews, and walnuts)
- 2 tbsp olive oil
- 4 cloves garlic, minced
- 1 tbsp fresh rosemary, finely chopped
- 1 tsp dried thyme
- 1/2 tsp smoked paprika
- 1/4 tsp cayenne pepper (optional, for heat)
- 1 tsp sea salt, plus more for finishing
- 1/2 tsp freshly cracked black pepper
Tools: A large baking sheet, parchment paper, a medium mixing bowl, and a small spatula or spoon for stirring.
Notes: Use good quality, fresh raw nuts for best flavor. Fresh rosemary is highly recommended for brighter aroma.
Nutrition (per serving)
| Calories: | 210 kcal |
| Protein: | 6 g |
| Fat: | 19 g |
| Carbs: | 7 g |
| Fiber: | 3 g |
Serves: 8 | Prep Time: 5 minutes | Cook Time: 15 minutes | Total Time: 20 minutes
Before You Start: Tips & Ingredient Notes
- Why raw nuts? Using raw, unsalted nuts gives you complete control over the seasoning and prevents them from becoming too salty. They also toast more evenly and won’t burn as easily as pre-roasted ones.
- Fresh vs. dried herbs. Fresh rosemary is non-negotiable for the best aroma, but dried thyme works perfectly here because its earthy flavor holds up well to the heat. If you only have dried rosemary, use half the amount.
- Don’t skip the oil. The oil isn’t just for flavor—it acts as a glue, helping all those delicious herbs and spices cling to every nook and cranny of the nuts. A good, fruity olive oil makes a noticeable difference.
- Watch the garlic. Mince your garlic finely. Larger pieces can burn in the high heat of the oven, becoming bitter. We want that golden, toasted garlic flavor, not a charred one.
How to Make Garlic Herb Roasted Nuts
Step 1: First, preheat your oven to 350°F (175°C). This is the perfect temperature for toasting nuts—hot enough to get them crispy and golden but not so hot that they burn before the flavors have a chance to meld. Line your baking sheet with parchment paper. This is a lifesaver for easy cleanup and prevents any little bits from sticking and scorching.
Step 2: In your medium mixing bowl, combine the olive oil, minced garlic, chopped rosemary, dried thyme, smoked paprika, cayenne (if using), salt, and black pepper. Give it a good stir with a spoon. You’ll notice the mixture will look like a fragrant, rustic paste. Let it sit for a minute so the garlic can infuse the oil—this little trick builds a deeper flavor base.
Step 3: Add all your raw, mixed nuts to the bowl. Now, use your spatula or a large spoon to toss everything together. Be thorough! You want every single nut to be glistening and coated in that beautiful herb and spice mixture. It should look evenly distributed, with no dry spots.
Step 4: Spread the coated nuts out in a single, even layer on your prepared baking sheet. This is crucial. If the nuts are piled on top of each other, they’ll steam instead of roast, and you’ll miss out on that satisfying crunch. A little space between them allows for hot air to circulate.
Step 5: Place the baking sheet in the preheated oven and roast for 12 to 15 minutes. You’ll want to stir the nuts halfway through the cooking time to ensure they brown evenly on all sides. Keep a close eye on them during the last few minutes—nuts can go from perfectly golden to burnt surprisingly fast.
Step 6: The nuts are done when they are fragrant and have taken on a deeper, golden-brown color. You might see the garlic and herbs looking a little toasty, which is exactly what you want. Carefully remove the pan from the oven. They will continue to crisp up as they cool, so resist the urge to taste them immediately—they’ll be very soft and hot!
Step 7: Let the nuts cool completely on the baking sheet. This is the final step to achieving maximum crunch. As they cool, give them one final sprinkle of flaky sea salt. This not only adds a last hit of flavor but also gives a lovely textural contrast. Once cool, transfer them to a serving bowl or an airtight container.
Storage & Freshness Guide
- Fridge: Not necessary; store in an airtight container at room temperature.
- Freezer: Freeze for up to 3 months in a sealed bag; thaw at room temperature.
- Reviving: If nuts lose crunch, re-toast in a 300°F oven for 5–10 minutes.
Serving Suggestions
Complementary Dishes
- A rustic cheese board — The salty, savory crunch of the nuts is a perfect counterpoint to creamy cheeses like brie or tangy blue cheese, along with some sweet dried fruit.
- A simple green salad — Toss a handful over a salad with a sharp vinaigrette; they add a protein-packed crunch that’s far better than standard croutons.
- Creamy soups — Use them as a garnish for butternut squash or tomato soup, where their texture and savory flavor provide a wonderful contrast to the smooth, rich soup.
Drinks
- A crisp, cold lager — The clean, effervescent quality of a lager cuts through the richness of the nuts and cleanses the palate beautifully between bites.
- A dry white wine — Think Sauvignon Blanc or Pinot Grigio; their acidity and citrus notes are a fantastic pairing for the garlic and herbal flavors.
- Sparkling water with lemon — A non-alcoholic option that provides a refreshing, bubbly contrast to the savory, oily nuts.
Something Sweet
- Dark chocolate-covered orange slices — The bittersweet chocolate and bright citrus are a stunning follow-up to the savory, garlicky profile of the nuts.
- Simple shortbread cookies — Their buttery, mild sweetness offers a quiet, gentle finish that doesn’t compete with the robust flavors you just enjoyed.
- Honey-drizzled yogurt — A small bowl of Greek yogurt with a swirl of honey provides a cool, creamy, and slightly sweet end to your snacking.
Top Mistakes to Avoid
- Mistake: Using pre-roasted, salted nuts. This almost always leads to an overly salty final product and nuts that can easily burn because they’re already cooked. Always start with raw for the best control and result.
- Mistake: Not stirring halfway through. The edges of the baking sheet get hotter, so nuts on the perimeter will burn if you don’t give everything a good mix to promote even browning and toasting.
- Mistake> Crowding the pan. If the nuts are piled on top of each other, they’ll steam and become soft and chewy instead of developing that delightful, crispy crunch we’re after. A single layer is non-negotiable.
- Mistake: Skipping the cool-down. I know it’s tempting to eat them warm, but the nuts are still soft straight out of the oven. They achieve their signature crunch only as they cool completely on the pan.
Expert Tips
- Tip: Toast your own spices. If you have whole cumin or coriander seeds, lightly toast them in a dry pan before grinding and adding to the mix. It unlocks incredible depth and aroma that pre-ground spices can’t match.
- Tip: Add a touch of sweetness. For a more complex flavor profile, add a teaspoon of maple syrup or honey to the oil and spice mixture. It creates a subtle sweet-and-savory glaze that’s absolutely irresistible.
- Tip: Use a microplane for the garlic. If you want to avoid any chance of burnt garlic bits, use a microplane to grate the garlic cloves into a paste. It distributes more evenly and infuses the oil without the risk of burning.
- Tip: Revive stale nuts. If your nuts have been in the pantry for a while and have lost their snap, this roasting method will bring them right back to life, making them taste fresh and vibrant again.
FAQs
Can I use different nuts?
Absolutely! This recipe is wonderfully adaptable. Pecans, peanuts, hazelnuts, and pistachios all work beautifully. Just try to keep the total volume around 3 cups. Be mindful that smaller nuts like pine nuts will toast much faster, so you might want to add them in during the last 5 minutes of cooking if you’re using a mix with very different sizes.
How long do these roasted nuts last?
Stored in an airtight container at room temperature, they’ll stay fresh and crunchy for up to 2 weeks. The high oil content means they can eventually go rancid, so I don’t recommend making huge batches to store for months. Their fantastic flavor usually means they’re eaten long before that becomes an issue anyway!
Can I make these spicy?
Of course! The cayenne is there for a gentle warmth, but feel free to turn up the heat. Add an extra 1/4 tsp of cayenne, or for a different kind of kick, a 1/2 teaspoon of chili flakes would be fantastic. You could even add a pinch of chipotle powder for a smoky heat.
Why are my nuts not crunchy?
This usually happens for one of two reasons: either the pan was overcrowded (causing steaming), or you didn’t let them cool completely on the baking sheet after roasting. The cooling process is when they firm up and become perfectly crisp. If they’re still soft after cooling, they may need another few minutes in the oven.
Can I make these on the stovetop?
You can, though the oven provides the most even heat. To do it on the stovetop, use a large, heavy-bottomed skillet over medium-low heat. Toast the nuts, stirring almost constantly, for 5-8 minutes until golden and fragrant. It requires more attention to prevent burning, but it’s a great quick method.


Garlic Herb Roasted Nuts
Make the best Garlic Herb Roasted Nuts with this easy recipe. A savory, crunchy snack perfect for parties or gifting. Get the simple steps now!
Ingredients
For the Nuts & Seasonings
-
3 cups mixed raw nuts (I use almonds, cashews, and walnuts)
-
2 tbsp olive oil
-
4 cloves garlic (minced)
-
1 tbsp fresh rosemary (finely chopped)
-
1 tsp dried thyme
-
0.5 tsp smoked paprika
-
0.25 tsp cayenne pepper (optional, for heat)
-
1 tsp sea salt (plus more for finishing)
-
0.5 tsp freshly cracked black pepper
Instructions
-
First, preheat your oven to 350°F (175°C). This is the perfect temperature for toasting nuts—hot enough to get them crispy and golden but not so hot that they burn before the flavors have a chance to meld. Line your baking sheet with parchment paper. This is a lifesaver for easy cleanup and prevents any little bits from sticking and scorching.01
-
In your medium mixing bowl, combine the olive oil, minced garlic, chopped rosemary, dried thyme, smoked paprika, cayenne (if using), salt, and black pepper. Give it a good stir with a spoon. You’ll notice the mixture will look like a fragrant, rustic paste. Let it sit for a minute so the garlic can infuse the oil—this little trick builds a deeper flavor base.02
-
Add all your raw, mixed nuts to the bowl. Now, use your spatula or a large spoon to toss everything together. Be thorough! You want every single nut to be glistening and coated in that beautiful herb and spice mixture. It should look evenly distributed, with no dry spots.03
-
Spread the coated nuts out in a single, even layer on your prepared baking sheet. This is crucial. If the nuts are piled on top of each other, they’ll steam instead of roast, and you’ll miss out on that satisfying crunch. A little space between them allows for hot air to circulate.04
-
Place the baking sheet in the preheated oven and roast for 12 to 15 minutes. You’ll want to stir the nuts halfway through the cooking time to ensure they brown evenly on all sides. Keep a close eye on them during the last few minutes—nuts can go from perfectly golden to burnt surprisingly fast.05
-
The nuts are done when they are fragrant and have taken on a deeper, golden-brown color. You might see the garlic and herbs looking a little toasty, which is exactly what you want. Carefully remove the pan from the oven. They will continue to crisp up as they cool, so resist the urge to taste them immediately—they’ll be very soft and hot!06
-
Let the nuts cool completely on the baking sheet. This is the final step to achieving maximum crunch. As they cool, give them one final sprinkle of flaky sea salt. This not only adds a last hit of flavor but also gives a lovely textural contrast. Once cool, transfer them to a serving bowl or an airtight container.07
Not what you're looking for?


