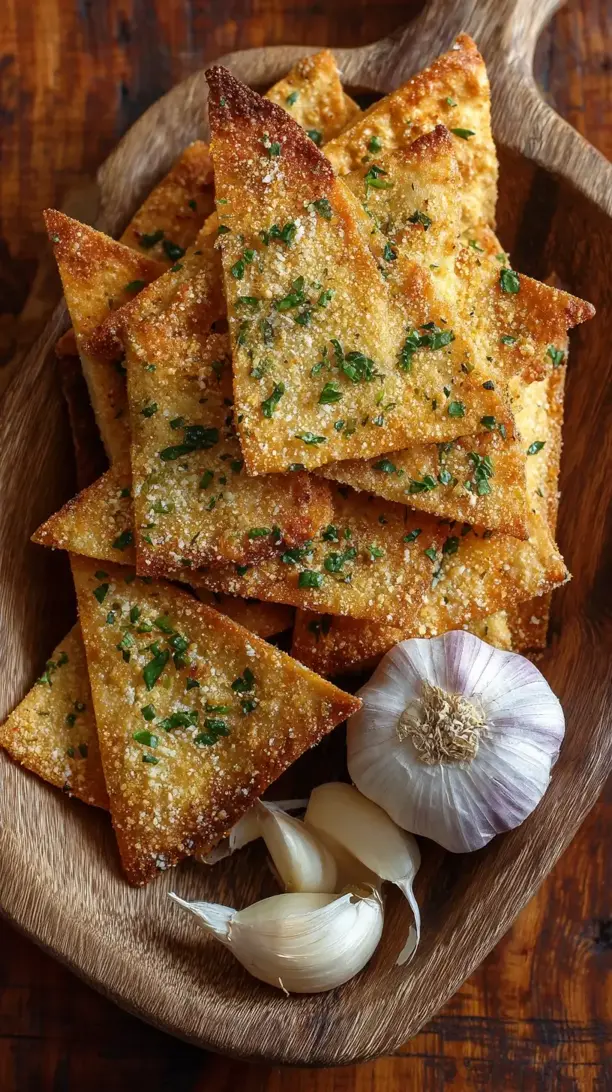
Transform soft pita into crispy, golden Garlic Parmesan Pita Chips in minutes. These homemade chips are aromatic with garlic and herbs, generously coated in nutty Parmesan cheese. Perfect for snacking or dipping, they’re a simple, irresistible upgrade from store-bought.
If you're looking for the perfect Garlic Parmesan Pita Chips, you're in the right place. Whether you love Savory Snacks or want to explore our Christmas Cookie collection, we've got you covered.


Why You’ll Love This Garlic Parmesan Pita Chips
- Unbeatable flavor: Shatteringly crisp with savory, cheesy, garlicky coating.
- Quick & easy: From pantry to plate in under 20 minutes.
- Wildly versatile: Perfect for dipping, soups, salads, or snacking.
- Cost-effective & customizable: Tailor seasoning and cheese to your taste.
Ingredients & Tools
- 4 medium-sized pita bread rounds (pocketless or pocketed both work)
- 1/4 cup extra virgin olive oil
- 3-4 large garlic cloves, finely minced
- 1/2 cup freshly grated Parmesan cheese
- 1 tsp dried Italian seasoning
- 1/2 tsp garlic powder (for an extra punch)
- 1/4 tsp onion powder
- 1/4 tsp smoked paprika (optional, for a hint of warmth)
- 1/4 tsp fine sea salt, plus more for finishing
- 1/4 tsp freshly cracked black pepper
- 2 tbsp fresh parsley, finely chopped (for garnish)
Tools: Large mixing bowl, baking sheet(s), parchment paper or a silicone baking mat, a sharp knife or pizza cutter, and a microplane or box grater.
Notes: Freshly grate Parmesan from a block for better melt and flavor than pre-shredded.
Nutrition (per serving)
| Calories: | 180 kcal |
| Protein: | 6 g |
| Fat: | 9 g |
| Carbs: | 19 g |
| Fiber: | 1 g |
Serves: 4 | Prep Time: 10 minutes | Cook Time: 12-15 minutes | Total Time: 25 minutes
Before You Start: Tips & Ingredient Notes
- Pita Bread Choices. You can use either pocketless (Greek-style) or pocket pitas. If using pocket pitas, I highly recommend carefully separating them into two thinner rounds before cutting—this makes for an extra-crispy, delicate chip.
- Fresh vs. Pre-minced Garlic. I know it’s tempting to use the jarred stuff, but for this recipe, fresh garlic is non-negotiable. It provides a brighter, more potent aroma and flavor that doesn’t have the slightly bitter aftertaste that can come with pre-minced.
- Grate Your Own Cheese. I’ll say it again: grate your own Parmesan. The pre-shredded kind is coated to prevent clumping, which also prevents it from melting and adhering to the pita as beautifully. A block of Parmigiano-Reggiano or a good-quality Grana Padano is ideal.
- Don’t Skip the Garlic Powder. It might seem redundant, but the garlic powder works alongside the fresh garlic to create a more rounded, pervasive garlic flavor that coats every nook and cranny of the chip.
How to Make Garlic Parmesan Pita Chips
Step 1: Preheat your oven and prepare your baking sheet. Crank your oven to 375°F (190°C). This moderate heat is perfect for crisping the pita without burning the garlic and cheese too quickly. Line one or two large baking sheets with parchment paper or a silicone baking mat. This prevents sticking and makes cleanup an absolute breeze.
Step 2: Cut the pita bread into wedges. Take your pita rounds and, using a sharp knife or a pizza cutter for efficiency, slice each one into 8 even wedges (like you’re cutting a pizza). If you’re using pocket pitas and have separated them, you’ll now have 16 very thin wedges per original pita. Place all the wedges in a large mixing bowl.
Step 3: Create the flavorful coating. In a small bowl, whisk together the olive oil and your finely minced fresh garlic. Let it sit for a minute—this helps infuse the oil with that incredible garlic flavor. In another small bowl, combine the freshly grated Parmesan, dried Italian seasoning, garlic powder, onion powder, smoked paprika (if using), salt, and pepper. Stir this dry mixture with a fork to ensure everything is evenly distributed.
Step 4: Toss the pita wedges. Pour the garlic-infused olive oil over the pita wedges in the large bowl. Use your hands or a pair of tongs to toss everything thoroughly, making sure every single piece gets a light, glossy coat of the oil. This oil is what will help the seasoning stick and create that beautiful golden color.
Step 5: Add the cheese and seasoning. Now, sprinkle the Parmesan and spice mixture over the oiled pita wedges. Toss again, gently but thoroughly. You’ll notice some clumps of cheese forming—that’s perfectly fine and actually what you want! Those cheesy clumps will become deliciously crispy bits in the oven.
Step 6: Arrange and bake. Spread the coated pita wedges out in a single layer on your prepared baking sheet(s). It’s crucial that they aren’t crowded or overlapping, or they’ll steam instead of crisp up. Pop them into the preheated oven and bake for 12 to 15 minutes. You’re looking for a light golden-brown color around the edges, and the cheese should look toasty and melted.
Step 7: Cool and garnish. Once they’re perfectly golden and crisp, remove the baking sheet from the oven. Let the chips cool directly on the sheet for at least 5 minutes—they will continue to crisp up as they cool. Just before serving, sprinkle them with the fresh chopped parsley for a pop of color and freshness.
Storage & Freshness Guide
- Fridge: Not recommended; store at room temperature in an airtight container.
- Freezer: Freeze baked chips in a single layer, then transfer to a freezer bag for up to 1 month.
- Reviving: Warm in a 350°F oven for 3–5 minutes to restore crispness.
Serving Suggestions
Complementary Dishes
- A Trio of Dips — Serve with a cool, creamy tzatziki, a vibrant sun-dried tomato and basil spread, and a rich, roasted red pepper hummus. The variety lets guests mix and match flavors with every crunchy bite.
- Charcuterie or Cheese Board — Use these chips as a sturdy, flavorful vehicle on your board. They pair wonderfully with sharp cheeses like aged cheddar or creamy brie and salty meats like prosciutto.
- Italian Wedding Soup or Minestrone — Instead of croutons, break a handful of these chips over a hot bowl of soup. They add a fantastic garlicky crunch that soaks up the broth just enough.
Drinks
- A Crisp Italian White Wine — A Pinot Grigio or a Vermentino has the acidity and citrus notes to cut through the richness of the cheese and oil, cleansing the palate between bites.
- Sparkling Water with Citrus — For a non-alcoholic option, the effervescence and hint of lemon or lime are incredibly refreshing against the savory, garlicky chips.
- A Light Italian Lager — A beer like Peroni offers a clean, crisp bitterness that contrasts beautifully with the saltiness and umami of the Parmesan.
Something Sweet
- Lemon Sorbet — The bright, tart, and clean flavor of a good lemon sorbet is the perfect palate-cleansing finish after the savory, garlic-forward snack.
- Amaretti Cookies — These classic Italian almond cookies provide a sweet, chewy-crisp texture and a nutty flavor that doesn’t overpower the memory of the chips.
- Dark Chocolate-Covered Espresso Beans — For a real grown-up treat, the bitter dark chocolate and intense coffee flavor are a bold and satisfying end note.
Top Mistakes to Avoid
- Overcrowding the Baking Sheet. If the pita wedges are piled on top of each other, they’ll steam and become chewy instead of crisping up. You want hot air to circulate around each one, so use two sheets if necessary.
- Burning the Garlic. Mincing the garlic too coarsely or baking at too high a temperature can cause it to burn, creating a bitter taste. A fine mince and a moderate 375°F oven are your best defenses.
- Using Pre-Shredded Cheese. I’ve messed this up before too… pre-shredded cheese contains starches that prevent it from melting properly. It often ends up drying out or burning rather than creating those lovely, crispy, cheesy bits.
- Skipping the Cooling Time. The chips will still be slightly soft when they first come out of the oven. Letting them cool on the sheet is the final step to achieving that perfect, shatteringly crisp texture.
Expert Tips
- Tip: For extra-crispy chips, separate pocket pitas. If you’re using standard pocket pitas, take the extra 60 seconds to carefully split each one into two thin rounds. This gives you a much more delicate, chip-like final product that crisps up uniformly.
- Tip: Infuse your oil for deeper flavor. For a more mellow, pervasive garlic flavor, gently warm the olive oil with the minced garlic in a small saucepan for just 2-3 minutes over low heat before tossing with the pita. Let it cool slightly so it’s warm, not hot.
- Tip: Add a pinch of red pepper flakes. If you like a little heat, a quarter teaspoon of crushed red pepper flakes mixed in with the dry seasonings adds a wonderful, subtle kick that complements the garlic and Parmesan beautifully.
- Tip: Revive them if they go soft. If your chips lose their crunch after a day, simply spread them on a baking sheet and pop them back into a 350°F oven for 3-5 minutes. They’ll come out perfectly crisp again.
FAQs
Can I use a different type of cheese?
Absolutely! While Parmesan is classic, other hard, salty cheeses like Pecorino Romano or Asiago work wonderfully. For a different twist, a finely grated sharp white cheddar can be delicious, though it will have a different melting characteristic. I’d avoid soft, moist cheeses like mozzarella, as they can make the chips soggy.
How long do these pita chips stay fresh?
Stored correctly in an airtight container at room temperature, they will stay perfectly crisp for about 3 to 4 days. The key is making sure they are completely cooled before you seal them up, as any residual warmth will create steam and soften them. A small piece of parchment paper in the container can help absorb any minimal moisture.
Can I make these gluten-free?
Yes, this recipe adapts very easily. Simply use your favorite gluten-free pita bread or even gluten-free tortillas. Just keep a close eye on the baking time, as gluten-free products can sometimes brown more quickly or have a different texture. The method and seasoning remain exactly the same.
My chips are chewy, not crispy. What happened?
This almost always comes down to one of two things: either the pita wedges were overcrowded on the baking sheet (trapping steam), or they weren’t baked long enough. Ovens can vary, so if yours runs cool, you might need an extra 2-3 minutes. They should feel firm and light, not bendable, when you take them out.
Can I use fresh herbs instead of dried?
You can, but with a caveat. Fresh herbs like rosemary or thyme have a higher moisture content and can burn in the oven. If you want to use them, I’d recommend mixing them with the oil (not the dry spices) and using a very light hand. For the Italian seasoning in the coating, dried is actually preferable as it’s more concentrated and won’t wilt.


Garlic Parmesan Pita Chips
Make crispy, savory Garlic Parmesan Pita Chips at home in under 20 minutes. Perfect for dipping or snacking. Get the easy recipe now!
Ingredients
For the Pita Chips:
-
4 medium-sized pita bread rounds (pocketless or pocketed both work)
-
1/4 cup extra virgin olive oil
-
3-4 large garlic cloves (finely minced)
-
1/2 cup freshly grated Parmesan cheese
-
1 tsp dried Italian seasoning
-
1/2 tsp garlic powder (for an extra punch)
-
1/4 tsp onion powder
-
1/4 tsp smoked paprika (optional, for a hint of warmth)
-
1/4 tsp fine sea salt (plus more for finishing)
-
1/4 tsp freshly cracked black pepper
-
2 tbsp fresh parsley (finely chopped, for garnish)
Instructions
-
Preheat your oven to 375°F (190°C). Line one or two large baking sheets with parchment paper or a silicone baking mat.01
-
Take your pita rounds and, using a sharp knife or a pizza cutter for efficiency, slice each one into 8 even wedges (like you’re cutting a pizza). Place all the wedges in a large mixing bowl.02
-
In a small bowl, whisk together the olive oil and your finely minced fresh garlic. In another small bowl, combine the freshly grated Parmesan, dried Italian seasoning, garlic powder, onion powder, smoked paprika (if using), salt, and pepper.03
-
Pour the garlic-infused olive oil over the pita wedges in the large bowl. Use your hands or a pair of tongs to toss everything thoroughly, making sure every single piece gets a light, glossy coat of the oil.04
-
Sprinkle the Parmesan and spice mixture over the oiled pita wedges. Toss again, gently but thoroughly.05
-
Spread the coated pita wedges out in a single layer on your prepared baking sheet(s). Pop them into the preheated oven and bake for 12 to 15 minutes.06
-
Remove the baking sheet from the oven. Let the chips cool directly on the sheet for at least 5 minutes. Just before serving, sprinkle them with the fresh chopped parsley.07
Not what you're looking for?


