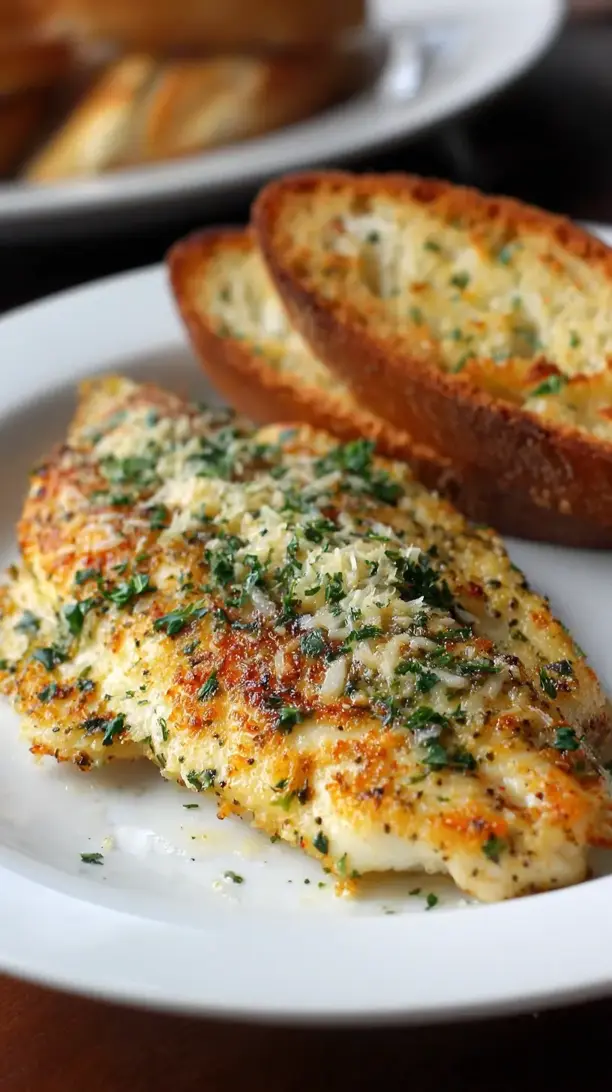
This Garlic Parmesan Tilapia is a quick, gourmet weeknight dinner that transforms simple fish into a savory, golden delight. The garlicky, cheesy topping broils to perfection in minutes, filling your kitchen with an intoxicating aroma. It’s a restaurant-worthy meal that’s impressively easy and satisfying.
Craving a delicious Garlic Parmesan Tilapia? You've come to the right spot! From Dinner Ideas favorites to amazing Chicken Recipes recipes, there's something here for everyone.


Why You’ll Love This Garlic Parmesan Tilapia
- Quick & Easy: From fridge to table in under 20 minutes.
- Huge Flavor Payoff: Savory, garlicky, cheesy, and buttery in every bite.
- Surprisingly Versatile: Pairs beautifully with almost any side dish.
- Perfect Texture: Crisp crust over moist, flaky fish.
Ingredients & Tools
- 4 tilapia fillets (about 6 oz / 170 g each)
- 1/2 cup (1 stick / 113 g) unsalted butter, softened
- 4-5 large garlic cloves, minced
- 1 cup (100 g) freshly grated Parmesan cheese
- 1/4 cup (15 g) fresh parsley, finely chopped
- 1 tbsp (15 ml) fresh lemon juice
- 1/2 tsp smoked paprika
- 1/4 tsp black pepper
- 1/4 tsp salt (or to taste)
- 1 lemon, cut into wedges for serving
Tools: A rimmed baking sheet, parchment paper, a small mixing bowl, a microplane or box grater
Notes: Using freshly grated Parmesan (not pre-shredded) and softened (not melted) butter ensures a smooth, cohesive topping.
Nutrition (per serving)
| Calories: | 385 kcal |
| Protein: | 35 g |
| Fat: | 25 g |
| Carbs: | 3 g |
| Fiber: | 0.5 g |
Serves: 4 | Prep Time: 10 minutes | Cook Time: 10 minutes | Total Time: 20 minutes
Before You Start: Tips & Ingredient Notes
- Pat your fish dry. This is a small step with a big impact. Moisture on the surface of the tilapia can steam the fish instead of letting the topping get nicely golden. A quick pat with a paper towel ensures a perfect crust.
- Freshly grate your Parmesan. I know it’s tempting to use the pre-shredded stuff, but it contains anti-caking agents that prevent it from melting as beautifully. Freshly grated cheese will give you a much smoother, more flavorful topping.
- Soften, don’t melt, the butter. You want the butter to be soft enough to mix easily with the other ingredients, but not melted or oily. This helps the Parmesan mixture hold its shape and spread evenly over the fish.
- Don’t skip the fresh lemon juice. That little bit of acidity is the secret weapon that cuts through the richness of the butter and cheese, brightening up the entire dish and making it taste even more fresh and vibrant.
How to Make Garlic Parmesan Tilapia
Step 1: First, get your oven ready. Move one of your oven racks to the top position, about 6 inches from the heating element, and preheat your broiler on high. Line a rimmed baking sheet with parchment paper for easy cleanup—trust me, you’ll thank yourself later. Arrange the tilapia fillets on the prepared baking sheet in a single layer, making sure they aren’t touching. Give each fillet a gentle pat with a paper towel to absorb any excess moisture; this is the key to a beautifully crisp topping.
Step 2: Now, let’s make that incredible garlic Parmesan topping. In a medium bowl, combine the softened butter, minced garlic, freshly grated Parmesan, chopped parsley, lemon juice, smoked paprika, black pepper, and salt. Use a fork to mash and mix everything together until it’s fully incorporated. You’ll end up with a thick, fragrant, spreadable paste. The aroma at this stage is honestly half the reward.
Step 3: Divide the Parmesan mixture evenly among the four tilapia fillets. Using the back of a spoon or a small spatula, spread the mixture over the top of each fillet, covering it from edge to edge in a nice, even layer. You want every single bite to be packed with that garlicky, cheesy goodness.
Step 4: Carefully place the baking sheet under the preheated broiler. Now, watch it closely! Broilers can vary in intensity. You’re looking for the fish to become opaque and flake easily with a fork, and for the topping to become a gorgeous, bubbly, golden brown. This usually takes about 8 to 10 minutes, but start checking at the 6-minute mark to be safe. The fish is done when it flakes easily at its thickest part.
Step 5: Once it’s perfectly golden and the fish is cooked through, carefully remove the baking sheet from the oven—remember, the handle will be hot! Let the tilapia rest on the pan for just a minute or two. This allows the juices to redistribute, ensuring a moist and tender result. Serve immediately with fresh lemon wedges for squeezing over the top. That final hit of fresh lemon juice right before eating really makes all the flavors sing.
Storage & Freshness Guide
- Fridge: Store leftovers in an airtight container for up to 2 days.
- Freezer: Freeze cooked tilapia in a single layer, then transfer to a freezer bag for up to 1 month.
- Reviving: Reheat in a 350°F oven or toaster oven until warm to maintain crispness.
Serving Suggestions
Complementary Dishes
- Lemon Herb Rice Pilaf — The fluffy, citrusy rice is the perfect base to soak up all the delicious, buttery juices from the tilapia.
- Roasted Asparagus with Garlic — It cooks at a similar high heat and its earthy flavor complements the rich, savory fish beautifully.
- A Simple Arugula Salad — The peppery bite of arugula with a light lemon vinaigrette provides a fresh, crisp contrast to the meal.
Drinks
- A Crisp Sauvignon Blanc — Its bright acidity and citrus notes mirror the lemon in the dish and cut through the richness perfectly.
- Sparkling Water with Lemon — A non-alcoholic option that cleanses the palate between bites with its refreshing bubbles and citrus zing.
Something Sweet
- Lemon Sorbet — A light, palate-cleansing dessert that continues the bright, citrus theme of the main course in the most refreshing way.
- Vanilla Panna Cotta with Berry Compote — The creamy, cool texture and sweet-tart berries are a lovely, simple finish after a savory meal.
Top Mistakes to Avoid
- Mistake: Using pre-shredded Parmesan cheese. The cellulose powder in pre-shredded cheese prevents it from melting smoothly, which can leave you with a grainy, oily topping instead of a cohesive, golden crust.
- Mistake: Not patting the tilapia dry. Any surface moisture will create steam, which can make the fish watery and prevent that beautiful, crisp Parmesan crust from forming properly.
- Mistake: Walking away from the broiler. I’ve messed this up before too… broilers are incredibly powerful and can go from perfectly golden to burnt in a matter of seconds. Stay nearby and keep a watchful eye!
- Mistake: Overcooking the fish. Tilapia is very lean and cooks quickly. Overcooking will make it dry and tough. It’s done as soon as it becomes opaque and flakes easily.
Expert Tips
- Tip: Grate your own garlic for a more potent paste. If you really love a strong garlic flavor, try grating your garlic cloves on a microplane instead of min


Garlic Parmesan Tilapia
Make this easy Garlic Parmesan Tilapia in just 20 minutes! A crispy, cheesy crust tops flaky fish for a restaurant-quality meal. Get the simple recipe here!
Ingredients
For the tilapia and topping:
-
4 tilapia fillets (about 6 oz / 170 g each)
-
1/2 cup unsalted butter (1 stick / 113 g, softened)
-
4-5 large garlic cloves (minced)
-
1 cup freshly grated Parmesan cheese (100 g)
-
1/4 cup fresh parsley (15 g, finely chopped)
-
1 tbsp fresh lemon juice (15 ml)
-
1/2 tsp smoked paprika
-
1/4 tsp black pepper
-
1/4 tsp salt (or to taste)
-
1 lemon (cut into wedges for serving)
Instructions
-
First, get your oven ready. Move one of your oven racks to the top position, about 6 inches from the heating element, and preheat your broiler on high. Line a rimmed baking sheet with parchment paper for easy cleanup—trust me, you’ll thank yourself later. Arrange the tilapia fillets on the prepared baking sheet in a single layer, making sure they aren’t touching. Give each fillet a gentle pat with a paper towel to absorb any excess moisture; this is the key to a beautifully crisp topping.01
-
Now, let’s make that incredible garlic Parmesan topping. In a medium bowl, combine the softened butter, minced garlic, freshly grated Parmesan, chopped parsley, lemon juice, smoked paprika, black pepper, and salt. Use a fork to mash and mix everything together until it’s fully incorporated. You’ll end up with a thick, fragrant, spreadable paste. The aroma at this stage is honestly half the reward.02
-
Divide the Parmesan mixture evenly among the four tilapia fillets. Using the back of a spoon or a small spatula, spread the mixture over the top of each fillet, covering it from edge to edge in a nice, even layer. You want every single bite to be packed with that garlicky, cheesy goodness.03
-
Carefully place the baking sheet under the preheated broiler. Now, watch it closely! Broilers can vary in intensity. You’re looking for the fish to become opaque and flake easily with a fork, and for the topping to become a gorgeous, bubbly, golden brown. This usually takes about 8 to 10 minutes, but start checking at the 6-minute mark to be safe. The fish is done when it flakes easily at its thickest part.04
-
Once it’s perfectly golden and the fish is cooked through, carefully remove the baking sheet from the oven—remember, the handle will be hot! Let the tilapia rest on the pan for just a minute or two. This allows the juices to redistribute, ensuring a moist and tender result. Serve immediately with fresh lemon wedges for squeezing over the top. That final hit of fresh lemon juice right before eating really makes all the flavors sing.05
Not what you're looking for?


