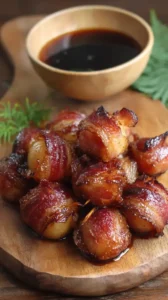
Transform humble pantry staples into a crave-worthy snack with these garlic roasted chickpeas. They deliver a serious crunch and a powerful garlic punch for a simple, budget-friendly treat. The aroma of garlic and olive oil wafting through your kitchen is just an added bonus.
Love Garlic Roasted Chickpeas? So do we! If you're into Savory Snacks or curious about Crockpot Recipes, you'll find plenty of inspiration below.


Why You’ll Love This Garlic Roasted Chickpeas
- Unbeatable Crunch: Light, crispy exterior with a nutty interior.
- Seriously Versatile: Perfect for salads, soups, or grain bowls.
- Simple & Pantry-Friendly: Made with basic kitchen staples.
- Customizable to Taste: Easy to adjust seasonings for variety.
Ingredients & Tools
- 2 cans (15 oz / 425 g each) chickpeas (also called garbanzo beans)
- 3 tablespoons extra virgin olive oil
- 4-5 cloves garlic, finely minced
- 1 teaspoon kosher salt
- 1/2 teaspoon freshly ground black pepper
- 1/2 teaspoon garlic powder (trust me, it doubles down on the flavor)
- 1/4 teaspoon smoked paprika (optional, for a subtle smoky depth)
Tools: A large rimmed baking sheet, kitchen towel or paper towels, a medium mixing bowl
Notes: The quality of your olive oil and the freshness of your garlic really shine here, so use the best you have. That being said, this is a forgiving recipe—don’t stress if you only have garlic powder; you can still make a fantastic batch.
Nutrition (per serving)
| Calories: | 180 kcal |
| Protein: | 7 g |
| Fat: | 8 g |
| Carbs: | 22 g |
| Fiber: | 6 g |
Serves: 4 | Prep Time: 10 minutes | Cook Time: 35-40 minutes | Total Time: 45-50 minutes
Before You Start: Tips & Ingredient Notes
- Dry those chickpeas thoroughly. This is, without a doubt, the most crucial step for achieving maximum crispiness. Any residual moisture will steam the chickpeas in the oven, preventing them from getting properly crunchy. Take the extra minute to pat them really dry.
- Why both fresh and powdered garlic? The fresh garlic provides that pungent, aromatic kick we all love, while the garlic powder adheres to the chickpeas and creates a more consistent, savory crust. Using both gives you a layered, complex garlic flavor that’s just… better.
- Don’t crowd the pan. Make sure your chickpeas are in a single, even layer with a little space between them. If they’re piled on top of each other, they’ll steam instead of roast. Using a large enough baking sheet is key here.
- Embrace the loose skins. When you dry the chickpeas, a lot of the thin, translucent skins will naturally come off. Don’t feel like you need to meticulously remove every single one—it’s a tedious task and won’t make a huge difference in the final product. Just remove the ones that come off easily.
How to Make Garlic Roasted Chickpeas
Step 1: Preheat your oven to 400°F (200°C). This high heat is essential for creating that initial blast of heat that gets the crisping process started. While the oven is heating up, drain and rinse your two cans of chickpeas in a colander. Give them a good shake to remove excess water.
Step 2: Now, for the most important part: drying. Spread the rinsed chickpeas out on a clean kitchen towel or a few layers of paper towels. Gently roll them around and pat them dry. You’ll notice the skins starting to come off—just pluck out the ones that detach easily and discard them. Don’t go crazy; a few skins left on are perfectly fine. The goal is to get the chickpeas as dry as possible to the touch.
Step 3: In a medium-sized mixing bowl, combine the olive oil, your finely minced garlic, kosher salt, black pepper, garlic powder, and the optional smoked paprika. Whisk it all together until it forms a fragrant, unified mixture. You’ll really smell the garlic coming to life in the oil.
Step 4: Transfer your thoroughly dried chickpeas into the bowl with the garlic-oil mixture. Use a spatula or a large spoon to toss everything together, making sure each and every chickpea is evenly coated with the seasoned oil. This coating is what will transform into that delicious, crispy, golden-brown exterior.
Step 5: Pour the coated chickpeas onto your large, rimmed baking sheet. Spread them out into a single, even layer. This space is crucial—if they’re crowded, they’ll steam. You want hot air to circulate around each one for even roasting and crisping.
Step 6: Place the baking sheet in the preheated oven and roast for 30 to 40 minutes. The trick is to give the pan a good shake or stir the chickpeas with a spatula about halfway through the cooking time. This prevents any spots from burning and ensures they get evenly golden and crispy all over.
Step 7: Keep a close eye on them during the last 10 minutes of cooking. Ovens can vary, and you’re looking for a deep golden-brown color and a firm, crispy texture when you bite into one. They will also harden a bit more as they cool, so don’t over-roast them expecting them to be rock-hard straight out of the oven.
Step 8: Once they’re perfectly roasted, remove the pan from the oven. Let the chickpeas cool right on the baking sheet for at least 10-15 minutes. This cooling period is when they achieve their final, satisfying crunch. They are best enjoyed the day they are made, as they can lose some crispiness over time.
Storage & Freshness Guide
- Fridge: Not recommended; humidity makes them chewy.
- Freezer: Freezing is not advised for texture reasons.
- Reviving: Warm in a 350°F oven for 5 minutes to restore some crunch.
Serving Suggestions
Complementary Dishes
- A Simple Green Salad — Toss a handful of these crunchy chickpeas over a bed of mixed greens with a lemony vinaigrette. They act as the most delicious, gluten-free croutons you’ve ever had, adding protein and a fantastic texture.
- Creamy Tomato Soup — Instead of a grilled cheese, use these garlicky chickpeas as a topping for your favorite tomato soup. The contrast between the creamy, acidic soup and the crunchy, savory chickpeas is absolutely divine.
- Mediterranean Grain Bowl — Sprinkle them over a bowl of couscous or quinoa with chopped cucumbers, tomatoes, olives, and a dollop of tzatziki. They bring the necessary crunch and a burst of garlic flavor that ties the whole bowl together.
Drinks
- A Crisp Lager or Pilsner — The clean, effervescent quality of a light beer is a perfect palate cleanser that cuts through the rich garlic and oil, making each bite taste like the first.
- Sparkling Water with Lemon — For a non-alcoholic option, the bubbles and citrus help reset your taste buds between handfuls, keeping the snack feeling light and refreshing.
- An Unoaked Chardonnay — A glass of crisp, mineral-forward white wine complements the savory, garlicky notes without overpowering them, creating a really sophisticated snack pairing.
Something Sweet
- Dark Chocolate-Covered Almonds — The deep, bitter notes of dark chocolate provide a beautiful counterpoint to the salty, savory chickpeas, creating a perfect end to your snacking experience.
- A Simple Fruit Platter — Fresh, sweet fruits like sliced apples, grapes, or berries offer a clean, juicy contrast that feels incredibly refreshing after the bold garlic flavor.
- Lemon Sorbet — A small scoop of bright, tart lemon sorbet is like a reset button for your palate, leaving you feeling cleansed and satisfied.
Top Mistakes to Avoid
- Mistake: Not Drying the Chickpeas Enough. I’ve messed this up before too, in a hurry. Wet chickpeas will steam, not roast, and you’ll end up with a soft, slightly chewy result instead of a crunchy one. Patience in the drying step is non-negotiable.
- Mistake: Using Too Much Oil. It might seem like a good idea to add more oil for extra crispiness, but it actually does the opposite. Excess oil can make the chickpeas greasy and can cause them to burn before they crisp up properly. A little goes a long way.
- Mistake: Skipping the Mid-Roast Shake. If you just put them in the oven and walk away, the chickpeas on the edges of the pan will likely burn while the ones in the center remain pale and soft. That quick stir ensures even coloring and crispness.
- Mistake: Storing Them While Still Warm. If you put warm chickpeas in an airtight container, the residual heat will create steam, which will immediately make your perfectly crispy snack soft and chewy. Always let them cool completely first.
Expert Tips
- Tip: For Ultimate Crisp, Leave the Oven Door Ajar. After the initial 30 minutes of roasting, if your chickpeas aren’t as crisp as you’d like, turn off the oven, crack the door open with a wooden spoon, and let them sit inside for another 10-15 minutes as the oven cools. This extra drying time can work wonders.
- Tip: Season After Roasting for Bold Spices. While the garlic and salt are best mixed in before roasting, if you want to add delicate herbs (like fresh rosemary or thyme) or spicy powders (like cayenne), toss them with the hot chickpeas right when they come out of the oven. The residual heat will “toast” the spices without burning them.
- Tip: Make a Double Batch for Meal Prep. While they are truly best the day of, you can make a larger quantity. Let them cool completely and store in a paper-towel-lined container for up to 2 days. A quick 5-minute warm-up in a 350°F (175°C) oven can help revive some of the crunch.
- Tip: Use an Air Fryer for a Quicker Version. If you’re short on time, you can cook these in an air fryer at 375°F (190°C) for 15-20 minutes, shaking the basket every 5 minutes. They’ll get crispy even faster!
FAQs
Why are my roasted chickpeas not crunchy?
This almost always comes down to one of two things: insufficient drying before roasting or storing them before they are completely cool. Moisture is the enemy of crispiness. Make sure you pat the chickpeas until they are very dry to the touch, and always let them cool fully on the baking sheet before you even think about storing them. If they’re still a bit soft after roasting, they might just need a few more minutes in the oven.
Can I use dried chickpeas instead of canned?
Absolutely! You’ll need to start with about 1 cup of dried chickpeas. Soak them overnight in plenty of water, then drain and cook them in fresh water until they are tender but not mushy (usually 45-60 minutes). Let them cool, then dry and proceed with the recipe as written. Using dried chickpeas can sometimes yield an even crispier result, as you have more control over their texture from the start.
How long do garlic roasted chickpeas last?
Honestly, they are at their absolute peak on the day they are made. For the best texture, enjoy them within 24 hours. You can store them in a paper bag or a container lined with a paper towel at room temperature for up to 2 days, but expect them to soften a bit. Do not refrigerate, as the humidity will make them chewy.
Can I use different seasonings?
Of course! This recipe is a fantastic base. For a different vibe, try tossing them with curry powder and a pinch of turmeric, or go for a ranch flavor with dried dill, onion powder, and parsley. For a spicy kick, add chili powder or cayenne pepper to the oil mixture. The world is your oyster—or your chickpea!
Are roasted chickpeas good for you?
As part of a balanced diet, they can be a great snack! Chickpeas are a good source of plant-based protein and fiber, which can help keep you feeling full. Roasting them with a moderate amount of olive oil is a healthier alternative to deep-frying. Just be mindful of the salt content if you are watching your sodium intake—you can always adjust it to your preference.


Garlic Roasted Chickpeas
Make crispy, savory Garlic Roasted Chickpeas with this easy recipe. A perfect healthy snack or salad topper. Get the simple steps and tips now!
Ingredients
For the Ingredients
-
2 cans chickpeas (15 oz / 425 g each, also called garbanzo beans)
-
3 tablespoons extra virgin olive oil
-
4-5 cloves garlic (finely minced)
-
1 teaspoon kosher salt
-
1/2 teaspoon freshly ground black pepper
-
1/2 teaspoon garlic powder (trust me, it doubles down on the flavor)
-
1/4 teaspoon smoked paprika (optional, for a subtle smoky depth)
Instructions
-
Preheat your oven to 400°F (200°C). This high heat is essential for creating that initial blast of heat that gets the crisping process started. While the oven is heating up, drain and rinse your two cans of chickpeas in a colander. Give them a good shake to remove excess water.01
-
Now, for the most important part: drying. Spread the rinsed chickpeas out on a clean kitchen towel or a few layers of paper towels. Gently roll them around and pat them dry. You’ll notice the skins starting to come off—just pluck out the ones that detach easily and discard them. Don’t go crazy; a few skins left on are perfectly fine. The goal is to get the chickpeas as dry as possible to the touch.02
-
In a medium-sized mixing bowl, combine the olive oil, your finely minced garlic, kosher salt, black pepper, garlic powder, and the optional smoked paprika. Whisk it all together until it forms a fragrant, unified mixture. You’ll really smell the garlic coming to life in the oil.03
-
Transfer your thoroughly dried chickpeas into the bowl with the garlic-oil mixture. Use a spatula or a large spoon to toss everything together, making sure each and every chickpea is evenly coated with the seasoned oil. This coating is what will transform into that delicious, crispy, golden-brown exterior.04
-
Pour the coated chickpeas onto your large, rimmed baking sheet. Spread them out into a single, even layer. This space is crucial—if they’re crowded, they’ll steam. You want hot air to circulate around each one for even roasting and crisping.05
-
Place the baking sheet in the preheated oven and roast for 30 to 40 minutes. The trick is to give the pan a good shake or stir the chickpeas with a spatula about halfway through the cooking time. This prevents any spots from burning and ensures they get evenly golden and crispy all over.06
-
Keep a close eye on them during the last 10 minutes of cooking. Ovens can vary, and you’re looking for a deep golden-brown color and a firm, crispy texture when you bite into one. They will also harden a bit more as they cool, so don’t over-roast them expecting them to be rock-hard straight out of the oven.07
-
Once they’re perfectly roasted, remove the pan from the oven. Let the chickpeas cool right on the baking sheet for at least 10-15 minutes. This cooling period is when they achieve their final, satisfying crunch. They are best enjoyed the day they are made, as they can lose some crispiness over time.08
Not what you're looking for?


