This Garlic Rosemary Chicken transforms a simple dinner into something special with minimal effort. The aroma of roasting garlic and rosemary fills your kitchen while the chicken cooks up juicy with crackling-crisp skin. It’s a rustic, elegant one-pan meal that’s deceptively easy to prepare.
Nothing beats a great Garlic Rosemary Chicken. Whether you're a fan of Dinner Ideas or want to try something from our Christmas Cookie selection, keep scrolling!


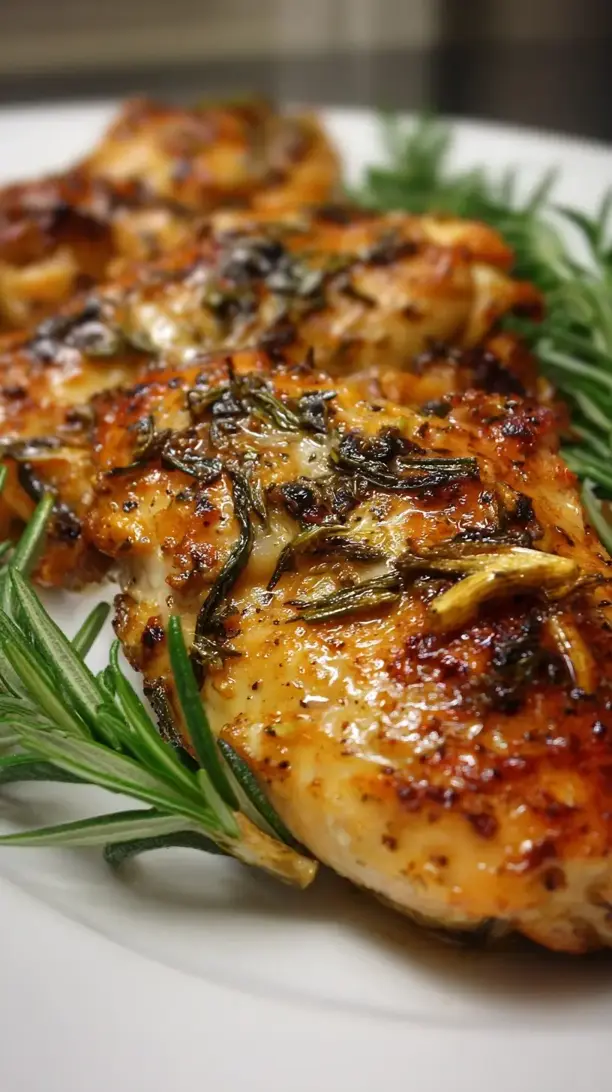
Why You’ll Love This Garlic Rosemary Chicken
- Aromatic & flavorful: Fresh rosemary and garlic create an intoxicating scent.
- Perfect texture: Crispy herby skin with tender, juicy meat underneath.
- One-pan simplicity: Easy prep and cleanup in a single pan.
- Fancy yet easy: Impressive for guests with minimal active effort.
Ingredients & Tools
- 1 whole chicken (about 1.5 kg / 3-4 lbs), pat dried
- 4-5 sprigs fresh rosemary
- 1 entire head of garlic
- 3 tbsp olive oil
- 1 lemon
- 1 tsp flaky sea salt
- 1/2 tsp freshly cracked black pepper
- 1 large onion, roughly chopped
- 2 carrots, cut into large chunks
Tools: A large roasting pan or oven-safe skillet, kitchen twine, an instant-read thermometer
Notes: The quality of your rosemary and garlic really makes a difference here—fresh, fragrant rosemary and a plump head of garlic will infuse the chicken with the most incredible flavor. Don’t be shy with the salt on the skin; it’s the key to that perfect, crackling texture.
Nutrition (per serving)
| Calories: | 380 kcal |
| Protein: | 35 g |
| Fat: | 25 g |
| Carbs: | 5 g |
| Fiber: | 1 g |
Serves: 4 | Prep Time: 15 minutes | Cook Time: 1 hour 15 minutes | Total Time: 1 hour 30 minutes
Before You Start: Tips & Ingredient Notes
- Dry the skin thoroughly. This is the single most important step for crispy skin. Use paper towels to pat the chicken completely dry, inside and out. Any moisture left on the skin will steam instead of crisp up in the oven.
- Why use a whole head of garlic? Roasting a whole head, with some cloves tucked inside the chicken and others in the pan, gives you two types of garlic flavor: deep, sweet, and spreadable from the roasted head, and a more pungent, aromatic kick from the internal cloves.
- Don’t skip the trussing. Tying the chicken legs together with kitchen twine might seem fussy, but it helps the bird cook evenly and keeps all those lovely juices and herbs locked inside. It creates a more uniform shape for even browning.
- Let the chicken come to room temperature. Taking the chicken out of the fridge 30-45 minutes before roasting allows it to cook more evenly. A cold chicken straight from the fridge can result in overcooked outer meat and undercooked inner sections.
How to Make Garlic Rosemary Chicken
Step 1: Start by prepping your chicken. Preheat your oven to 220°C (425°F). Take your thoroughly dried chicken and place it in your roasting pan. Season the cavity generously with a big pinch of salt and pepper. Take one rosemary sprig and half of the head of garlic, broken into a few individual cloves (no need to peel), and stuff them inside the chicken. This will perfume the meat from the inside out as it cooks.
Step 2: Now, it’s time to flavor the outside. Using your fingers, gently loosen the skin over the chicken breast from the neck end, creating a pocket. Be careful not to tear it. Take the leaves from another rosemary sprig and slide them under the skin, distributing them evenly over both breasts. This puts the herb in direct contact with the meat for maximum flavor infusion.
Step 3: Truss the chicken. Tuck the wingtips behind the chicken’s back and tie the legs together with kitchen twine. This creates a neat package that promotes even cooking. Rub the entire outside of the chicken with the olive oil, making sure to coat every nook and cranny. Then, squeeze the juice of half your lemon all over the bird, followed by a very generous sprinkling of flaky sea salt and the black pepper. Massage it all in—you’ll notice the skin already looks glossier.
Step 4: Prepare your pan. Scatter the chopped onion and carrot chunks around the chicken in the pan. Cut the remaining half of the lemon into wedges and add them to the pan as well. Take the other half of the garlic head and slice the very top off to expose the cloves. Place this in the pan with the vegetables. The veggies will roast in the chicken drippings, becoming incredibly flavorful.
Step 5: Roast the chicken. Place the pan in the preheated oven and roast for about 1 hour and 15 minutes. You’ll know it’s done when the skin is a deep golden brown and crispy, and an instant-read thermometer inserted into the thickest part of the thigh (without touching bone) reads 74°C (165°F). The juices should also run clear. The aroma in your kitchen will be absolutely divine.
Step 6: The most crucial step—let it rest! Once out of the oven, transfer the chicken to a cutting board and tent it loosely with foil. Let it rest for a full 15-20 minutes. This allows the muscle fibers to relax and reabsorb all the juices. If you cut into it right away, all those precious juices will run out, leaving you with drier meat. Use this time to scoop the roasted garlic out of its skin—it will be soft, sweet, and perfect for spreading on the chicken or your serving plate.
Step 7: Carve and serve. After resting, remove the twine and carve the chicken into pieces. Serve it alongside the roasted vegetables and pan juices. Don’t forget that soft, roasted garlic—it’s like a flavor gold mine. Squeeze it over everything or spread it on the chicken like a savory butter.
Storage & Freshness Guide
- Fridge: Store carved leftovers in an airtight container for up to 3 days.
- Freezer: Not recommended for best texture; skin becomes soggy upon thawing.
- Reviving: Reheat in oven at 175°C (350°F) with a splash of broth, covered, for 10–15 minutes.
Serving Suggestions
Complementary Dishes
- Creamy mashed potatoes — They are the ultimate vehicle for that incredible, garlicky pan sauce and the soft roasted garlic. The creamy texture is a perfect match for the juicy chicken.
- A simple arugula salad with a lemon vinaigrette — The peppery arugula and sharp lemon dressing cut through the richness of the chicken beautifully, balancing the whole meal.
- Crusty, warm bread — Absolutely non-negotiable for mopping up every last bit of the delicious juices and olive oil left in the pan. It’s the best part of the cleanup.
Drinks
- A medium-bodied Chardonnay — Its slight oakiness and notes of citrus complement the herbal rosemary and rich chicken without overpowering it. A really lovely pairing.
- A crisp, pale ale — The carbonation and slight bitterness cleanse the palate between bites of the savory, fatty chicken skin, making each mouthful taste as good as the first.
Something Sweet
- Lemon tart — The bright, citrusy finish continues the lemon theme from the main course but in a sweet, refreshing way that feels light and satisfying.
- Panna Cotta with a berry compote — The smooth, cool, and creamy panna cotta provides a wonderful textural contrast and a subtly sweet end to the robust, savory meal.
Top Mistakes to Avoid
- Mistake: Not drying the chicken skin. This is the difference between crispy and soggy. Any surface moisture will steam the skin instead of letting it render and puff up into that perfect crackle we’re after.
- Mistake: Skipping the rest time. I know it’s tempting to dig right in, but cutting into a hot chicken lets all the juices escape onto the cutting board instead of staying in the meat. Patience is rewarded with juiciness.
- Mistake: Overcrowding the pan. If you pack too many vegetables around the chicken, they’ll steam instead of roast. You want a single layer so everything gets nicely caramelized and flavorful.
- Mistake: Relying only on time, not temperature. Ovens vary, and the size of your chicken can differ. An instant-read thermometer is your best friend here to guarantee perfectly cooked, safe, and juicy meat every single time.
Expert Tips
- Tip: Spatchcock the chicken for faster, even cooking. If you’re short on time, use kitchen shears to cut out the backbone and flatten the chicken. It will roast in about 45 minutes and the entire skin surface gets incredibly crispy.
- Tip: Make a quick pan sauce. After removing the chicken and veggies, place the roasting pan on the stovetop over medium heat. Add a splash of white wine or chicken broth, scrape up all the browned bits, and let it reduce slightly for a phenomenal, no-effort sauce.
- Tip: Use compound butter under the skin. For an extra layer of flavor and moisture, mix softened butter with minced rosemary, garlic, and lemon zest. Spread this under the skin before roasting. It bastes the meat from the inside for an even more succulent result.
- Tip: Season the chicken the night before. For the most deeply seasoned meat, pat your chicken dry, salt it generously (including inside the cavity), and leave it uncovered on a rack in the fridge overnight. This “dry-brine” draws out moisture and then reabsorbs it, seasoning the meat all the way through and drying the skin out even further for ultimate crispiness.
FAQs
Can I use dried rosemary instead of fresh?
You can, but the flavor will be less vibrant and more piney. Fresh rosemary has those beautiful, fragrant oils that really make this dish sing. If you must use dried, use about one-third of the amount (so for 3 fresh sprigs, use 1 tsp dried) and rub it into the olive oil before coating the chicken. The flavor will be more subtle, so you might want to add a little more.
What if I don’t have kitchen twine?
No worries! You can simply tuck the chicken legs into the cavity at the bottom of the bird—it’s not as secure as trussing, but it does a decent job of holding the shape. Alternatively, you can use unwaxed dental floss, which works surprisingly well. The main goal is just to keep the legs from splaying out, which can cause the breast to overcook.
How do I store and reheat leftovers?
Store leftover chicken (carved off the bone) in an airtight container in the fridge for up to 3 days. The best way to reheat it without drying it out is in the oven. Place it on a baking sheet, add a tablespoon of water or broth to the pan, cover loosely with foil, and warm at 175°C (350°F) for 10-15 minutes. The steam will help keep it moist.
Can I use chicken pieces instead of a whole chicken?
Absolutely! Bone-in, skin-on chicken thighs or drumsticks are a fantastic option. The cooking time will be shorter—about 35-45 minutes at the same temperature. Just make sure to still pat the skin dry and follow the same seasoning and roasting process. You’ll still get that amazing crispy skin and juicy meat.
My garlic is burning in the pan. What happened?
This usually happens if the garlic cloves are too small or exposed directly to the hot pan without being nestled among other vegetables or under the chicken. To prevent this, make sure to place the halved garlic head cut-side down and keep the individual cloves you add to the pan tucked in with the onions and carrots, where they’ll be protected and roast gently instead of scorching.


Garlic Rosemary Chicken
Make juicy, crispy-skinned Garlic Rosemary Chicken with this easy one-pan recipe. Perfect for a weeknight dinner or entertaining. Get the full recipe here!
Ingredients
For the Chicken and Aromatics:
-
1 whole chicken (about 1.5 kg / 3-4 lbs, pat dried)
-
4-5 sprigs fresh rosemary
-
1 entire head garlic
-
3 tbsp olive oil
-
1 lemon
-
1 tsp flaky sea salt
-
1/2 tsp freshly cracked black pepper
For the Pan Vegetables:
-
1 large onion (roughly chopped)
-
2 carrots (cut into large chunks)
Instructions
-
Start by prepping your chicken. Preheat your oven to 220°C (425°F). Take your thoroughly dried chicken and place it in your roasting pan. Season the cavity generously with a big pinch of salt and pepper. Take one rosemary sprig and half of the head of garlic, broken into a few individual cloves (no need to peel), and stuff them inside the chicken.01
-
Now, it's time to flavor the outside. Using your fingers, gently loosen the skin over the chicken breast from the neck end, creating a pocket. Be careful not to tear it. Take the leaves from another rosemary sprig and slide them under the skin, distributing them evenly over both breasts.02
-
Truss the chicken. Tuck the wingtips behind the chicken's back and tie the legs together with kitchen twine. Rub the entire outside of the chicken with the olive oil, making sure to coat every nook and cranny. Then, squeeze the juice of half your lemon all over the bird, followed by a very generous sprinkling of flaky sea salt and the black pepper. Massage it all in.03
-
Prepare your pan. Scatter the chopped onion and carrot chunks around the chicken in the pan. Cut the remaining half of the lemon into wedges and add them to the pan as well. Take the other half of the garlic head and slice the very top off to expose the cloves. Place this in the pan with the vegetables.04
-
Roast the chicken. Place the pan in the preheated oven and roast for about 1 hour and 15 minutes. You'll know it's done when the skin is a deep golden brown and crispy, and an instant-read thermometer inserted into the thickest part of the thigh (without touching bone) reads 74°C (165°F). The juices should also run clear.05
-
The most crucial step—let it rest! Once out of the oven, transfer the chicken to a cutting board and tent it loosely with foil. Let it rest for a full 15-20 minutes. Use this time to scoop the roasted garlic out of its skin.06
-
Carve and serve. After resting, remove the twine and carve the chicken into pieces. Serve it alongside the roasted vegetables and pan juices.07
Not what you're looking for?


