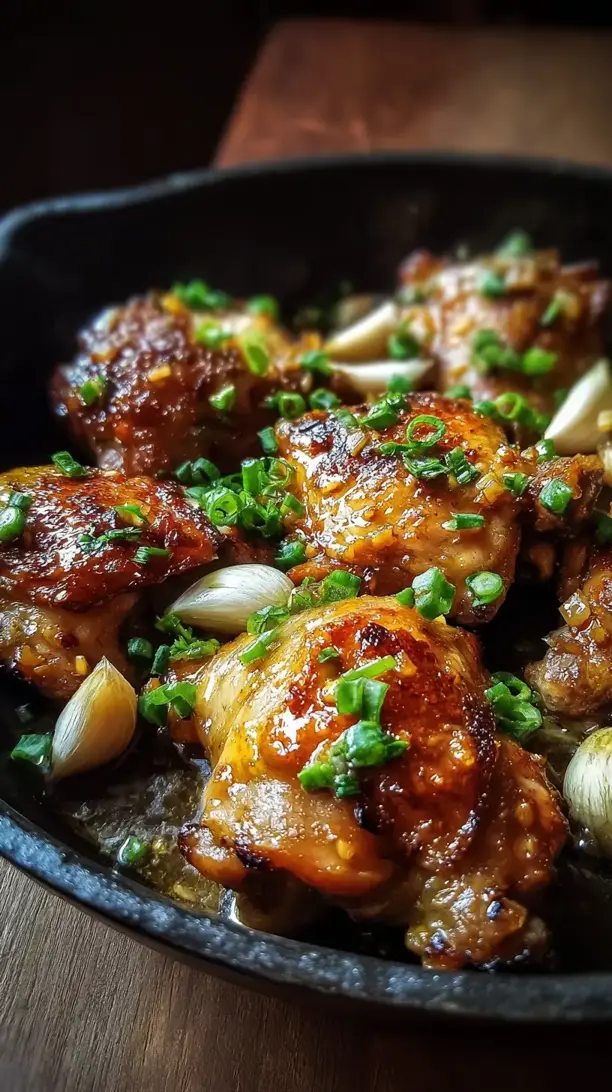
Garlic Soy Chicken combines savory soy, aromatic garlic, and a hint of sweetness for a deeply flavorful, tender dish. This one-pan meal comes together quickly with simple pantry ingredients. The glossy, umami-rich sauce makes this Garlic Soy Chicken a weeknight favorite.
Craving a delicious Garlic Soy Chicken? You've come to the right spot! From Chicken Breast Recipes favorites to amazing Appetizers & Snacks recipes, there's something here for everyone.


Why You’ll Love This Garlic Soy Chicken
- Big flavor, versatile: Adjust heat or sweetness to suit your taste.
- Perfect texture: Searing locks in juices; simmering keeps it tender.
- One-pan ease: Cook and simmer in one skillet for easy cleanup.
- Restaurant-quality simplicity: Impressive results with minimal effort.
Ingredients & Tools
- 600 g boneless, skinless chicken thighs
- 8–10 garlic cloves, minced
- 60 ml soy sauce (use light soy sauce if possible)
- 2 tbsp honey or brown sugar
- 1 tbsp rice vinegar
- 1 tsp sesame oil
- 1/2 tsp freshly ground black pepper
- 2 tbsp vegetable or canola oil
- 120 ml chicken broth or water
- 1 tbsp cornstarch mixed with 2 tbsp water (slurry)
- 2 spring onions, thinly sliced
- 1 tsp sesame seeds for garnish (optional)
Tools: A large skillet or frying pan with high sides, tongs, a small bowl for mixing the sauce, and a sharp knife for mincing garlic.
Notes: Fresh garlic gives an aromatic punch; don’t skip the sesame oil—it adds nutty fragrance.
Nutrition (per serving)
| Calories: | 320 kcal |
| Protein: | 28 g |
| Fat: | 16 g |
| Carbs: | 14 g |
| Fiber: | 1 g |
Serves: 4 | Prep Time: 10 minutes | Cook Time: 20 minutes | Total Time: 30 minutes
Before You Start: Tips & Ingredient Notes
- Why use chicken thighs instead of breasts? Thighs have more fat, which means they stay juicy and tender even if you accidentally overcook them a little. Breasts can dry out quickly, but thighs are much more forgiving—especially in a saucy dish like this.
- Is fresh garlic really that important? Honestly, yes. The flavor of fresh minced garlic is brighter and more aromatic compared to pre-minced or powdered versions. It mellows beautifully as it cooks, infusing the sauce with a deep, savory sweetness.
- Can I make this gluten-free? Absolutely! Just use tamari or a certified gluten-free soy sauce. The flavor will be just as rich and delicious, so no one will even notice the difference.
- What if I don’t have rice vinegar? A splash of apple cider vinegar or even fresh lime juice will work in a pinch. You just need a little acidity to balance the sweetness and saltiness of the sauce.
How to Make Garlic Soy Chicken
Step 1: Start by patting the chicken thighs completely dry with paper towels. This might seem like a small step, but it’s crucial for getting a good sear—wet chicken steams instead of browning. Season both sides generously with black pepper. You’ll notice I don’t add salt here because the soy sauce will bring plenty of saltiness later.
Step 2: Heat the vegetable oil in your skillet over medium-high heat. Once the oil is shimmering—you can test it by flicking a tiny drop of water; if it sizzles, you’re good—add the chicken thighs. Don’t overcrowd the pan; cook them in batches if needed. Sear for about 4–5 minutes per side until they develop a golden-brown crust. They don’t need to be cooked through at this stage—just beautifully colored. Remove the chicken from the pan and set it aside on a plate.
Step 3: Reduce the heat to medium and add the minced garlic to the same skillet. Sauté for about 30–60 seconds until fragrant—be careful not to burn it, or it’ll turn bitter. You’ll notice the aroma filling your kitchen almost instantly. This quick cook wakes up the garlic’s flavors and ensures they meld perfectly into the sauce.
Step 4: Pour in the soy sauce, honey, rice vinegar, and chicken broth, stirring to combine everything. Scrape up any browned bits from the bottom of the pan—those little flavor nuggets will make your sauce even more delicious. Bring the mixture to a gentle simmer, letting it bubble for a minute or two to slightly reduce and combine.
Step 5: Return the chicken thighs to the skillet, along with any juices that accumulated on the plate. Spoon some of the sauce over the top, then cover the pan and let it simmer on low heat for about 10–12 minutes. The chicken should be cooked through and tender, and the sauce will have thickened slightly from the reduction.
Step 6: In a small bowl, mix the cornstarch with water to create a smooth slurry. Stir this into the sauce around the chicken—not directly on top, to avoid clumping. The sauce will thicken noticeably within a minute or two, becoming glossy and coating the back of a spoon. If it gets too thick, you can always add a splash more broth or water.
Step 7: Turn off the heat and drizzle in the sesame oil, stirring gently to incorporate. Taste the sauce and adjust seasoning if needed—maybe a pinch more pepper or a tiny extra drizzle of honey. Garnish with sliced spring onions and sesame seeds for a fresh, colorful finish.
Storage & Freshness Guide
- Fridge: Cool completely, store in airtight container up to 3 days.
- Freezer: Not recommended—chicken texture may turn mushy.
- Reviving: Reheat gently on stovetop, add splash of broth if thick.
Serving Suggestions
Complementary Dishes
- Steamed jasmine rice — The fluffy grains soak up the savory sauce beautifully, making every bite a perfect balance of flavors and textures.
- Stir-fried bok choy or broccoli — The slight bitterness and crispness of the greens provide a lovely contrast to the rich, savory chicken.
- Quick-pickled cucumber salad — A refreshing, tangy side that cuts through the richness and cleanses the palate between bites.
Drinks
- Cold jasmine or green tea — Its subtle floral notes and light bitterness complement the umami depth of the dish without overwhelming it.
- Crisp lager or pale ale — The carbonation and mild hop bitterness help balance the savory-sweet sauce, making each sip refreshing.
- Ginger-infused sparkling water — A non-alcoholic option that adds a zesty, spicy kick which pairs wonderfully with the garlic and soy flavors.
Something Sweet
- Mango sticky rice — The creamy, sweet coconut and fresh mango provide a tropical finish that contrasts nicely with the savory main.
- Green tea ice cream — Its mild, earthy sweetness and cool creaminess are a perfect, soothing end to the meal.
- Lychee sorbet — Light, floral, and refreshing, it cleanses the palate and leaves you feeling satisfied but not overly full.
Top Mistakes to Avoid
- Overcrowding the pan when searing the chicken. If you add too much chicken at once, the pan temperature drops, and the chicken ends up steaming instead of developing that beautiful, flavorful crust. Cook in batches if your skillet isn’t large enough—it’s worth the extra few minutes.
- Burning the garlic. Garlic cooks quickly and can turn bitter if it gets too dark. Keep the heat at medium and stir constantly—you just want it fragrant and lightly golden, not brown.


Garlic Soy Chicken
Make this easy Garlic Soy Chicken in one pan for a flavorful, tender meal ready in 30 minutes. Get the simple recipe and enjoy a delicious dinner tonight!
Ingredients
For the Ingredients
-
600 g boneless, skinless chicken thighs
-
8–10 garlic cloves (minced)
-
60 ml soy sauce (use light soy sauce if possible)
-
2 tbsp honey or brown sugar
-
1 tbsp rice vinegar
-
1 tsp sesame oil
-
1/2 tsp freshly ground black pepper
-
2 tbsp vegetable or canola oil
-
120 ml chicken broth or water
-
1 tbsp cornstarch mixed with 2 tbsp water (slurry)
-
2 spring onions (thinly sliced)
-
1 tsp sesame seeds (for garnish (optional))
Instructions
-
Start by patting the chicken thighs completely dry with paper towels. This might seem like a small step, but it’s crucial for getting a good sear—wet chicken steams instead of browning. Season both sides generously with black pepper. You’ll notice I don’t add salt here because the soy sauce will bring plenty of saltiness later.01
-
Heat the vegetable oil in your skillet over medium-high heat. Once the oil is shimmering—you can test it by flicking a tiny drop of water; if it sizzles, you’re good—add the chicken thighs. Don’t overcrowd the pan; cook them in batches if needed. Sear for about 4–5 minutes per side until they develop a golden-brown crust. They don’t need to be cooked through at this stage—just beautifully colored. Remove the chicken from the pan and set it aside on a plate.02
-
Reduce the heat to medium and add the minced garlic to the same skillet. Sauté for about 30–60 seconds until fragrant—be careful not to burn it, or it’ll turn bitter. You’ll notice the aroma filling your kitchen almost instantly. This quick cook wakes up the garlic’s flavors and ensures they meld perfectly into the sauce.03
-
Pour in the soy sauce, honey, rice vinegar, and chicken broth, stirring to combine everything. Scrape up any browned bits from the bottom of the pan—those little flavor nuggets will make your sauce even more delicious. Bring the mixture to a gentle simmer, letting it bubble for a minute or two to slightly reduce and combine.04
-
Return the chicken thighs to the skillet, along with any juices that accumulated on the plate. Spoon some of the sauce over the top, then cover the pan and let it simmer on low heat for about 10–12 minutes. The chicken should be cooked through and tender, and the sauce will have thickened slightly from the reduction.05
-
In a small bowl, mix the cornstarch with water to create a smooth slurry. Stir this into the sauce around the chicken—not directly on top, to avoid clumping. The sauce will thicken noticeably within a minute or two, becoming glossy and coating the back of a spoon. If it gets too thick, you can always add a splash more broth or water.06
-
Turn off the heat and drizzle in the sesame oil, stirring gently to incorporate. Taste the sauce and adjust seasoning if needed—maybe a pinch more pepper or a tiny extra drizzle of honey. Garnish with sliced spring onions and sesame seeds for a fresh, colorful finish.07
Not what you're looking for?


