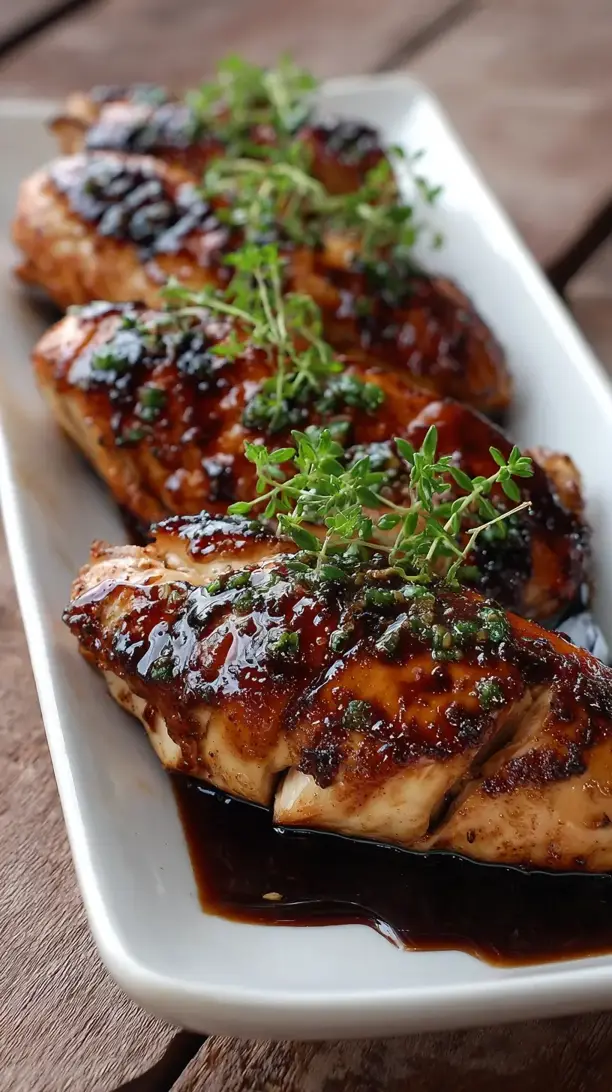
This Glazed Chicken recipe delivers a glossy, sticky-sweet crust with minimal effort. The honey-mustard-soy glaze caramelizes beautifully, sealing in juices for tender, flavorful meat. It’s a versatile dish perfect for weeknights or entertaining.
Nothing beats a great Glazed Chicken. Whether you're a fan of Chicken Recipes or want to try something from our Crockpot Recipes selection, keep scrolling!


Why You’ll Love This Glazed Chicken
- Pantry-friendly simplicity: Uses common ingredients with straightforward techniques.
- Complex, balanced flavor: Sweet, salty, and tangy notes caramelize into a deep glaze.
- Versatile serving options: Equally great over rice, in salads, or as a main.
- Perfect texture: Crispy, sticky exterior with moist, tender chicken inside.
Ingredients & Tools
- 4 boneless, skinless chicken breasts (about 1.5 lbs / 680 g)
- 3 tbsp soy sauce (or tamari for gluten-free)
- 3 tbsp honey
- 2 tbsp Dijon mustard
- 2 cloves garlic, minced
- 1 tbsp olive oil
- 1 tbsp apple cider vinegar
- 1/2 tsp smoked paprika
- 1/4 tsp black pepper
- 2 tbsp fresh parsley, chopped (for garnish)
Tools: A large oven-safe skillet, small bowl for mixing, whisk, measuring spoons, and an instant-read thermometer.
Notes: Quality ingredients like robust honey and Dijon mustard build deeper flavor. Smoked paprika adds subtle smoky warmth.
Nutrition (per serving)
| Calories: | 285 kcal |
| Protein: | 35 g |
| Fat: | 8 g |
| Carbs: | 15 g |
| Fiber: | 0.5 g |
Serves: 4 | Prep Time: 10 minutes | Cook Time: 20 minutes | Total Time: 30 minutes
Before You Start: Tips & Ingredient Notes
- Chicken thickness is key. If your chicken breasts are very thick or uneven, place them between two pieces of plastic wrap and gently pound them to an even ¾-inch thickness. This ensures they cook through at the same rate without drying out.
- Don’t skip the vinegar. It might seem like a small component, but the acidity in the apple cider vinegar is crucial. It balances the sweetness of the honey and cuts through the richness, preventing the glaze from becoming one-dimensionally sweet.
- Get your skillet properly hot. A hot pan is non-negotiable for achieving that beautiful sear and caramelization on the chicken. You should hear a definite sizzle the moment the chicken hits the oil.
- An instant-read thermometer is your best friend. Guessing when chicken is done is a recipe for dry meat. Pull the chicken from the heat when the internal temperature reaches 160–165°F (71–74°C); it will continue to cook as it rests.
How to Make Glazed Chicken
Step 1: First, let’s get the star of the show ready. Pat your chicken breasts completely dry with paper towels—this is a small step that makes a huge difference, I promise. A dry surface is what gives you that gorgeous golden sear instead of a pale, steamed look. Then, season both sides generously with the black pepper and a tiny pinch of salt (go easy, as the soy sauce is plenty salty).
Step 2: Now, for the magic potion. In a small bowl, whisk together the honey, soy sauce, Dijon mustard, minced garlic, olive oil, apple cider vinegar, and smoked paprika. Whisk it until it’s completely smooth and emulsified—you’ll notice the oil incorporates and the mixture looks glossy and unified. Give it a quick taste; it should be a powerful, balanced punch of sweet, salty, and tangy. Set this glorious glaze aside for now.
Step 3: Time to cook! Place your large, oven-safe skillet over medium-high heat and let it get properly hot for a minute or two. Add a tiny drizzle of olive oil if your pan isn’t non-stick. Carefully place the seasoned chicken breasts in the hot skillet. You should hear that satisfying sizzle. Let them cook undisturbed for about 5-7 minutes, until you can see the edges turning opaque and a beautiful golden-brown crust has formed on the bottom.
Step 4: Flip the chicken breasts over. Now, reduce the heat to medium. This is where we start building the glaze. Pour about two-thirds of your prepared glaze mixture over the chicken, reserving the rest for later. It will bubble and sizzle furiously—that’s exactly what you want! Let the chicken cook for another 5-7 minutes, occasionally spooning the bubbling glaze over the top. The sauce will begin to thicken and cling to the chicken.
Step 5: This is the most important step: check for doneness. Insert an instant-read thermometer into the thickest part of a chicken breast. You’re aiming for 160–165°F (71–74°C). Once it hits that range, immediately transfer the chicken to a clean plate or cutting board. Do not slice into it yet! Let it rest for at least 5 minutes. This allows the juices to redistribute throughout the meat, guaranteeing a moist result.
Step 6: While the chicken rests, let’s finish the glaze. Pour the remaining one-third of the glaze into the still-hot skillet. It will be thin at first, but as you let it simmer for just a minute or two over medium heat, it will reduce into a thicker, syrupy, and incredibly glossy finishing sauce. This is the final touch that makes the dish look and taste restaurant-quality.
Step 7: To serve, you have two lovely options. You can slice the rested chicken breasts and arrange them on a platter, then drizzle the reduced glaze from the pan all over the top. Or, for maximum glaze coverage, return the whole chicken breasts to the skillet and turn them gently in the reduced sauce to coat them completely. Either way, finish with a sprinkle of fresh, chopped parsley for a pop of color and freshness.
Storage & Freshness Guide
- Fridge: Store in an airtight container for up to 3 days.
- Freezer: Freeze cooked chicken (without fresh parsley) for up to 2 months.
- Reviving: Reheat gently in a skillet with a splash of water or broth to restore moisture.
Serving Suggestions
Complementary Dishes
- Fluffy Jasmine Rice — The plain, steamy rice is the perfect canvas to soak up every last drop of that incredible sticky glaze, making sure none of the flavor goes to waste.
- Garlic Roasted Broccoli — The crispy, slightly charred florets and sharp garlic notes provide a wonderful textural and flavor contrast to the sweet and savory chicken.
- Creamy Mashed Potatoes — For the ultimate comfort food plate, the rich, buttery potatoes create a decadent base that pairs beautifully with the glossy chicken and its sauce.
Drinks
- A Crisp Pinot Grigio — The wine’s bright acidity and citrus notes cut through the richness of the glaze beautifully, cleansing the palate between bites.
- Sparkling Water with Lemon — For a non-alcoholic option, the effervescence and citrus zing provide a refreshing counterpoint to the sticky, savory-sweet flavors of the dish.
- A Light Pale Ale — The slight bitterness of a pale ale balances the sweetness of the honey in the glaze, creating a really harmonious pairing.
Something Sweet
- Lemon Sorbet — After a rich meal, a scoop of tangy, palate-cleansing lemon sorbet is the most refreshing and light way to end the evening.
- Dark Chocolate Truffles — Just one or two intense, rich truffles provide a sophisticated, bittersweet finish that doesn’t feel too heavy after the main course.
- Berry Crumble — A warm, fruity crumble with a scoop of vanilla ice cream continues the theme of sweet and tangy in the most comforting way possible.
Top Mistakes to Avoid
- Mistake: Adding the glaze too early. If you pour all the glaze in at the beginning, the sugars in the honey will likely burn before the chicken is cooked through, giving you a bitter, blackened coating instead of a sweet, caramelized one.
- Mistake: Skipping the rest time. I know it’s tempting to cut right in, but if you slice the chicken immediately after cooking, all the precious juices will run out onto the cutting board, leaving you with dry meat. Patience is a virtue here.
- Mistake: Using a cold pan. Starting with a cold skillet will cause the chicken to steam and release its juices, preventing that crucial sear and resulting in a pale, boiled-looking exterior.
- Mistake: Overcrowding the pan. If the chicken pieces are too close together, they’ll steam each other. Give them plenty of space so the moisture can evaporate and the surface can properly brown and caramelize.
Expert Tips
- Tip: Brine your chicken for ultimate juiciness. For an extra layer of insurance against dry chicken, soak the breasts in a simple brine (1 quart water + ¼ cup salt) for 30 minutes before patting dry and seasoning. This helps the meat retain moisture incredibly well during cooking.
- Tip: Add a knob of butter at the end. After you’ve reduced the final bit of glaze in the pan, turn off the heat and swirl in a tablespoon of cold, unsalted butter. This French technique (monter au beurre) gives the sauce an unbelievable silkiness and rich flavor.
- Tip: Use thigh meat for more flavor. If you prefer dark meat, this recipe works wonderfully with boneless, skinless chicken thighs. They’re inherently more forgiving and flavorful, and the cooking time will be roughly the same.
- Tip: Get creative with the glaze. This is a fantastic base recipe. Try swapping the Dijon for whole-grain mustard for texture, or add a teaspoon of sriracha or chili flakes for a gentle, spicy kick.
FAQs
Can I make this Glazed Chicken ahead of time?
Absolutely, you can! You can mix the glaze up to 3 days in advance and keep it in a jar in the fridge—just give it a good shake before using. You can also fully cook the chicken, let it cool, and store it sliced in an airtight container for up to 3 days. Reheat it gently in a skillet with a splash of water or chicken broth to keep it moist. The glaze might lose a little of its initial gloss, but the flavor will still be fantastic.
My glaze is too thin and watery. How can I thicken it?
Don’t worry, this is an easy fix! If your finished glaze isn’t thickening up to a syrupy consistency, simply mix one teaspoon of cornstarch with one tablespoon of cold water in a small bowl until smooth. Whisk this “slurry” into the simmering glaze in the pan and let it cook for another minute. You’ll see it thicken up beautifully right before your eyes.
Can I use chicken with the skin on?
You certainly can, and it will be deliciously crispy! For skin-on chicken, start by placing the chicken skin-side down in the cold skillet. Then, turn the heat to medium. This renders the fat slowly, resulting in an incredibly crisp, golden skin. Flip and continue with the recipe as directed, but you may need to finish it in a 400°F (200°C) oven for a few minutes to cook through without burning the glaze.
Is this recipe gluten-free?
It can be, very easily! Just make sure to use tamari or a certified gluten-free soy sauce instead of regular soy sauce. All the other ingredients are naturally gluten-free, so with that one simple swap, you’re good to go.
Why did my glaze burn in the pan?
This usually happens if the heat is too high when you add the glaze, or if you’re using a pan that’s too thin and doesn’t distribute heat evenly. Honey has a high sugar content and can burn quickly. The trick is to reduce the heat to medium once you add the glaze and to use a heavy-bottomed, oven-safe skillet which provides consistent, controlled heat.


Glazed Chicken
Make perfect Glazed Chicken with a honey-mustard-soy glaze in just 30 minutes. Get juicy, tender results every time. Try this easy recipe tonight!
Ingredients
For the Ingredients
-
4 boneless, skinless chicken breasts (about 1.5 lbs / 680 g)
-
3 tbsp soy sauce (or tamari for gluten-free)
-
3 tbsp honey
-
2 tbsp Dijon mustard
-
2 cloves garlic (minced)
-
1 tbsp olive oil
-
1 tbsp apple cider vinegar
-
0.5 tsp smoked paprika
-
0.25 tsp black pepper
-
2 tbsp fresh parsley (chopped, for garnish)
Instructions
-
First, let’s get the star of the show ready. Pat your chicken breasts completely dry with paper towels—this is a small step that makes a huge difference, I promise. A dry surface is what gives you that gorgeous golden sear instead of a pale, steamed look. Then, season both sides generously with the black pepper and a tiny pinch of salt (go easy, as the soy sauce is plenty salty).01
-
Now, for the magic potion. In a small bowl, whisk together the honey, soy sauce, Dijon mustard, minced garlic, olive oil, apple cider vinegar, and smoked paprika. Whisk it until it’s completely smooth and emulsified—you’ll notice the oil incorporates and the mixture looks glossy and unified. Give it a quick taste; it should be a powerful, balanced punch of sweet, salty, and tangy. Set this glorious glaze aside for now.02
-
Time to cook! Place your large, oven-safe skillet over medium-high heat and let it get properly hot for a minute or two. Add a tiny drizzle of olive oil if your pan isn’t non-stick. Carefully place the seasoned chicken breasts in the hot skillet. You should hear that satisfying sizzle. Let them cook undisturbed for about 5-7 minutes, until you can see the edges turning opaque and a beautiful golden-brown crust has formed on the bottom.03
-
Flip the chicken breasts over. Now, reduce the heat to medium. This is where we start building the glaze. Pour about two-thirds of your prepared glaze mixture over the chicken, reserving the rest for later. It will bubble and sizzle furiously—that’s exactly what you want! Let the chicken cook for another 5-7 minutes, occasionally spooning the bubbling glaze over the top. The sauce will begin to thicken and cling to the chicken.04
-
This is the most important step: check for doneness. Insert an instant-read thermometer into the thickest part of a chicken breast. You’re aiming for 160–165°F (71–74°C). Once it hits that range, immediately transfer the chicken to a clean plate or cutting board. Do not slice into it yet! Let it rest for at least 5 minutes. This allows the juices to redistribute throughout the meat, guaranteeing a moist result.05
-
While the chicken rests, let’s finish the glaze. Pour the remaining one-third of the glaze into the still-hot skillet. It will be thin at first, but as you let it simmer for just a minute or two over medium heat, it will reduce into a thicker, syrupy, and incredibly glossy finishing sauce. This is the final touch that makes the dish look and taste restaurant-quality.06
-
To serve, you have two lovely options. You can slice the rested chicken breasts and arrange them on a platter, then drizzle the reduced glaze from the pan all over the top. Or, for maximum glaze coverage, return the whole chicken breasts to the skillet and turn them gently in the reduced sauce to coat them completely. Either way, finish with a sprinkle of fresh, chopped parsley for a pop of color and freshness.07
Not what you're looking for?


