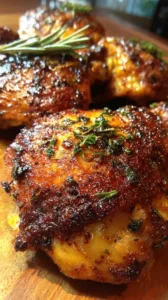
These Glazed Chicken Thighs deliver crackly, lacquered skin and impossibly juicy meat with minimal fuss. The sticky-sweet glaze caramelizes into a gorgeous, glossy coat in one pan. It’s a restaurant-worthy dish that’s deceptively simple to pull off at home.
Nothing beats a great Glazed Chicken Thighs. Whether you're a fan of Chicken Thigh Recipes or want to try something from our Chicken Recipes selection, keep scrolling!


Why You’ll Love This Glazed Chicken Thighs
- Insanely Juicy: Chicken thighs stay moist and tender, packed with flavor.
- Sticky Glaze: A caramelized, sweet-savory crust clings perfectly.
- One-Pan Wonder: Everything cooks in one skillet for easy cleanup.
- Endlessly Adaptable: Easy to customize with spices or heat.
Ingredients & Tools
- 8 bone-in, skin-on chicken thighs (about 1.5 lbs / 680 g)
- 1 tbsp olive oil
- 1 tsp kosher salt
- 1/2 tsp freshly ground black pepper
- 2 garlic cloves, minced
- 1/3 cup honey or maple syrup
- 2 tbsp soy sauce (or tamari for gluten-free)
- 1 tbsp apple cider vinegar
- 1 tsp Dijon mustard
- 1/2 tsp smoked paprika
- Fresh parsley or chives, for garnish (optional)
Tools: A large, oven-safe skillet (cast iron is ideal), tongs, a small bowl for mixing the glaze.
Notes: Don’t use boneless, skinless thighs—the skin and bone protect the meat and create incredible texture. The honey-soy-vinegar combo gives a perfect sweet-salty-tangy balance.
Nutrition (per serving)
| Calories: | 385 kcal |
| Protein: | 28 g |
| Fat: | 22 g |
| Carbs: | 16 g |
| Fiber: | 0.5 g |
Serves: 4 | Prep Time: 10 minutes | Cook Time: 30 minutes | Total Time: 40 minutes
Before You Start: Tips & Ingredient Notes
- Pat that skin DRY. This is the single most important step for crispy skin. Use paper towels to thoroughly pat the chicken skin dry before you season it. Any moisture will steam the skin instead of letting it sear and crisp up beautifully.
- Why bone-in, skin-on? The bone acts as a heat conductor, cooking the meat more evenly and keeping it incredibly juicy. The skin? That’s your flavor vehicle—it protects the meat, renders fat for cooking, and becomes a delicious, crispy canvas for the glaze.
- Your skillet matters. An oven-safe skillet is non-negotiable. A well-seasoned cast-iron skillet is my top choice because it retains heat so well and gives you a fantastic sear, but a heavy-bottomed stainless steel pan will work too.
- Don’t skip the acid. The apple cider vinegar (or you could use rice vinegar or even a squeeze of lime) might seem like a small component, but it’s vital. It cuts through the richness of the chicken and the sweetness of the honey, balancing the entire dish.
How to Make Glazed Chicken Thighs
Step 1: Preheat your oven to 400°F (200°C). While it’s heating up, take your chicken thighs and pat them completely dry with paper towels—be ruthless here. Season both sides generously with the salt and pepper. This initial seasoning is what will flavor the meat itself, not just the surface.
Step 2: Place your oven-safe skillet over medium-high heat and add the olive oil. Once the oil is shimmering hot, carefully add the chicken thighs, skin-side down. You should hear a confident sizzle. Resist the urge to move them! Let them cook undisturbed for 6-8 minutes to render the fat and develop a deep golden-brown, crispy skin.
Step 3: While the chicken is searing, whisk together your glaze in a small bowl. Combine the honey, soy sauce, apple cider vinegar, Dijon mustard, minced garlic, and smoked paprika. Whisk it until it’s smooth and well-emulsified. You’ll notice the mustard helps bring everything together into a cohesive, glossy mixture.
Step 4: Flip the chicken thighs so they are now skin-side up. You should see beautifully rendered fat and a perfectly crisped skin. Carefully pour off about 90% of the excess fat from the skillet (you can save it for roasting vegetables—it’s gold!). We just need a little bit left to prevent sticking.
Step 5: Now, pour the glaze mixture evenly over the chicken thighs, making sure to get some on each piece. It will bubble and sizzle excitedly as it hits the hot pan. Use a spoon or brush to coat the top of each thigh generously.
Step 6: Immediately transfer the entire skillet to your preheated oven. Bake for 18-22 minutes, or until the chicken is cooked through. You’ll know it’s done when the internal temperature reaches 165°F (74°C) at the thickest part, and the glaze has thickened and become sticky and caramelized.
Step 7: Carefully remove the hot skillet from the oven—remember that handle is scorching! Let the chicken rest in the pan for about 5 minutes. This allows the juices to redistribute throughout the meat, ensuring maximum juiciness when you cut into it.
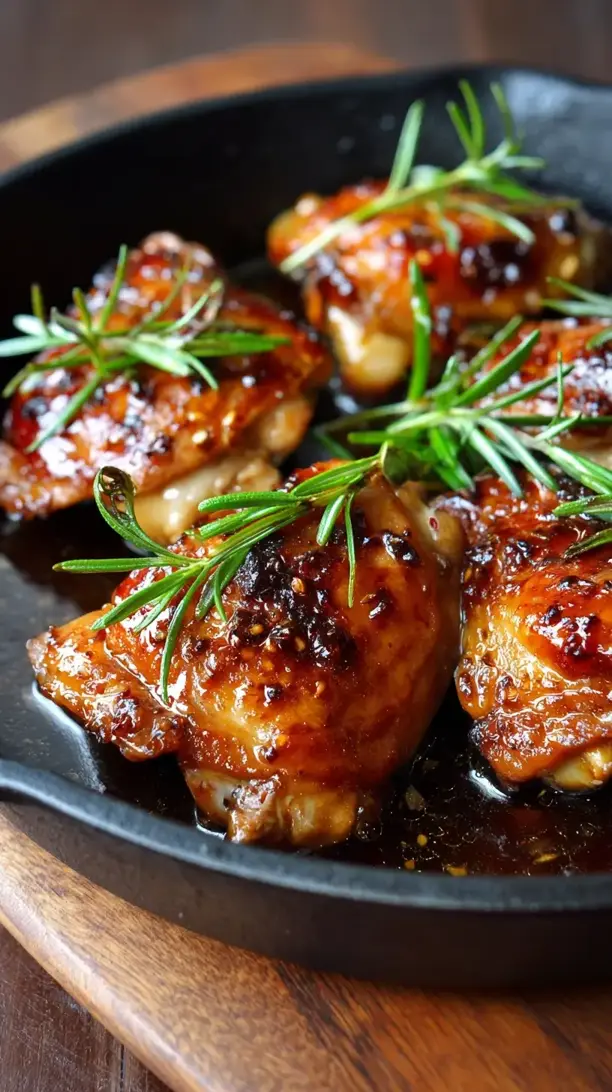
Step 8: To serve, spoon any of the extra glaze from the bottom of the pan over the top of the chicken. Garnish with a sprinkle of fresh, chopped parsley or chives for a pop of color and freshness. And get ready for the compliments to roll in.
Storage & Freshness Guide
- Fridge: Store in an airtight container for up to 3 days.
- Freezer: Freeze in a sealed container for up to 2 months.
- Reviving: Reheat in a 350°F oven for 10–15 minutes to restore crispness.
Serving Suggestions
Complementary Dishes
- Fluffy Mashed Potatoes — The ultimate comfort food pairing. The creamy, buttery potatoes are a dream for soaking up every last drop of that incredible glaze.
- Simple Roasted Asparagus or Broccoli — Toss them in the oven alongside the chicken during the last 15 minutes of cooking. The roasted, slightly charred edges pair wonderfully with the sweet and salty chicken.
- Buttery Couscous or Rice Pilaf — A quick, neutral base that lets the chicken be the star. The light, fluffy grains help balance the richness of the dish perfectly.
Drinks
- A Crisp, Dry Rosé — Its bright acidity and subtle fruit notes cut through the richness of the glaze beautifully, cleansing the palate between bites.
- A Citrusy IPA — The hoppy, bitter character of the beer stands up to the strong flavors, while the citrus undertones harmonize with the tangy elements in the glaze.
- Sparkling Water with Lemon — A non-alcoholic option that provides a refreshing, bubbly contrast to the sticky-sweet and savory flavors on the plate.
Something Sweet
- Lemon Sorbet — The ultimate palate cleanser. Its bright, sharp citrus flavor is a refreshing and light way to end the meal after something so savory and rich.
- Warm Apple Crumble — The warm, spiced apples and buttery oat topping continue the cozy, comforting theme but in dessert form. Serve it with a scoop of vanilla ice cream.
- Dark Chocolate Truffles — Just one or two rich, intense truffles provide a sophisticated, not-too-sweet finish that contrasts elegantly with the main course.
Top Mistakes to Avoid
- Mistake: Not drying the chicken skin. This is the difference between crispy, rendered skin and a soft, rubbery, pale layer. Moisture is the enemy of browning, so take that extra minute with the paper towels.
- Mistake: Moving the chicken too soon. When you first place the chicken in the hot pan, let it be! If you try to move it before the skin has released naturally, you’ll tear that beautiful crust and it will stick to the pan.
- Mistake: Using a non-oven-safe skillet. If your skillet has a plastic or wood handle, it cannot go in the oven. Transferring the chicken to a baking dish mid-recipe will cause you to lose all the flavorful fond and can mess with the cooking time.
- Mistake: Skipping the rest time. I know it’s tempting to dig right in, but if you cut into the chicken immediately, all those precious juices will run out onto the cutting board instead of staying in the meat where they belong.
Expert Tips
- Tip: Get creative with the glaze. The base recipe is perfect, but it’s also a fantastic playground. Stir in a tablespoon of gochujang for a spicy kick, or a teaspoon of grated fresh ginger for a zesty punch. A little orange zest can also work wonders.
- Tip: Use a thermometer. For perfectly cooked chicken every single time, an instant-read thermometer is your best friend. Pull the chicken out of the oven when it hits 160-162°F (71-72°C)—the carryover cooking will bring it to the safe 165°F (74°C) as it rests.
- Tip: Make it ahead. You can whisk the glaze together up to 3 days in advance and store it in the fridge. You can also pat the chicken dry and season it the night before, keeping it covered on a plate in the refrigerator.
- Tip: Broil for a final blast. If you want an extra-caramelized, almost candied top, switch your oven to broil for the last 1-2 minutes of cooking. Watch it like a hawk though—it can go from perfect to burnt in seconds!
FAQs
Can I use boneless, skinless chicken thighs?
You absolutely can, but the result will be different. Without the skin, you won’t get that crispy, glazed crust, and the meat can dry out a bit faster. If you do use them, reduce the initial searing time to about 4 minutes per side and the baking time to 12-15 minutes. The flavor of the glaze will still be delicious, but you’ll miss that textural contrast.
My glaze is burning in the pan. What did I do wrong?
This usually happens if your heat is too high when you add the glaze, or if there’s not enough residual fat in the pan. The sugar in the honey can burn quickly. Make sure you’ve poured off most, but not all, of the chicken fat. If it’s still bubbling too aggressively in the oven, you can add a tablespoon of water or chicken stock to the pan to slow things down.
Can I make this recipe with chicken breasts?
Yes, but with major adjustments. Chicken breasts are much leaner and cook faster. I’d recommend using bone-in, skin-on breasts and pounding them to an even thickness. Follow the same searing method, but check the internal temperature after only 12-15 minutes in the oven. They are done at 160°F (71°C) as they will carry over to 165°F (74°C).
How should I store and reheat leftovers?
Store any leftover chicken in an airtight container in the refrigerator for up to 3 days. To reheat, place it on a baking sheet in a 350°F (175°C) oven for 10-15 minutes until warmed through. Avoid the microwave, as it will make the skin soft and rubbery. The glaze might have solidified, but it will become glossy again as it heats up.
Is the glaze very sweet?
It’s a balanced sweet and salty, not cloying. The honey provides the sweetness, but the soy sauce adds a deep umami saltiness, and the vinegar gives a necessary tang that keeps it from being one-dimensional. If you’re sensitive to sweetness, you can reduce the honey to 1/4 cup and it will still be wonderfully flavorful and sticky.


Glazed Chicken Thighs
Make perfect Glazed Chicken Thighs with crispy skin & a sticky-sweet glaze in one pan. This easy, juicy recipe is a guaranteed crowd-pleaser. Get cooking now!
Ingredients
For the Ingredients
-
8 bone-in, skin-on chicken thighs (about 1.5 lbs / 680 g)
-
1 tbsp olive oil
-
1 tsp kosher salt
-
1/2 tsp freshly ground black pepper
-
2 garlic cloves (minced)
-
1/3 cup honey or maple syrup
-
2 tbsp soy sauce (or tamari for gluten-free)
-
1 tbsp apple cider vinegar
-
1 tsp Dijon mustard
-
1/2 tsp smoked paprika
-
Fresh parsley or chives (for garnish (optional))
Instructions
-
Preheat your oven to 400°F (200°C). While it’s heating up, take your chicken thighs and pat them completely dry with paper towels—be ruthless here. Season both sides generously with the salt and pepper. This initial seasoning is what will flavor the meat itself, not just the surface.01
-
Place your oven-safe skillet over medium-high heat and add the olive oil. Once the oil is shimmering hot, carefully add the chicken thighs, skin-side down. You should hear a confident sizzle. Resist the urge to move them! Let them cook undisturbed for 6-8 minutes to render the fat and develop a deep golden-brown, crispy skin.02
-
While the chicken is searing, whisk together your glaze in a small bowl. Combine the honey, soy sauce, apple cider vinegar, Dijon mustard, minced garlic, and smoked paprika. Whisk it until it’s smooth and well-emulsified. You’ll notice the mustard helps bring everything together into a cohesive, glossy mixture.03
-
Flip the chicken thighs so they are now skin-side up. You should see beautifully rendered fat and a perfectly crisped skin. Carefully pour off about 90% of the excess fat from the skillet (you can save it for roasting vegetables—it’s gold!). We just need a little bit left to prevent sticking.04
-
Now, pour the glaze mixture evenly over the chicken thighs, making sure to get some on each piece. It will bubble and sizzle excitedly as it hits the hot pan. Use a spoon or brush to coat the top of each thigh generously.05
-
Immediately transfer the entire skillet to your preheated oven. Bake for 18-22 minutes, or until the chicken is cooked through. You’ll know it’s done when the internal temperature reaches 165°F (74°C) at the thickest part, and the glaze has thickened and become sticky and caramelized.06
-
Carefully remove the hot skillet from the oven—remember that handle is scorching! Let the chicken rest in the pan for about 5 minutes. This allows the juices to redistribute throughout the meat, ensuring maximum juiciness when you cut into it.07
-
To serve, spoon any of the extra glaze from the bottom of the pan over the top of the chicken. Garnish with a sprinkle of fresh, chopped parsley or chives for a pop of color and freshness. And get ready for the compliments to roll in.08
Not what you're looking for?


