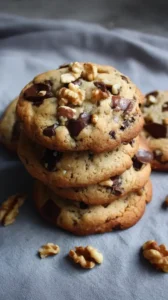
There’s something about a classic oatmeal raisin cookie that feels like a hug in food form. I wanted to recreate that cozy, chewy, warmly-spiced comfort for my gluten-free kitchen, and this recipe has become my go-to. It’s a simple, wholesome project using old-fashioned oats, perfect for a quiet weeknight or whenever you need a little nostalgic comfort food.
But honestly, these cookies truly shine during the festive season. Whenever I start planning my holiday baking, these are at the top of my list for Christmas baking ideas. They are a wonderful addition to any collection of Christmas cookie recipes, and as holiday cookies for Christmas celebrations, they’re always a hit. They’re the kind of delicious holiday treats that make everyone feel included.
So if you’re searching for easy Christmas treats to gift or need some standout Christmas dessert ideas for your table, these gluten-free oatmeal raisin cookies are my heartfelt recommendation. They bring that familiar, joyful comfort to every single bite.
Looking for Gluten-Free Oatmeal Raisin inspiration? You'll love what we have! Explore more Christmas Cookie recipes or discover our Dessert Recipes favorites.


Why You’ll Love This Gluten-Free Oatmeal Raisin
Chewy & soft: A careful flour blend creates that classic, bendy texture.
Warmly spiced flavor: A mix of spices and brown sugar makes each bite comforting.
Simple to make: Just a mixing bowl and a spoon—a one-bowl situation.
Packed with oats: Hearty and satisfying, perfect with a glass of milk.
Ingredients & Tools
- 120 g gluten-free all-purpose flour blend (with xanthan gum)
- 1/2 tsp baking soda
- 1/2 tsp fine sea salt
- 1 tsp ground cinnamon
- 1/4 tsp ground nutmeg
- 115 g unsalted butter, softened
- 100 g light brown sugar, packed
- 50 g granulated sugar
- 1 large egg, at room temperature
- 1 tsp pure vanilla extract
- 180 g old-fashioned rolled oats (certified gluten-free)
- 150 g raisins
Tools: A large mixing bowl, a hand mixer or stand mixer, a baking sheet, and parchment paper or a silicone baking mat.
Notes: Softened butter and room-temperature egg are key for proper creaming. Double-check that your oats are certified gluten-free.
Getting your ingredients to the right state is half the battle here. Softened butter creams beautifully with the sugars to create a light base, and a room-temperature egg incorporates smoothly, preventing the dough from seizing up. And please, double-check that your oats are certified gluten-free—it’s a crucial detail for safety and peace of mind.
Nutrition (per serving)
| Calories: | 185 kcal |
| Protein: | 3 g |
| Fat: | 7 g |
| Carbs: | 29 g |
| Fiber: | 2 g |
Serves: 18 | Prep Time: 15 minutes | Cook Time: 12 minutes | Total Time: 27 minutes
Before You Start: Tips & Ingredient Notes
- Your flour blend matters. Not all gluten-free flours are created equal. Use a reliable 1:1 all-purpose blend that includes xanthan gum. This acts as the binder that gluten would normally provide, giving the cookies structure and chew.
- Don’t skip the dough rest. This might be the most important step for a gluten-free cookie. Letting the dough sit for at least 30 minutes allows the flours to fully hydrate, resulting in a better texture and preventing a gritty mouthfeel.
- Soak your raisins for maximum juiciness. If you have a few extra minutes, plump your raisins in hot water (or even tea!) for 10-15 minutes, then drain and pat dry. This prevents them from drying out or burning in the oven and gives you lovely little bursts of moisture.
- Measure your flour correctly. The best way is to use a kitchen scale. If you’re using cups, fluff your flour with a spoon, spoon it into the measuring cup, and level it off. Never scoop directly from the bag—you’ll end up with too much flour and dry cookies.
How to Make Gluten-Free Oatmeal Raisin
Step 1: Start by whisking your dry ingredients. In a medium bowl, whisk together the gluten-free flour, baking soda, salt, cinnamon, and nutmeg. You’ll notice the aroma of the spices already starting to come together—it’s a good sign! This ensures the leavening and spices are evenly distributed throughout the flour, so every cookie is perfectly spiced.
Step 2: Cream the butter and sugars. In your large mixing bowl, beat the softened butter with the brown and granulated sugars on medium speed for about 2-3 minutes. The mixture should become pale, fluffy, and well-combined. This step is key for creating a light texture and for helping the cookies spread just the right amount in the oven.
Step 3: Incorporate the wet ingredients. Beat in the egg and vanilla extract until the mixture is smooth and creamy. Scrape down the sides of the bowl with a spatula to make sure everything is fully incorporated. You’ll see the mixture come together into a cohesive, almost caramel-colored batter at this stage.
Step 4: Combine wet and dry. With your mixer on low speed, gradually add the flour mixture to the wet ingredients. Mix just until the flour disappears—don’t overmix! Overworking gluten-free flour can sometimes lead to a gummy texture, so stop as soon as you no longer see dry streaks.
Step 5: Fold in the heart of the cookie. Switch to a sturdy spatula and gently fold in the rolled oats and the raisins. The dough will be quite thick and sticky, which is exactly what you want. Make sure the oats and raisins are evenly distributed for that perfect bite every time.
Step 6: The crucial rest. Cover the bowl with plastic wrap and let the dough rest at room temperature for at least 30 minutes, or up to an hour. This allows the oats to soften slightly and the flours to fully absorb the moisture, which gives you a much chewier, less crumbly final cookie.
Step 7: Preheat and portion. While the dough is resting, preheat your oven to 350°F (175°C) and line your baking sheets with parchment paper. After resting, use a cookie scoop or two spoons to portion out heaping tablespoons of dough. Roll them into rough balls and place them about 2 inches apart on the baking sheet—they will spread.
Step 8: Bake to perfection. Bake for 10-12 minutes, or until the edges are set and golden brown but the centers still look soft and slightly underdone. The cookies will continue to set as they cool on the hot baking sheet. This is the secret to a chewy center!
Step 9: The patient cool. Let the cookies cool on the baking sheet for at least 5 minutes before transferring them to a wire rack to cool completely. I know it’s tempting, but this waiting period is essential for them to firm up enough to handle without falling apart.
Storage & Freshness Guide
- Fridge: Not recommended; store at room temperature for best texture.
- Freezer: Freeze baked cookies or dough balls in an airtight bag for up to 3 months.
- Reviving: Warm cookies in a 300°F oven for 3–5 minutes to refresh crispness.
Serving Suggestions
Complementary Dishes
- A bowl of vanilla bean ice cream — Sandwich a slightly warm cookie around a scoop for an incredible ice cream sandwich. The contrast of temperatures and textures is pure bliss.
- A sharp cheddar cheese plate — The classic pairing of sweet, spiced oats and sharp, salty cheese is a match made in heaven. It might sound odd, but trust me, it works.
- Apple cinnamon compote — Serve a few cookies alongside a warm, chunky apple compote for a cozy, dessert-for-breakfast kind of vibe.
Drinks
- A tall glass of cold milk — It’s a non-negotiable classic for a reason. The creamy milk cuts through the sweetness and complements the hearty oats perfectly.
- Masala chai tea — The warm spices in the chai echo the cinnamon and nutmeg in the cookies, creating a wonderfully aromatic and comforting experience.
- Dark roast coffee — The bitterness of a strong coffee provides a beautiful counterpoint to the sweet, caramel notes of the brown sugar and raisins.
Something Sweet
- Dairy-free coconut whipped cream — For a lighter finish, a dollop of fluffy coconut cream with a cookie on the side feels indulgent yet not overly heavy.
- A simple fruit salad — A mix of fresh berries and orange segments provides a bright, acidic contrast that cleanses the palate after the rich, spiced cookies.
- Dark chocolate-dipped strawberries — Continue the theme of fruit and spice by ending your treat session with these elegant, simple bites.
Top Mistakes to Avoid
- Mistake: Using instant oats. Instant oats are cut too finely and will turn to mush in your dough, resulting in a pasty texture instead of a chewy, hearty one. Old-fashioned rolled oats are essential for structure.
- Mistake: Overbaking the cookies. I’ve messed this up before too—it’s so easy to do! Remember, the cookies are done when the edges are golden but the centers look soft. They will set up as they cool. Overbaking leads to dry, crunchy cookies.
- Mistake: Not letting the butter soften properly. If your butter is too cold, it won’t cream properly with the sugar, leading to dense cookies. If it’s melted, your cookies will spread too thin. Softened butter should hold a slight indent when you press it.
- Mistake: Skipping the dough rest. This is the number one reason for gritty or crumbly gluten-free cookies. Patience here is not just a virtue; it’s a requirement for the perfect texture.
Expert Tips
- Tip: Brown your butter for a nutty twist. Gently cook the butter until it turns a golden brown and smells nutty. Let it cool and solidify again before creaming. This adds an incredible depth of flavor that pairs wonderfully with the oats and raisins.
- Tip: Add a tablespoon of molasses. For an even deeper, more robust caramel flavor, add a tablespoon of molasses along with the wet ingredients. It enhances the brown sugar notes and makes the cookies extra chewy.
- Tip: Create a flavor-soaked raisin. Instead of water, plump your raisins in a warm mixture of apple cider or even a splash of bourbon for a grown-up, sophisticated flavor profile that will impress everyone.
- Tip: Make a cookie bar version. Press the entire batch of dough into a greased 8×8 inch pan and bake for 20-25 minutes. You’ll get soft, chewy bars that are perfect for feeding a crowd with zero scooping required.
FAQs
Can I make these cookies dairy-free as well?
Absolutely! The butter is an easy swap. Use a high-quality vegan butter stick (not the kind from a tub) in a 1:1 ratio. Look for one with a fat content similar to real butter for the best results. The flavor and texture will be nearly identical, and you’ll have a fully gluten-free and dairy-free treat that everyone can enjoy.
Can I use a different dried fruit instead of raisins?
Of course! This recipe is wonderfully adaptable. Dried cranberries or chopped dried apricots would be lovely. If you’re using a larger, chewier fruit like dates or dried figs, just chop them into raisin-sized pieces first so they distribute evenly. You could even use a mix for a “fruit and nut” style cookie—just keep the total weight around 150 grams.
Why are my cookies not spreading?
This usually happens for one of two reasons. First, your dough might have been too cold when it went into the oven. If you chilled it for longer than an hour, let it sit at room temp for 10-15 minutes before baking. Second, you might have accidentally used too much flour. Always measure by weight for the most consistent results. A little less flour will help them spread more.
How should I store these cookies to keep them soft?
The key to soft cookies is an airtight container. Once completely cool, store them in a sealed container or a zip-top bag at room temperature. For an extra boost of softness, you can add a piece of bread to the container—the cookies will draw moisture from the bread and stay wonderfully chewy for days.
Can I freeze the cookie dough?
You sure can, and I highly recommend it for fresh-baked cookies on demand! Scoop the dough balls onto a parchment-lined tray and freeze them solid. Then, transfer the frozen dough balls to a freezer bag. You can bake them straight from frozen, just add 1-2 minutes to the baking time. There’s nothing better than a warm cookie on a whim.


Gluten-Free Oatmeal Raisin Cookies: A Chewy Comfort Food
This Gluten-Free Oatmeal Raisin cookie recipe is a chewy, warmly-spiced holiday treat, perfect for your Christmas baking and easy enough for any festive gathering.
Ingredients
For the dry ingredients:
-
120 g gluten-free all-purpose flour blend (with xanthan gum)
-
1/2 tsp baking soda
-
1/2 tsp fine sea salt
-
1 tsp ground cinnamon
-
1/4 tsp ground nutmeg
For the wet ingredients:
-
115 g unsalted butter (softened)
-
100 g light brown sugar (packed)
-
50 g granulated sugar
-
1 large egg (at room temperature)
-
1 tsp pure vanilla extract
For the mix-ins:
-
180 g old-fashioned rolled oats (certified gluten-free)
-
150 g raisins
Instructions
-
Start by whisking your dry ingredients. In a medium bowl, whisk together the gluten-free flour, baking soda, salt, cinnamon, and nutmeg. This ensures the leavening and spices are evenly distributed throughout the flour, so every cookie is perfectly spiced.01
-
Cream the butter and sugars. In your large mixing bowl, beat the softened butter with the brown and granulated sugars on medium speed for about 2-3 minutes. The mixture should become pale, fluffy, and well-combined. This step is key for creating a light texture and for helping the cookies spread just the right amount in the oven.02
-
Incorporate the wet ingredients. Beat in the egg and vanilla extract until the mixture is smooth and creamy. Scrape down the sides of the bowl with a spatula to make sure everything is fully incorporated.03
-
Combine wet and dry. With your mixer on low speed, gradually add the flour mixture to the wet ingredients. Mix just until the flour disappears—don’t overmix! Overworking gluten-free flour can sometimes lead to a gummy texture, so stop as soon as you no longer see dry streaks.04
-
Fold in the heart of the cookie. Switch to a sturdy spatula and gently fold in the rolled oats and the raisins. The dough will be quite thick and sticky, which is exactly what you want. Make sure the oats and raisins are evenly distributed for that perfect bite every time.05
-
The crucial rest. Cover the bowl with plastic wrap and let the dough rest at room temperature for at least 30 minutes, or up to an hour. This allows the oats to soften slightly and the flours to fully absorb the moisture, which gives you a much chewier, less crumbly final cookie.06
-
Preheat and portion. While the dough is resting, preheat your oven to 350°F (175°C) and line your baking sheets with parchment paper. After resting, use a cookie scoop or two spoons to portion out heaping tablespoons of dough. Roll them into rough balls and place them about 2 inches apart on the baking sheet—they will spread.07
-
Bake to perfection. Bake for 10-12 minutes, or until the edges are set and golden brown but the centers still look soft and slightly underdone. The cookies will continue to set as they cool on the hot baking sheet. This is the secret to a chewy center!08
-
The patient cool. Let the cookies cool on the baking sheet for at least 5 minutes before transferring them to a wire rack to cool completely. I know it’s tempting, but this waiting period is essential for them to firm up enough to handle without falling apart.09
Not what you're looking for?


