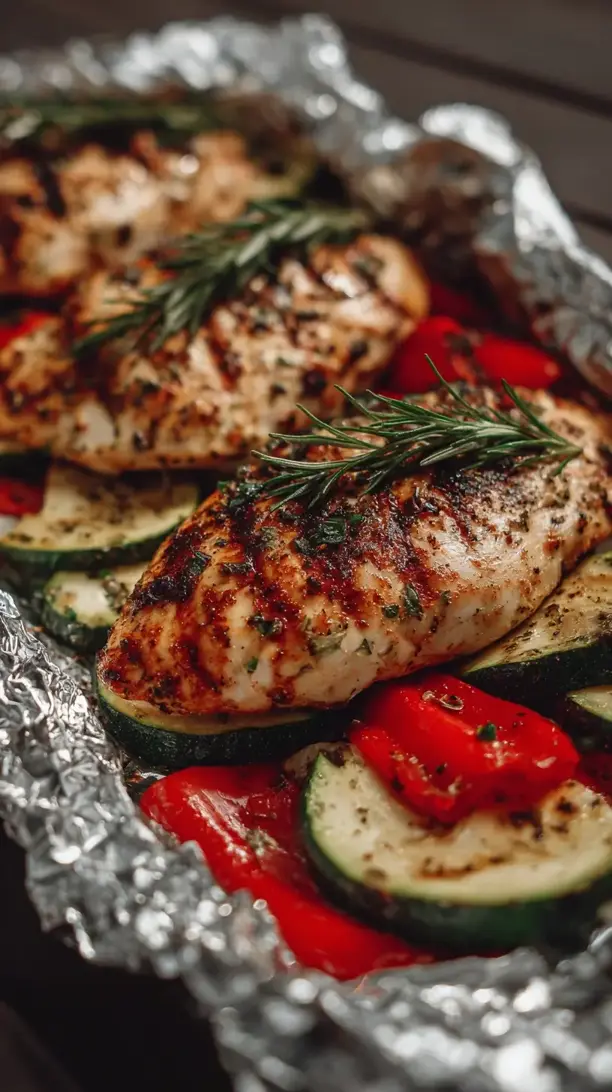
Grilled Foil Chicken is a summer favorite that’s nearly impossible to mess up. The foil locks in moisture while letting smoky grill flavor through, creating tender, juicy chicken every time. It’s a complete, customizable meal with minimal cleanup—perfect for busy nights or feeding a crowd.
Love Grilled Foil Chicken? So do we! If you're into Chicken Breast Recipes or curious about Chicken Thigh Recipes, you'll find plenty of inspiration below.

Why You’ll Love This Grilled Foil Chicken
- Forgiving method: Foil acts like an insulated oven for moist, protected cooking.
- Minimal cleanup: Mix, fold, grill, and toss the foil—no scrubbing needed.
- Endless flavors: Customize with lemon-herb, chili-lime, or rosemary-thyme variations.
- Complete meal: Add potatoes, zucchini, or peppers to cook alongside the chicken.
Ingredients & Tools
- 4 boneless, skinless chicken breasts (about 1.5 lbs / 680 g)
- 3 tbsp olive oil
- 2 tsp smoked paprika
- 1 tsp garlic powder
- 1 tsp dried oregano
- 1/2 tsp onion powder
- 1/2 tsp black pepper
- 1 tsp salt
- 1 lemon, thinly sliced
- 1 medium zucchini, sliced into half-moons
- 1 red bell pepper, chopped
- 1/4 cup fresh parsley, chopped (for garnish)
Tools: Heavy-duty aluminum foil, grill (gas or charcoal), tongs, small bowl for mixing spices, sharp knife, cutting board.
Notes: Don’t stress if you’re missing an ingredient—the beauty is in the simplicity. Olive oil helps spices stick and encourages browning; lemon slices steam inside for brightness.
Nutrition (per serving)
| Calories: | 285 kcal |
| Protein: | 35 g |
| Fat: | 12 g |
| Carbs: | 8 g |
| Fiber: | 2 g |
Serves: 4 | Prep Time: 15 minutes | Cook Time: 25 minutes | Total Time: 40 minutes
Before You Start: Tips & Ingredient Notes
- Use heavy-duty foil. Regular foil can tear easily when you’re moving the packets around on the grill, leading to steam escape and potential flare-ups. The extra strength is worth it.
- Don’t skip the oil. It’s not just for the spices—it helps prevent the chicken and veggies from sticking to the foil, so you get every last delicious bit onto your plate.
- Cut veggies uniformly. If you’re adding harder vegetables like potatoes or carrots, slice them thin or small so they cook through in the same time as the chicken. Nobody wants crunchy potatoes next to perfectly cooked chicken.
- Let the chicken rest. I know it’s tempting to dig right in, but letting the packets sit for a couple minutes after grilling allows the juices to redistribute throughout the meat, making it even more tender.
How to Make Grilled Foil Chicken
Step 1: First, fire up your grill to medium heat, around 375–400°F (190–200°C). You want a nice, even heat—not so hot that it burns the bottom, but hot enough to cook the chicken through and create plenty of steam inside the foil. While the grill heats, tear off four large sheets of heavy-duty aluminum foil, each about 12×18 inches. Lay them out on your counter.
Step 2: In a small bowl, mix together the smoked paprika, garlic powder, dried oregano, onion powder, black pepper, and salt. This is your super simple, flavor-packed dry rub. Pat the chicken breasts dry with a paper towel—this helps the oil and spices adhere better. Drizzle the chicken with the olive oil, rubbing it all over, then sprinkle the spice mix evenly on both sides. You’ll notice the color turning a lovely reddish-brown from the paprika.
Step 3: Place one seasoned chicken breast in the center of each foil sheet. Arrange the sliced zucchini and chopped red bell pepper around the chicken. Top each pile with a couple of thin lemon slices. The lemon isn’t just for looks—as it heats up, it’ll release its juices and keep everything incredibly moist and fragrant.
Step 4: Now, fold the foil to create sealed packets. Bring the long sides together over the food and fold them down in a series of tight folds, about half an inch each, until the packet is snug against the food. Then, fold the short ends up and inward, crimping to seal. You’re aiming for a semi-tight seal—not so loose that steam escapes easily, but with a little room for air to circulate inside. The packet will puff up while cooking, which is exactly what you want to see.
Step 5: Carefully place the foil packets on the preheated grill grate. Close the lid and cook for about 20–25 minutes. The cooking time can vary a bit depending on your grill and the thickness of your chicken, but you’ll know it’s done when the packets are puffed up and you can hear a gentle sizzling inside.
Step 6: Using tongs, carefully remove the packets from the grill and place them on a heatproof surface or baking sheet. This is the hard part—let them rest for 3–5 minutes before opening. I know, the anticipation is real! But this rest allows the intense heat and steam to settle, finishing the cooking process gently.
Step 7: Now for the grand unveiling! Use a knife to slit the top of each packet open, being careful of the hot steam that will rush out. The aroma is absolutely incredible—smoky, lemony, herby. Check that the chicken is cooked through; it should be opaque all the way through and register 165°F (74°C) on an instant-read thermometer. Garnish with the fresh parsley for a pop of color and freshness, and serve everything right from the foil.
Storage & Freshness Guide
- Fridge: Store leftovers in an airtight container up to 3 days.
- Freezer: Freeze cooked chicken (without veggies) in sealed bags up to 3 months.
- Reviving: Reheat gently in foil in a 350°F oven or covered skillet with a splash of broth.
Serving Suggestions
Complementary Dishes
- Fluffy quinoa or couscous — These grains are fantastic for soaking up all the delicious juices that collect at the bottom of the foil packet. They’re light yet satisfying.
- A simple arugula salad with a lemon vinaigrette — The peppery arugula and sharp dressing cut through the richness of the chicken beautifully, balancing the meal.
- Grilled garlic bread — Because who can resist crispy, buttery bread? It’s perfect for mopping up every last bit of flavor from your plate.
Drinks
- A crisp Sauvignon Blanc — Its citrusy notes mirror the lemon in the chicken and cleanse the palate between bites.
- Sparkling water with lime — A non-alcoholic option that adds a refreshing fizz and acidity, which is lovely with the smoky, herby flavors.
- A light lager or pilsner — The crisp, clean finish of a cold beer is a classic pairing with anything from the grill.
Something Sweet
- Grilled peaches with a drizzle of honey — You already have the grill fired up, so why not? The warm, caramelized fruit is a dream after a savory meal.
- Lemon sorbet — It’s light, refreshing, and continues the citrus theme from the main course in a cool, palate-cleansing way.
- Simple shortbread cookies — A buttery, not-too-sweet cookie that provides a lovely, simple finish without much effort.
Top Mistakes to Avoid
- Overfilling the foil packets. If you pack in too many veggies or make the layers too thick, the steam can’t circulate properly, and you’ll end up with unevenly cooked food. A single layer is best.
- Using foil that’s too thin. I’ve messed this up before too… a torn packet means lost juices and potentially burnt food. Heavy-duty foil is your friend here.
- Not sealing the packets tightly enough. If the seams are loose, all that precious steam—which is what cooks and tenderizes the food—will escape, leaving you with drier results.
- Opening the packets immediately after grilling. That burst of steam is hot and dangerous, and you’ll lose a lot of the moisture. A short rest is crucial for safety and texture.
Expert Tips
- Tip: Create a “flavor base” with onion. Before adding the chicken, scatter some thinly sliced onion on the foil. As it cooks, it will caramelize and create a delicious foundation that the chicken sits on.
- Tip: Add a splash of white wine or chicken broth. Just a tablespoon or two poured over the chicken and veggies before sealing will create even more steam and an instant, light sauce.
- Tip: Use herb stems for extra aroma. If you’re using fresh herbs like rosemary or thyme, place a whole stem or two inside the packet. They infuse the chicken with a deeper, woodier flavor than dried herbs alone.
- Tip: Make-ahead for easy entertaining. You can assemble the foil packets completely, keep them in the fridge for up to 8 hours, and then just take them straight to the grill. It makes hosting a breeze.
FAQs
Can I use chicken thighs instead of breasts?
Absolutely! Chicken thighs are actually more forgiving because of their higher fat content. They’ll stay incredibly juicy. Just note that they may require a slightly longer cooking time—check for an internal temperature of 165°F (74°C) and make sure the juices run clear. The packet method works beautifully with any cut of chicken.
My veggies aren’t cooking through. What happened?
This usually means your veggie pieces were too large or thick. Harder vegetables like potatoes, carrots, or broccoli need to be cut into small, bite-sized pieces to cook in the same time as the chicken. If you’re using a mix, you can parcook the harder veggies for a few minutes before adding them to the packet.
Can I cook this in the oven instead?
You sure can! The method is almost identical. Place the sealed foil packets on a baking sheet and bake in a preheated 400°F (200°C) oven for about 25-30 minutes, or until the chicken is cooked through. You’ll miss the smoky grill flavor, but it’s a fantastic year-round option.
How do I know when the chicken is done without opening the packet?
The puffed-up foil and the audible sizzling are good visual and audio cues. For absolute certainty, you can carefully open one packet (watch the steam!) and check the thickest part of a chicken breast with an instant-read thermometer. It should read 165°F (74°C). The chicken should also be opaque with no pink in the center.
Can I prepare these packets ahead of time?
Yes, this is a great meal-prep strategy. Assemble the packets completely, place them on a baking sheet, and refrigerate for up to 8 hours before grilling. If they’re very cold from the fridge, you might need to add 3-5 extra minutes to the grilling time. I don’t recommend freezing them, as the veggies can become mushy upon thawing.


Grilled Foil Chicken
Make perfect Grilled Foil Chicken every time! This easy recipe delivers juicy, flavorful chicken with minimal cleanup. Get the simple step-by-step guide now!
Ingredients
For the Ingredients
-
4 boneless, skinless chicken breasts (about 1.5 lbs / 680 g)
-
3 tbsp olive oil
-
2 tsp smoked paprika
-
1 tsp garlic powder
-
1 tsp dried oregano
-
1/2 tsp onion powder
-
1/2 tsp black pepper
-
1 tsp salt
-
1 lemon (thinly sliced)
-
1 medium zucchini (sliced into half-moons)
-
1 red bell pepper (chopped)
-
1/4 cup fresh parsley (chopped (for garnish))
Instructions
-
First, fire up your grill to medium heat, around 375–400°F (190–200°C). You want a nice, even heat—not so hot that it burns the bottom, but hot enough to cook the chicken through and create plenty of steam inside the foil. While the grill heats, tear off four large sheets of heavy-duty aluminum foil, each about 12x18 inches. Lay them out on your counter.01
-
In a small bowl, mix together the smoked paprika, garlic powder, dried oregano, onion powder, black pepper, and salt. This is your super simple, flavor-packed dry rub. Pat the chicken breasts dry with a paper towel—this helps the oil and spices adhere better. Drizzle the chicken with the olive oil, rubbing it all over, then sprinkle the spice mix evenly on both sides. You’ll notice the color turning a lovely reddish-brown from the paprika.02
-
Place one seasoned chicken breast in the center of each foil sheet. Arrange the sliced zucchini and chopped red bell pepper around the chicken. Top each pile with a couple of thin lemon slices. The lemon isn’t just for looks—as it heats up, it’ll release its juices and keep everything incredibly moist and fragrant.03
-
Now, fold the foil to create sealed packets. Bring the long sides together over the food and fold them down in a series of tight folds, about half an inch each, until the packet is snug against the food. Then, fold the short ends up and inward, crimping to seal. You’re aiming for a semi-tight seal—not so loose that steam escapes easily, but with a little room for air to circulate inside. The packet will puff up while cooking, which is exactly what you want to see.04
-
Carefully place the foil packets on the preheated grill grate. Close the lid and cook for about 20–25 minutes. The cooking time can vary a bit depending on your grill and the thickness of your chicken, but you’ll know it’s done when the packets are puffed up and you can hear a gentle sizzling inside.05
-
Using tongs, carefully remove the packets from the grill and place them on a heatproof surface or baking sheet. This is the hard part—let them rest for 3–5 minutes before opening. I know, the anticipation is real! But this rest allows the intense heat and steam to settle, finishing the cooking process gently.06
-
Now for the grand unveiling! Use a knife to slit the top of each packet open, being careful of the hot steam that will rush out. The aroma is absolutely incredible—smoky, lemony, herby. Check that the chicken is cooked through; it should be opaque all the way through and register 165°F (74°C) on an instant-read thermometer. Garnish with the fresh parsley for a pop of color and freshness, and serve everything right from the foil.07
Not what you're looking for?


