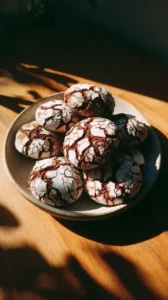
There’s something about a truly great chocolate cookie that feels like a quiet moment of comfort, especially during the busy holiday season. I created these healthy flourless chocolate cookies for exactly those times—when you need a deep, fudgy hug in edible form. With a crackly top and a chewy, brownie-like center, they’re my go-to comfort food recipe that comes together in just one bowl. They’re a guilt-free indulgence that proves a treat can be both wholesome and deeply satisfying.
Friends, these have become my favorite secret for festive gatherings. Whenever I’m brainstorming christmas dessert ideas, these cookies always make the list as a standout among unique christmas cookies. They’re perfect for holiday baking with family, turning a simple session into a sweet memory. If you’re looking for wonderful holiday treats or need some fresh christmas baking ideas, these are a delightful, healthier option that never fails to impress.
Honestly, they are the ultimate easy christmas treats. Whether you need a last-minute sweet for guests or a thoughtful homemade gift, this recipe delivers all the decadence you crave in a wonderfully simple package. It’s the kind of treat that makes the season just a little bit sweeter.
If you're looking for the perfect Healthy Flourless Chocolate Cookies, you're in the right place. Whether you love Christmas Cookie or want to explore our Dessert Recipes collection, we've got you covered.

Why You’ll Love This Healthy Flourless Chocolate Cookies
- Secretly simple: One bowl, ten minutes prep, foolproof method.
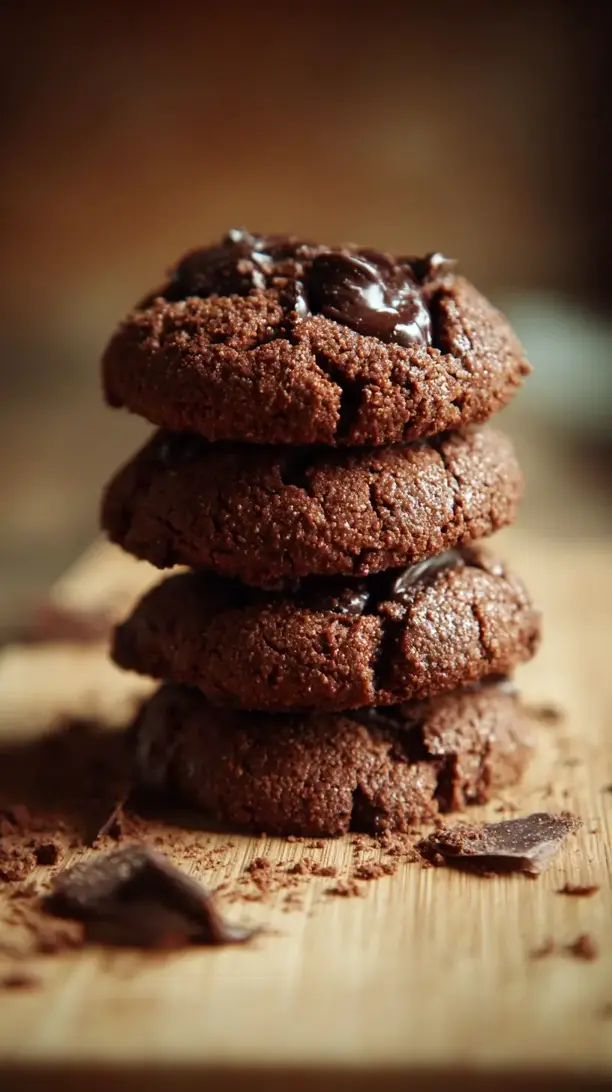
- Magical texture: Crackly top with a fudgy, brownie-like interior.
- Wonderfully adaptable: Swap nut butters or add chocolate chips.
- Real treat: Deeply chocolatey without compromise.
Ingredients & Tools
- 1 cup (250 g) creamy almond butter (or cashew/sunflower seed butter)
- 1/2 cup (120 ml) pure maple syrup, at room temperature
- 1 large egg, at room temperature
- 1 tsp vanilla extract
- 1/3 cup (30 g) unsweetened cocoa powder (Dutch-processed works beautifully)
- 1/2 tsp baking soda
- 1/4 tsp fine sea salt
- 1/2 cup (85 g) dark chocolate chips or chopped chocolate (optional, but highly recommended)
Tools: A medium mixing bowl, a whisk or spatula, a baking sheet, and parchment paper.
Notes: Quality cocoa and nut butter are key for flavor. Room temperature ingredients help the dough blend smoothly.
Nutrition (per serving)
| Calories: | 145 kcal |
| Protein: | 4 g |
| Fat: | 10 g |
| Carbs: | 12 g |
| Fiber: | 2 g |
Serves: 16 | Prep Time: 10 minutes | Cook Time: 10 minutes | Total Time: 20 minutes
Before You Start: Tips & Ingredient Notes
- Your nut butter matters. Make sure you’re using a natural, drippy nut butter where the oil is not separated at the bottom of the jar. If it’s too stiff, the dough will be dry and crumbly. A quick stir is all you need.
- Why room temperature ingredients? A cold egg or syrup can cause the nut butter to seize up and become grainy. Taking them out of the fridge 30 minutes beforehand ensures a silky, emulsified dough that bakes up perfectly.
- Don’t skip the rest. After you mix the dough, letting it sit for 5-10 minutes is a game-changer. It allows the cocoa powder to hydrate and the baking soda to start working, which gives you those lovely crackly tops.
- Cocoa powder is key. For the deepest, richest chocolate flavor, I highly recommend a Dutch-processed cocoa powder. Its milder acidity results in a smoother, more mellow chocolate taste that really shines here.
How to Make Healthy Flourless Chocolate Cookies
Step 1: Start by preheating your oven to 350°F (175°C) and lining a baking sheet with parchment paper. This is crucial because these cookies can stick without it. While the oven heats up, you can get your dough ready—it comes together that quickly.
Step 2: In your medium mixing bowl, combine the almond butter, maple syrup, egg, and vanilla extract. Whisk them together until the mixture is completely smooth and well-blended. You’ll notice it should look glossy and have a uniform, liquid consistency. This is the base of your cookie, so make sure there are no streaks of unmixed egg or nut butter.
Step 3: Now, sift in the cocoa powder, baking soda, and salt directly over the wet ingredients. Sifting is important here to avoid any lumps of cocoa or baking soda, which would create bitter pockets in your finished cookies. Use a spatula to fold everything together until a thick, dark, and fudgy batter forms.
Step 4: If you’re using chocolate chips, now’s the time to fold them in gently. The dough will be quite sticky and soft—that’s exactly what you want! Let the dough rest for about 5-10 minutes. You’ll see it thicken slightly as the cocoa powder absorbs the moisture. This rest period is the secret to achieving that perfect chewy texture.
Step 5: Using a tablespoon or a small cookie scoop, drop rounded tablespoons of dough onto your prepared baking sheet, spacing them about 2 inches apart. These cookies don’t spread a huge amount, but they do need a little room to breathe. For a prettier finish, you can gently flatten the tops just a tiny bit with your fingers or the back of a spoon.
Step 6: Bake for 8-10 minutes. The trick is to pull them out when the tops are crackly and the edges look set, but the centers still appear soft. They will continue to cook on the hot baking sheet after you remove them. Over-baking is the enemy of a fudgy center, so err on the side of underdone.
Step 7: This is the hardest part: let the cookies cool on the baking sheet for at least 10-15 minutes before you attempt to move them. They are extremely fragile when hot and need this time to firm up. Transferring them too early will result in a crumbly mess. Once they’ve set, you can move them to a wire rack to cool completely… or just eat one warm, because you’ve earned it.
Storage & Freshness Guide
- Fridge: Store in an airtight container for up to 4 days; they soften over time.
- Freezer: Freeze baked cookies or dough balls for up to 3 months.
- Reviving: Thaw at room temperature or microwave frozen cookies for 10 seconds.
Serving Suggestions
Complementary Dishes
- A scoop of vanilla bean ice cream — The classic combination of warm, fudgy cookie and cold, creamy ice cream is simply unbeatable. The vanilla provides a beautiful contrast to the deep chocolate.
- A small bowl of fresh berries — The bright, tart pop of a raspberry or strawberry cuts through the richness of the chocolate beautifully, making the whole experience feel a little more balanced.
- A dollop of coconut whipped cream — For a dairy-free delight, a light and airy coconut whip adds a lovely creamy texture and a subtle tropical note that pairs wonderfully with the cocoa.
Drinks
- A cold glass of almond milk — It keeps the theme going and is the perfect, simple companion to wash down each delicious, chewy bite.
- A bold cup of black coffee — The bitterness of a good, strong brew highlights the complexity of the dark cocoa and makes the cookie taste even richer.
- A glass of chilled red wine — If you’re feeling fancy, a fruit-forward red like a Merlot can create a stunning pairing with the dark chocolate notes.
Something Sweet
- Chocolate-dipped orange segments — The vibrant citrus flavor is a classic partner for chocolate and offers a refreshing, juicy finish to your cookie indulgence.
- A small square of peppermint dark chocolate — This is like a built-in after-dinner mint that amplifies the chocolate experience without being too heavy.
- Frozen banana “nice” cream — For a double dose of healthy-ish dessert, the creamy, sweet banana flavor is a fantastic match for the dense, chewy cookie.
Top Mistakes to Avoid
- Using cold ingredients. This is the number one reason for a greasy, separated dough. If your nut butter and maple syrup are cold, they won’t emulsify properly with the egg, leading to oily cookies that spread too much.
- Over-measuring the nut butter. When you scoop it straight from the jar, you can accidentally pack in too much. The best method is to stir the jar well, then spoon it loosely into your measuring cup and level it off.
- Over-baking the cookies. They will not look “done” in the traditional sense when you take them out. Remember, they set as they cool. Baking them until they look firm will give you a dry, crumbly cookie instead of a fudgy one.
- Moving them too soon. I know it’s tempting, but patience is a virtue here. Let them cool and set on the baking sheet. If you try to lift a warm cookie, it will almost certainly fall apart in your hands.
Expert Tips
- Tip: For an extra flavor boost, add a pinch of espresso powder to the dry ingredients. You won’t taste coffee, but it will deepen and intensify the chocolate flavor in a really remarkable way.
- Tip: If your dough seems too wet or sticky to handle after resting, pop the whole bowl in the fridge for 15-20 minutes. This will firm it up just enough to make scooping a breeze.
- Tip: Want a saltier, more gourmet feel? Press a few flakes of Maldon sea salt onto the top of each cookie right when they come out of the oven. The contrast is absolutely divine.
- Tip: To make these cookies completely vegan, you can try using a “flax egg” (1 tbsp ground flaxseed mixed with 3 tbsp water, left to gel for 5 minutes). The texture will be slightly more cakey but still delicious.
FAQs
Can I use a different nut butter?
Absolutely! The beauty of this recipe is its flexibility. Creamy cashew butter will yield a milder, butterier flavor, while peanut butter will give you a definite peanut-chocolate vibe (which is never a bad thing). For a nut-free version, sunflower seed butter works wonderfully—just be aware it can sometimes cause the baked cookies to turn a slight greenish color due to a reaction with the baking soda. It’s perfectly safe to eat and doesn’t affect the taste!
Why are my cookies dry and crumbly?
This usually points to two potential issues. First, your nut butter might have been too thick or over-measured, throwing off the fat-to-liquid ratio. Second, they were likely over-baked. Remember, they continue to cook on the hot tray, so taking them out when the centers look soft is key. Next time, try reducing the bake time by a minute or two and ensure your nut butter is nice and drippy.
Can I make the dough ahead of time?
You can! The dough can be covered and refrigerated for up to 2 days. You might need to let it sit at room temperature for 10-15 minutes to become scoopable again. You can also scoop the dough into balls and freeze them on a tray before transferring to a bag. Bake from frozen, just adding 1-2 extra minutes to the baking time.
My cookies didn’t spread at all. What happened?
If your cookies stayed in little mounds, the dough was probably too cold when it went into the oven, or your baking soda might be old and lost its leavening power. Always check the expiration date on your baking soda! Letting the dough come to a cool room temperature before baking will help them spread just the right amount.
How should I store these cookies?
Once completely cool, store them in an airtight container at room temperature for up to 4 days. They tend to soften over time. If you prefer a firmer texture, you can store them in the fridge. For longer storage, they freeze beautifully for up to 3 months. Just thaw at room temperature or pop a frozen one in the microwave for 10 seconds for a warm, gooey treat.


Healthy Flourless Chocolate Cookies: An Easy Gluten-Free Dessert
Craving a deep chocolate fix? These Healthy Flourless Chocolate Cookies are a fudgy, guilt-free indulgence. This easy flourless cookies recipe makes the perfect holiday treat for your Christmas dessert platter.
Ingredients
For the Ingredients
-
1 cup creamy almond butter (250 g (or cashew/sunflower seed butter))
-
1/2 cup pure maple syrup (120 ml, at room temperature)
-
1 large egg (at room temperature)
-
1 tsp vanilla extract
-
1/3 cup unsweetened cocoa powder (30 g (Dutch-processed works beautifully))
-
1/2 tsp baking soda
-
1/4 tsp fine sea salt
-
1/2 cup dark chocolate chips or chopped chocolate (85 g (optional, but highly recommended))
Instructions
-
Start by preheating your oven to 350°F (175°C) and lining a baking sheet with parchment paper.01
-
In your medium mixing bowl, combine the almond butter, maple syrup, egg, and vanilla extract.02
-
Whisk them together until the mixture is completely smooth and well-blended.03
-
Sift in the cocoa powder, baking soda, and salt directly over the wet ingredients.04
-
Use a spatula to fold everything together until a thick, dark, and fudgy batter forms.05
-
If you’re using chocolate chips, now’s the time to fold them in gently.06
-
Let the dough rest for about 5-10 minutes.07
-
Using a tablespoon or a small cookie scoop, drop rounded tablespoons of dough onto your prepared baking sheet, spacing them about 2 inches apart.08
-
Bake for 8-10 minutes.09
-
Let the cookies cool on the baking sheet for at least 10-15 minutes before you attempt to move them.10
Not what you're looking for?


