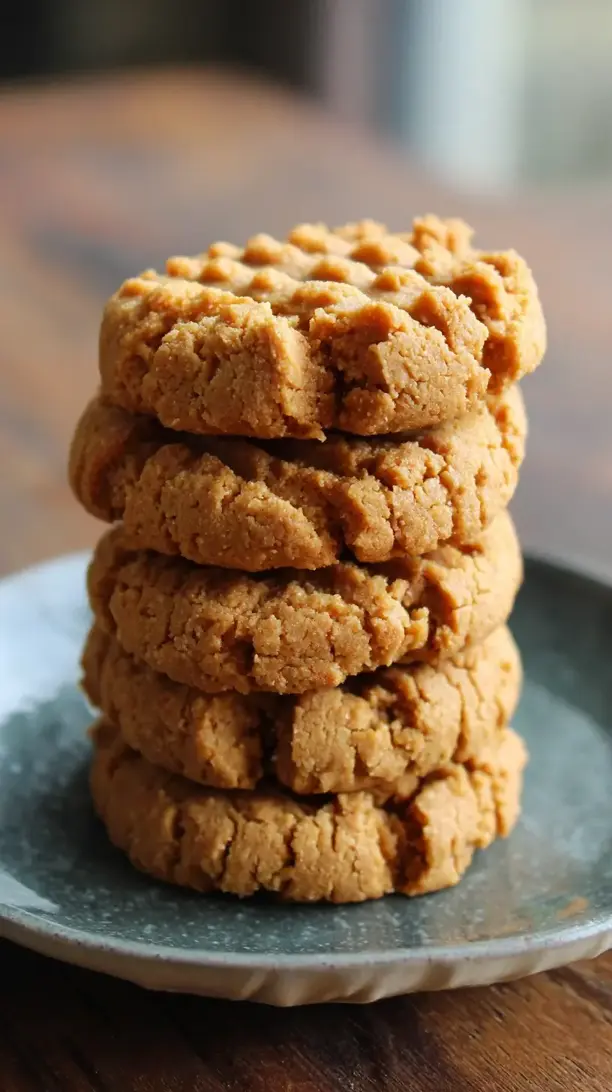
There’s something magical about a cookie that comes together in one bowl and fills the kitchen with the cozy scent of roasted peanuts. I think of these healthy flourless peanut butter cookies as my edible hug—a simple, soul-warming treat you can feel genuinely good about enjoying any day. They have that perfect crisp-chewy texture and deep peanut butter flavor, making them an ideal healthy dessert that feels like a celebration.
And speaking of celebrations, as the season turns, this recipe naturally becomes a star of my holiday baking. If you’re curating a list of Christmas dessert ideas, these offer a wholesome, gluten-free twist among the usual Christmas snacks. Honestly, if you’re searching for unique Christmas cookies that will delight everyone, these fit the bill beautifully. They’re the kind of effortless holiday treats that require minimal prep but deliver maximum comfort and joy.
So whether you’re brainstorming Christmas baking ideas for a festive cookie swap or just need some reliable easy Christmas treats to have on hand for surprise guests, this is your answer. More than just a recipe, it’s a dependable comfort food recipe that proves a wholesome treat can be incredibly delicious and wonderfully simple to make.
Love Healthy Flourless Peanut Butter Cookies? So do we! If you're into Christmas Cookie or curious about Crockpot Recipes, you'll find plenty of inspiration below.


Why You’ll Love This Healthy Flourless Peanut Butter Cookies
- Incredibly Simple & Fast: One bowl, no chilling, ready in under 20 minutes.
- Naturally Gluten-Free: No flour or butter, just wholesome ingredients.
- Perfect Texture Trio: Crisp exterior, soft chewy middle, classic criss-cross look.
- Endlessly Customizable: Easy base for chocolate chips, sea salt, or spices.
Ingredients & Tools
- 1 cup (250 g) smooth, natural peanut butter
- 3/4 cup (150 g) coconut sugar or light brown sugar
- 1 large egg, at room temperature
- 1 tsp vanilla extract
- 1/2 tsp baking soda
- 1/4 tsp fine sea salt
- Optional: coarse sea salt for sprinkling
Tools: A medium mixing bowl, a sturdy spatula or spoon, a baking sheet, and parchment paper.
Notes: Use natural, drippy peanut butter for best texture. Room temperature egg incorporates smoothly.
Nutrition (per serving)
| Calories: | 142 kcal |
| Protein: | 5 g |
| Fat: | 9 g |
| Carbs: | 12 g |
| Fiber: | 1 g |
Serves: 12 | Prep Time: 8 minutes | Cook Time: 10 minutes | Total Time: 18 minutes
Storage & Freshness Guide
- Fridge: Not needed; store airtight at room temperature up to 5 days.
- Freezer: Freeze baked cookies or dough balls up to 3 months.
- Reviving: Re-crisp in a 300°F oven for 3–4 minutes if softened.
Serving Suggestions
Complementary Dishes
- A cold glass of milk — It’s a timeless pairing for a reason. The creaminess of the milk cuts through the rich, nutty density of the cookie perfectly.
- A bowl of vanilla bean ice cream — Sandwich a scoop between two slightly warm cookies for an epic, gooey ice cream sandwich that’s pure bliss.
- Fresh fruit like apple slices or banana — The bright, fresh fruit provides a lovely contrast to the sweet, savory cookie and makes the whole snack feel more balanced.
Drinks
- Black coffee or a strong espresso — The bitterness of the coffee highlights the deep, toasty notes in the peanut butter, creating a sophisticated flavor combination.
- A cold glass of almond milk — For a dairy-free option, the subtle nuttiness of almond milk harmonizes beautifully with the peanut butter theme.
- Chai tea latte — The warm spices of chai—cinnamon, cardamom, ginger—are a wonderful, cozy companion to the simple, nutty flavor of the cookies.
Something Sweet
- A small dish of dark chocolate mousse — The intense, bittersweet chocolate is a fantastic partner for the salty-sweet peanut butter, creating a truly decadent dessert duo.
- A drizzle of melted dark chocolate — Simply melt a few chocolate chips and zig-zag it over the cooled cookies for a beautiful and delicious finishing touch.
- A simple berry compote — The tartness of simmered raspberries or strawberries provides a vibrant, juicy counterpoint that cuts the richness of the cookie.
Before You Start: Tips & Ingredient Notes
- Your Peanut Butter Matters. For the best texture, avoid using the super-stiff, shelf-stable peanut butter that’s heavily processed. The natural, “stir-well” kind with just peanuts and salt gives you a much better, softer cookie. If yours is very oily, give it a good stir before measuring.
- Why Room Temperature Egg? A cold egg can cause the peanut butter to seize up and become difficult to mix, leading to a greasy dough. Taking five minutes to let your egg sit on the counter makes the whole process so much smoother.
- Don’t Skip the Fork Press. It’s not just for looks! Flattening the dough balls with a fork ensures they bake evenly. Without it, you’ll end up with domed, undercooked middles because the dense dough can’t spread on its own.
- The Sugar You Choose. Coconut sugar will give you a deeper, almost caramel-like flavor and a darker cookie. Light brown sugar yields a more classic, molasses-kissed taste. Both work beautifully, so it’s really a matter of personal preference.
How to Make Healthy Flourless Peanut Butter Cookies
Step 1: Preheat your oven to 350°F (175°C) and line a baking sheet with parchment paper. This is a quick-baking cookie, so you want that oven fully heated and ready to go. The parchment paper is non-negotiable for easy removal and clean-up—trust me on this.
Step 2: In a medium bowl, combine the peanut butter, sugar, egg, vanilla extract, baking soda, and salt. Now, get ready to stir! Use a sturdy spatula or a wooden spoon and mix until you have a thick, uniform dough. You’ll notice it might look a little gritty at first from the sugar, but keep going until it’s completely smooth and all ingredients are fully incorporated.
Step 3: Scoop the dough. I like using a tablespoon cookie scoop for uniformity, but a regular spoon works just fine. Roll about 1.5 tablespoons of dough between your palms to form a smooth ball. Place the dough balls on your prepared baking sheet, leaving about 2 inches between them as they will spread a bit.
Step 4: This is the signature step! Take a fork and gently press down on each dough ball to flatten it to about a 1/2-inch thickness. Then, rotate the fork 90 degrees and press again to create that classic criss-cross pattern. If the fork starts sticking, dip it in a little bit of water or coconut sugar between presses.
Step 5: If you’re using it, now is the time to sprinkle a tiny pinch of coarse sea salt on top of each cookie. This little bit of saltiness perfectly balances the sweetness and enhances the peanut flavor incredibly.
Step 6: Bake for 9-11 minutes. The trick is to pull them out when the edges are set and look dry, but the centers still appear a tiny bit soft and puffy. They will not look fully done, and that is exactly what you want! They firm up beautifully as they cool, giving you that perfect chewy texture.
Step 7: This is the hardest part: let the cookies cool on the baking sheet for at least 10 minutes. They are extremely fragile when they first come out of the oven. Allowing them to set on the hot pan is crucial for them to hold their shape and develop their final texture.
Step 8: After their initial rest, you can transfer them to a wire rack to cool completely. Or, you know, just eat one warm right then and there. I won’t tell. The bottoms should be a lovely golden brown, and the tops will have a delicate, crackly surface.
Top Mistakes to Avoid
- Mistake: Using the wrong peanut butter. I’ve messed this up before too—using a very dry, commercial brand can result in a crumbly, dry dough that doesn’t spread. The natural oils in a good, stir-able peanut butter are essential for the right texture.
- Mistake: Over-baking the cookies. It’s so tempting to leave them in until they look “done,” but they continue to cook on the hot tray. Pull them out when the edges are just set and the centers look soft. Over-baking is the primary cause of dry, hard cookies.
- Mistake: Skipping the cooling time on the pan. If you try to move them immediately, they will fall apart. That 10-minute rest on the baking sheet is not a suggestion—it’s a critical step that allows them to set and become sturdy enough to handle.
- Mistake: Not measuring the peanut butter correctly. Always use the “spoon and level” method. Scooping the peanut butter directly with the measuring cup can pack it in, leading to an overly dense and oily cookie.
Expert Tips
- Tip: Add a textural twist. For a little crunch, fold in 1/4 cup of chopped roasted peanuts or a tablespoon of flax seeds into the dough right before scooping. It adds a wonderful new dimension.
- Tip: Make them extra fudgy. For an even chewier, almost brownie-like center, try using an extra egg yolk along with the whole egg. The added fat and moisture create an incredibly rich and tender crumb.
- Tip: Create a flavor-infused sugar. Before you start, rub the vanilla bean seeds (if using a pod) into your coconut or brown sugar. This helps to distribute the vanilla flavor more evenly and intensely throughout the entire cookie.
- Tip: Freeze the dough balls for later. This dough freezes beautifully. Scoop and roll the balls, then freeze them solid on a tray before transferring to a bag. You can bake them straight from frozen, just add 1-2 minutes to the baking time.
FAQs
Can I use a different nut butter?
Absolutely! Almond butter or cashew butter work wonderfully as a 1:1 substitute. Just be aware that the flavor will change accordingly. Almond butter will give you a slightly milder, more rustic cookie. The key is to ensure your alternative nut butter is of a similar consistency to natural peanut butter—nice and stir-able, not dry or overly stiff.
Why are my cookies crumbly and dry?
This almost always points to one of two issues: the peanut butter was too dry (see my note on using the right kind!), or the cookies were over-baked. Remember, they firm up as they cool. If you bake them until they look completely solid in the oven, they’ll be rock-hard once cooled. Next time, trust the process and pull them out when the centers still look a bit soft.
Can I make these without an egg?
You can try a “flax egg” as a binder. Mix 1 tablespoon of ground flaxseed with 3 tablespoons of water and let it sit for 5-10 minutes until gelatinous. Use this in place of the egg. The texture will be a bit more delicate and crumbly, and they may not spread quite as much, but it’s a good vegan alternative.
How should I store these cookies?
Once completely cool, store them in an airtight container at room temperature for up to 5 days. They tend to soften a bit over time, which I actually love. If you prefer a crisper cookie, you can gently re-crisp them in a 300°F oven for 3-4 minutes. They also freeze beautifully for up to 3 months.
My cookies didn’t spread at all. What happened?
This is usually a sign that your peanut butter was too thick or your dough was too cold. If your peanut butter isn’t the natural, oily kind, the dough won’t have the necessary fat to spread. Also, if your egg was straight from the fridge, it can make the peanut butter firm up. Always use room temperature ingredients for the best, most predictable results.


Healthy Flourless Peanut Butter Cookies: An Easy One-Bowl Recipe
Healthy Flourless Peanut Butter Cookies are a simple, wholesome treat with a perfect crisp-chewy texture. This easy recipe makes for delightful holiday baking or a comforting, feel-good snack.
Ingredients
For the Ingredients
-
1 cup smooth, natural peanut butter (250 g)
-
3/4 cup coconut sugar or light brown sugar (150 g)
-
1 large egg (at room temperature)
-
1 tsp vanilla extract
-
1/2 tsp baking soda
-
1/4 tsp fine sea salt
-
coarse sea salt (for sprinkling)
Instructions
-
Preheat your oven to 350°F (175°C) and line a baking sheet with parchment paper.01
-
In a medium bowl, combine the peanut butter, sugar, egg, vanilla extract, baking soda, and salt.02
-
Use a sturdy spatula or a wooden spoon and mix until you have a thick, uniform dough.03
-
Roll about 1.5 tablespoons of dough between your palms to form a smooth ball.04
-
Place the dough balls on your prepared baking sheet, leaving about 2 inches between them.05
-
Take a fork and gently press down on each dough ball to flatten it to about a 1/2-inch thickness.06
-
Rotate the fork 90 degrees and press again to create that classic criss-cross pattern.07
-
If you're using it, now is the time to sprinkle a tiny pinch of coarse sea salt on top of each cookie.08
-
Bake for 9-11 minutes.09
-
Let the cookies cool on the baking sheet for at least 10 minutes.10
-
After their initial rest, you can transfer them to a wire rack to cool completely.11
Not what you're looking for?


