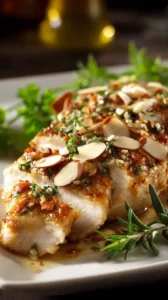
This Herb Crusted Chicken delivers juicy, tender chicken with a fragrant, savory blanket of herbs, garlic, and Parmesan. It’s elegant enough for a dinner party yet simple enough for a busy weeknight. The golden-brown crust creates incredible texture and aroma, making this recipe a reliable favorite.
Looking for Herb Crusted Chicken inspiration? You'll love what we have! Explore more Chicken Breast Recipes recipes or discover our Appetizer Recipes favorites.


Why You’ll Love This Herb Crusted Chicken
- Maximum Flavor: The herb crust does all the heavy lifting with minimal effort.
- Perfect Texture: A satisfying crunch gives way to tender, juicy chicken inside.
- Incredibly Versatile: Serve over salad, with potatoes, or in a sandwich.
- Pro-Level Results: Impressive, gorgeous, and nearly impossible to mess up.
Ingredients & Tools
- 4 boneless, skinless chicken breasts (about 150-180 g each)
- 60 ml extra virgin olive oil, divided
- 2 cloves garlic, minced
- 80 g Panko breadcrumbs
- 40 g freshly grated Parmesan cheese
- 15 g fresh parsley, finely chopped
- 5 g fresh thyme leaves
- 5 g fresh rosemary, finely chopped
- 1 tsp lemon zest
- 1/2 tsp salt, plus more for seasoning
- 1/2 tsp black pepper, plus more for seasoning
- 1/4 tsp smoked paprika (optional, for color)
Tools: A sharp knife, cutting board, mixing bowls, a baking sheet, parchment paper or a silicone baking mat, and a meat mallet or rolling pin (for pounding the chicken).
Notes: Fresh herbs are non-negotiable for vibrant flavor. Lemon zest cuts through richness and makes flavors pop.
Nutrition (per serving)
| Calories: | 320 kcal |
| Protein: | 35 g |
| Fat: | 16 g |
| Carbs: | 8 g |
| Fiber: | 1 g |
Serves: 4 | Prep Time: 15 minutes | Cook Time: 20 minutes | Total Time: 35 minutes
Before You Start: Tips & Ingredient Notes
- Pound your chicken to an even thickness. This is the single most important step for ensuring your chicken cooks evenly. No more dry, overcooked edges with a raw center! A uniform thickness means perfect doneness from edge to edge.
- Fresh herbs are a game-changer. I know it’s tempting to use dried, but trust me on this. The flavor and fragrance from fresh rosemary, thyme, and parsley are what make this crust so incredibly aromatic and delicious.
- Don’t skip the Panko. Panko breadcrumbs are lighter and flakier than traditional breadcrumbs, which results in a much crispier, less dense crust that won’t get soggy. It makes all the difference for that perfect golden crunch.
- Grate your own Parmesan. The pre-grated stuff in a tub often contains anti-caking agents that can prevent it from melting and browning properly. A block of Parmigiano-Reggiano that you grate yourself will have far superior flavor and texture.
How to Make Herb Crusted Chicken
Step 1: First, prep your chicken. Place each chicken breast between two pieces of plastic wrap or in a large zip-top bag. Using a meat mallet, rolling pin, or even the bottom of a heavy pan, gently pound the thicker ends until the entire breast is an even 2 cm thickness. This might feel like a small step, but it’s crucial for even cooking. Pat the chicken completely dry with paper towels—this helps the oil and crust stick much better.
Step 2: Now, let’s make that incredible herb crust. In a medium bowl, combine the Panko breadcrumbs, grated Parmesan, all of the chopped fresh herbs, lemon zest, salt, pepper, and smoked paprika if you’re using it. Use a fork or your fingers to mix everything together, making sure the herbs and lemon zest are evenly distributed. You’ll notice the aroma is just fantastic already.
Step 3: In a small bowl, mix together about two-thirds of the olive oil with the minced garlic. Brush this garlic-oil mixture generously over the top and sides of each pounded chicken breast. This layer not only adds flavor but acts as the “glue” for our crust. Season both sides of the chicken lightly with a little extra salt and pepper.
Step 4: Time to create the crust! Take your herb and breadcrumb mixture and press it firmly onto the top and sides of each chicken breast. You want a nice, thick, even layer. Don’t be shy—really pack it on there. The pressure helps the crust adhere during cooking so it doesn’t fall off when you slice into it.
Step 5: Preheat your oven to 200°C (400°F) and line a baking sheet with parchment paper. Drizzle the remaining olive oil onto the prepared sheet and place the crusted chicken breasts on top, crust-side up. This little extra oil on the pan helps the bottom get a bit crispy too. Bake for 18-22 minutes.
Step 6: The trick is to not open the oven door too early. You’re waiting for that beautiful golden-brown color. The chicken is done when the internal temperature reaches 74°C (165°F) on a meat thermometer and the crust is crisp. If you want a little extra browning, you can pop it under the grill for the last minute or two—just watch it closely!
Step 7: Once out of the oven, transfer the chicken to a clean cutting board and let it rest for 5 minutes. This is non-negotiable! Resting allows the juices to redistribute throughout the meat, ensuring every single bite is moist and tender. Then, slice and serve immediately.
Storage & Freshness Guide
- Fridge: Store in an airtight container for up to 3 days.
- Freezer: Freeze before baking; cook from frozen, adding 10-15 minutes.
- Reviving: Reheat in a 180°C (350°F) oven for 10-15 minutes to crisp the crust.
Serving Suggestions
Complementary Dishes
- Garlic Mashed Potatoes — The creamy, comforting potatoes are the perfect canvas for the savory, crispy chicken. They soak up any delicious juices left on the plate.
- Simple Arugula Salad with Lemon Vinaigrette — The peppery arugula and bright, acidic dressing cut through the richness of the chicken beautifully, balancing the whole meal.
- Roasted Asparagus or Green Beans — A simple side of roasted veggies adds a lovely color and a healthy element that complements the herby flavors without overpowering them.
Drinks
- A Crisp Sauvignon Blanc — Its citrusy notes will echo the lemon zest in the crust and cleanse your palate between bites of the rich, herby chicken.
- Sparkling Water with Lemon — For a non-alcoholic option, the bubbles and citrus are incredibly refreshing and do a wonderful job of balancing the meal’s savory depth.
- Light Pale Ale — The slight bitterness and carbonation of a pale ale can stand up to the robust herbs and cut through the richness of the Parmesan crust.
Something Sweet
- Lemon Sorbet — A scoop of tangy, refreshing sorbet is the perfect palate-cleanser after a savory meal and continues the lovely citrus theme from the chicken.
- Vanilla Panna Cotta with Berry Compote — The smooth, cool creaminess of the panna cotta provides a delightful contrast to the warm, textured chicken you just enjoyed.
- Dark Chocolate Espresso Truffles — Just one or two of these rich, intense bites offer a sophisticated and satisfying end to the dinner without being too heavy.
Top Mistakes to Avoid
- Mistake: Not pounding the chicken. I’ve messed this up before too, thinking I could just cook it as is. The result is always uneven—the thin end is tough and dry long before the thick center is cooked through. A few minutes of pounding saves the entire dish.
- Mistake: Using dried herbs instead of fresh. Dried herbs have a more concentrated, sometimes dusty flavor that just doesn’t provide the same bright, aromatic quality. Your crust will taste flat and lack that wow factor.
- Mistake: Not packing the crust on firmly. If you just sprinkle the mixture on, it will fall off during cooking or when you try to serve it. You need to use the palm of your hand to press and adhere the crust to the oiled chicken surface.
- Mistake: Skipping the rest time. Slicing into the chicken straight from the oven will cause all those precious, flavorful juices to run out onto the cutting board, leaving you with a drier piece of meat. Patience is a virtue here.
Expert Tips
- Tip: Use a meat thermometer. This is the only way to guarantee perfectly cooked chicken every single time. Pull it from the oven at 74°C (165°F)—it will carry over to a safe temperature while resting. No more guessing or cutting into it to check.
- Tip: Toast your Panko first. For an even deeper flavor and extra crunch, spread the Panko breadcrumbs on a baking sheet and toast them in the oven for 3-4 minutes at 180°C (350°F) until lightly golden before mixing them with the other crust ingredients.
- Tip: Add a touch of Dijon. For an extra layer of flavor, mix a teaspoon of Dijon mustard into the olive oil and garlic mixture you brush onto the chicken. It adds a subtle tang that works wonderfully with the herbs and Parmesan.
- Tip: Make it ahead. You can assemble the entire dish—pound the chicken, make the crust, and press it on—then cover and refrigerate it for up to 4 hours before baking. It’s a fantastic timesaver for dinner parties.
FAQs
Can I use chicken thighs instead of breasts?
Absolutely! Boneless, skinless chicken thighs work wonderfully here. They’re inherently more forgiving and juicy. Just be aware that their cooking time might be a few minutes longer due to their higher fat content. Use a meat thermometer to be sure—they’re done at the same 74°C (165°F) internal temperature.
My crust isn’t sticking to the chicken. What did I do wrong?
This usually happens for one of two reasons. First, the chicken wasn’t patted dry, so the oil couldn’t properly adhere. Second, you didn’t press the crust on firmly enough. Really use the palm of your hand to pack that mixture onto the oiled surface. It should feel like a solid layer before it goes in the oven.
Can I make this recipe gluten-free?
Yes, easily! Just swap the Panko breadcrumbs for your favorite gluten-free breadcrumb alternative. Many brands make gluten-free Panko-style crumbs that will give you a very similar light and crispy texture. All the other ingredients are naturally gluten-free.
How do I store and reheat leftovers?
Store any leftover chicken in an airtight container in the refrigerator for up to 3 days. To reheat, avoid the microwave as it will make the crust soft and soggy. Instead, place it on a baking sheet and warm it in a 180°C (350°F) oven for about 10-15 minutes, until heated through. This will help the crust crisp back up.
Can I freeze the herb-crusted chicken?
You can, but with a caveat. It’s best to freeze it before baking. Assemble the chicken with the crust, place it on a parchment-lined tray, and freeze until solid. Then transfer the frozen chicken breasts to a freezer bag. You can bake them straight from frozen, adding 10-15 minutes to the cooking time. The texture of the fresh herbs may soften slightly upon thawing, but the flavor will still be great.


Herb Crusted Chicken
Make perfect Herb Crusted Chicken with a crispy Parmesan & fresh herb crust. Juicy, flavorful, and ready in 35 minutes. Get the easy recipe now!
Ingredients
For the Ingredients
-
4 boneless, skinless chicken breasts (about 150-180 g each)
-
60 ml extra virgin olive oil (divided)
-
2 cloves garlic (minced)
-
80 g Panko breadcrumbs
-
40 g freshly grated Parmesan cheese
-
15 g fresh parsley (finely chopped)
-
5 g fresh thyme leaves
-
5 g fresh rosemary (finely chopped)
-
1 tsp lemon zest
-
1/2 tsp salt (plus more for seasoning)
-
1/2 tsp black pepper (plus more for seasoning)
-
1/4 tsp smoked paprika (optional, for color)
Instructions
-
First, prep your chicken. Place each chicken breast between two pieces of plastic wrap or in a large zip-top bag. Using a meat mallet, rolling pin, or even the bottom of a heavy pan, gently pound the thicker ends until the entire breast is an even 2 cm thickness. This might feel like a small step, but it’s crucial for even cooking. Pat the chicken completely dry with paper towels—this helps the oil and crust stick much better.01
-
Now, let’s make that incredible herb crust. In a medium bowl, combine the Panko breadcrumbs, grated Parmesan, all of the chopped fresh herbs, lemon zest, salt, pepper, and smoked paprika if you’re using it. Use a fork or your fingers to mix everything together, making sure the herbs and lemon zest are evenly distributed. You’ll notice the aroma is just fantastic already.02
-
In a small bowl, mix together about two-thirds of the olive oil with the minced garlic. Brush this garlic-oil mixture generously over the top and sides of each pounded chicken breast. This layer not only adds flavor but acts as the “glue” for our crust. Season both sides of the chicken lightly with a little extra salt and pepper.03
-
Time to create the crust! Take your herb and breadcrumb mixture and press it firmly onto the top and sides of each chicken breast. You want a nice, thick, even layer. Don’t be shy—really pack it on there. The pressure helps the crust adhere during cooking so it doesn’t fall off when you slice into it.04
-
Preheat your oven to 200°C (400°F) and line a baking sheet with parchment paper. Drizzle the remaining olive oil onto the prepared sheet and place the crusted chicken breasts on top, crust-side up. This little extra oil on the pan helps the bottom get a bit crispy too. Bake for 18-22 minutes.05
-
The trick is to not open the oven door too early. You’re waiting for that beautiful golden-brown color. The chicken is done when the internal temperature reaches 74°C (165°F) on a meat thermometer and the crust is crisp. If you want a little extra browning, you can pop it under the grill for the last minute or two—just watch it closely!06
-
Once out of the oven, transfer the chicken to a clean cutting board and let it rest for 5 minutes. This is non-negotiable! Resting allows the juices to redistribute throughout the meat, ensuring every single bite is moist and tender. Then, slice and serve immediately.07
Not what you're looking for?


