There’s a certain magic that happens in my kitchen every December, and it always begins with a bowl of peanut butter cookie dough. For me, these holiday peanut butter blossoms are pure, edible nostalgia. That moment when a soft, crinkly cookie hugs a rich chocolate kiss? It’s the taste of my childhood holidays, and it’s the ultimate comfort food recipe that never fails to fill the house with warmth. If you’re looking to create that same festive feeling, let this be your joyful start to holiday baking. I promise, these classic blossoms are beloved for a reason.
Honestly, this is one of those easy Christmas treats that delivers so much joy for so little effort. Whether you’re assembling a grand platter or need last-minute Christmas dessert ideas, these cookies are a guaranteed smile-maker. They’ve earned their spot as a standout among unique Christmas cookies, with that signature chocolate center making them a star on any table of holiday cookies. Truly, no spread of holiday treats feels complete without them. So, if you’re searching through Christmas cookies recipes for something reliably wonderful and wonderfully simple, you’ve just found your recipe. Let’s make some magic.
Love Holiday Peanut Butter Blossoms? So do we! If you're into Christmas Cookie or curious about Chicken Thigh Recipes, you'll find plenty of inspiration below.


Why You’ll Love This Holiday Peanut Butter Blossoms
- Perfect Texture Combo: Soft, chewy cookie with a sandy crumb and smooth, melting chocolate.
- Fun to Make: Rolling dough and pressing chocolate is festive and satisfying for all ages.
- Make-Ahead Dream: Dough chills well; baked cookies freeze beautifully for busy seasons.
- Universally Beloved: Classic peanut butter and chocolate pleases every crowd.
Ingredients & Tools
- 1 ¾ cups all-purpose flour
- 1 tsp baking soda
- ½ tsp salt
- ½ cup unsalted butter, softened to room temperature
- ½ cup creamy peanut butter
- ½ cup granulated sugar, plus extra for rolling
- ½ cup light brown sugar, packed
- 1 large egg, at room temperature
- 1 tsp vanilla extract
- 1 bag (9 oz) milk chocolate Hershey’s Kisses, unwrapped
Tools: Stand mixer or hand mixer, medium bowl, baking sheets, parchment paper or silicone baking mats, small bowl for sugar, wire cooling rack.
Notes: Room temperature butter and egg are crucial for smooth dough. Creamy peanut butter is standard, but crunchy can be used for texture.
Nutrition (per serving)
| Calories: | 125 kcal |
| Protein: | 2 g |
| Fat: | 6 g |
| Carbs: | 16 g |
| Fiber: | 0.5 g |
Serves: 36 | Prep Time: 20 minutes | Cook Time: 8 minutes | Total Time: 28 minutes
Before You Start: Tips & Ingredient Notes
- Room temperature is non-negotiable. Your butter and egg need to be truly at room temp. If the butter is too cold, your dough will be stiff and difficult to mix; if it’s melted, your cookies will spread too much. An easy test: your finger should leave a slight indentation in the butter without sinking in.
- Unwrap all the kisses first. This seems like a small thing, but trust me—you do not want to be frantically unwrapping chocolates while your hot cookies are waiting on the baking sheet. Get this tedious task out of the way before you even preheat the oven.
- Don’t skip the sugar roll. Rolling the dough balls in granulated sugar before baking isn’t just for looks. It creates that beautiful, sparkly, slightly crackled surface that is signature to these cookies. It also adds a delightful little crunch to the exterior.
- Consider your peanut butter. For the most consistent results, use a standard commercial peanut butter like Jif or Skippy. Natural peanut butters that separate can alter the dough’s texture and fat content, potentially leading to oily or crumbly cookies.
How to Make Holiday Peanut Butter Blossoms
Step 1: First, preheat your oven to 375°F (190°C). Line your baking sheets with parchment paper or silicone mats. This is a small step that makes a huge difference—it prevents sticking and ensures even browning on the bottom of your cookies. In a medium bowl, whisk together the flour, baking soda, and salt. This aerates the dry ingredients and ensures the leavening is evenly distributed, which is key for a uniform rise.
Step 2: Now, in the bowl of your stand mixer fitted with the paddle attachment (or a large bowl if using a hand mixer), cream together the softened butter, peanut butter, granulated sugar, and brown sugar. You’ll want to beat this on medium-high speed for a good 2-3 minutes, until the mixture becomes light, pale, and fluffy. Scrape down the sides of the bowl halfway through. This step is all about incorporating air—it’s what gives the cookies their lovely texture.
Step 3: Reduce the mixer speed to low and add the egg and vanilla extract. Mix just until they are fully incorporated, scraping the bowl again to make sure everything is homogenous. The mixture might look a little curdled at first, but it will smooth out as you mix. The vanilla adds a warm, aromatic depth that complements the peanut butter perfectly.
Step 4: With the mixer still on low, gradually add the dry ingredients to the wet ingredients. Mix only until the flour streaks have just disappeared and a soft dough has formed. Be careful not to overmix here! Overworking the dough once the flour is added can lead to tough cookies. The dough should be soft and slightly sticky, but easy to handle.
Step 5: Pour some extra granulated sugar into a small bowl. Scoop out about 1 tablespoon of dough for each cookie and roll it between your palms to form a smooth ball. Roll each ball in the granulated sugar until it’s completely coated, then place it on your prepared baking sheet, leaving about 2 inches between each one. They need a little space to spread.
Step 6: Bake for 7 to 9 minutes. The trick is to pull them out when the edges are just barely starting to turn a light golden brown and the tops still look slightly underdone. They will not look fully set—and that’s exactly what you want! This is the secret to a soft, chewy cookie. If you overbake them, they’ll be dry and crumbly.
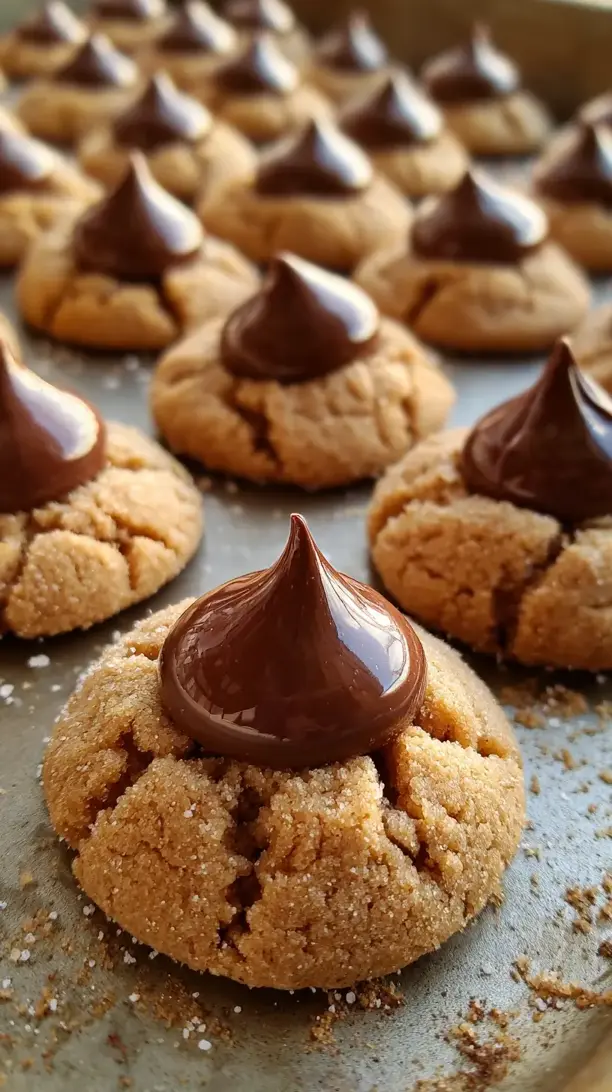
Step 7: As soon as you remove the baking sheet from the oven, working quickly but carefully, press a chocolate kiss firmly into the center of each hot cookie. You’ll notice the cookie will crack slightly around the edges of the chocolate—this is normal and part of their charming, rustic look. The residual heat from the cookie will slightly melt the base of the kiss, helping it adhere.
Step 8: Let the cookies cool on the baking sheet for 5 minutes before transferring them to a wire rack to cool completely. This resting period allows them to set up so they don’t fall apart when you move them. The chocolate will firm back up as it cools. And then… try to resist eating them all at once!
Storage & Freshness Guide
- Fridge: Not recommended; store airtight at room temperature.
- Freezer: Freeze baked cookies in airtight container for up to 3 months.
- Reviving: Warm in 300°F oven 2–3 minutes to crisp exterior.
Serving Suggestions
Complementary Dishes
- A Festive Cookie Platter — Pair them with classic shortbread, chewy ginger molasses cookies, and white chocolate cranberry oatmeal cookies for a beautiful and varied holiday spread that offers something for everyone.
- Vanilla Bean Ice Cream — Serve a couple of slightly warmed blossoms alongside a scoop of high-quality vanilla ice cream. The warm cookie and cool, creamy ice cream is a decadent dessert combination that feels truly special.
- Hot Cocoa with Whipped Cream — The rich, chocolatey drink is a natural partner for the peanut butter and chocolate in the cookie, making for the ultimate cozy afternoon treat by the Christmas tree.
Drinks
- A Glass of Cold Milk — It’s the timeless, unbeatable pairing. The creaminess of the milk cuts through the richness of the peanut butter and chocolate, cleansing the palate perfectly between bites.
- Dark Roast Coffee — The slight bitterness of a good, strong coffee provides a wonderful contrast to the sweetness of the cookie, elevating your coffee break into a moment of pure bliss.
- Peppermint Tea — The cool, refreshing flavor of peppermint offers a lovely, light counterpoint to the rich cookie, making the whole experience feel festive and bright.
Something Sweet
- Peppermint Bark — A small piece of crunchy, minty white and dark chocolate bark provides a different texture and a burst of cool flavor that complements the blossoms without competing with them.
- Cinnamon Sugar Donut Holes — For a truly indulgent dessert table, the warm spice of a cinnamon donut hole is a fantastic friend to the peanut butter blossom’s nutty sweetness.
- Simple Fruit Salad — A bright salad with oranges, pomegranate seeds, and a hint of mint offers a fresh, juicy palate cleanser that balances the richness of a cookie-heavy dessert spread.
Top Mistakes to Avoid
- Mistake: Using melted butter. This is the number one reason cookies spread too much. Melted butter causes the dough to relax and flatten dramatically in the oven, resulting in thin, greasy cookies instead of soft, plump mounds.
- Mistake: Overbaking the cookies. I’ve messed this up before too, thinking they needed more time. They continue to cook on the hot baking sheet after being removed from the oven. Pull them out when they still look a little underbaked in the center for the perfect chewy texture.
- Mistake: Pressing the kisses in after the cookies have cooled. If you wait too long, the chocolate won’t stick properly and will just sit on top, falling off with the first bite. The window for pressing is when they are fresh out of the oven and still very pliable.
- Mistake: Overmixing the dough after adding flour. This develops the gluten in the flour, leading to a tough, cake-like cookie instead of the desired tender and crumbly texture. Mix just until you no longer see streaks of flour.
Expert Tips
- Tip: Chill the dough if your kitchen is warm. If you find the dough is too soft to roll, pop it in the refrigerator for 15-20 minutes. This firms up the butter, making the dough easier to handle and helping the cookies hold their shape better in the oven.
- Tip: Use a cookie scoop for uniformity. A small #60 cookie scoop (which holds about 1 tablespoon) is my secret weapon. It ensures all your cookies are the same size, which means they will bake evenly and look professionally made.
- Tip: Experiment with different chocolates. While milk chocolate kisses are classic, don’t be afraid to try dark chocolate kisses for a richer, less sweet flavor, or even hugs for a swirled look. You can also use Rolos for a caramel surprise in the center!
- Tip: Refresh stored cookies. If your cookies have been in an airtight container for a few days and have softened, you can pop them in a 300°F oven for 2-3 minutes to crisp up the exterior slightly and warm them through. It makes them taste freshly baked again.
FAQs
Can I make the dough ahead of time?
Absolutely, and it’s a great time-saver! You can cover the bowl of dough tightly and refrigerate it for up to 2 days. The flavor actually deepens a bit. When you’re ready to bake, let the dough sit at room temperature for 15-20 minutes to soften slightly before rolling and baking. You can also roll the dough balls in sugar, place them on a parchment-lined tray, and freeze them solid. Once frozen, transfer them to a zip-top bag and bake directly from frozen, adding 1-2 minutes to the baking time.
Why did my cookies spread too much?
This is almost always a temperature issue. The most common culprit is butter that was too warm or even melted. Another reason could be a warm baking sheet—always allow your baking sheets to cool completely between batches. If you’re reusing a hot sheet, the dough will start melting before it even hits the oven. Using a light-colored baking sheet instead of a dark one can also help prevent over-browning and excessive spreading on the bottom.
Can I use natural peanut butter?
You can, but it’s a bit of a gamble. Natural peanut butters often have a different oil content and can separate. This can lead to a greasy, crumbly, or overly spread-out cookie. If you want to try it, make sure you stir the natural peanut butter very, very well so the oil is fully incorporated, and be prepared for a slightly different texture. For guaranteed classic results, stick with a stabilized brand like Jif or Skippy.
How should I store these cookies?
Once the cookies are completely cooled, store them in an airtight container at room temperature. Layer them between sheets of parchment or wax paper to prevent them from sticking together. They will stay fresh and delicious for up to 5 days. The chocolate kiss may lose a little of its shine over time, but the flavor will still be fantastic. You can also freeze them for up to 3 months.
My chocolate kiss melted completely! What happened?
This usually means your cookies were too hot when you pressed the kiss in, or your oven temperature is running high. The cookies should be just out of the oven, but not scalding hot. If this keeps happening, try letting the cookies cool on the sheet for just 1 minute before adding the chocolate. Also, an oven thermometer is a cheap and invaluable tool to ensure your oven is at the correct temperature.


Holiday Peanut Butter Blossoms: An Easy Christmas Cookie Recipe
Holiday Peanut Butter Blossoms are the ultimate easy Christmas treat. These soft, crinkly peanut butter blossom cookies are pure festive magic for your dessert table.
Ingredients
For the Ingredients
-
1 ¾ cups all-purpose flour
-
1 tsp baking soda
-
½ tsp salt
-
½ cup unsalted butter (softened to room temperature)
-
½ cup creamy peanut butter
-
½ cup granulated sugar (plus extra for rolling)
-
½ cup light brown sugar (packed)
-
1 large egg (at room temperature)
-
1 tsp vanilla extract
-
1 bag milk chocolate Hershey's Kisses (9 oz, unwrapped)
Instructions
-
First, preheat your oven to 375°F (190°C). Line your baking sheets with parchment paper or silicone mats. In a medium bowl, whisk together the flour, baking soda, and salt.01
-
In the bowl of your stand mixer fitted with the paddle attachment (or a large bowl if using a hand mixer), cream together the softened butter, peanut butter, granulated sugar, and brown sugar. Beat this on medium-high speed for a good 2-3 minutes, until the mixture becomes light, pale, and fluffy. Scrape down the sides of the bowl halfway through.02
-
Reduce the mixer speed to low and add the egg and vanilla extract. Mix just until they are fully incorporated, scraping the bowl again to make sure everything is homogenous.03
-
With the mixer still on low, gradually add the dry ingredients to the wet ingredients. Mix only until the flour streaks have just disappeared and a soft dough has formed.04
-
Pour some extra granulated sugar into a small bowl. Scoop out about 1 tablespoon of dough for each cookie and roll it between your palms to form a smooth ball. Roll each ball in the granulated sugar until it's completely coated, then place it on your prepared baking sheet, leaving about 2 inches between each one.05
-
Bake for 7 to 9 minutes. Pull them out when the edges are just barely starting to turn a light golden brown and the tops still look slightly underdone.06
-
As soon as you remove the baking sheet from the oven, working quickly but carefully, press a chocolate kiss firmly into the center of each hot cookie.07
-
Let the cookies cool on the baking sheet for 5 minutes before transferring them to a wire rack to cool completely.08
Not what you're looking for?


