There’s something truly magical about holiday baking that fills the home with warmth, but let’s be honest—sometimes we need a shortcut to that joy. That’s exactly why I created these Holiday Sugar Cookie Bars. They’re my go-to for capturing that classic, buttery vanilla magic without any rolling-pin stress. Think of them as your new secret weapon for the easiest easy Christmas treats you can imagine, all baked in one simple pan.
If you’re sifting through Christmas cookies recipes and feeling a bit overwhelmed, let this be your cozy comfort food recipe instead. These soft, chewy bars, topped with cheerful sprinkles, are a perfect addition to your list of Christmas dessert ideas. They make wonderful holiday treats for sharing at parties or leaving out on a plate for Santa. Truly, they are the ultimate holiday cookies Christmas celebrations are made for.
So whether you’re planning a festive platter of Christmas sweets or just want a simple, happy project to bake with your family, these bars are the answer. They deliver all the flavor and fun of the season, letting you spend less time fussing and more time savoring the sweet moments with the people you love.
Nothing beats a great Holiday Sugar Cookie Bars. Whether you're a fan of Christmas Cookie or want to try something from our Appetizers & Snacks selection, keep scrolling!


Why You’ll Love This Holiday Sugar Cookie Bars
- Maximum Festivity: All the sugar cookie taste without rolling or cutting.
- Soft & Chewy: Tender crumb with a satisfying, slightly chewy edge.
- Creative Canvas: Customize frosting and sprinkles for any holiday theme.
- Perfect for Sharing: Travels well and makes a fantastic edible gift.
Ingredients & Tools
- 226 g (1 cup) unsalted butter, softened to room temperature
- 200 g (1 cup) granulated sugar
- 1 large egg, at room temperature
- 2 tsp pure vanilla extract
- 280 g (2 ¼ cups) all-purpose flour
- ½ tsp baking powder
- ½ tsp salt
- For the Frosting:
- 113 g (½ cup) unsalted butter, softened
- 240 g (2 cups) powdered sugar, sifted
- 2 tbsp milk or heavy cream
- 1 tsp pure vanilla extract
- A pinch of salt
- Assorted holiday sprinkles, for decorating
Tools: 9×13 inch baking pan, electric hand mixer or stand mixer, parchment paper, medium bowl, spatula
Notes: Using room temperature ingredients ensures smooth dough and even baking. Vanilla in both cookie and frosting adds warm, familiar flavor.
Nutrition (per serving)
| Calories: | 380 kcal |
| Protein: | 3 g |
| Fat: | 18 g |
| Carbs: | 52 g |
| Fiber: | 0.5 g |
Serves: 16 | Prep Time: 20 minutes | Cook Time: 20-25 minutes | Total Time: 45 minutes (plus cooling)
Before You Start: Tips & Ingredient Notes
- What does “softened butter” really mean? You should be able to press your finger into the butter easily, leaving a clear indentation. It should not be melty or greasy. If it’s too cold, your dough will be crumbly; if it’s melted, your bars will spread too much and become greasy.
- Why sift the powdered sugar? For the creamiest, lump-free frosting, you absolutely must sift the powdered sugar. It breaks up any clumps and incorporates air, resulting in a frosting that’s light, smooth, and a dream to spread.
- Don’t skip the salt. That half teaspoon in the cookie dough might seem small, but it’s crucial for balancing the sweetness and enhancing the buttery, vanilla flavors. It keeps the bars from tasting one-dimensionally sweet.
- The importance of room temperature eggs. A cold egg can cause the creamed butter and sugar to seize up and look curdled. A room temperature egg blends in seamlessly, creating a smooth, emulsified base for your dough.
How to Make Holiday Sugar Cookie Bars
Step 1: Preheat your oven to 350°F (175°C). Line your 9×13 inch baking pan with parchment paper, leaving some overhang on the two longer sides. This creates “handles” that will make it incredibly easy to lift the entire slab of cookie bars out of the pan later for clean slicing.
Step 2: In a large bowl, use an electric mixer to cream together the softened butter and granulated sugar. Beat it on medium-high speed for a good 2-3 minutes, until the mixture is light, pale in color, and fluffy. You’ll notice it looks almost like a soft whipped cream. This step is key for creating that tender texture, as it incorporates air into the batter.
Step 3: Scrape down the sides of the bowl with a spatula. Add the room temperature egg and vanilla extract, then mix on medium speed until just combined. The mixture might look a little curdled at first, but it will smooth out as you mix—don’t worry!
Step 4: In a separate medium bowl, whisk together the flour, baking powder, and salt. This ensures the leavening and salt are evenly distributed throughout the flour. With your mixer on low speed, gradually add the dry ingredients to the wet ingredients. Mix only until the flour streaks disappear and a soft dough forms. Be careful not to overmix, as this can lead to tough bars.
Step 5: Transfer the cookie dough to your prepared pan. It will be quite thick. Use your fingers or the bottom of a measuring cup to press the dough into a smooth, even layer across the entire bottom of the pan. Getting it even is important for consistent baking.
Step 6: Bake for 20-25 minutes. You’re looking for the edges to be a very light golden brown and the top to look set. The center might still seem a tiny bit soft—that’s perfect! It will continue to cook as it cools, resulting in a beautifully soft and chewy bar. Do not overbake.
Step 7: Place the pan on a wire rack and allow the cookie base to cool completely. This is a patient step—if you frost a warm base, the buttercream will melt into a sad, runny puddle. It usually takes about 1-2 hours to cool fully.
Step 8: While the base cools, make the frosting. In a clean bowl, beat the softened butter until smooth. Gradually add the sifted powdered sugar, milk (or cream), vanilla, and salt. Start on low speed to avoid a powdered sugar cloud, then increase to high and beat for 2-3 minutes until the frosting is very light and fluffy.
Step 9: Once the cookie base is completely cool, spread the frosting evenly over the top using an offset spatula or a butter knife. Work from the center outward for the smoothest finish.
Step 10: Immediately after frosting, shower the top with your holiday sprinkles! If you wait, the frosting will form a “skin” and the sprinkles won’t stick as well. Be generous—this is the festive part!
Step 11: For the cleanest slices, you can place the pan in the refrigerator for about 20-30 minutes to let the frosting set a bit. Then, use the parchment paper handles to lift the entire slab onto a cutting board. Use a sharp knife to slice into bars. Wipe the knife clean between cuts for neat edges.
Storage & Freshness Guide
- Fridge: Store frosted bars in an airtight container for up to 5 days.
- Freezer: Freeze unfrosted slab wrapped tightly for up to 3 months; frost after thawing.
- Reviving: Bring to room temperature before serving for best texture.
Serving Suggestions
Complementary Dishes
- A mug of rich hot chocolate — The deep, chocolatey warmth is a perfect companion to the sweet, vanilla-forward bars, creating a classic holiday flavor pairing.
- A cheese and charcuterie board — The salty, savory elements from the cheese and cured meats provide a wonderful contrast that makes the sweet cookie bars even more of a treat.
- Spiced apple cider — The warm cinnamon and clove notes in the cider echo the cozy, festive feeling of the bars, making the whole experience feel even more seasonal.
Drinks
- A cold glass of milk — It’s a timeless pairing for a reason. The cool, creamy milk cuts through the sweetness and just feels right.
- Peppermint tea — The refreshing, cool mint flavor cleanses the palate and complements the vanilla frosting beautifully without being overpowering.
- Eggnog latte — For the ultimate indulgence, the rich, spiced flavors of eggnog in a warm latte make these bars taste like a full-blown holiday party.
Something Sweet
- Peppermint bark — The combination of chocolate and cool peppermint offers a different texture and flavor profile that pairs wonderfully with the soft, buttery bars.
- Gingerbread men — Serve these alongside for a cookie platter that covers all the classic holiday spice and sweet bases.
- A simple scoop of vanilla ice cream — For a next-level dessert, serve a slightly warmed bar with a scoop of cold ice cream on top. The contrast is divine.
Top Mistakes to Avoid
- Mistake: Using melted butter. This is the number one error. Melted butter will cause your bars to spread excessively and become greasy and dense, rather than light and tender.
- Mistake: Frosting the warm cookie base. I’ve been impatient and done this before, and it’s a mess. The heat melts the butter in the frosting, making it slide right off and soak into the cookie, creating a soggy, sticky situation.
- Mistake: Overmixing the dough. Once you add the flour, mix only until it’s just incorporated. Overworking the dough develops the gluten in the flour, which can make your bars tough and chewy in a bad way.
- Mistake: Overbaking. The bars continue to cook as they cool. If you wait for them to look completely firm and golden in the center, they’ll be dry and crumbly once cooled. Take them out when the edges are just lightly golden.
Expert Tips
- Tip: For an extra layer of flavor, add ¼ teaspoon of almond extract to the cookie dough along with the vanilla. It gives a subtle, bakery-style depth that is absolutely incredible.
- Tip: If your butter is still cold, you can quickly soften it by cutting it into tablespoons and microwaving on a plate for 5-second bursts, flipping after each burst. It should be soft but not melted.
- Tip: To get super clean, professional-looking slices, dip your sharp knife in hot water and wipe it dry before each cut. The heat glides through the frosting and cookie layers seamlessly.
- Tip: For a sturdier frosting that holds its shape perfectly, use half butter and half vegetable shortening. The shortening provides more stability, especially if your kitchen is warm.
- Tip: If you want to make these ahead of time, bake and cool the base, then wrap it tightly in plastic wrap. Frost and decorate the day you plan to serve them for the freshest taste and texture.
FAQs
Can I make these cookie bars ahead of time?
Absolutely! They are a great make-ahead dessert. You can bake and cool the base up to two days in advance; just wrap the pan tightly in plastic wrap once completely cool. Frost and decorate within 24 hours of serving for the best texture. The fully assembled bars will keep in an airtight container at room temperature for about 2 days, or in the fridge for up to 5 days.
Can I freeze Holiday Sugar Cookie Bars?
Yes, they freeze beautifully. It’s best to freeze them without the frosting for the best texture upon thawing. Wrap the cooled, unfrosted cookie slab tightly in plastic wrap and then foil, and freeze for up to 3 months. Thaw overnight in the fridge, then bring to room temperature before frosting and serving. You can freeze frosted bars, but the frosting texture can become slightly less creamy.
My dough is really sticky and hard to press into the pan. What did I do wrong?
This usually happens if the butter was too warm or if you accidentally added too much flour by not measuring properly. To fix it, you can lightly dampen your fingers or the bottom of your measuring cup with water to prevent sticking while you press the dough. For next time, fluff your flour with a spoon before scooping it into your measuring cup, then level it off with a knife for an accurate measure.
Can I use a different type of frosting?
Of course! While the vanilla buttercream is classic, feel free to get creative. A cream cheese frosting would be tangy and delicious. For a simpler option, you could even just drizzle the bars with a simple glaze made from powdered sugar and milk or a melted vanilla or white chocolate.
Why are my bars cakey and not chewy?
A cakey texture usually points to two things: either you overmixed the dough after adding the flour, which developed too much gluten, or you可能有 used too much flour. Remember to measure your flour correctly using the “spoon and level” method, and mix only until the ingredients are just combined. The dough should be soft but not overly dry.


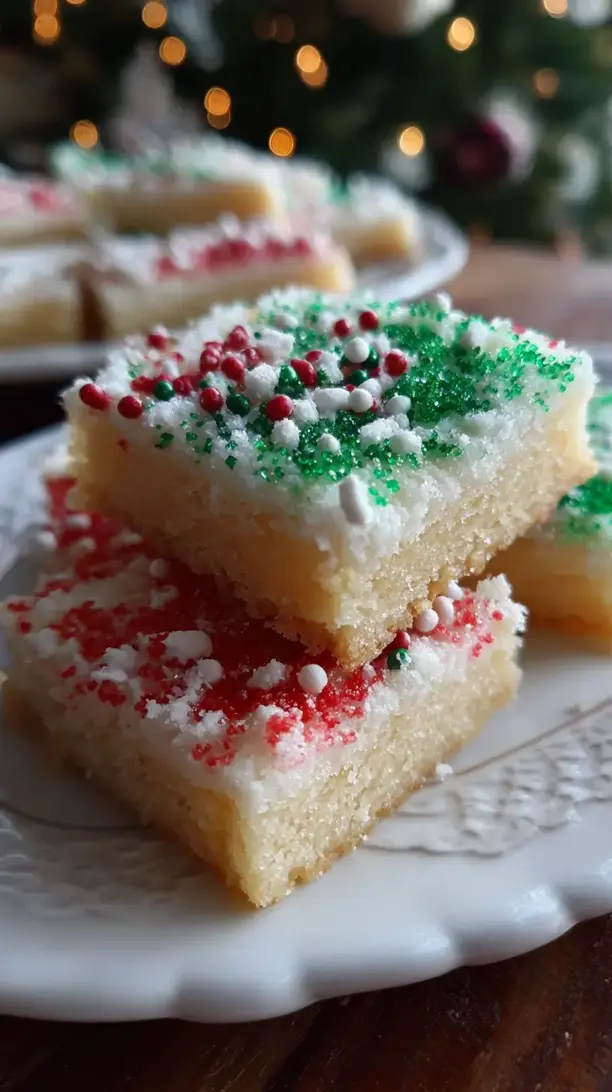
Holiday Sugar Cookie Bars: An Easy Festive Dessert
Holiday Sugar Cookie Bars are the ultimate easy Christmas treat. These soft, chewy, and sprinkle-topped bars are a simple, festive dessert perfect for holiday baking and sharing.
Ingredients
For the Cookie Dough:
-
226 g unsalted butter (softened to room temperature)
-
200 g granulated sugar
-
1 large egg (at room temperature)
-
2 tsp pure vanilla extract
-
280 g all-purpose flour
-
½ tsp baking powder
-
½ tsp salt
For the Frosting:
-
113 g unsalted butter (softened)
-
240 g powdered sugar (sifted)
-
2 tbsp milk or heavy cream
-
1 tsp pure vanilla extract
-
salt (A pinch)
-
Assorted holiday sprinkles (for decorating)
Not what you're looking for?


